& FB8*B(1 &KLQDB B B ERRN 3DJH 7KXUVGD\ $SULO 30 To enter a symbol 1 When you enter text, select Options > Add symbol. 2 Scroll to a symbol and select Insert. Multitap input only applies when latin characters are selected as input language. Chinese input To enter text using T9™ Text Input 1 From standby select, for example, Menu > Messaging > Write new > Text message. 2 If is not displayed, press and hold down to change to T9 Text Input.
& FB8*B(1 &KLQDB B B ERRN 3DJH 7KXUVGD\ $SULO 30 If the character you want is not displayed in the candidate row, press to present another candidate row. Continue pressing until the character you want is displayed. Alternatively, you can enter the next stroke or Pinyin letter and a new set of characters will immediately be displayed in the candidate row. To go back to the previous row, press . To select a character in the candidate row, press the navigation key.
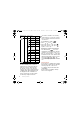
& FB8*B(1 &KLQDB B B ERRN 3DJH 7KXUVGD\ $SULO 30 Number Stroke Basic Stroke Key Category Stroke Name Character Over-Down ষ Ꮖ ᠋ к 偼 Over-Down- д г ৠ Hook ∌ OverজПⱏ Left Slope ⼒ Over-Down- ঞ ᵕ ᓋ ᓎ OverLeft Slope Over䰓䯳䰜䙷 Left Slope- 䚼 CurvedHook Over-Down- З 䗣 哤 䲑 Over-Hook ᴼ Over-Down- ߌ Over-Down Curved⢫䉍ᆊ䗤 Hook ⢖ Over-Down- Э б ⪺ 亲 Curved亢 Hook Over-Down- ᡩ ⊓ 㠍 ߍ Over Over-Down- 䆱 䅵 䅸 䆃 Lift ? (Wild card key) Components The basic building units of Chinese characters ar
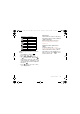
& FB8*B(1 &KLQDB B B ERRN 3DJH 7KXUVGD\ $SULO 30 Number Key Pinyin Letter abc def ghi jkl mno pqrs tuü wxyz On the keypad, the letter ü is replaced by v. For example, to enter “ ֵᙃ ” 1 Press , , . 2 When “xin” is highlighted, press or and select “ ֵ ”, then press . (If you want to enter any of the other suggested Pinyin combinations, scroll up or down to the desired combination, then press ). 3 Press again to select “ ᙃ ”, when “ ᙃ ” is highlighted.
& FB8*B(1 &KLQDB B B ERRN 3DJH 7KXUVGD\ $SULO 30 Imaging Using the camera Camera and video recorder You can take pictures and record video clips to view, save or send. You find your saved pictures and video clips in Media > Photo > Camera album and Organizer > File manager. Your Cyber-shot™ camera has 5.0 MP with auto focus, face detection and photo flash. You can use the light when recording videos.
& FB8*B(1 &KLQDB B B ERRN 3DJH 7KXUVGD\ $SULO 30 3 When the dot and focus frame are green, press fully down to take a picture. The picture is automatically saved on the memory card, if a memory card is inserted. If not, the picture is saved in the phone memory. Do not record with a strong light source in the background. Use a support or the self-timer to avoid a blurred picture. Face detection You can use face detection to bring an off-centre face into focus.
& FB8*B(1 &KLQDB B B ERRN 3DJH 7KXUVGD\ $SULO 30 Icon Description Camera: remaining pictures Shoot mode Location data is turned on Scenes. Predefined settings for common picture situations, including landscape, portrait and sport Ⳍᴎᓣ 㾚乥ᓣ ᶹⳟᓣ ᇍ⛺ Picture size Focus/Face detection Metering mode White balance. To adjust colour tones to the lighting conditions Video length.
& FB8*B(1 &KLQDB B B ERRN 3DJH 7KXUVGD\ $SULO 30 To use BestPic™ Activate the camera. Select > Shoot mode > BestPic™. Press halfway down to use auto focus. When the dot and focus frame are green, press fully down to complete the shot. 5 Select Options > Save all or press or to choose the best picture and select Save. Transferring pictures To use Photo mate • From standby select Menu > Organizer > Applications > Photo mate.
& FB8*B(1 &KLQDB B B ERRN 3DJH 7KXUVGD\ $SULO 30 1 2 3 4 5 6 7 8 To print camera pictures using the USB cable From standby select Menu > Media and scroll to Photo > Camera album. Scroll to a month and a picture. Select Options > Print. Select an option. Connect the USB cable to the phone. Connect the USB cable to the printer. Wait for feedback in the phone and select OK. Enter printer settings, if required and select Print.
& FB8*B(1 &KLQDB B B ERRN 3DJH 7KXUVGD\ $SULO 30 To create a new photo tag 1 From standby select Menu > Media and scroll to Photo > Camera album. 2 Scroll to a month and a picture. Select View. 3 Press and select Options > New tag. 4 Enter a name and select OK. 5 Select an icon. 6 Press the centre navigation key to tag the picture. Using pictures You can add a picture to a contact, use it during phone startup, as a wallpaper in standby or as a screen saver.
& FB8*B(1 &KLQDB B B ERRN 3DJH 7KXUVGD\ $SULO 30 Calling Making and receiving calls You need to turn on your phone and be within range of a network. To make a call 1 From standby enter a phone number (with international country/region code and area code, if applicable). 2 Press . You can call numbers from your contacts and call list. See Contacts on page 29, and Call list on page 33. You can also use your voice to make calls. See Voice control on page 34.
& FB8*B(1 &KLQDB B B ERRN 3DJH 7KXUVGD\ $SULO 30 Default contacts You can choose which contact information is shown as default. If Phone contacts is selected as default, your contacts show all the information saved in Contacts. If you select SIM contacts as default, your contacts show names and numbers saved on the SIM card. Emergency calls Your phone supports international emergency numbers, for example, 112 and 911.
& FB8*B(1 &KLQDB B B ERRN 3DJH 7KXUVGD\ $SULO 30 Calling contacts To call a phone contact To call a contact written in Chinese characters 1 > Contacts. Then enter the entire multi-letter name, pure initial or mixed initial pinyin of Chinese contacts you want to call. For example: Initial status Pure initial search Full name search 2 When the contact is highlighted, press or Mixed initial search to select a number and press .
& FB8*B(1 &KLQDB B B ERRN 3DJH 7KXUVGD\ $SULO 30 To go directly to the contacts list • From standby press and hold down – . To call with Smart search 1 From standby press – to enter a contact name or a phone number. All entries which match the sequence of digits or letters are shown in a list. 2 Scroll to a contact or a phone number and press . To turn Smart search on or off 1 From standby select Menu > Settings > the Calls tab > Smart search. 2 Select an option.
& FB8*B(1 &KLQDB B B ERRN 3DJH 7KXUVGD\ $SULO 30 To save contacts on a memory card 1 From standby select Menu > Contacts. 2 Scroll to New contact and select Options > Advanced > Back up to m. card. SIM contacts SIM contacts can contain names and numbers only. They are saved on the SIM card. These SIM contacts instructions are only valid if you set SIM contacts as default contact. 1 2 3 4 5 6 To add a SIM contact From standby select Menu > Contacts.
& FB8*B(1 &KLQDB B B ERRN 3DJH 7KXUVGD\ $SULO 30 • Windows Address Book (Outlook Express) • Sony Ericsson PC Suite proprietary contact & calendar manager For more information see Synchronizing on page 58. To add your own business card 1 From standby select Menu > Contacts. 2 Scroll to Myself and select Open. 3 Scroll to My contact info and select Add > Create new. 4 Scroll between tabs and select the fields to add information. 5 Enter the information and select Save.
& FB8*B(1 &KLQDB B B ERRN 3DJH 7KXUVGD\ $SULO 30 1 2 3 4 Voice control To add contacts to speed dial numbers From standby select Menu > Contacts. Scroll to New contact and select Options > Speed dial. Scroll to a position number and select Add. Select a contact. To speed dial • From standby enter the position number and press . Voicemail If your subscription includes an answering service, callers can leave a voicemail message when you cannot answer a call.
& FB8*B(1 &KLQDB B B ERRN 3DJH 7KXUVGD\ $SULO 30 Voice dialling You can hear your recorded contact name when you receive a call from that contact. To voice dial 1 From standby press and hold down a volume key. 2 Wait for the tone and say a recorded name, for example “John mobile”. The name is played back to you and the call is connected. Voice answering When you use a handsfree, you can answer or reject incoming calls with your voice.
& FB8*B(1 &KLQDB B B ERRN 3DJH 7KXUVGD\ $SULO 30 More than one call You can handle more than one call at a time. For example, you can put an ongoing call on hold, while you make or answer a second call. You can also switch between the two calls. You cannot answer a third call without ending one of the first two calls. Call waiting When call waiting is used, you hear continuous beep if you receive a second call.
& FB8*B(1 &KLQDB B B ERRN 3DJH 7KXUVGD\ $SULO 30 To add a new participant 1 During the call, select Options > Hold call. This puts the joined calls on hold. 2 Select Options > Add call. 3 Enter the number to call and press . 4 Select Options > Join calls to add the new participant. 5 Repeat this task to add more participants. Restricted dialling To release a participant 1 Select Options > Release party. 2 Select the participant to release.
& FB8*B(1 &KLQDB B B ERRN 3DJH 7KXUVGD\ $SULO 30 Call time and cost During a call, the duration of the call is shown. You can check the duration of your last call, outgoing calls and the total time of your calls. To check the call time • From standby select Menu > Settings > the Calls tab > Time & cost > Call timers. Showing or hiding your phone number You can decide to show or hide your phone number when you make a call.
& FB8*B(1 &KLQDB B B ERRN 3DJH 7KXUVGD\ $SULO 30 Text messages Text messages can contain simple pictures, sound effects, animations, and melodies. Before you use messaging You must have a service centre number. The number is supplied by your service provider and is usually saved on the SIM card. If the number to your service centre is not saved on your SIM card, you must enter the number yourself.
& FB8*B(1 &KLQDB B B ERRN 3DJH 7KXUVGD\ $SULO 30 Before you use picture messaging You must set an MMS profile and the address of your message server. If no MMS profile or message server exists, you can receive all the settings automatically from your network operator or at www.sonyericsson.com/cn. To select an MMS profile 1 From standby select Menu > Messaging > Settings > Picture message > MMS profile. 2 Select a profile.
& FB8*B(1 &KLQDB B B ERRN 3DJH 7KXUVGD\ $SULO 30 To set picture message options 1 From standby select Menu > Messaging > Settings > Picture message. 2 Scroll to an option and select Edit. Email To set message options for a specific message 1 When the message is ready and a recipient is selected, select Options > Advanced. 2 Scroll to an option and select Edit.
& FB8*B(1 &KLQDB B B ERRN 3DJH 7KXUVGD\ $SULO 30 4 Scroll to an option and select Add > Enter email address. Enter the email address and select OK. When you are ready, select Done. 5 Select Edit and enter a subject. Select OK. 6 Select Edit and enter the text. Select OK. 7 Select Add and choose a file to attach. 8 Select Cont. > Send. To receive and read an email message 1 From standby select Menu > Messaging > Email > Inbox > Options > Check new email.
& FB8*B(1 &KLQDB B B ERRN 3DJH 7KXUVGD\ $SULO 30 My friends You can connect and log in to the My friends server to communicate online with chat messages. Before you use My friends If no settings exist in your phone, you need to enter server settings.
& FB8*B(1 &KLQDB B B ERRN 3DJH 7KXUVGD\ $SULO 30 To create a chat group 1 From standby select Menu > Messaging > My friends > the Chat groups tab. 2 Select Options > Add chat group > New chat group. 3 Select who to invite from your contacts list and select Continue. 4 Enter a short invitation text and select Cont. > Send. To add a chat group 1 From standby select Menu > Messaging > My friends > the Chat groups tab > Options > Add chat group. 2 Select an option.
& FB8*B(1 &KLQDB B B ERRN 3DJH 7KXUVGD\ $SULO 30 Media player and music You can listen to music, audio books and podcasts. Use Sony Ericsson Media Manager to transfer content to your phone. Sony Ericsson Media Manager software is included on the CD that comes with your phone and is available for download at www.sonyericsson.com/cn.
& FB8*B(1 &KLQDB B B ERRN 3DJH 7KXUVGD\ $SULO 30 Stereo portable handsfree To use the handsfree • Connect the portable handsfree. Music stops when you receive a call and resumes when the call has ended. To move between tracks • Press or . To change the volume • Press the volume keys up or down. Browsing files Music is saved and categorized. • • • • • Artists – list music by artist. Albums – list music by album. Tracks – list all music tracks.
& FB8*B(1 &KLQDB B B ERRN 3DJH 7KXUVGD\ $SULO 30 To add files to a playlist 1 From standby select Menu > Media and scroll to Music > Playlists. 2 Select a playlist. 3 Scroll to Add music and select Add. 4 For each track you want to add, scroll to the track and select Mark. 5 Select Add to add the tracks to the playlist. To remove tracks from a playlist 1 From standby select Menu > Media and scroll to Music > Playlists. 2 Select a playlist. 3 Scroll to the track and press .
& FB8*B(1 &KLQDB B B ERRN 3DJH 7KXUVGD\ $SULO 30 TrackID™ Online music and video clips TrackID™ is a music recognition service. You can search for song titles, artists and album names. You can view video clips and listen to music by streaming them to your phone from the Internet. If settings are not already in your phone, see Settings on page 55. For more information, contact your network operator or go to www.sonyericsson.com/cn.
& FB8*B(1 &KLQDB B B ERRN 3DJH 7KXUVGD\ $SULO 30 Entertainment Video player To play videos 1 From standby select Menu > Media and scroll to Video. 2 Scroll to a title and select Play. To stop playing videos • Press the centre navigation key. Radio Do not use your phone as a radio in places where this is prohibited. To listen to the radio 1 Connect the handsfree to the phone. 2 From standby select Menu > Radio.
& FB8*B(1 &KLQDB B B ERRN 3DJH 7KXUVGD\ $SULO 30 To turn the ringtone off • From standby press and hold down . All signals except the alarm signal are affected. To set the vibrating alert 1 From standby select Menu > Settings > the Sounds & alerts tab > Vibrating alert. 2 Select an option. MusicDJ™ You can compose and edit your own melodies to use as ringtones. A melody consists of four types of tracks – Drums, Basses, Chords, and Accents.
& FB8*B(1 &KLQDB B B ERRN 3DJH 7KXUVGD\ $SULO 30 Applications You can download and run Java applications. You can also view information or set different permissions. Before you use Java™ applications If Internet settings are not already entered in your phone, see Settings on page 55. To select a Java application 1 From standby select Menu > Organizer > Applications. 2 Select an application.
& FB8*B(1 &KLQDB B B ERRN 3DJH 7KXUVGD\ $SULO 30 Internet To start browsing 1 From standby select Menu > Monternet. 2 Select Options > Go to. 3 Select an option. If your connection to the Internet does not work, see Settings on page 55 or contact your operator. To exit the browser • When you browse the Internet, select Options > Exit browser. Bookmarks You can create and edit bookmarks as quick links to your favourite Web pages.
& FB8*B(1 &KLQDB B B ERRN 3DJH 7KXUVGD\ $SULO 30 Key Shortcut Bookmarks – Enter text to Enter address or search in Bookmarks. Fullscreen or Landscape or Normal screen. Zoom Pan & zoom (when Smart-fit is off). To make a call while browsing • When you browse the Internet press . To save a picture from a Web page 1 When you browse the Internet, select Options > Tools > Save picture. 2 Select a picture.
& FB8*B(1 &KLQDB B B ERRN 3DJH 7KXUVGD\ $SULO 30 To download content via feeds 1 From standby select Menu > Media > Web feeds. 2 Scroll to a feed and select View or . 3 Select a heading to expand. 4 Select an icon depending on content, to open a Web page, to download an audio podcast, to download a video podcast or to download a photo. You can also subscribe to and download content to a computer via feeds using Sony Ericsson Media Manager.
& FB8*B(1 &KLQDB B B ERRN 3DJH 7KXUVGD\ $SULO 30 To access audio podcasts • From standby select Menu > Media > Music > Podcasts. Connectivity To access video podcasts • From standby select Menu > Media > Video > Podcasts. Before you synchronize with an Internet service, use the Internet, PlayNow™, My friends, Java, picture messaging, email and picture blog you need to have settings in your phone. Photo feeds You can subscribe to photo feeds and download photos.
& FB8*B(1 &KLQDB B B ERRN 3DJH 7KXUVGD\ $SULO 30 Bluetooth™ wireless technology The Bluetooth function makes wireless connection to other Bluetooth devices possible. You can, for example: • Connect to handsfree devices. • Connect to several devices at the same time. • Connect to computers and access the Internet. • Exchange items and play multiplayer games. We recommend a range within 10 metres (33 feet), with no solid objects in between, for Bluetooth communication.
& FB8*B(1 &KLQDB B B ERRN 3DJH 7KXUVGD\ $SULO 30 To pair the phone with more than one Bluetooth handsfree 1 From standby select Menu > Settings > the Connectivity tab > Bluetooth > Handsfree > My handsfree > New handsfree. 2 Select a device from the list. 3 Enter a passcode, if required. Power saving You can save battery power with the Power save function. You can only connect with one Bluetooth device at a time when using Power save.
& FB8*B(1 &KLQDB B B ERRN 3DJH 7KXUVGD\ $SULO 30 Before you use the USB cable • See Required operating systems on page 45. Only use a USB cable supported by your phone. Do not remove the USB cable from your phone or computer during file transfer as this may corrupt the phone memory or the memory card. To disconnect the USB cable safely 1 Right-click the removable disk icon in Windows Explorer. 2 Select Eject.
& FB8*B(1 &KLQDB B B ERRN 3DJH 7KXUVGD\ $SULO 30 Synchronizing using a computer Before synchronizing you need to install the Sony Ericsson PC Suite. Sony Ericsson PC Suite software is included on the CD with your phone and available for download at www.sonyericsson.com/cn. See Required operating systems on 45. To install the Sony Ericsson PC Suite 1 Turn on your computer and insert the CD. The CD starts automatically and the installation window opens.
& FB8*B(1 &KLQDB B B ERRN 3DJH 7KXUVGD\ $SULO 30 6 Scroll to the Applications tab and mark applications to synchronize. 7 Scroll to the App. settings tab and select an application. 8 Select Database name and enter the required information. 9 Scroll to the Advanced tab to enter additional settings for synchronizing and select Save. To synchronize using SyncML 1 From standby select Menu > Organizer > Synchronization. 2 Scroll to an account and select Start.
& FB8*B(1 &KLQDB B B ERRN 3DJH 7KXUVGD\ $SULO 30 There are two ways to update your phone: • Over the air using your phone • Using the provided USB cable and an Internet-connected computer Update service requires data access such as GPRS. Before you use the Update service If Internet settings are not in your phone see Settings on page 55. To change Internet settings • From standby select Menu > Settings > the General tab > Update service > Settings > Internet settings.
& FB8*B(1 &KLQDB B B ERRN 3DJH 7KXUVGD\ $SULO 30 More features Flight mode In Flight mode the network and radio transceivers are turned off to prevent disturbance to sensitive equipment. When the flight mode menu is activated you are asked to select a mode the next time you turn on your phone: • Normal mode – full functionality • Flight mode – limited functionality You can use the Bluetooth™ function in Flight mode.
& FB8*B(1 &KLQDB B B ERRN 3DJH 7KXUVGD\ $SULO 30 File manager You can use the file manager to handle files saved in the phone memory or on a memory card. Handling files You can move and copy files between your phone, a computer and a memory card. See Transferring content to and from a computer on page 45. Files are saved on the memory card first and then in the phone memory. Unrecognized files are saved in the Other folder.
& FB8*B(1 &KLQDB B B ERRN 3DJH 7KXUVGD\ $SULO 30 To set the recurrent alarm From standby select Menu > Alarms. Scroll to an alarm and select Edit. Scroll to Recurrent: and select Edit. Scroll to a day and select Mark. To select another day, scroll to the day and select Mark. 6 Select Done > Save. 1 2 3 4 5 1 2 3 4 5 To set the alarm signal From standby select Menu > Alarms. Scroll to an alarm and select Edit. Scroll to the tab. Scroll to Alarm signal: and select Edit.
& FB8*B(1 &KLQDB B B ERRN 3DJH 7KXUVGD\ $SULO 30 If Chinses is selected as the phone language, an additional option appears, Lunar calendar. Appointments You can add new appointments or reuse existing appointments. To add an appointment 1 From standby select Menu > Organizer > Calendar. 2 Select a date. 3 Scroll to New appointment and select Add. 4 Enter the information and confirm each entry. 5 Select Save.
& FB8*B(1 &KLQDB B B ERRN 3DJH 7KXUVGD\ $SULO 30 To show a note in standby 1 From standby select Menu > Organizer > Notes. 2 Scroll to a note and select Options > Show in standby. To hide a note from standby 1 From standby select Menu > Organizer > Notes. 2 Scroll to a note and select Options > Hide in standby. Tasks You can add new tasks or reuse existing tasks. To add a task 1 From standby select Menu > Organizer > Tasks. 2 Select New task and select Add.
& FB8*B(1 &KLQDB B B ERRN 3DJH 7KXUVGD\ $SULO 30 Time and date To set the time 1 From standby select Menu > Settings > the General tab > Time & date > Time. 2 Enter the time and select Save. To set the date 1 From standby select Menu > Settings > the General tab > Time & date > Date. 2 Enter the date and select Save. To set the time zone 1 From standby select Menu > Settings > the General tab > Time & date > My time zone. 2 Select the time zone you are in.
& FB8*B(1 &KLQDB B B ERRN 3DJH 7KXUVGD\ $SULO 30 To unblock the SIM card 1 When PIN blocked appears, enter your PUK and select OK. 2 Enter a new four-to-eight-digit PIN and select OK. 3 Re-enter the new PIN and select OK. 1 2 3 4 To edit the PIN From standby select Menu > Settings > the General tab > Security > Locks > SIM protection > Change PIN. Enter your PIN and select OK. Enter a new four-to-eight-digit PIN and select OK. Re-enter the new PIN and select OK.
& FB8*B(1 &KLQDB B B ERRN 3DJH 7KXUVGD\ $SULO 30 Keypad lock You can set this lock to avoid accidental dialling. Incoming calls can be answered without unlocking the keypad. Troubleshooting Some problems will require you to call your network operator. For more support go to www.sonyericsson.com/cn. Calls to the international emergency number 112 can still be made.
& FB8*B(1 &KLQDB B B ERRN 3DJH 7KXUVGD\ $SULO 30 I cannot charge the phone or battery capacity is low The charger is not properly connected or the battery connection is poor. Remove the battery and clean the connectors. The battery is worn out and needs to be replaced. See Charge the battery on page 8. No battery icon appears when I start charging the phone It may take a few minutes before the battery icon appears on the screen.
& FB8*B(1 &KLQDB B B ERRN 3DJH 7KXUVGD\ $SULO 30 The phone cannot be detected by other devices using Bluetooth wireless technology You have not turned the Bluetooth function on. Make sure that the visibility is set to show phone. See To turn the Bluetooth function on on page 56. 3 Select Options > Reset. 4 Reset code memo? appears. 5 Select Yes.
& FB8*B(1 &KLQDB B B ERRN 3DJH 7KXUVGD\ $SULO 30 Insert correct SIM card Your phone is set to work only with certain SIM cards. Check if you are using the correct operator SIM card. Wrong PIN / Wrong PIN2 You have entered your PIN or PIN2 incorrectly. Enter the correct PIN or PIN2 and select Yes. See PIN on page 7. PIN blocked / PIN2 blocked You have entered your PIN or PIN2 code incorrectly three times in a row. To unblock, see SIM card lock on page 67.
& FB8*B(1 &KLQDB B B ERRN 3DJH 7KXUVGD\ $SULO 30 Important information Sony Ericsson Consumer Web site On www.sonyericsson.com/cn is a support section where help and tips are only a few clicks away. Here you will find the latest computer software updates and tips on how to use your product more efficiently. Service and support • • • • You have access to a portfolio of exclusive service advantages such as: Global and local Web sites providing support.
& FB8*B(1 &KLQDB B B ERRN 3DJH 7KXUVGD\ $SULO 30 • Do not place your product or install wireless equipment in the area above an air bag in your car. • Caution: Cracked or broken displays may create sharp edges or splinters that could be harmful upon contact. • Do not use your Bluetooth Headset in positions where it is uncomfortable or will be subject to pressure. Children Warning! Keep out of the reach of children.
& FB8*B(1 &KLQDB B B ERRN 3DJH 7KXUVGD\ $SULO 30 Emergency calls Calls cannot be guaranteed under all conditions. Never rely solely upon mobile phones for essential communications. Calls may not be possible in all areas, on all networks, or when certain network services and/or phone features are used. a minimum of 15 mm from the body without any metal parts in the vicinity of the phone or when properly used with an appropriate Sony Ericsson accessory and worn on the body.
& FB8*B(1 &KLQDB B B ERRN 3DJH 7KXUVGD\ $SULO 30 Disposal of old electrical and electronic equipment Electronic equipment and batteries should not be included as household waste but should be left at an appropriate collection point for recycling. This helps prevent potential negative consequences for the environment and human health.
& FB8*B(1 &KLQDB B B ERRN 3DJH 7KXUVGD\ $SULO 30 Protection of personal information Erase personal data before disposing of the product. To delete data, perform a master reset. Deleting data from the phone memory does not ensure that it cannot be recovered. Sony Ericsson does not warrant against recovery of information and does not assume responsibility for disclosure of any information even after a master reset.
& FB8*B(1 &KLQDB B B ERRN 3DJH 7KXUVGD\ $SULO 30 WHAT WE WILL DO If, during the warranty period, this Product fails to operate under normal use and service, due to defects in design, materials or workmanship, Sony Ericsson authorized distributors or service partners, in the country/region* where you purchased the Product, will, at their option, either repair or replace the Product in accordance with the terms and conditions stipulated herein.
& FB8*B(1 &KLQDB B B ERRN 3DJH 7KXUVGD\ $SULO 30 5 This warranty does not cover Product failures caused by installations, modifications, or repair or opening of the Product performed by a nonSony Ericsson authorised person. 6 The warranty does not cover Product failures which have been caused by use of accessories or other peripheral devices which are not Sony Ericsson branded original accessories intended for use with the Product.
& FB8*B(1 &KLQDB B B ERRN 3DJH 7KXUVGD\ $SULO 30 This equipment has been tested and found to comply with the limits for a Class B digital device, pursuant to Part 15 of the FCC Rules. These limits are designed to provide reasonable protection against harmful interference in a residential installation.
& FB8*B(1 &KLQDB B B ERRN 3DJH 7KXUVGD\ $SULO 30 Index A activity menu ........................................ 16 adding notes ............................................ 65 alarms ................................................... 63 answering service ................................ 34 applications .......................................... 51 appointments ....................................... 65 assembly ................................................ 6 audio book ...
& FB8*B(1 &KLQDB B B ERRN 3DJH 7KXUVGD\ $SULO 30 E J email ..................................................... 41 emergency numbers ............................ 29 entering text ......................................... 17 Java™ ...................................................51 F face detection ...................................... 23 file manager ......................................... 63 flight mode ........................................... 62 K keypad lock .
& FB8*B(1 &KLQDB B B ERRN 3DJH 7KXUVGD\ $SULO 30 text ............................................... 39 voice ............................................. 41 microphone .......................................... 28 MMS See picture messages music player ......................................... 46 MusicDJ™ ............................................ 50 My friends ............................................ 43 my numbers .........................................
& FB8*B(1 &KLQDB B B ERRN 3DJH 7KXUVGD\ $SULO 30 SIM card ............................................... 67 copying to/from ........................... 31 locking .......................................... 67 unblocking ................................... 68 SMS See text messages SOS See emergency numbers sound recorder ..................................... 50 speed dialling ....................................... 33 standby ..................................................
& FB8*B(1 &KLQDB B B ERRN 3DJH 7KXUVGD\ $SULO 30 W warranty ............................................... 77 Web search .......................................... 53 Web feeds ............................................ 53 showing in standby ...................... 54 update .......................................... 54 Web pages history .......................................... 52 pan and zoom .............................. 52 Z zoom ......................................