Contents Getting started..............................................................................4 Touch instructions...............................................................................4 Phone overview...................................................................................5 Turning on the phone..........................................................................6 Help....................................................................................................
Online music and video clips.............................................................39 Radio ...............................................................................................39 Recording sound ..............................................................................40 Transferring and handling content...........................................41 Handling content in the phone..........................................................41 Sending content to another phone.................
More features.............................................................................61 Flight mode.......................................................................................61 Alarms..............................................................................................61 Calendar...........................................................................................62 Notes................................................................................................62 Tasks....
Getting started Important information Please read the Important information before you use your mobile phone. Touch instructions Instructions highlighted by a grey line refer to touch screen functions only. 4 This is an Internet version of this publication. © Print only for private use.
Phone overview 1 Ear speaker 2 Screen 3 Selection keys 4 Call key 5 Activity menu key 6 Navigation key 7 C key (Clear) 8 Volume key 9 End key, On/off key 10 1 2 8 Camera key/shutter key 3 4 9 5 10 6 7 11 Screen lock key 12 Flash light 13 Camera lens 14 Memory card slot (under the cover) 15 Connector for charger, handsfree and USB cable 16 Phone antenna 17 Loudspeaker 11 12 13 14 15 16 17 To insert the SIM card 5 This is an Internet version of this publication.
1 2 Remove the battery cover. Slide the SIM card into its holder with the gold-coloured contacts facing down. To insert the battery 1 2 Insert the battery with the label side up and the connectors facing each other. Attach the battery cover. Turning on the phone To turn on the phone 1 2 3 4 Press and hold down . Enter your SIM card PIN (Personal Identification Number), if requested, and select OK. Select a language. Follow the instructions that appear.
Using other networks Making and receiving calls, using messaging and data transfer, for example, Internet-based services, outside your home network (roaming) may incur additional costs. Contact your operator for more information. Help In addition to this User guide, Feature guides and more information are available at www.sonyericsson.com/support. There are also help functions and a User guide in your phone. See the following instructions on how to access them.
• • • If you are in an area with no coverage, your phone repeatedly scans for available networks. This consumes power. If you cannot move to an area with better coverage, turn off your phone temporarily. Turn off 3G, Bluetooth™ wireless technology and Wi-Fi™ when you do not need these functions. Do not cover the phone antenna when you are engaged in a call. Go to www.sonyericsson.com/support to learn more about how to maximise your battery's performance. 8 This is an Internet version of this publication.
Screen icons These icons may appear on the screen: Icon Description The battery is almost fully charged The battery needs charging The network coverage is good No network coverage (also shown in flight mode) A 3G network is available A UMTS HSPA network is available Missed calls Calls diverted Ongoing call The microphone is muted The loudspeaker is on The phone is in silent mode New text message New multimedia message New email The music player is playing The radio is playing A handsfree is connected The B
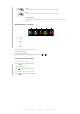
Drag Touch, hold and move an item from one place on the screen to another. Flick Touch and move your finger quickly left, right, up or down, respectively. Touch and hold Touch and let your finger remain on the item to activate it or to have an options menu appear. Media browser overview 1 1 2 3 1 Camera 2 Photo 3 Music 4 Video 5 Radio 2 3 To navigate your media browser Unlock the screen. Tap one of the items. To go back, tap on the top part of the screen, 4 or 5 .
Menu overview* PlayNow™ Camera Stopwatch Torch Calculator Location services Entertainment Google Maps Navigation Tracker My favourites Settings Calls** All Online services Radio TrackID™ Remote Play Games Photo Mate Record sound Demo tour Media Missed Photo Music Video Games Web feeds Settings Internet Music player Messaging Settings Write new Inbox/Conversations Messages Email Call voicemail General Profiles Time & date Language Update software Voice control Shortcuts Flight mode PIN codes S
Navigation • • To access the main menu When Menu appears on the screen, press the centre selection key to select Menu. , and then press the centre If Menu does not appear on the screen, press selection key to select Menu. To navigate the phone menus • Press the navigation key upwards, downwards, left or right to move through the menus. • To select actions on the screen Press the left, centre or right selection key. • To view options for an item Select Options to, for example, edit.
1 2 3 To edit a navigation key shortcut Select Menu > Settings > General > Shortcuts. Scroll to an option and select Edit. Scroll to a menu option and select Shortc.. Main menu shortcuts Menu numbering starts from the top left icon and moves across and then down row by row. • To go directly to a main menu item – , Select Menu and press , or . The Main menu layout must be set to Grid. See To change the main menu layout on page 64.
To insert a memory card • Remove the battery cover and insert the memory card with the gold-coloured contacts facing down. Phone language You can select a language to use in your phone. 1 2 To change the phone language Select Menu > Settings > General > Language > Phone language. Select an option. Entering text to enter text. The Quick text input You can use multitap text input or Quick text input method uses a dictionary application in your phone.
4 5 To enter text using Quick text input Select, for example, Menu > Messaging > Write new > Message. If is not displayed, press and hold down to change to Quick text input. Press each key only once, even if the letter you want is not the first letter on the key. For example, to write the word “Jane”, press , , , . Write the whole word before looking at the suggestions. To view word suggestions, press or press the navigation key downwards. Press to accept a suggestion and add a space.
Calling You need to turn on your phone and be within range of a network. Answering calls You can answer calls without opening the phone. To answer a call when screen lock is on • Drag from left to right. • To answer a call when screen lock is off Tap . To reject a call when screen lock is on • Drag to the right and then to the left. To reject a call when screen lock is off . • Tap • To mute the microphone during a call Tap . • To turn on a loudspeaker during a call .
To end a call • Tap . Making and answering calls 1 2 To make a call Enter a phone number (with international country code and area code, if applicable). . Press You can call numbers from your contacts and call list. • To end a call Press . 1 2 3 To make international calls until a “+” sign appears. Press and hold down Enter the country code, area code (without the first zero) and phone number. Press . • To re-dial a number When Retry? appears, select Yes.
Before making video calls 3G (UMTS) service is available when or appears. To make a video call, both parties on the call must have a 3G (UMTS) phone subscription that supports 3G (UMTS) service and 3G (UMTS) coverage. 1 2 To make a video call Enter a phone number (with international country code and area code, if applicable). Select Options > Make video call. • To use the zoom with an outgoing video call Press the navigation key upwards or downwards.
Default contacts You can choose which contact information is shown as default. If Phone contacts is selected as default, your contacts show all the information saved in Contacts. If you select SIM contacts as default, your contacts show names and numbers saved on the SIM card. 1 2 3 To select default contacts Select Menu > Contacts. Scroll to New contact and select Options > Advanced > Default contacts. Select an option.
1 2 3 To copy names and numbers to the SIM card Select Menu > Contacts. Scroll to New contact and select Options > Advanced > Copy to SIM. Select an option. When you copy all contacts from your phone to the SIM card, all existing SIM card information is replaced. 1 2 3 To automatically save names and phone numbers on the SIM card Select Menu > Contacts. Scroll to New contact and select Options > Advanced > Auto save on SIM. Select an option. 1 2 To save contacts on a memory card Select Menu > Contacts.
Groups You can create a group of phone numbers and email addresses from Phone contacts to send messages to. You can also use groups (with phone numbers) when you create accepted callers lists. 1 2 3 4 5 6 7 To create a group of numbers and email addresses Select Menu > Contacts. Scroll to New contact and select Options > Groups. Scroll to New group and select Add. Enter a name for the group and select Continue. Scroll to New and select Add.
1 2 To voice dial Press and hold down a volume key. Wait for the tone and say a recorded name, for example “John mobile.” The phone plays the name back to you and connects the call. 3 4 5 6 7 To activate voice answering and record voice answer commands Select Menu > Settings > General > Voice control > Voice answer > Activate. Follow the instructions that appear and select Continue. Wait for the tone and say “Answer”, or say any other word. Select Yes to accept or No for a new recording.
1 2 3 To make a second call During the call, press . This puts the ongoing call on hold. Select Options > Add call. Enter the number to call and press . • To answer a second call During the call, press . This puts the ongoing call on hold. • To reject a second call During the call, press and continue with the ongoing call. • To end an ongoing call and answer a second call During the call, select Replace active call.
Restrict calls options Standard options are: • • • • • All outgoing – all outgoing calls Outgoing intl – all outgoing international calls Outgoing intl roam. – all outgoing international calls except to your home country All incoming – all incoming calls Inc. when roaming – all incoming calls when you are abroad 1 2 3 4 To restrict calls Select Menu > Settings > Calls > Manage calls > Restrict calls. Select an option. Select Activate. Enter your password and select OK.
Imaging The phone must be closed before you can use the camera. You can take photos and record videos to view, save or send. When the phone is closed, you can find saved photos and videos in or . When the phone is open, you can find saved photos and videos in Media and in File manager. Use Media Go™ to transfer content to and from your phone. For more information, see Transferring content to and from a computer on page 42. • To activate the camera Tap .
1 2 3 4 5 6 To improve a photo with Photo fix Take a photo. During review, tap the screen to display the toolbar. Tap . Tap . Review the improvement and tap to save. If you do not want to save the improvement select . You can apply Photo fix on a photo several times. Still camera settings Setting Icon Description Use Scenes to quickly set up the camera for common situations using pre-programmed scenes.
On, 10s Sets a 10-second delay from when the shutter key is pressed until the photo is taken. On, 2s It can be hard to hold the phone perfectly still when pressing the shutter key, which may result in a blurred photo. Use the 2-second delay to solve this problem. Off The photo is taken as soon as you press the shutter key. You can select between several picture sizes and aspect ratios before taking a photo. Note that a photo with a higher resolution requires more memory.
Keep your lens clean Mobile phones are used in all kinds of weather and places, and carried in pockets and bags. This results in the camera lens becoming dirty and covered with fingerprints. Use a soft cloth to clean the lens. Using the video camera 1 2 3 4 5 6 7 To record a video by tapping the screen Activate the camera. If the video camera is not selected, tap . Tap . To start recording, tap the screen. To pause the recording, tap . To continue recording, tap . To stop recording, tap .
Off When turned off, no sound is recorded with the video. On When turned on, sound is recorded with the video. With the self-timer you can record a video without holding the phone. Use it to record a video where everyone can be in it. You can also use the self-timer to make sure that the phone is steady when the video is recorded. Self-timer On, 10s Sets a 10-second delay from when the shutter key is pressed until the video recording starts.
Viewing and tagging photos 1 2 3 4 5 To view photos and videos using the camera Activate the camera. Tap . Tap . Flick through your photos and videos. Tap the screen to display controls. Videos are indicated by . Tap to play a video. 1 2 3 To view photos and videos in the media browser Tap . Flick through the photos and videos. Tap a photo or a video. 1 2 3 4 5 To view photos in a slide show Select Menu > Media > Photo > Camera album. Select a month. Scroll to a photo and select View.
1 2 3 4 5 6 1 2 To tag photos Select Menu > Media > Photo > Camera album. Select a month. Scroll to a photo and select View. Press the navigation key downwards and scroll to a tag. Select Options > Tag this photo. For each photo you want to tag, scroll to the photo and select Options > Tag this photo. To delete a tag from a photo When viewing a photo, press the navigation key downwards Scroll to a tag and select Options > Delete tag.
1 2 3 4 To send a photo or a video you have just captured When you have captured a photo or a video, tap . Select To web albums, As message, As email or Via Bluetooth. Open the phone. Enter a recipient and select Send. Using web albums If your subscription supports this service, you can send photos or videos to a web album. If you cannot send content to a web album, see I cannot use Internet-based services on page 73.
• To move between videos Flick left to move to the next video, or flick right to move to the previous video. 1 2 To view a video zoomed in Tap the screen to display the controls. Tap . 1 2 3 To show subtitles Tap the screen to display the controls. If a video has subtitles, is displayed. Tap Select a language. 1 2 3 To hide subtitles Tap the screen to display the controls. If a video has subtitles, is displayed. Tap Tap Off. 1 2 To play videos Select Menu > Media > Video > Videos or Camera album.
Music You can listen to music, audio books and podcasts. Use Media Go™ to transfer content to and from your phone. For more information, see Transferring content to and from a computer on page 42. Stereo portable handsfree • To use a handsfree Connect a portable handsfree. Music stops when you receive a call and resumes when the call has ended. If headphones are not included with the phone, you may purchase them separately.
• To move between tracks Tap or . • To view the current play queue Tap the album art. • To minimise the music player Tap . • To return to the music player Tap in the lower part of the screen. 1 2 3 To play music Select Menu > Media > Music. Browse by category using the navigation key. Scroll to a title and select Play. • To stop playing music Press the centre selection key. • To fast forward and rewind Press and hold down the navigation key right or left.
Shake control To shuffle tracks • When music is playing, press and hold down and shake your phone. You can also shuffle tracks when the phone is open by shaking the phone. Using the music mini player You can use the music mini player for quick access to music controls when the screen lock is on. 1 2 To activate the music mini player To view the screen, press on top of the phone. Tap the status bar at the bottom of the screen.
1 2 3 4 5 To create a playlist Select Menu > Media > Music > Playlists. Scroll to New playlist and select Add. Enter a name and select OK. For each track you want to add, scroll to the track and select Mark. Select Add to add the marked tracks to the playlist. 1 2 3 4 5 To add tracks to a playlist Select Menu > Media > Music > Playlists. Select a playlist. Scroll to Add music and select Add. For each track you want to add, scroll to the track and select Mark.
Audio books If you use Media Go™ to transfer audio books to your phone from a computer, you can listen to the audio books in your phone. It may take a few minutes before a transferred audio book appears in the list of available audio books. • To access audio books Select Menu > Media > Music > Audio books. You can find audio books in formats other than M4B and those that do not have ID3v2 chapter tags in the Tracks folder.
Online music and video clips You can view video clips and listen to music by streaming them to your phone from the Internet. If you cannot use the Internet, see I cannot use Internet-based services on page 73. 1 2 3 To select a data account for streaming Select Menu > Settings > Connectivity > Streaming settings > Connect using:. Select the data account to use. Select Save. 1 2 3 To stream music and video clips Select Menu > Internet. Select and then . Select a link to stream from.
• To fine tune the frequency Press the navigation key right or left. • To change the volume Press the volume key up or down. • To minimise the radio Select Options > Minimise. • To return to the radio Select Menu > Entertainment > Radio. Saving channels You can save up to 20 preset channels. • To save channels automatically Select Options > Channels > Auto save. 1 2 3 To save channels manually When you find a radio channel, select Options > Channels > Save. Scroll to a position and select Insert.
Transferring and handling content You can transfer and handle content such as pictures and music. You are not allowed to exchange some copyright-protected material. item. identifies a protected Handling content in the phone You can use File manager in your phone, to handle content saved in the phone memory or on a memory card. Tabs and icons in File manager show where the content is saved. If the memory is full, delete some content to create space.
1 2 3 Computer: Right-click the Safely Remove Hardware icon in Microsoft® Windows® Explorer. Select the drives you want to disconnect. Select Stop. Wait until you are notified that it is safe to remove the drive. Disconnect the USB cable. PC Companion PC Companion lets you: • • • Explore content in your phone. Use your phone as a modem. Install PC Software used to synchronise, transfer and back up phone content. For more information, go to www.sonyericsson.com/support to read Feature guides.
1 2 • To set up Media Home Computer: Turn on Media Go™ and enable Media sharing. Phone: Start and complete the Setup wizard. To automatically transfer content to your phone from Media Go™ Connect the phone to the charger. Media Home will start an automatic download when a charger is connected. 1 2 To manually transfer content to your phone from Media Go™ Select Organiser > Media Home. Press Start. 1 2 3 To browse and download content from a DLNA server Select Organiser > Media Home > Options > Browse.
1 2 3 4 To allow connection to the phone Select Menu > Settings > Connectivity > Bluetooth. Select a device from the list. Select Options > Allow connection. Select Always ask or Always allow. This is only possible with devices that require access to a secure service. Power saving You can save battery power with the Power save function. In Power save mode you can only connect with a single Bluetooth device.
1 2 3 Computer: Start the Sony Ericsson PC Suite from Start/Programs/Sony Ericsson/ Sony Ericsson PC Suite. Follow the instructions in the Sony Ericsson PC Suite on how to connect. Go to the backup and restore section in the Sony Ericsson PC Suite and restore your phone content. 45 This is an Internet version of this publication. © Print only for private use.
Updating your phone You can update your phone to the most recent software for optimal performance and to get the latest enhancements. You need a USB cable and an Internet-connected PC. To learn how, go to www.sonyericsson.com/update. Remember to back up your phone content before updating. See Backing up and restoring on page 44. Updating your phone using Sony Ericsson PC Suite You can update your phone using a USB cable and Sony Ericsson PC Suite.
Messaging Text and picture messages Messages can contain text, pictures, sound effects, animations, and melodies. When sending messages, the phone automatically selects the most suitable method (as a text or picture message) for sending the message. If you cannot use picture messages, see I cannot use Internet-based services on page 73. Sending messages You can send messages from your phone.
1 2 1 2 To set options for all messages Select Menu > Messaging > Messages > Settings. Select an option. To set options for a specific message When the message is ready and a recipient is selected, select Options > Advanced. Scroll to an option and select Edit. Conversations You can choose whether to view your messages in Conversations or the Inbox. A messaging conversation shows all messaging communication between you and one of your contacts.
8 9 To write and send an email message Select Menu > Messaging > Email. If you have several email accounts, select the account you want to send the message from. Select Write new. To add a recipient, scroll to To: and select Add > Enter email address. Enter the email address and select OK. To add more recipients, scroll to To: and select Edit. Scroll to an option and select Add. When you are ready, select Done. To enter a subject, scroll to Subject:, select Edit, enter the subject, and select OK.
1 2 3 4 To set the interval for checking for new email messages Select Menu > Messaging > Email. If you have several email accounts, select an account. Select Settings > the Download tab > Check interval. Select an option. 50 This is an Internet version of this publication. © Print only for private use.
Internet If you cannot use the Internet, see I cannot use Internet-based services on page 73. 1 2 3 To start browsing Select Search. Enter a web address, a search phrase or the name of a bookmark. Scroll to an item in the list and select Go to or Search. 1 2 To exit the browser When you are browsing the web, select Select Exit browser. and then select . Web browser toolbar .
History pages You can view and go to web pages you have previously visited. 1 2 3 To view history pages Select Menu > Internet. Select and then select Select History. . More browser features 1 2 3 4 To turn on or off Smart-Fit Rendering™ Select Menu > Internet. Select and then select . Select Settings > Smart-Fit. Select an option. With Smart-Fit on, the web site is adjusted to your display to avoid horizontal scrolling. With Smart-fit off, you can pan and zoom while viewing a web site.
photo uploads to web sites, such as web albums and blogs. In the File transfer manager you can also install downloaded Java applications, and to pause, resume or cancel downloads. 1 2 3 To access a file using File transfer Select Menu > Organiser > File transfer. Scroll to the file. Press the centre selection key to access the file, or select Options for other actions. Web feeds Using web feeds, you can subscribe to and download frequently updated content, such as news, podcasts or photos.
1 2 To access web feeds from standby From standby, select Ticker. To read more about a feed, press the navigation key upwards or downwards to scroll to a headline, then select View. Podcasts Podcasts are files, for example, radio programmes or video content, that you can download and play. You subscribe to and download podcasts using web feeds. • To access audio podcasts Select Menu > Media > Music > Music feeds. • To access video podcasts Select Menu > Media > Video > Video feeds.
Connected home Connected home makes the phone a part of everyday living in terms of music and media handling in home environment. It connects Hifi, TV, movies, gaming etc. on the home network. Wi-Fi™ Using Wi-Fi™ you can access the Internet wirelessly with your phone. You can browse the Internet at home (personal networks) or in public access zones (hot spots): • • Personal networks – usually protected. A pass phrase or a key is required from the owner.
1 2 3 4 5 To play music stored in your phone on another DLNA device Select Menu > Media > Music. Browse by category using the navigation key. Scroll to and select a title. Select Options > Play on. Select a DLNA device from the list. 1 2 3 4 To play music stored on another DLNA device in your phone Select Menu > Media > Music > Media servers. Select a Media server from the list. Browse by category using the navigation key. Scroll to a title and select Play.
GPS Your phone has a GPS receiver that uses satellite signals to calculate your location. Some GPS features use the Internet. Data rates and charges may apply. If you cannot use some GPS features, see I cannot use Internet-based services on page 73. Using GPS Your location can be found when you have a clear view of the sky. If your location is not found after a few minutes, move to another location. To help the search, stand still and do not cover the GPS antenna.
Turning off GPS The GPS receiver turns off automatically when it is not in use. You can also turn the GPS receiver off manually. This saves battery power when you use features that do not require the GPS receiver to find your location. 1 2 To turn on or off GPS manually Select Menu > Location services > Settings. Select Enable GPS or Disable GPS. Google Maps™ for mobile Google Maps™ lets you view your current location, find other locations and calculate routes.
1 2 3 4 5 6 To compare results during training Select Menu > Location services > Tracker > Start training. Select Route based. Scroll to Route:, select Edit and select a route. Scroll to Live compare and select Edit. Scroll to the result you want to compare and select Compare. Select Done and then Start. A GPS location is required before results can be compared. • To end a training session manually During a training session, select Pause > End.
Synchronising You can synchronise your phone in two different ways: using a computer program, or using an Internet service. Use only one of the synchronisation methods at a time with your phone. For more information, go to www.sonyericsson.com/support to read the Synchronisation Feature guide.
More features Flight mode In Flight mode the network and radio transceivers are turned off to prevent disturbance to sensitive equipment. When the flight mode menu is activated you are asked to select a mode the next time you turn on your phone: • • Normal mode – full functionality Flight mode – limited functionality • To activate the flight mode menu Select Menu > Settings > General > Flight mode > Continue > Show at startup.
1 2 3 4 To set the snooze duration Select Menu > Organiser > Alarms. Scroll to an alarm and select Edit. Scroll to Snooze duration: and select Edit. Select an option. The alarm in silent mode You can set the alarm not to sound when the phone is in silent mode. 1 2 3 4 5 To set an alarm to sound or not in silent mode Select Menu > Organiser > Alarms. Scroll to an alarm and select Edit. Scroll to the tab. Scroll to Silent mode: and select Edit. Select an option.
1 2 3 To add a note Select Menu > Organiser > Notes. Scroll to New note and select Add. Write a note and select Save. 1 2 To show a note in standby Select Menu > Organiser > Notes. Scroll to a note and select Options > Show in standby. 1 2 To hide a note from standby Select Menu > Organiser > Notes. Scroll to the note shown in standby. This is marked with an icon. Select Options > Hide in standby. Tasks You can add new tasks or reuse existing tasks.
1 2 To set the time zone Select Menu > Settings > General > Time & date > My time zone. Select the time zone you are in. If you select a city, My time zone also updates the time when daylight saving time changes. 1 2 To change the clock size of the standby screen Select Menu > Settings > Display > Clock size. Select an option. Themes You can change the appearance of the screen through items such as colours and wallpaper. You can also create new themes and download them. For more information, go to www.
1 2 To set the vibrating alert Select Menu > Settings > Sounds & alerts > Vibrating alert. Select an option. Games Your phone contains preloaded games. You can also download games. For more information, go to www.sonyericsson.com/fun. Help texts are available for most games. 1 2 To start a game Select Menu > Media > Games. Select a game. • To end a game . Press Applications You can download and run Java applications. You can also view information or set different permissions.
1 2 To turn on Antivirus Select Menu > Settings > General > Security > Antivirus. Follow the instructions to use the setup wizard. 1 2 To turn off Antivirus Select Menu > Settings > General > Security > Antivirus > Virus scan. Select Off. PIN codes SIM protection This lock only protects your subscription. Your phone will work with a new SIM card. If the lock is on, you have to enter a PIN (Personal Identity Number).
1 2 3 4 To change the phone lock code Select Menu > Settings > General > PIN codes > Phone protection > Change code. Enter the old code and select OK. Enter the new code and select OK. Repeat the code and select OK. IMEI number Keep a copy of your IMEI (International Mobile Equipment Identity) number in case your phone is stolen. • To view your IMEI number , , , , Press . 67 This is an Internet version of this publication. © Print only for private use.
Stereo Streaming Bluetooth™ Headset MH100 1 Microphone 2 Call key 3 Earpiece connector 4 Volume touch area 5 On/off key 6 Charger connector 7 Next/Play-Pause/Previous keys 8 Music/battery/status light indicators 1 2 3 8 7 4 5 6 If you are using a headset other than the MH100, go to www.sonyericsson.com/support for more information. Introduction The Stereo Streaming Bluetooth Headset MH100 lets you stay in control of your incoming and outgoing phone calls.
Turning on and off • To turn on the headset Press and hold down until a light appears. • To turn off the headset Press and hold down until the lights have disappeared. Pairing the headset The MH100 is already pre-paired with the phone it is shipped with. The MH100 and the phone connect automatically the first time you turn on this headset. Pairing the headset with a different phone If you want to use the headset with a different phone you need to pair the headset with that phone.
Calling • To make a call Dial the number using the phone keys. The call is automatically activated in the headset. • To end a call Press briefly. • To make a call using voice commands briefly, wait for a beep and then say the command. Press • To answer a call A beep indicates an incoming call. Press • To reject a call Press and hold down • To re-dial a number Double-click . • To answer a second call . The ongoing call is put on hold.
• To select a preset radio station Press or . Resetting headset Reset the headset if it behaves unexpectedly. Resetting the headset removes all information about paired devices other than the phone it was shipped with. 1 2 3 To reset the headset Make sure the headset is turned off. Press and hold down the on/off key until the indicator light flashes blue and green alternately. Simultaneously press and hold down the on/off key and the call key until the headset turns off.
• If you have paired the MH100 with another phone, this phone might not support the FM reception in the MH100. The headset is automatically turned off • • The battery level is too low. You hear a beep approximately 10 minutes before the headset turns off. Charge the battery. The headset turns off if you do not pair it with the phone within 10 minutes. Unexpected behaviour • Reset the headset. No connection to the phone Make sure the headset is charged and within range of the phone.
Troubleshooting Some problems can be fixed using Update Service. Using Update Service on a regular basis will optimise the phone’s performance. See Updating your phone on page 46. Some problems will require you to call your network operator. For more support go to www.sonyericsson.com/support.
You can download settings using the Settings download or from www.sonyericsson.com/support. 1 2 To download settings Select Menu > Settings > User help > Settings download. Follow the instructions that appear. Contact your network operator or service provider for more information. I cannot send messages from my phone To send messages, you need to set a service centre number. The number is supplied by your service provider and is usually saved on the SIM card.
Error messages Insert SIM There is no SIM card in your phone or you may have inserted it incorrectly. See To insert the SIM card on page 5. The SIM card connectors need cleaning. If the card is damaged, contact your network operator. Insert correct SIM card Your phone is set to work only with certain SIM cards. Check if you are using the correct operator SIM card. Incorrect PIN/Incorrect PIN2 You have entered your PIN or PIN2 incorrectly. Enter the correct PIN or PIN2 and select OK.
Legal information Sony Ericsson U10i/U10a/U10 - MH100 This User guide is published by Sony Ericsson Mobile Communications AB or its local affiliated company, without any warranty. Improvements and changes to this User guide necessitated by typographical errors, inaccuracies of current information, or improvements to programs and/or equipment, may be made by Sony Ericsson Mobile Communications AB at any time and without notice. Such changes will, however, be incorporated into new editions of this User guide.
Index F A activity menu ...........................................................13 alarms ......................................................................61 answering service ....................................................21 antivirus ...................................................................65 applications .............................................................65 appointments ..........................................................62 audio book .............................
P standby ......................................................................6 notes ................................................................63 still camera ..............................................................25 streaming .................................................................39 synchronising ..........................................................60 pan and zoom web pages .......................................................52 PC Companion ..............................