DVD Recorder Operating Instructions
Table Of Contents
- WARNING
- Precautions
- Guide to Parts and Controls
- Hookups and Settings
- Hooking Up the Recorder
- Step 1: Connecting the Aerial Cable
- Step 2: Connecting the TV and Audio Component
- Step 3: Inserting a Conditional Access Module (CAM) (RDR-DC105/DC205/DC305/DC505 only)
- Step 4: Connecting the Mains Lead
- Step 5: Preparing the Remote
- Step 6: Easy Setup
- Connecting a VCR or Similar Device
- Connecting an External Decoder
- Basic Operations
- Recording to the HDD (“GUIDE Plus+”)
- Recording to the HDD (“Freeview+”)
- Using the EPG (Electronic Programme Guide) Display
- One Button Recording Using the EPG
- Recording TV Programme Using the EPG
- Recording Programmes Using Series Recording (Models for the UK Only)
- Setting the Timer Manually (Manual)
- Checking/Changing/Cancelling Timer Settings (Timer List)
- Recording from Connected Equipment
- Playback
- Erasing and Editing
- Dubbing (HDD y DVD)
- HDD/DV Camcorder Dubbing
- Settings and Adjustments
- Using the Disc Setup Menus (Disc Setup)
- Disc Settings (Disc Information)
- Formatting the HDD (HDD Formatting)
- Using the Setup Menus (Initial Setup)
- Clock Setting
- Aerial Reception Settings (Channel)
- Recorder Settings (System 1)
- Recorder Settings (System 2)
- Language Settings (Language)
- Video Settings (Video In/Out)
- Audio Input Settings (Audio In)
- Audio Output Settings (Audio Out)
- Limitation Settings (Parental Lock)
- Easy Setup (Resetting the Recorder)
- Additional Information

58
3 Select an item to be repeated using
</,.
“Title” (for HDD/DVDs): repeats the
current title.
“Chapter” (for HDD/DVDs): repeats the
current chapter.
“Track” (for VIDEO CDs): repeats the
current track.
“Disc” (for VIDEO CDs): repeats the
entire disc.
4 Press .
Repeat play starts.
To play a specific portion repeatedly
(Repeat A-B)
1 Select “A-B” in step 3.
2 Press .
The “Repeat A-B” display appears.
3 Press again to set the starting point
(point A).
4 Press again to set the ending point
(point B).
Repeat-A-B play starts.
To cancel Repeat play
Press CLEAR, or set “Repeat” to “Off” in
the “Play Mode” menu.
To close the “Play Mode” menu
Press INFO, O RETURN, or SYSTEM
MENU.
z
To play VIDEO CDs repeatedly, cancel the PBC
functions by pressing TITLE LIST before step 1.
b
• Set the start and stop points for “Repeat A-B”
within the same title.
• Sections shorter than 7 seconds cannot be set for
“Repeat A-B.”
To change the angles
1 Press INFO during playback to select
“Angle.”
2 Change the angles using </,, and
press .
b
You can change the angles only when multi-angles
are recorded on the DVD.
Playing DivX/Music/
Photo Files
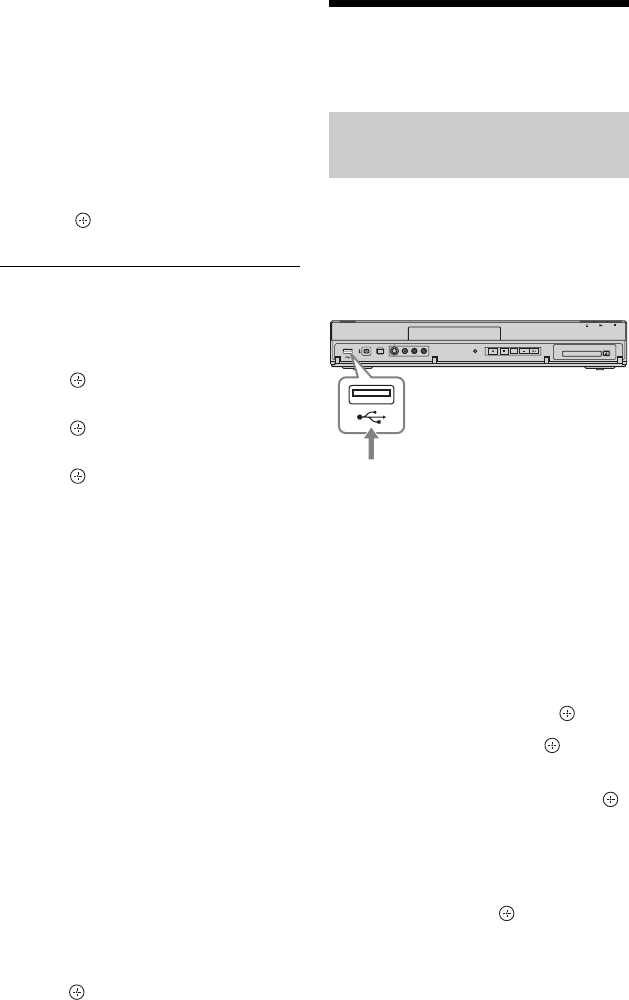
1 Connect the USB device to the USB
jack on the recorder.
Refer to the operating instructions
supplied with the USB device before
connecting.
b
• Some USB devices may not work with this
recorder.
• The recorder can recognise Mass Storage
Class (MSC) devices that are FAT-
compatible.
2 Press HDD.
3 Press SYSTEM MENU.
The System Menu appears.
4 Select “Media,” and press .
5 Select “USB,” and press .
6 Select a file type (“Video (DivX),”
“Photo,” or “Music”), and press .
Select a USB partition, if necessary.
The DivX List, Photo List, or Music List
appears.
7 Press the red button (“Edit”) to select
“Copy,” and press .
The Copy List appears.
When copying photo files from a USB
device, the display asks whether to
categorise the data by date. Select “Yes”
or “No.”
Copying DivX/music/photo
files to the HDD
USB device
DVD recorder
to USB jack


