
DVD Recorder Operating Instructions


Table Of Contents
- WARNING
- Precautions
- Guide to Parts and Controls
- Hookups and Settings
- Hooking Up the Recorder
- Step 1: Connecting the Aerial Cable
- Step 2: Connecting the TV and Audio Component
- Step 3: Inserting a Conditional Access Module (CAM) (RDR-DC105/DC205/DC305/DC505 only)
- Step 4: Connecting the Mains Lead
- Step 5: Preparing the Remote
- Step 6: Easy Setup
- Connecting a VCR or Similar Device
- Connecting an External Decoder
- Basic Operations
- Recording to the HDD (“GUIDE Plus+”)
- Recording to the HDD (“Freeview+”)
- Using the EPG (Electronic Programme Guide) Display
- One Button Recording Using the EPG
- Recording TV Programme Using the EPG
- Recording Programmes Using Series Recording (Models for the UK Only)
- Setting the Timer Manually (Manual)
- Checking/Changing/Cancelling Timer Settings (Timer List)
- Recording from Connected Equipment
- Playback
- Erasing and Editing
- Dubbing (HDD y DVD)
- HDD/DV Camcorder Dubbing
- Settings and Adjustments
- Using the Disc Setup Menus (Disc Setup)
- Disc Settings (Disc Information)
- Formatting the HDD (HDD Formatting)
- Using the Setup Menus (Initial Setup)
- Clock Setting
- Aerial Reception Settings (Channel)
- Recorder Settings (System 1)
- Recorder Settings (System 2)
- Language Settings (Language)
- Video Settings (Video In/Out)
- Audio Input Settings (Audio In)
- Audio Output Settings (Audio Out)
- Limitation Settings (Parental Lock)
- Easy Setup (Resetting the Recorder)
- Additional Information
69
Erasing and Editing
Creating and Editing a
Playlist
Playlist edit allows you to edit or re-edit
without changing the actual recordings. You
can create up to 99 Playlist titles.
b
Playlist titles containing titles recorded with the
“Copy-Once” copy protection signal cannot be
dubbed or moved (page 110).
1 Press TITLE LIST.
2 Select the title you want to include in
the Playlist title.
3 Press the red button (“Edit”) to select
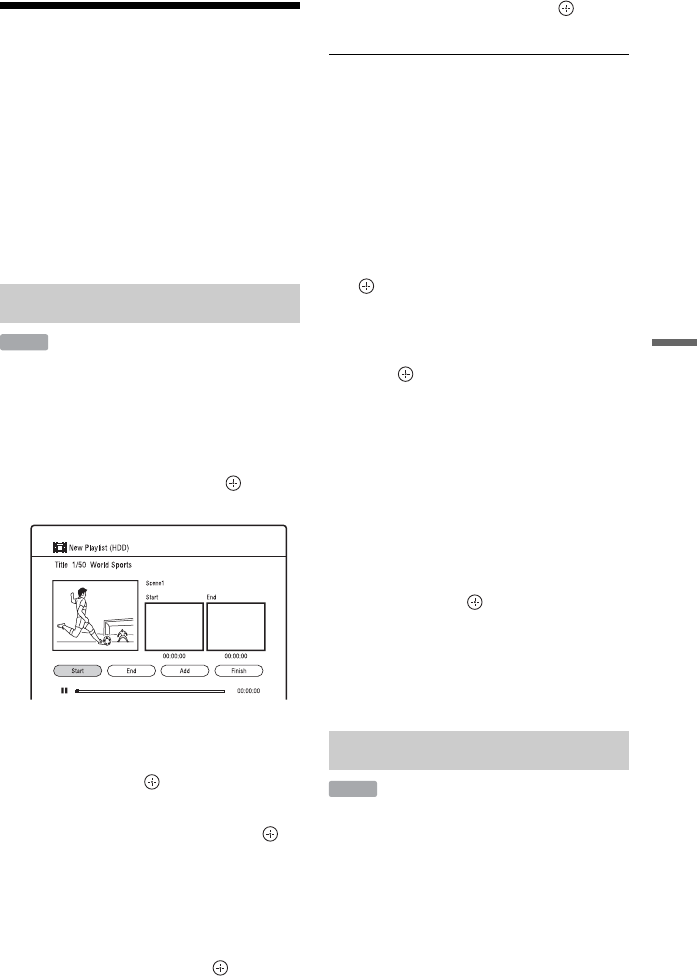
“New Playlist,” and press .
The “New Playlist” display appears.
4 Press N to start playback.
5 Select the start point using m/M,
etc., and press (“Start”).
The start point is set.
6 Select the end point, and press
(“End”).
The end point is set.
• To reset either start or end point, select
“Start” or “End” using </,, and
repeat from step 5 or 6.
7 Select “Add,” and press .
A scene for a Playlist title is created.
• To add more scenes, repeat steps 5 to
7.
• To add more scenes from another title,
switch titles using ./>.
8 Select “Finish,” and press .
A Playlist title is added to the Playlist.
To cancel “New Playlist”
Press O RETURN. The Title List appears.
To play a Playlist title
You can play a Playlist title on the HDD or a
DVD-RW/DVD-R (VR mode).
1 Press the yellow button (“Go To”) while
the Title List is displayed.
2 Select “Playlist” using M/m, and press
.
To go back to the Title List, press the
yellow button (“Title List”) again.
3 Select a Playlist title using M/m, and
press .
Playback starts from the selected title.
z
You can search for a Playlist title using the INFO
button during playback (“Playlist Search”).
To change the Playlist title order
1 Press the green button (“Sort”) while the
Playlist is displayed.
2 Select “By Date” or “By Name” using
M/m, and press .
b
You cannot make a Playlist title that contains
scenes from both the titles in DR mode and the
titles in other recording modes.
1 Press TITLE LIST, and switch to the
Playlist.
For details on switching to the Playlist,
see “To play a Playlist title” on page 69.
2 Follow steps 2 to 6 of “Erasing a title
(Erase)” on page 67.
Creating a Playlist title
HDD
Erasing a Playlist title
HDD
,continued