
DVD Recorder Operating Instructions


Table Of Contents
- WARNING
- Precautions
- Guide to Parts and Controls
- Hookups and Settings
- Hooking Up the Recorder
- Step 1: Connecting the Aerial Cable
- Step 2: Connecting the TV and Audio Component
- Step 3: Inserting a Conditional Access Module (CAM) (RDR-DC105/DC205/DC305/DC505 only)
- Step 4: Connecting the Mains Lead
- Step 5: Preparing the Remote
- Step 6: Easy Setup
- Connecting a VCR or Similar Device
- Connecting an External Decoder
- Basic Operations
- Recording to the HDD (“GUIDE Plus+”)
- Recording to the HDD (“Freeview+”)
- Using the EPG (Electronic Programme Guide) Display
- One Button Recording Using the EPG
- Recording TV Programme Using the EPG
- Recording Programmes Using Series Recording (Models for the UK Only)
- Setting the Timer Manually (Manual)
- Checking/Changing/Cancelling Timer Settings (Timer List)
- Recording from Connected Equipment
- Playback
- Erasing and Editing
- Dubbing (HDD y DVD)
- HDD/DV Camcorder Dubbing
- Settings and Adjustments
- Using the Disc Setup Menus (Disc Setup)
- Disc Settings (Disc Information)
- Formatting the HDD (HDD Formatting)
- Using the Setup Menus (Initial Setup)
- Clock Setting
- Aerial Reception Settings (Channel)
- Recorder Settings (System 1)
- Recorder Settings (System 2)
- Language Settings (Language)
- Video Settings (Video In/Out)
- Audio Input Settings (Audio In)
- Audio Output Settings (Audio Out)
- Limitation Settings (Parental Lock)
- Easy Setup (Resetting the Recorder)
- Additional Information
78
Dubbing from DV
Camcorder
This section explains dubbing with a DV
camcorder via the DV IN jack on the front
panel. If you want to dub by way of the
LINE IN jacks, see “Recording from
Connected Equipment” on page 45.
The DV IN jack on this recorder conforms to
the i.LINK standard.
Follow the instructions in “Preparing for DV
camcorder dubbing,” and then move on to
the section on dubbing. For more
information about i.LINK, see “About
i.LINK” on page 114.
Before you start DV camcorder dubbing…
• Check that the HDD of the recorder has
enough available space for the dubbing
(page 82). You can open up disc space by
erasing titles (page 67).
How chapters are created
The contents dubbed to the HDD become a
single title. This title is divided into chapters.
Chapters are created for each shooting
session on the tape and each pause during
dubbing.
To use this recorder’s auto chapter setting,
be sure to correctly set the clock on your DV
camcorder before shooting.
You can connect a DV camcorder to the DV
IN jack on the recorder to dub or edit from a
DV/Digital8 format tape. Operation is
straightforward because the recorder will
fast forward and rewind the tape for you –
you do not need to operate your DV
camcorder.
Refer as well to the instruction manual
supplied with the DV camcorder before
connecting.
b
• You cannot make a recording while DV
camcorder dubbing.
• The DV IN jack is for input only. It will not
output signals.
• You cannot use the DV IN jack when:
– signal input to the DV IN jack on the front
panel or recorder operation cannot be
performed correctly when using a digital video
camera (see “About i.LINK” on page 114).
Connect the camera to the LINE IN jack and
follow the instructions of “Recording from
Connected Equipment” on page 45.
– the input signal is not in DVC-SD format. Do
not connect a MICRO MV format digital video
camera even if it has an i.LINK jack.
– the images on the tape contain copy protection
signals, which limit recording.
• Set the recorder and DV camcorder to the same
colour system (page 92).
• When the total number of titles on the HDD
exceeds 999, you cannot dub the contents on the
DV camcorder to the recorder.
Hookups
1 Insert the source DV/Digital8 format
tape into your DV camcorder, and set
the DV camcorder to video playback
mode.
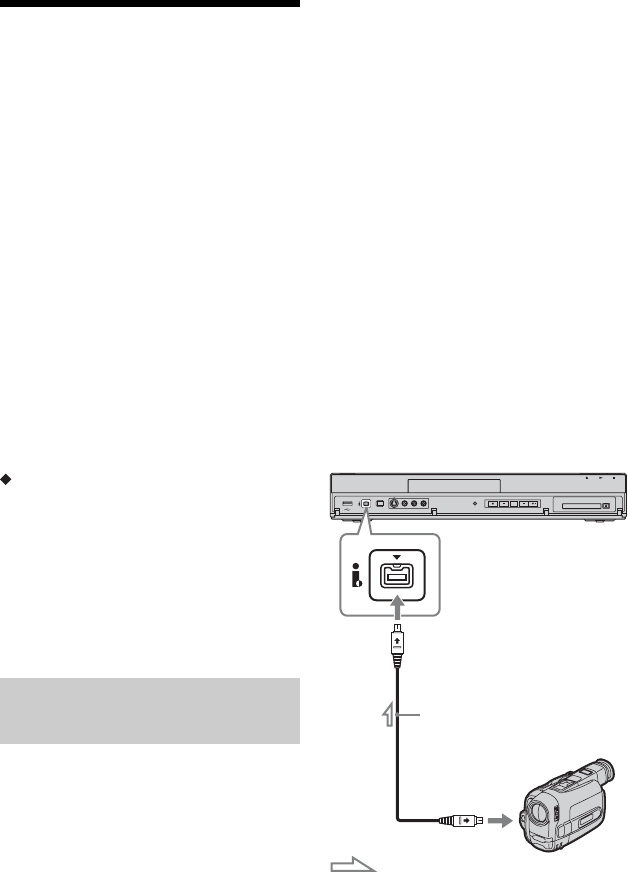
Preparing for DV camcorder
dubbing
DVD recorder
to DV IN
i.LINK cable
(not supplied)
DV output
DV camcorder
: Signal flow