
Instruction Manual
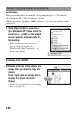
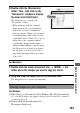

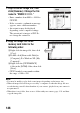
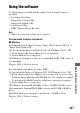

Table Of Contents
- Notes on using your camera
- Table of Contents
- Preparing the camera
- Before your operation
- Shooting images
- Using the shooting function
- Selecting the focus method
- Zooming in in one step
- Using the flash
- Adjusting the brightness of the image (Exposure, Flash compensation, Metering)
- Shooting with fixed brightness (AE Lock)
- Using brightness compensation for the entire image (Exposure compensation)
- Adjusting the amount of flash light (Flash compensation)
- Selecting the flash control mode to set the amount of flash light (Flash control)
- Selecting the method for measuring the brightness of a subject (Metering mode)
- Compensating for the brightness and contrast automatically (D-Range)
- Image processing
- Setting ISO
- Adjusting the color tones (White balance)
- Selecting the drive mode
- Capturing smiling faces (Smile Shutter)
- Using the viewing function
- Changing your setup
- Viewing images on a computer
- Printing images
- Others
- Index

Viewing images on a computer
149
x Macintosh
• Log on as Administrator.
Note
• When the restart confirmation message appears, restart the computer following the
instructions on the screen.
3 Remove the CD-ROM after the installation is complete.
The following software is installed and shortcut icons appear on the desktop.
• Sony Image Data Suite
“Image Data Converter SR”
“Image Data Lightbox SR”
• Sony Picture Utility
“PMB”
“PMB Guide”
1 Turn on your Macintosh computer, and insert the CD-ROM
(supplied) into the CD-ROM drive.
2 Double-click the CD-ROM icon.
3 Copy the [IDS_INST.pkg] file in the [MAC] folder to the hard
disk icon.
4 Double-click the [IDS_INST.pkg] file in the copy-to folder.
• Follow the instructions on the screen to complete the installation.