
Digital Camera User Manual
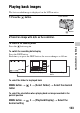
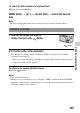

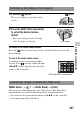
Table Of Contents
- Notes on using your camera
- Table of Contents
- Preparing the camera
- Before your operation
- Shooting images
- Using the shooting function
- Selecting the focus method
- Using autofocus
- Shooting with your desired composition (Focus-lock)
- Selecting the focus method to suit the movement of the subject (Autofocus Mode)
- Selecting the focus area (AF area)
- Adjusting the focus manually (Manual focus)
- Composing your shot using the image sensor (Focus check Live View)
- Checking the focus by enlarging the image
- Detecting faces
- Using the flash
- Adjusting the brightness of the image (Exposure, Flash compensation, Metering)
- Shooting with fixed brightness (AE Lock)
- Using brightness compensation for the entire image (Exposure compensation)
- Adjusting the amount of flash light (Flash Compensation)
- Selecting the flash control mode to set the amount of flash light (Flash control)
- Selecting the method for measuring the brightness of a subject (Metering Mode)
- Setting ISO
- Compensating for the brightness and contrast automatically (D-Range)
- Image processing
- Adjusting the color tones (White balance)
- Selecting the drive mode
- Selecting the focus method
- Using the viewing function
- Changing your setup
- Viewing images on a computer
- Printing images
- Others
- Index

122
Based on the selected white balance, and the color temperature/color filter,
three images are recorded with the white balance shifted.
* Mired: a unit to indicate the color conversion quality in color temperature filters.
You can shoot using the SHUTTER and 2SEC (the shutter is released after
2 seconds) buttons on the RMT-DSLR1 Wireless Remote Commander
(sold separately). Also, refer to the operating instructions supplied with the
Wireless Remote Commander.
Note
• When you shoot images using the viewfinder, use the eyepiece cover (page 34).
Shooting with white balance shifted (WB bracket)
1 button t (WB bracket) t Select the desired
setting
• When Lo is selected, it is shifted by 10 mired*, and when Hi is selected, it is
shifted by 20 mired.
2 Adjust the focus and shoot the subject.
Shooting with the Wireless Remote Commander
1 button t (Remote Cdr.)
2 Focus on the subject, point the transmitter of the Wireless
Remote Commander to the remote sensor, and shoot the
image.