
Interchangeable Lens Digital Camera Instruction Manual

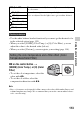
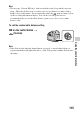
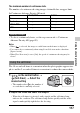
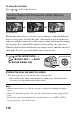
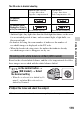

Table Of Contents
- Notes on using your camera
- Table of Contents
- Preparing the camera
- Before your operation
- Shooting images
- Using the shooting function
- Selecting the focus method
- Detecting faces
- Using the flash
- Adjusting the brightness of the image (Exposure, Flash compensation, Metering)
- Shooting with fixed brightness (AE Lock)
- Using brightness compensation for the entire image (Exposure compensation)
- Adjusting the amount of flash light (Flash Compensation)
- Selecting the flash control mode to set the amount of flash light (Flash control)
- Selecting the method for measuring the brightness of a subject (Metering Mode)
- Setting ISO
- Compensating for the brightness and contrast automatically (D-Range)
- Image processing
- Adjusting the color tones (White balance)
- Selecting the drive mode
- Using the viewing function
- Changing your setup
- GPS setting (SLT-A55V only)
- Setting image size and image quality
- Setting the method for recording on a memory card
- Changing the noise reduction setting
- Changing the function of the buttons
- Changing other settings
- Setting the LCD monitor/electronic viewfinder
- Confirming the version of the camera
- Resetting to the default
- Viewing images on a computer
- Printing images
- Others
- Index

117
Using the shooting function
The maximum number of continuous shots
The number of continuous shooting images obtainable has an upper limit.
In Continuous Advance Priority AE mode
• To shoot continuously faster, set the exposure mode to Continuous
Advance Priority AE (page 69).
Notes
• When is selected, the image recorded between the frames is displayed.
• You cannot shoot continuously when using Scene Selection modes other than
[Sports Action].
• When [Face Detection] is set to [On], the speed of continuous shooting may be
slower.
The 10-second self-timer is convenient when the photographer appears in a
photo and the 2-second self-timer is convenient to reduce the camera shake.
SLT-A55/A55V SLT-A33
Fine 28 images 14 images
Standard 28 images 16 images
RAW & JPEG 19 images 7 images
RAW 19 images 7 images
Shooting technique
Using the self-timer
1 on the control button t
(Self-timer) t Select the
desired setting
• The number after is the number of
seconds that is currently selected.
2 Adjust the focus and shoot the subject.
• When the self-timer is activated, audio signals and the self-timer lamp
indicate the condition. The self-timer lamp flashes quickly and the audio
signal sounds quickly right before the shooting.