
Interchangeable Lens Digital Camera Instruction Manual

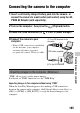
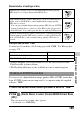
Table Of Contents
- Notes on using your camera
- Table of Contents
- Preparing the camera
- Before your operation
- Shooting images
- Using the shooting function
- Selecting the focus method
- Detecting faces
- Using the flash
- Adjusting the brightness of the image (Exposure, Flash compensation, Metering)
- Shooting with fixed brightness (AE Lock)
- Using brightness compensation for the entire image (Exposure compensation)
- Adjusting the amount of flash light (Flash Compensation)
- Selecting the flash control mode to set the amount of flash light (Flash control)
- Selecting the method for measuring the brightness of a subject (Metering Mode)
- Setting ISO
- Compensating for the brightness and contrast automatically (D-Range)
- Image processing
- Adjusting the color tones (White balance)
- Selecting the drive mode
- Using the viewing function
- Changing your setup
- GPS setting (SLT-A55V only)
- Setting image size and image quality
- Setting the method for recording on a memory card
- Changing the noise reduction setting
- Changing the function of the buttons
- Changing other settings
- Setting the LCD monitor/electronic viewfinder
- Confirming the version of the camera
- Resetting to the default
- Viewing images on a computer
- Printing images
- Others
- Index

166
File name
• ssss (file number) stands for any number within the range of 0001 to
9999.
• When [Image: Quality] is set to [RAW & JPEG], the numerical portions
of the name of a RAW data file and its corresponding JPEG file are the
same.
Notes
• For operations such as importing AVCHD movies to the computer, use “PMB.”
• Use “PMB” to import the movies with GPS location information to a computer
(SLT-A55V only).
• When the camera is connected to the computer, if you operate AVCHD format
movies or folders from the connected computer, images may be damaged or cannot
be played. Do not delete or copy AVCHD format movies on the memory card from
the computer. Sony is not held liable for consequences resulting from such
operations via the computer.
Folder The type of file File name
DCIM folder JPEG file DSC0ssss.JPG
JPEG file (Adobe RGB) _DSCssss.JPG
RAW file DSC0ssss.ARW
RAW file (Adobe RGB) _DSCssss.ARW
MP_ROOT folder MP4 file (1440 × 1080) MAH0ssss.MP4
MP4 file (VGA) MAQ0ssss.MP4
Importing images to the computer (Macintosh)
1 Connect the camera to your Macintosh computer first. Double-
click the newly recognized icon on the desktop t the folder
where the images you want to import are stored.
2 Drag and drop the image files to the hard disk icon.
The image files are copied to the hard disk.