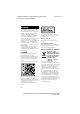
D:\NORM'S JOB\SONY HA\SO130019\BDV-N9100W (PMRF 01)\4456335121_GB (CE)\010COV.
D:\NORM'S JOB\SONY HA\SO130019\BDV-N9100W (PMRF 01)\4456335121_GB (CE)\020REG.fm masterpage: Left WARNING Do not install the appliance in a confined space, such as a bookcase or built-in cabinet. To reduce the risk of fire, do not cover the ventilation opening of the appliance with newspapers, tablecloths, curtains, etc. Do not expose the appliance to naked flame sources (for example, lighted candles).
D:\NORM'S JOB\SONY HA\SO130019\BDV-N9100W (PMRF 01)\4456335121_GB (CE)\020REG.fm Europe Only Disposal of waste batteries (applicable in the European Union and other European countries with separate collection systems) This symbol on the battery or on the packaging indicates that the battery provided with this product shall not be treated as household waste. On certain batteries this symbol might be used in combination with a chemical symbol.
D:\NORM'S JOB\SONY HA\SO130019\BDV-N9100W (PMRF 01)\4456335121_GB (CE)\020REG.fm masterpage: Left Precautions Copy Protection This equipment has been tested and found to comply with the limits set out in the EMC Directive using a connection cable shorter than 3 meters. (Europe models only) • Please be advised of the advanced content protection systems used in both Blu-ray Disc and DVD media.
D:\NORM'S JOB\SONY HA\SO130019\BDV-N9100W (PMRF 01)\4456335121_GB (CE)\020REG.fm ** Manufactured under license under U.S. Patent Nos: 5,956,674; 5,974,380; 6,226,616; 6,487,535; 7,212,872; 7,333,929; 7,392,195; 7,272,567 & other U.S. and worldwide patents issued & pending. DTS-HD, the Symbol, & DTS-HD and the Symbol together are registered trademarks of DTS, Inc. Product includes software. © DTS, Inc. All Rights Reserved. • This system incorporates High-Definition Multimedia Interface (HDMITM) technology.
D:\NORM'S JOB\SONY HA\SO130019\BDV-N9100W (PMRF 01)\4456335121_GB (CE)\020REG.fm • This product incorporates proprietary technology under license from Verance Corporation and is protected by U.S. Patent 7,369,677 and other U.S. and worldwide patents issued and pending as well as copyright and trade secret protection for certain aspects of such technology. Cinavia is a trademark of Verance Corporation. Copyright 2004-2010 Verance Corporation. All rights reserved by Verance.
D:\NORM'S JOB\SONY HA\SO130019\BDV-N9100W (PMRF 01)\4456335121_GB (CE)\020REG.fm You agree that your non-exclusive license to use the Gracenote Data, the Gracenote Software, and Gracenote Servers will terminate if you violate these restrictions. If your license terminates, you agree to cease any and all use of the Gracenote Data, the Gracenote Software, and Gracenote Servers. Gracenote reserves all rights in Gracenote Data, the Gracenote Software, and the Gracenote Servers, including all ownership rights.
D:\NORM'S JOB\SONY HA\SO130019\BDV-N9100W (PMRF 01)\4456335121_GB (CE)\010COVTOC.fm masterpage: Left Table of Contents About These Operating Instructions .... 7 Unpacking .......................................... 10 Guide to Parts and Controls ............... 13 Getting Started Step 1: Installing the Speakers .............................. 19 Step 2: Connecting the System ................................. 20 Connecting the speakers ....... Connecting the TV ..................
D:\NORM'S JOB\SONY HA\SO130019\BDV-N9100W (PMRF 01)\4456335121_GB (CE)\010COVTOC.fm masterpage: Right Settings and Adjustments Using the Setup Display .................... 57 [Remote Control Setting Guide] ........ 58 [Network Update] .............................. 58 [Screen Settings] ................................ 58 [Audio Settings] ................................. 60 [BD/DVD Viewing Settings] ............. 62 [Parental Control Settings] ................. 62 [Music Settings] ........................
D:\NORM'S JOB\SONY HA\SO130019\BDV-N9100W (PMRF 01)\4456335121_GB (CE)\030UNP.
D:\NORM'S JOB\SONY HA\SO130019\BDV-N9100W (PMRF 01)\4456335121_GB (CE)\030UNP.
D:\NORM'S JOB\SONY HA\SO130019\BDV-N9100W (PMRF 01)\4456335121_GB (CE)\030UNP.
D:\NORM'S JOB\SONY HA\SO130019\BDV-N9100W (PMRF 01)\4456335121_GB (CE)\030UNP.fm masterpage: Right Guide to Parts and Controls For more information, refer to the pages indicated in parentheses. Main unit Top and front panel 2 3 4 5 6 1 0 A "/1 (on/standby) Turns on the main unit, or sets it to standby mode. B Disc lid (page 32) C LED indicator White: Lights up when the main unit is turned on.
D:\NORM'S JOB\SONY HA\SO130019\BDV-N9100W (PMRF 01)\4456335121_GB (CE)\030UNP.fm masterpage: Left Note During the demonstration, the volume level may be higher than the volume level you have set. G (USB) port (page 34) Place your fingernail in the slot to open the cover. H ./> (previous/next) I (remote control sensor) J Z (open/close) About soft-touch buttons/ indicators These buttons function when the soft-touch button indicators are lit.
D:\NORM'S JOB\SONY HA\SO130019\BDV-N9100W (PMRF 01)\4456335121_GB (CE)\030UNP.fm masterpage: Right Indicators in the top panel display A Lights up when stereo sound is received. (Radio only) B Lights up when repeat play is activated. C Lights up when the system is playing via the PARTY STREAMING function. D Lights up when muting is on.
D:\NORM'S JOB\SONY HA\SO130019\BDV-N9100W (PMRF 01)\4456335121_GB (CE)\030UNP.fm masterpage: Left Rear panel 1 0 9 8 A SPEAKER ILLUMINATION terminals (BDV-N9100WL/ BDV-N7100WL only) (page 21) B A.
D:\NORM'S JOB\SONY HA\SO130019\BDV-N9100W (PMRF 01)\4456335121_GB (CE)\030UNP.fm Remote control A Z (open/close) Opens or closes the disc lid. The following buttons description is only for the system operation. See “Controlling Your TV or Other Equipment with the Supplied Remote Control” (page 52) for the buttons to operate the connected equipment. BDV-N9100WL/ 1 BDV-N7100WL 2 BDV-N9100W/ BDV-N8100W/ 3 BDV-N7100W B 4 5 6 7 8 • Number 5, AUDIO, N, and PROG + buttons have a tactile dot.
D:\NORM'S JOB\SONY HA\SO130019\BDV-N9100W (PMRF 01)\4456335121_GB (CE)\030UNP.fm POP UP/MENU Opens or closes the BD-ROM’s Popup Menu, or the DVD’s menu. OPTIONS (pages 31, 42, 55) Displays the options menu on the TV screen or in the top panel display. (The location differs depending on the selected function.) RETURN Returns to the previous display. B/V/v/b Moves the highlight to a displayed item. (enter) Enters the selected item. F BLUETOOTH (pages 35, 36) Selects the “BT” function.
D:\NORM'S JOB\SONY HA\SO130019\BDV-N9100W (PMRF 01)\4456335121_GB (CE)\040GET.fm Radio operation buttons See “Tuner” (page 45). TUNING +/– PRESET +/– H (muting) Turns off the sound temporarily. 2 (volume) +/– Adjusts the volume. SLEEP (page 51) Sets the sleep timer. Getting Started Getting Started x (stop) Stops playback and remembers the stop point (resume point). The resume point for a title/track is the last point you played or the last photo for a photo folder.
D:\NORM'S JOB\SONY HA\SO130019\BDV-N9100W (PMRF 01)\4456335121_GB (CE)\040GET.fm Getting Started Note • Be sure to select the speakers layout setting (page 49) according to your speakers placement. • Use caution when placing the speakers and/or speaker stands attached to the speakers on a specially treated (waxed, oiled, polished, etc.) floor, as staining or discoloration may result. • Do not lean or hang on a speaker, as it may fall down. • The speakers of this system are not magnetically shielded.
D:\NORM'S JOB\SONY HA\SO130019\BDV-N9100W (PMRF 01)\4456335121_GB (CE)\040GET.fm To the surround amplifier To the surround amplifier Gray (Surround right speaker (R)) Surround left speaker (L) Surround right speaker (R) To connect the SPEAKER ILLUMINATION terminal (BDV-N9100WL/ BDV-N7100WL only) Connect the speaker illumination connector (attached with the speaker cord) to the main unit and surround amplifier so you can enjoy the lighting effect on your speakers.
D:\NORM'S JOB\SONY HA\SO130019\BDV-N9100W (PMRF 01)\4456335121_GB (CE)\040GET.fm masterpage: Left Getting Started Connecting the TV Select one of the following connection methods according to the input jacks on your TV. C A B Video connection A HDMI cable1) (not supplied) 2) or 1) 2) High Speed HDMI cable If the HDMI IN jack of your TV is compatible with the ARC (Audio Return Channel) function, digital audio signal can be output from the TV via an HDMI cable connection.
D:\NORM'S JOB\SONY HA\SO130019\BDV-N9100W (PMRF 01)\4456335121_GB (CE)\040GET.fm masterpage: Right Connecting the other equipment (Set-top box, etc.) TV Video out* Equipment (Set-top box, VCR, PlayStation®, or digital satellite receiver, etc.) A System B, C Signal flow : Video signal : Audio signal * This connection is unnecessary for connection A (HDMI connection). Select one of the following connection methods according to the jack type of the equipment.
D:\NORM'S JOB\SONY HA\SO130019\BDV-N9100W (PMRF 01)\4456335121_GB (CE)\040GET.fm Getting Started A masterpage: Left High quality HDMI cable* (not supplied) HDMI OUT * High Speed HDMI cable B Optical digital cord (not supplied) DIGITAL OUT OPTICAL C Audio cable (not supplied) L AUDIO OUTPUT R Standard quality When you make connection A This connection can transmit both video and audio signals.
D:\NORM'S JOB\SONY HA\SO130019\BDV-N9100W (PMRF 01)\4456335121_GB (CE)\040GET.fm Step 3: Preparing for Network Connection Rear of the main unit Tip To connect the system to your network, perform [Easy Network Settings]. For details, see “Step 5: Performing the Easy Setup” (page 29). or Select the method based on your LAN (Local Area Network) environment. • If you use a wireless LAN The system has built-in Wi-Fi, and you can connect the system to the network by making the network settings.
D:\NORM'S JOB\SONY HA\SO130019\BDV-N9100W (PMRF 01)\4456335121_GB (CE)\040GET.fm Getting Started Before performing the network settings When your wireless LAN router (access point) is Wi-Fi Protected Setup (WPS)compatible, you can easily set the network settings with the WPS button. If not, check the following information in advance, and record it in the space provided below. • The network name (SSID*) that identifies your network**.
D:\NORM'S JOB\SONY HA\SO130019\BDV-N9100W (PMRF 01)\4456335121_GB (CE)\040GET.fm The main unit transmits sound to the surround amplifier that is connected to the surround speakers. To activate wireless transmission, perform the following Steps. 3 4 Connect the AC power cord (mains lead) of the main unit. Before connecting the AC power cord, make sure all connections in “Step 2: Connecting the System” (page 20) are secure. Press "/1 to turn on the system.
Getting Started D:\NORM'S JOB\SONY HA\SO130019\BDV-N9100W (PMRF 01)\4456335121_GB (CE)\040GET.fm masterpage: Left About the LINK/STANDBY indicator To specify the wireless connection The LINK/STANDBY indicator shows wireless transmission status, as follows. If you use multiple wireless products or your neighbors use wireless products, interference may occur. To prevent this, you can specify the wireless connection to link the main unit to the surround amplifier (Secure Link function).
D:\NORM'S JOB\SONY HA\SO130019\BDV-N9100W (PMRF 01)\4456335121_GB (CE)\040GET.fm 5 Before performing Step 5 Switch the input selector on your TV so that the signal from the system appears on the TV screen. The [Easy Initial Settings] for OSD language selection appears. Follow the Steps below to make the basic adjustments and network settings for the system. Displayed items vary depending on the area.
Getting Started D:\NORM'S JOB\SONY HA\SO130019\BDV-N9100W (PMRF 01)\4456335121_GB (CE)\040GET.fm masterpage: Left To recall the [Easy Network Settings] display Function and playback source 1 Press HOME. Equipment (TV, etc.) that is connected to the TV (DIGITAL IN OPTICAL) jack, or a TV compatible with the Audio Return Channel function that is connected to the HDMI (OUT) jack (page 22) The home menu appears on the TV screen. 2 Press B/b to select [Setup].
D:\NORM'S JOB\SONY HA\SO130019\BDV-N9100W (PMRF 01)\4456335121_GB (CE)\040GET.fm Press SOUND MODE repeatedly during playback until the mode you want appears in the top panel display or on the TV screen. Auto The system automatically selects [Movie] or [Music] to produce the sound effect depending on the disc or sound stream. • 2-channel source: The system simulates surround sound from 2-channel sources and outputs sound from the 5.1 channel speakers.
D:\NORM'S JOB\SONY HA\SO130019\BDV-N9100W (PMRF 01)\4456335121_GB (CE)\050PLA.fm Selecting the football mode Press FOOTBALL while watching a football match broadcast. You can experience a feeling of presence in the stadium when watching the football match broadcast. • [Football : Narration On]: You can enjoy an immersive feeling of being in a football stadium through enhanced stadium cheers.
D:\NORM'S JOB\SONY HA\SO130019\BDV-N9100W (PMRF 01)\4456335121_GB (CE)\050PLA.fm Enjoying BONUSVIEW/ BD-LIVE 2 3 You can enjoy Blu-ray 3D Discs with the 3D logo*. * 1 * 1 Enjoying Blu-ray 3D Connect the USB device to the (USB) port (page 34). For local storage, use a 1 GB or larger USB memory. Prepare for BD-LIVE (BD-LIVE only). • Connect the system to a network (page 25). • Set [BD Internet Connection] to [Allow] (page 62). Insert a BD-ROM with BONUSVIEW/BD-LIVE.
D:\NORM'S JOB\SONY HA\SO130019\BDV-N9100W (PMRF 01)\4456335121_GB (CE)\050PLA.fm Displaying the playback information masterpage: Left Playing from a USB Device You can check the playback information, etc., by pressing DISPLAY. The displayed information differs depending on the disc type and system status. You can play video/music/photo files on a connected USB device. For playable types of files, see “Playable Types of Files” (page 77).
D:\NORM'S JOB\SONY HA\SO130019\BDV-N9100W (PMRF 01)\4456335121_GB (CE)\050PLA.fm masterpage: Right Note Enjoying music from a Bluetooth device Bluetooth wireless technology is a shortrange wireless technology that enables wireless data communication between digital devices. Bluetooth wireless technology operates within a range of about 10 meters.
D:\NORM'S JOB\SONY HA\SO130019\BDV-N9100W (PMRF 01)\4456335121_GB (CE)\050PLA.fm 5 Once pairing is completed, the device is automatically connected to the system. Device name appears on the TV screen. 3 4 Note You can pair up to 9 Bluetooth devices. If the 10th Bluetooth device is paired, the least recently connected device will be replaced by the new one. 6 7 Start playback on the Bluetooth device. Adjust the volume.
D:\NORM'S JOB\SONY HA\SO130019\BDV-N9100W (PMRF 01)\4456335121_GB (CE)\050PLA.fm Two-dimensional code* for direct access Connecting to a smartphone by Onetouch listening function (NFC) * Use a two-dimensional code reader app. Playback By holding an NFC-compatible smartphone near to the on the main unit, the main unit and smartphone proceed to complete pairing and the Bluetooth connection automatically. Compatible smartphones Smartphones with a built-in NFC function (OS: Android 2.3.3 – 4.0.
D:\NORM'S JOB\SONY HA\SO130019\BDV-N9100W (PMRF 01)\4456335121_GB (CE)\050PLA.fm masterpage: Left Note • The system only can recognizes and connects to one NFC-compatible device at a time. • Depending on your smartphone, you may need to turn on the NFC function on your smartphone in advance. For details, refer to the operating instructions of the smartphone. Tip Playing via a Network Enjoying Sony Entertainment Network (SEN) If pairing and the Bluetooth connection fail, do the following.
D:\NORM'S JOB\SONY HA\SO130019\BDV-N9100W (PMRF 01)\4456335121_GB (CE)\050PLA.fm Video streaming control panel A Control display Press B/V/v/b or operations. for playback B Playing status bar Status bar, cursor indicating the current position, playing time, duration of the video file Playing files on a Home Network (DLNA) You can play video/music/photo files on other DLNA-certified equipment by connecting them to your home network. This main unit can be used as a player and renderer.
D:\NORM'S JOB\SONY HA\SO130019\BDV-N9100W (PMRF 01)\4456335121_GB (CE)\050PLA.fm To play files stored on a DLNA server via the system (DLNA Player) Select the DLNA server icon from [Video], [Music], or [Photo] in the home menu, then select the file that you want to play. Server Player (This system) To play remote files by operating the system (Renderer) via a DLNA controller You can operate the system with a DLNA-certified controller (a mobile phone, etc), when playing files stored on a DLNA server.
D:\NORM'S JOB\SONY HA\SO130019\BDV-N9100W (PMRF 01)\4456335121_GB (CE)\050PLA.fm 3 Select a track in [Music], a radio station in [Radio], [AUDIO] or [Bluetooth AUDIO] in [Input], press OPTIONS. Then select [Start PARTY] to start. To close, press OPTIONS, then select [Close PARTY]. 4 Note If content that is not compatible with the PARTY STREAMING function is played, the system closes PARTY automatically.
D:\NORM'S JOB\SONY HA\SO130019\BDV-N9100W (PMRF 01)\4456335121_GB (CE)\050PLA.fm masterpage: Left [Video] only Available Options Various settings and playback operations are available by pressing OPTIONS. The available items differ depending on the situation. [A/V SYNC] Adjusts the time gap between picture and sound (page 44). [3D Output Setting] Sets whether or not to output 3D video automatically. Common options Note [Sound Mode] Changes the sound mode setting (page 31).
D:\NORM'S JOB\SONY HA\SO130019\BDV-N9100W (PMRF 01)\4456335121_GB (CE)\050PLA.fm [Subtitle] [Photo] only Selects the subtitle language when multilingual subtitles are recorded on BD-ROMs/DVD VIDEOs. [Slideshow] [Angle] [Slideshow Speed] [IP Content NR Pro] Adjusts the video quality for Internet content. [Video Search] Displays information on the BD-ROM/ DVD-ROM based on Gracenote technology.
D:\NORM'S JOB\SONY HA\SO130019\BDV-N9100W (PMRF 01)\4456335121_GB (CE)\060SOU.fm Adjusting the delay between the picture and sound (A/V SYNC) When the sound does not match the pictures on the TV screen, you can adjust the delay between the picture and sound for each function separately. The setting method differs depending on the function. When other than the “BT” or “TV” function is selected 1 2 3 Press OPTIONS. The option menu appears on the TV screen. Press V/v to select [A/V SYNC], then press .
D:\NORM'S JOB\SONY HA\SO130019\BDV-N9100W (PMRF 01)\4456335121_GB (CE)\070TUN.fm masterpage: Right Note [ Stereo (Audio1)] and [ Stereo (Audio2)] do not appear if only one audio stream is recorded on the disc. Listening to the Radio 1 2 (DUAL MONO) Manual tuning Press TUNING +/– repeatedly. 3 Note To receive a Dolby Digital signal, you need to connect a TV or other equipment to the TV (DIGITAL IN OPTICAL) jack with a optical digital cord (pages 22, 23).
D:\NORM'S JOB\SONY HA\SO130019\BDV-N9100W (PMRF 01)\4456335121_GB (CE)\070TUN.fm To turn off the radio Selecting a preset station Press "/1. 1 Presetting radio stations You can preset up to 20 stations. Before tuning, make sure to turn down the volume to minimum. 1 2 3 4 5 6 Press FUNCTION repeatedly until “FM” appears in the top panel display. Hold down TUNING +/– until the auto scanning starts. Scanning stops when the system tunes in a station. Press OPTIONS.
D:\NORM'S JOB\SONY HA\SO130019\BDV-N9100W (PMRF 01)\4456335121_GB (CE)\080OTH.fm Receiving Radio Data System (RDS) (Europe models only) Simply select a station from the FM band. Other Operations Using the Control for HDMI Function for “BRAVIA” Sync This function is available on TVs with the “BRAVIA” Sync function. By connecting Sony equipment that is compatible with the Control for HDMI function via an HDMI cable, operation is simplified.
D:\NORM'S JOB\SONY HA\SO130019\BDV-N9100W (PMRF 01)\4456335121_GB (CE)\080OTH.fm masterpage: Left System Audio Control You can enjoy the sound from TV or other equipment by a simple operation. You can use the System Audio Control function as follows: • When the system is turned on, the sound of the TV or other equipment can be output from the speakers of the system.
D:\NORM'S JOB\SONY HA\SO130019\BDV-N9100W (PMRF 01)\4456335121_GB (CE)\080OTH.fm 6 7 Press V/v to select [OK]. To cancel, select [Cancel]. Press . [Auto Calibration] starts. The system adjusts the speaker settings automatically. Be quiet during the measurement. Setting the Speakers [Speaker Settings] To obtain optimum surround sound, set the speakers’ distance from your listening position. Then use the test tone to adjust the balance of the speakers.
D:\NORM'S JOB\SONY HA\SO130019\BDV-N9100W (PMRF 01)\4456335121_GB (CE)\080OTH.fm x [Distance] When you move the speakers, be sure to set the parameters of the distance from the listening position to the speakers. You can set the parameters from 0.0 to 7.0 meters. [Front Left/Right] 3.0 m: Set the front speaker distance. [Centre] 3.0 m: Set the center speaker distance. [Surround Left/Right] 3.0 m: Set the surround speaker distance. [Subwoofer] 3.0 m: Set the subwoofer distance.
D:\NORM'S JOB\SONY HA\SO130019\BDV-N9100W (PMRF 01)\4456335121_GB (CE)\080OTH.fm Using the Sleep Timer You can set the system to turn off at a preset time, so you can fall asleep listening to music. The time can be preset in intervals of 10 minutes. Press SLEEP. Each time you press SLEEP, the minutes display (the remaining time) in the top panel display changes by 10 minutes. To check the remaining time Press SLEEP once. To change the remaining time Press SLEEP repeatedly.
D:\NORM'S JOB\SONY HA\SO130019\BDV-N9100W (PMRF 01)\4456335121_GB (CE)\080OTH.fm Controlling Your TV or Other Equipment with the Supplied Remote Control Note When you replace the batteries of the remote control, the remote control setting may be reset to the default (SONY) setting. Controlling your equipment with the supplied remote control 1 2 Press TV or STB that matches the equipment you want to control. Press the appropriated buttons listed in the following table.
D:\NORM'S JOB\SONY HA\SO130019\BDV-N9100W (PMRF 01)\4456335121_GB (CE)\080OTH.fm 3 4 5 6 8 Press V/v to select [Preset Mode], then press . Press V/v to select the equipment type that you want to operate with the supplied remote control, then press . Press V/v to select the device’s manufacturer, then press . Press POP UP/MENU while pressing TV (for a TV) or STB (for a cable box, digital satellite receiver, digital video recorder, etc.).
D:\NORM'S JOB\SONY HA\SO130019\BDV-N9100W (PMRF 01)\4456335121_GB (CE)\080OTH.fm Browsing Websites 1 2 3 4 Prepare for Internet browsing. Connect the system to a network (page 25). Press HOME. The home menu appears on the TV screen. masterpage: Left Internet Browser display You can check website information by pressing DISPLAY. The display information differs depending on the website and page status. Press B/b to select [Network]. Press V/v to select [Internet Browser], then press .
D:\NORM'S JOB\SONY HA\SO130019\BDV-N9100W (PMRF 01)\4456335121_GB (CE)\080OTH.fm Available options Various settings and operations are available by pressing OPTIONS. The available items differ depending on the situation. [Browser Setup] [Display certificate] Displays server certificates sent from pages that support SSL. [Input] Displays the software keyboard to enter characters while browsing a website. [Break] Moves the cursor to the next line in the text input field.
D:\NORM'S JOB\SONY HA\SO130019\BDV-N9100W (PMRF 01)\4456335121_GB (CE)\080OTH.fm Further Settings for the Wireless System Activating wireless transmission between specific units [Secure Link] You can specify the wireless connection to link the main unit to the surround amplifier using the Secure Link function. This function can help prevent interference if you use multiple wireless products or your neighbors use wireless products. 1 2 3 4 5 6 7 8 Press HOME. The home menu appears on the TV screen.
D:\NORM'S JOB\SONY HA\SO130019\BDV-N9100W (PMRF 01)\4456335121_GB (CE)\090SET.fm If wireless transmission is unstable [RF Channel] If you use multiple wireless systems, such as a wireless LAN (Local Area Network) or Bluetooth, the wireless signals may be unstable. In this case, the transmission may be improved by changing the following [RF Channel] setting. 1 4 Press B/b to select [Setup]. Press V/v to select [System Settings], then press . Press V/v to select [Wireless Sound Connection], then press .
D:\NORM'S JOB\SONY HA\SO130019\BDV-N9100W (PMRF 01)\4456335121_GB (CE)\090SET.fm Icon Explanation [Network Update] [Parental Control Settings] (page 62) Makes detailed settings for the Parental Control function. [Music Settings] (page 63) Makes detailed settings for Super Audio CD playback. [System Settings] (page 63) Makes the system-related settings. [External Input Settings] (page 64) Sets the input skip setting for each external input.
D:\NORM'S JOB\SONY HA\SO130019\BDV-N9100W (PMRF 01)\4456335121_GB (CE)\090SET.fm x [TV Type] [16:9]: Select this when connecting to a wide-screen TV or a TV with a wide-mode function. [4:3]: Select this when connecting to a 4:3 screen TV without a wide-mode function. x [DVD Aspect Ratio] [Letter Box]: Displays a wide picture with black bands on the top and bottom. [Pan & Scan]: Displays a full-height picture on the entire screen, with trimmed sides.
D:\NORM'S JOB\SONY HA\SO130019\BDV-N9100W (PMRF 01)\4456335121_GB (CE)\090SET.fm x [4K Output] [Auto1]: Outputs 2K (1920 × 1080) video signals during video playback and 4K video signals during photo play when connecting to a Sony 4K-compatible equipment. Outputs 4K video signals during playback of 24p video contents in BD/DVD ROMs or photo play when connecting to a nonSony 4K-compatible equipment. This setting does not work for 3D video image playback.
D:\NORM'S JOB\SONY HA\SO130019\BDV-N9100W (PMRF 01)\4456335121_GB (CE)\090SET.fm x [Attenuate - AUDIO] Distortion may occur when you listen to an equipment connected to the AUDIO (AUDIO IN L/R) jacks. You can prevent distortion by attenuating the input level on the main unit. [On]: Attenuates the input level. The output level will decrease at this setting. [Off]: Normal input level. x [Audio Output] You can select the output method where the audio signal is output.
D:\NORM'S JOB\SONY HA\SO130019\BDV-N9100W (PMRF 01)\4456335121_GB (CE)\090SET.fm masterpage: Left [BD/DVD Viewing Settings] [Parental Control Settings] x [BD/DVD Menu Language] You can select the default menu language for BD-ROMs or DVD VIDEOs. When you select [Select Language Code], the display for entering the language code appears. Enter the code for your language by referring to “Language Code List” (page 81). x [Password] Set or change the password for the Parental Control function.
D:\NORM'S JOB\SONY HA\SO130019\BDV-N9100W (PMRF 01)\4456335121_GB (CE)\090SET.fm masterpage: Right Note [Music Settings] x [Super Audio CD Playback Layer] [Super Audio CD]: Plays the Super Audio CD layer. [CD]: Plays the CD layer. x [Super Audio CD Playback Channels] [DSD 2ch]: Plays the 2-channel area. [DSD Multi]: Plays the multi-channel area. x [OSD Language] You can select the language you want for the system on-screen display.
D:\NORM'S JOB\SONY HA\SO130019\BDV-N9100W (PMRF 01)\4456335121_GB (CE)\090SET.fm x [Quick Start Mode] [On]: Shortens the startup time from standby mode. You can operate the system quickly after turning it on. [Off]: The default setting. Note (Europe models only) Before you set the [Quick Start Mode] to [On], you need to set the [Control for HDMI] and [Remote Start] to [Off]. When you set the [Control for HDMI] or [Remote Start] to [On], the [Quick Start Mode] is automatically set to [Off].
D:\NORM'S JOB\SONY HA\SO130019\BDV-N9100W (PMRF 01)\4456335121_GB (CE)\090SET.fm [Network Settings] x [Internet Settings] Connect the system to the network beforehand. For details, see “Step 3: Preparing for Network Connection” (page 25). [Wired Setup]: Select this when you connect to a broadband router using a LAN cable. [Wireless Setup(built-in)]: Select this when you use the built-in wireless LAN of the system for wireless network connection.
D:\NORM'S JOB\SONY HA\SO130019\BDV-N9100W (PMRF 01)\4456335121_GB (CE)\100ADD.fm [Easy Network Settings] Runs [Easy Network Settings] to make the basic network settings. Follow the onscreen instructions. [Resetting] x [Reset to Factory Default Settings] You can reset the system settings to the factory default by selecting the group of settings. All the settings within the group will be reset. x [Initialise Personal Information] You can erase your personal information stored in the system.
D:\NORM'S JOB\SONY HA\SO130019\BDV-N9100W (PMRF 01)\4456335121_GB (CE)\100ADD.fm • Keep the system and discs away from components with strong magnets, such as microwave ovens, or large loudspeakers. • Do not place heavy objects on the system. • Do not place metal objects in front of the front panel. It may limit reception of radio waves. • Do not place the system in a place where medical equipment is in use. It may cause a malfunction of medical equipment.
D:\NORM'S JOB\SONY HA\SO130019\BDV-N9100W (PMRF 01)\4456335121_GB (CE)\100ADD.fm On Bluetooth communication • Bluetooth devices should be used within approximately 10 meters (unobstructed distance) of each other. The effective communication range may become shorter under the following conditions.
D:\NORM'S JOB\SONY HA\SO130019\BDV-N9100W (PMRF 01)\4456335121_GB (CE)\100ADD.fm masterpage: Right Notes about Discs Troubleshooting On handling discs If you experience any of the following difficulties while using the system, use this troubleshooting guide to help remedy the problem before requesting repairs. Should any problem persist, consult your nearest Sony dealer.
D:\NORM'S JOB\SONY HA\SO130019\BDV-N9100W (PMRF 01)\4456335121_GB (CE)\100ADD.fm Messages masterpage: Left appears without any messages on the entire TV screen. [A new software version is available. Please go to the “Setup” section of the menu and select “Network Update” to perform the update.] appears on the TV screen. t Contact your nearest Sony dealer or local authorized Sony service facility. t See [Network Update] (page 58) to update the system to a latest software version.
D:\NORM'S JOB\SONY HA\SO130019\BDV-N9100W (PMRF 01)\4456335121_GB (CE)\100ADD.fm The dark area of the picture is too dark/the bright area is too bright or unnatural. t Set [Picture Quality Mode] to [Auto] (default) (page 42). Picture noise appears. t Clean the disc. t If the picture output from your system goes through your VCR to get to your TV, the copy-protection signal applied to some BD/DVD programs could affect picture quality.
D:\NORM'S JOB\SONY HA\SO130019\BDV-N9100W (PMRF 01)\4456335121_GB (CE)\100ADD.fm The sound outputs from the center speaker only. t Depending on the disc, the sound may output from the center speaker only. No sound or only a very low-level sound is heard from the surround speakers. t Check the speaker connections and settings (pages 20, 49). t Check the sound mode setting (page 31). t Depending on the source, the effect of the surround speakers may be less noticeable.
D:\NORM'S JOB\SONY HA\SO130019\BDV-N9100W (PMRF 01)\4456335121_GB (CE)\100ADD.fm Noise is heard from surround speakers or sound from the surround speakers skips. t Wireless transmission is unstable. Change the [RF Channel] setting in [Wireless Sound Connection] (page 57). t Install the main unit and surround amplifier closer to each other. t Do not install the main unit and surround amplifier in a closed rack, on a metal rack, or under a table. Tuner Radio stations cannot be tuned in.
D:\NORM'S JOB\SONY HA\SO130019\BDV-N9100W (PMRF 01)\4456335121_GB (CE)\100ADD.fm USB device The USB device is not recognized. t Try the following: 1 Turn the system off. 2 Remove and reconnect the USB device. 3 Turn the system on. t Make sure that the USB device is securely connected to the (USB) port. t Check if the USB device or a cable is damaged. t Check if the USB device is on. t If the USB device is connected via a USB hub, disconnect it and connect the USB device directly to the main unit.
D:\NORM'S JOB\SONY HA\SO130019\BDV-N9100W (PMRF 01)\4456335121_GB (CE)\100ADD.fm The system cannot connect to the network or the network connection is unstable. The wireless router you want is not shown in the wireless network list. t Press RETURN to return to the previous screen, and try [Wireless Setup(built-in)] again. If the wireless router you want is still not detected, select [Add a new address.] from the network list, then select [Manual Registration] to input a network name (SSID) manually.
D:\NORM'S JOB\SONY HA\SO130019\BDV-N9100W (PMRF 01)\4456335121_GB (CE)\100ADD.fm t If there is equipment that generates electromagnetic radiation, such as a wireless LAN, other Bluetooth device, or a microwave oven nearby, move them away.
D:\NORM'S JOB\SONY HA\SO130019\BDV-N9100W (PMRF 01)\4456335121_GB (CE)\100ADD.fm masterpage: Right Photo Playable Types of Files Video Video Codec Container Extension MPEG-1 Video*1 PS .mpg, .mpeg MPEG-2 Video*2 PS*3 .mpg, .mpeg TS*4 Xvid .m2ts, .mts .avi MKV .mkv MKV*1 .mkv MP4*1 .mp4, .m4v TS*1 .m2ts, .mts Quick Time*6 .mov 3gpp/ 3gpp2*6 .3gp, .3g2, .3gpp, .3gp2 VC1*1 TS .m2ts, .mts WMV9*1 ASF .wmv, .asf Motion JPEG*6 Quick Time .mov AVI .
D:\NORM'S JOB\SONY HA\SO130019\BDV-N9100W (PMRF 01)\4456335121_GB (CE)\100ADD.fm • The system can support video bit rate up to 40 Mbps. • The system can support video resolution up to 1920 × 1080p. • Some USB devices may not work with this system. • The system can recognize Mass Storage Class (MSC) devices (such as flash memory or an HDD), Still Image Capture Devices (SICDs), and 101-key keyboards. • The system may not play high bit rate video files from a DATA CD smoothly.
D:\NORM'S JOB\SONY HA\SO130019\BDV-N9100W (PMRF 01)\4456335121_GB (CE)\100ADD.fm masterpage: Right BD/DVD/Super Audio CD/CD System FM Tuner Section Signal format system NTSC/PAL System PLL quartz-locked digital synthesizer Tuning range 87.5 MHz – 108.
D:\NORM'S JOB\SONY HA\SO130019\BDV-N9100W (PMRF 01)\4456335121_GB (CE)\100ADD.fm masterpage: Left Center (SS-CTB124) for BDV-N9100W/BDV-N8100W/ BDV-N7100W Surround amplifier (TA-SA300WR) for BDV-N9100W/BDV-N8100W/ BDV-N7100W Center (SS-CTB123) for BDV-N9100WL/BDV-N7100WL Surround amplifier (TA-SA400WR) for BDV-N9100WL/BDV-N7100WL Dimensions (w/h/d) (approx.) 365 mm × 75 mm × 75 mm Mass (approx.) 1.
D:\NORM'S JOB\SONY HA\SO130019\BDV-N9100W (PMRF 01)\4456335121_GB (CE)\100ADD.fm masterpage: Right Language Code List The language spellings conform to the ISO 639: 1988 (E/F) standard.
D:\NORM'S JOB\SONY HA\SO130019\BDV-N9100W (PMRF 01)\4456335121_GB (CE)\100ADD.
D:\NORM'S JOB\SONY HA\SO130019\BDV-N9100W (PMRF 01)\4456335121_GB (CE)\010COVIX.fm masterpage: Right Index Numerics D 3D 33 3D Output Setting 58 D.C.A.C.
D:\NORM'S JOB\SONY HA\SO130019\BDV-N9100W (PMRF 01)\4456335121_GB (CE)\010COVIX.
D:\NORM'S JOB\SONY HA\SO130019\BDV-N9100W (PMRF 01)\4456335121_GB (CE)\010COVIX.
D:\NORM'S JOB\SONY HA\SO130019\BDV-N9100W (PMRF 01)\4456335121_GB (CE)\110BCO.fm masterpage: Left The software of this system may be updated in the future. To find out details on any available updates, please visit the following URL. For customers in Europe and Russia: http://support.sony-europe.com/ For customers in other countries/regions: http://www.sony-asia.