
Manual

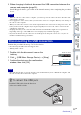
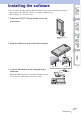
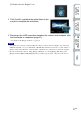
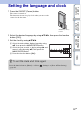
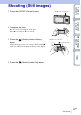
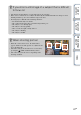
Table Of Contents
- How to use this handbook
- Notes on using the camera
- Life with “Bloggie”
- Table of contents
- Operation Search
- About operation buttons of the camera
- Menu/Settings Search
- Identifying parts
- Identifying parts
- List of icons displayed on the screen
- How to hold the camera
- Checking the accessories supplied
- Charging the camera
- Installing the software
- Setting the language and clock
- Shooting (Still images)
- Shooting (Movies)
- Zoom
- Light (MHS-FS2/FS2K only)
- Self-Timer
- Shooting in mirror mode (Self-portraits) (MHS-FS2/FS2K only)
- Shooting 360 Video images (MHS-FS1K/FS2K only)
- Viewing
- Playback zoom
- Volume control
- Recommended computer environment
- Using the Bloggie Software
- Importing images to a computer
- Uploading images to a media service
- Photo Size
- Movie Size
- Delete
- Protect
- Share it Later
- Flicker Reduction
- Beep
- Language Setting
- Demo Mode
- Initialize
- LUN Setting
- HDMI Output
- Format
- Date & Time Setting
- Viewing images on a TV
- Using the camera as a Web camera
- Troubleshooting
- Warning indicators and messages
- Number of still images and recordable time of movies
- Built-in battery pack
- Precautions
- Specifications
- Index

28
GB
Table of
contents
Operation
Search
Menu/Settings
Search
Index
Setting the language and clock
1 Press the ON/OFF (Power) button.
The camera is turned on.
The demonstration movie plays back when you turn on the
camera for the first time.
2 Select the desired language by using v/V/b/B, then press the function
button ([OK]).
3 Set the clock by using v/V/b/B.
1 Select the desired date display format by using
v/V, then press the MOVIE/ENTER button.
2 Select the year, month, or day by using b/B and
numeric value by using v/V, then press the
MOVIE/ENTER button.
3 Press the function button ([OK]).
ON/OFF (Power)
button
zTo set the date and time again
Press the function button ([Menu]) t Select (Settings) t [Date & Time Setting]
(page 64).