2-346-664-12(1) MiniDisc Recorder Operating Instructions MDS-E11 1998 by Sony Sound Tec Corporation
WARNING Notice for the Customers in the United Kingdom IMPORTANT The wires in this mains lead are coloured in accordance with the following code: Blue : Neutral Brown : Live As the colours of the wires in the mains lead of this apparatus may not correspond with the coloured markings identifying the terminals in your plug, proceed as follows: The wire which is coloured blue must be connected to the terminal which is marked with the letter N or coloured black.
TABLE OF CONTENTS Getting Started Unpacking ........................................................................................................................... 4 Connection .......................................................................................................................... 4 Basic Operations Recording on an MD ......................................................................................................... 6 Playing an MD ...............................................
Getting Started Unpacking Connection Check that you received the following items: • Remote commander (remote) RM-D7M (1) • R6 (size AA) batteries (2) Overview Inserting batteries into the remote This section describes how to hook up the MD recorder to other components such as a mixer, CD player or DAT recorder. Be sure to turn off the power of each component before connection. You can control the recorder using the supplied remote.
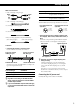
Getting Started What cords will I need? • Audio connecting cords (pin type) White (L) White (L) Red (R) Red (R) Switch setting Output level +4dBu Signals having a metered level of –20 dB are generated at a +4 dBu level. –10dBu Signals having a metered level of –20 dB are generated at a –10 dBu level.
Basic Operations Recording on an MD 2 5 3 4 8 67 1 2 3 Turn on the mixer and program source. Press U. Insert a recordable MD. With the arrow pointing this way With the label side up If the MD has a recorded material on it, the recorder will automatically start recording from the end of the last recorded track. Analog input When using the analog input, switch the rear-panel ANALOG INPUT (BAL or UNBAL) acording to the type of the input terminal used.
Basic Operations 6 7 Press r. The recorder stands by for record. 8 9 Press · or P. Recording starts. When recording the analog input signal, adjust the recording level with REC LEVEL. The fourth dot is satisfactory for most purposes. For details, refer to “Adjusting the Recording Level” on page 11. Start playing the program source. Do not turn off the power or disconnect the recorder from the power source immediately after recording. The recorder is currently updating the Table Of Contents (TOC).
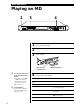
Basic Operations Playing an MD 2 3 4 1 2 Turn on the mixer and adjust the fader or level control of the corresponding channel. 3 Insert an MD. Press U. With the arrow pointing this way z You can locate and play back a track while the recorder is stopped 1 Turn AMS (or press = or + on the remote) until the number of the desired track appears. 2 Press AMS or ·. z To use headphones Connect them to PHONES jack. Use PHONE LEVEL to adjust the volume. 8 4 With the label side up Press ·.
Recording on MDs Recording on MDs If “Cannot Copy” appears in the display Notes on Recording If “Protected” appears in the display The MD is record-protected. Close the slot to record on the disc (see “To protect an MD against accidental erasure” on page 7). If “Din Unlock” flashes in the display • The digital program source which you set with INPUT in Step 4 on page 6, is not connected. To continue, connect the program source properly. • The program source is not on. Turn on the program source.
Recording on MDs Monitoring the input signal (Input Monitor) Before starting recording, you can monitor the selected input signal through the recorder’s output connectors. 1 Press §EJECT to remove the MD. 2 Set INPUT according to the input signal you want to monitor. When INPUT is set to ANALOG The analog signal input through LINE (ANALOG) IN is output to DIGITAL OUT after A/D conversion, and then to the LINE (ANALOG) OUT connectors and PHONES jack after D/A conversion.
Recording on MDs Recording Over Existing Tracks Adjusting the Recording Level Follow the procedure below to record over existing material just as you would on an analog cassette tape. When recording with INPUT set to ANALOG and the signal input through LINE (ANALOG) IN jacks, use REC LEVEL to adjust the recording level before starting recording. You cannot adjust the recording level during digital recording.
Recording on MDs To Cancel Auto Track Marking Marking Track Numbers While Recording (Track Marking) You can mark track numbers either manually or automatically. By marking track numbers at specific points, you can quickly locate the points later using the AMS Function or Editing Functions. EDIT/NO YES 1 While the recorder is stopped, press EDIT/NO twice to display “Set up Menu”. 2 Turn AMS until “Level Sync” appears in the display, then press AMS.
Recording on MDs Synchro-Recording With Audio Equipment of Your Choice Z 6 ≠ AMS ± · 1 P = + 0 ) p r T.REC Carry out Steps 1 to 6 in “Recording on an MD” on pages 6 and 7. The recorder changes to recording pause. 2 Start playing the program source you want to record. The most recent 6 seconds of audio data is stored in the buffer memory. 3 Press AMS (or T.REC) to start Time Machine Recording.
Recording on MDs Synchro-Recording With a Sony CD Player Z By connecting your recorder to a Sony CD player, you can easily dub CDs onto MDs using the CD synchro buttons on the remote. If your recorder is connected to a Sony CD player by a digital input cable, track numbers are automatically marked as on the original, regardless of whether “LevelSync ON” or “LevelSyncOFF” is selected.
Recording on MDs Recording Using a Timer A commercially available timer connected to the recorder allows it to start or stop recording at a preappointed time. For additional information, refer to the information manual for the timer. 1 Turn on the timer. 2 Perform steps 1 to 5 in “Recording on an MD” (see page 6). 3 Choose “Timer REC” from the Setup Menu. 1. While the recorder is stopped, press EDIT/NO twice to display “Setup Menu.” 2. Turn AMS until “Timer” appears in the display, then press AMS. 3.
Playing MDs Disc name Using the Display Z You can use the display to check disc and track information such as the total track number, total playing time of the tracks, remaining recordable time of the disc and disc name. Total number of tracks Total disc playing time 6 DISPLAY SCROLL To label a recordable disc and its tracks, see “Labeling Recordings” on page 26.
Playing MDs z You can check the track name at any time while playing an MD Z z You must press >25 first, before entering the corresponding digits. Press >25 once if it is a 2-digit track number, and twice if it is a 3-digit track number. To enter “0,” press button 10. Examples: • To play track number 30 Press >25 once, then 3 and 10. • To play track number 100 Press >25 twice, then 1, 10 and 10. Press SCROLL on the remote.
Playing MDs Locating a Particular Point in a Track Playing Tracks Repeatedly Z You can play tracks repeatedly in any play mode. You can also use 0 and ) to locate a particular point in a track during playback or playback pause. 6 0/) REPEAT A˜B · To locate a point Press While monitoring the sound ) (forward) or 0 (backward) and keep pressing until you find the desired point.
Playing MDs Repeating a specific portion (A-B Repeat) Z You can play a specific portion of a track repeatedly. This might be useful when you want to memorize lyrics. Note that you can only repeat a portion within the boundaries of a single track. 1 Playing Tracks in Random Order (Shuffle Play) Z You can have the recorder “shuffle” tracks and play them in random order. 6 While playing a disc, press A˜B at the starting point (point A) of the portion to be played repeatedly.
Playing MDs Creating Your Own Program (Program Play) Z You can specify the playback order of the tracks on an MD and create your own programs containing up to 25 tracks. z You can program the same track repeatedly Press the appropriate number button as many times as you want to repeat. z The program remains even after Program Play ends When you press ·, you can play the same program again.
Playing MDs Useful Tips When Recording From MDs to Tape Z The Auto Space and Auto Pause Functions described in this section make recording from MDs to tape more easy. Pausing after each track (Auto Pause) When the Auto Pause Function is on, the recorder pauses after playing each track. Auto Pause is convenient when recording single tracks or multiple, non-consecutive tracks. Press A.SPACE on the remote controller until a mark appears in A.PAUSE in the display. 6 To restart playback A.
Playing MDs Editing Recorded MDs Playing Using a Timer Notes on Editing A commercially available timer connected to the recorder allows it to start or stop playing at a preappointed time. For additional information, refer to the information manual for the timer. You can edit the recorded tracks after recording, using the following functions: • Erase Function allows you to erase recorded tracks simply by specifying the corresponding track number.
Playing MDs Editing Recorded Erasing a single track Erasing all tracks on an MD You can erase a track simply by specifying the respective track number. When you erase a track, the total number of tracks on the MD decreases by one and all tracks following the erased one are renumbered. Since erasing merely updates the TOC, there is no need to record over material. You can delete the disc name, all recorded tracks, and titles of the recordable MD at once.
Editing Recorded MDs Dividing Recorded Tracks (Divide Function) With the Divide Function you can assign a track number at places that you want to randomly access afterwards. Use this function to add tracks to MDs recorded from an analog source (and therefore contain no track numbers), or to divide an existing track into multiple portions. When you divide a track, the total number of tracks on the MD increases by one and all tracks following the divided track are renumbered.
Editing Recorded MDs To cancel the Combine Function Combining Recorded Tracks (Combine Function) Use the Combine Function while the recorder is stopped, playing or in pause to combine consecutive tracks on a recorded MD. This function is useful for combining several songs into a single medley, or several independently recorded portions into a single track. When you combine two tracks, the total number of tracks decreases by one and all tracks following the combined tracks are renumbered.
Editing Recorded MDs Moving Recorded Tracks (Move Function) Labeling Recordings (Title Function) Use the Move Function to change the order of any track. After you move a track, the track numbers between the new and old track positions are automatically renumbered. You can create titles for your recorded MDs and tracks. Titles — which may consist of uppercase and lowercase letters, numbers and symbols for a maximum of about 1,700 characters per disc — appear in the display during MD operation.
Editing Recorded MDs 4 Turn AMS to select the character. 6 Repeat Steps 4 to 5 until you have entered the entire title. If you entered the wrong character Press 0 or ) until the character to be corrected starts flashing, and repeat Steps 4 and 5 to enter the correct character. To erase a character The selected character flashes. Letters, numbers, and symbols appear in sequential order as you turn AMS. You can use the following symbols in titles: ! ”#$%&’()*+,–.
Editing Recorded MDs Labeling tracks and MDs with the remote Z 4 Repeat Steps 2 and 3 until you have entered the entire title. If you entered the wrong character 6 Press 0 or ) until the character to be corrected starts flashing. Press CLEAR to erase the incorrect character, then enter the correct one. Alphabet/number buttons NAME CHAR 0/) · P = + 0 ) p r 5 CLEAR p NUM Press NAME again. The entered title appears on the left side of the display window after the label has been recorded.
Additional Information Editing Recorded MDs Undoing the Last Edit (Undo Function) Function of Control Terminal You can use the Undo Function to cancel the last edit and restore the contents of the MD to the condition that existed before editing was done. Note, however, that you cannot undo an edit if you do any of the following after the edit: • Press the r button on the front panel. • Press the r button, the MUSIC SYNC button, or the CD-SYNC STANDBY button on the remote.
Additional Information Dimensions Unit: mm Mounting the recorder This recorder can be attached to a standard 19 inch rack (type EIA). After detaching the four feet on the bottom of the recorder, mount the recorder on the rack.
Additional Information 1 The first recorder starts playing. 2 When the first recorder finishes playing, the second recorder starts playing. — Stereo mini-jack terminal 3 Where multiple recorders are hooked up together, after the first recorder has finished recording or playing, control signals are automatically transferred to the second recorder through the RELAY terminal to direct it to start recording or playing.
Additional Information 1 The first recorder starts recording. 2 When the first recorder finishes recording, the second recorder starts recording. 3 The third and subsequent connected by cabling to their RELAY IN REC terminals start recording in sequence as soon as the preceding recorders in the chain finish recording.
Additional Information With user settings (USER), PIN1 to PIN5 and POUT1 to POUT3 in the Setup Menu can be assigned the functions in the table below. Each pin has fixed I/O status. PIN1 to PIN5 (Input pins) POWER ON Turns on power. Not functional when already on. POWER OFF Turns off power. Not functional when already off. POWER ON/OFF Turns power on and off. (/P Performs a play or pause operation. PLAY Performs the same function as the recorder’s PLAY key.
Additional Information Display Messages System Limitations The following table explains the various messages that appear in the display. The recording system in your MiniDisc recorder is radically different from those used in cassette and DAT recorders and is characterized by the limitations described below. Note, however, that these limitations are due to the inherent nature of the MD recording system itself and not to mechanical causes.
Additional Information “TOC Reading” appears for a long time “TOC Reading” will be displayed for longer than normal when an MD containing many songs is loaded. The recorder does not record. / The MD is record-protected (“Protected” appears.) Close the record-protect slot (see page 7.) / The recorder is not connected properly to the sound Limitations when recording over an existing track • The correct remaining recording time may not be displayed.
Additional Information General Specifications Power requirements System MiniDisc digital audio system Disc MiniDisc Laser Semiconductor laser (λ = 780 nm) Emission duration: continuous Laser output Less than 44.6 µW* * This output is the value measured at a distance of 200 mm from the objective lens surface on the Optical Pick-up Block with 7 mm aperture. Power consumption European models: 15W USA models: 14W Dimensions (approx.) (w/h/d) incl.
Additional Information Index of Parts and Controls 1 U (power) switch !¡ PHONE LEVEL control 2 Disc compartment !™ Remote sensor 3 REC indicator !£ § EJECT button 4 TOC incicator !¢ AMS control 5 Display !∞ P (pause) button 6 EDIT/NO button !§ p (stop) button 7 YES button !¶ · (play) button 8 0/) (fast forward/rewind) buttons !• r (record) button 9 INPUT selector !ª PHONES jack 0 REC LEVEL control 37
Additional Information Guide to the Serial Copy Management System This MD recorder uses the Serial Copy Management System, which allows only first-generation digital copies to be made of premastered software via the recorder’s digital input jack. An outline of this system appears below: 1 You can record from digital program sources (CDs, DATs or premastered MDs) onto a DAT tape or recordable MD via digital input jack on the DAT or MD recorder.
Additional Information 3 You can record a DAT tape or MD recorded via the DAT or MD recorder’s analog input jack onto another DAT tape or MD via the DAT or MD recorder’s digital output jack. You cannot, however, make a second-generation DAT tape or MD copy via the DAT or MD recorder’s digital output jack.
Additional Information 40