3-810-776-11 (1) FM/AM Compact Disc Player Operating Instructions EN Manual de instrucciones ES ### C For installation and connections, see the supplied installation/connections manual. Con respecto a la instalación y las conexiones, consulte el manual de Instalación/ conexiones suministrado.
Features General • Detachable-front panel enables you to take the front panel away with you when you leave your car (page 4). • Caution alarm will be activated if you turn off the ignition key without removing the front panel from the unit. • 12-hour digital clock provided (page 5). • Switchable two colour (amber and green) illumination (page 9). • Built-in power amplifier (max. output: 35 W × 4 ch.) enables you to enjoy 4-speaker systems. • Line outputs for connecting an optional power amplifier.
Table of Contents Precautions ............................................................... 4 Detaching and Attaching the Front Panel ............ 4 Setting the Clock ...................................................... 5 CD Player Operation Playing a CD ............................................................. Ejecting the CD ........................................................ Locating the Beginnings of Tracks — AMS (Automatic Music Sensor) Function ...........................................
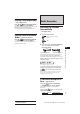
Precautions • Before operating the unit for the first time or after replacing the car battery, press the reset button with a ballpoint pen etc., then operate the unit. Reset button • If your car was parked in direct sunlight resulting in a considerable rise in temperature inside the car, allow the unit to cool off before operating it. • If no power is being supplied to the unit, check the connections first. If everything is in order, check the fuse.
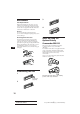
Attaching the Front Panel Apply the right side of the front panel to the unit by attaching part A of the front panel to part B of the unit as illustrated, then swing the left side into the unit until it clicks. Setting the Clock The clock has a 12-hour digital indication. For example, setting it to 10:08 1 Display the time. (Press the DSPL button during unit operation.) 2 Press the seconds. DSPL button for more than two A B The hour digit blinks. Set the hour digits.
CD Player Operation Locating the Beginnings of Tracks — AMS (Automatic Music Sensor) Function During playback, press either side of the AMS/SEEK button once for each track you wish to skip. Playing a CD After inserting the CD, playback will start from the first track automatically. Label side up AMS/SEEK To locate previous tracks AMS/SEEK To locate succeeding tracks Locating the Desired Part of a Track — Manual Search Function If a CD is already inserted, press the button to start playback.
Playing Tracks Repeatedly — Repeat Play Function Radio Reception REPEAT Press the 2 button during playback. n “REP” appears on the display. When the currently played track is over, it will be played again from the beginning. To cancel this mode, press the button again. Searching for Stations Automatically — Automatic Tuning Playing Tracks in Random Order — Shuffle Play Function 1 Select the desired band. FM FM1 n FM2 n FM3n FM1 n ··· SHUF Press the 3 button during playback.
Tuning in by Adjusting the Frequency — Manual Tuning Memorising Only the Desired Stations 1 1 Select the desired band. FM 2 Press and hold either side of the PRESET button. Release the button when the desired station is received. For higher frequencies PREVENT ACCIDENTS! When tuning in during driving, use automatic tuning or the preset search function instead of manual tuning. EN AM 2 Tune in the station which you wish to store on a preset number button.
Other Functions Muting the Beep Tone Press the 6 button while pressing the button. To reactivate the beep tone again, press these buttons once more. SEL Adjusting the Sound Characteristics 1 Note When connecting an optional power amplifier to the LINE OUT, the beep tone is disabled. Select the item you want to adjust by pressing the button repeatedly.
3 Maintenance Fuse Replacement When replacing the fuse, be sure to use one with the correct amperage stated on the fuse case. Never use a fuse whose amperage rating exceeds the one supplied with the unit as this could cause a malfunction of the unit. 4 Warning Use a fuse with the specified amperage. Use of a fuse with higher amperage may cause serious damage. Cleaning the Connectors EN The unit may not function properly if the connectors between the unit and the front panel are not clean.
Location of Controls OFF AMS/SEEK PRESET LOUD MUTE DSPL FM SEL INTRO REPEAT SHUF 1 2 3 RELEASE BTM CD SENS AM 4 5 6 Refer to the pages in r for details.
Location of Controls Optional the Wireless Remote Commander (RM-X40) OFF MODE – = – REW – MUTE EN SOURCE + SEEK AM 8 + PRESET DISC FF SEL + + DSPL Buttons with the same function as those as those on the master unit Different function buttons 1 OFF button 2 MODE button During radio reception: Changes preset groups within band received: z FM1 z FM2 z FM3 4 SEEK/AMS button 5 PRESET/DISC button You cannot do the manual search and manual tuning with the remote commander.
Specifications CD player section System Signal-to- noise ratio Frequency response Wow and flutter General Compact disc digital audio system 90 dB 10 – 20,000 Hz Below measurable limit Output lead Tone controls Power requirements Tuner section Dimensions FM Mounting dimension Tuning range FM tuning interval: 50 kHz/200 kHz switchable 87.5 – 108.0 MHz (at 50 kHz step) 87.5 – 107.9 MHz (at 200 kHz step) Antenna terminal External antenna connector Intermediate frequency 10.
Troubleshooting Guide The following checklist will assist in the correction of most problems which you may encounter with your unit. Before going through the checklist below, refer to the connection and operating procedures. General Problem Cause/Solution No sound • Adjust the volume with the button. • Set the fader control to the centre position for 2-speaker systems. The contents of the memory have been erased. • The power cord or battery has been disconnected. • The reset button has been pressed.
Error displays The following indications will flash for about five seconds and an alarm sound will be heard. Display Cause Solution CD is dirty or inserted upside down. Clean or insert the CD correctly. The CD player cannot be operated because of some problem. Press the reset button. If the above-mentioned solutions do not help to improve the situation, consult your nearest Sony dealer.
Particularidades Generales • Panel frontal desmontable para poder llevarlo consigo cuando abandone el automóvil (página 4). • Alarma de precaución, que se activará cuando apague la llave de encendido sin extraer el panel frontal de la unidad. • Reloj digital de 12 horas suministrado (página 5). • Iluminación en dos colores (ámbar y verde) intercambiables (página 10). • Amplificador de potencia incorporado (salida máx.: 35 W × 4 canales) que le permitirá disfrutar de un sistema de 4 altavoces.
Indice Precauciones ............................................................. 4 Extracción e inserción del panel frontal ............... 4 Puesta en hora del reloj ........................................... 5 Operación del reproductor de CD Reproducción de un CD ......................................... Extracción del CD .................................................... Localización del comienzo de las canciones — Función del sensor de música automático (AMS) .......................................
Precauciones • Antes de utilizar la unidad por primera vez, o después de haber reemplazado la batería del automóvil, presione el botón de reposición con un bolígrafo, etc y, a continuación, inicie el funcionamiento de la unidad. No exponga los discos a la luz solar directa ni a fuentes térmicas tales como conductos de aire cálido, ni los deje en un automóvil aparcado al sol donde la temperatura de su interior puede aumentar considerablemente.
Tecla OFF Puesta en hora del reloj El reloj posee una indicación digital de 12 horas. Por ejemplo, para ajustarlo a las 10:08 1 Muestre la hora. (Presione la tecla DSPL durante el funcionamiento de la unidad.) 2 Presione la tecla dos segundos. Tecla RELEASE Tenga cuidado de no dejar caer el panel cuando lo retire de la unidad.
Operación del reproductor de CD Reproducción de un CD Después de insertar un CD, la reproducción se iniciará automáticamente desde la primera canción. Cara de la etiqueta hacia arriba Extracción del CD Presione la tecla . Nota Si deja el disco extraído en la ranura de inserción del mismo después de haber presionado la tecla 6, el disco se insertará automáticamente en la unidad después de unos 15 segundos a fin de protegerlo.
Búsqueda de una canción determinada Radiorecepción — Función de exploración de introducciones INTRO Presione la tecla 1 durante la reproducción. n “INTRO” aparece en el visualizador principal. Se reproducen los 10 primeros segundos de todas las canciones. Cuando encuentre la canción que desee, presione la tecla una vez más. La unidad vuelve al modo de reproducción normal. Búsqueda automática de emisoras — Sintonización automática 1 Seleccione la banda que desee.
Si un programa de FM estéreo es difícil de recibir — Modo monoaural 1 FM 2 BTM Presione ligeramente la tecla SENS . n “MONO” aparece en visualizador principal. El sonido mejorará, pero será monoaural. BTM Si presiona la tecla SENS , es posible cambiar los elementos mostrados como se indica a continuación: z LCL z MONO z Modo normal Sintonización mediante el ajuste de la frecuencia Seleccione la banda que desee. AM BTM Mantenga presionada la tecla SENS durante más de dos segundos.
Recepción de emisoras memorizadas 1 Seleccione la banda deseada. FM 2 Otras funciones AM Presione ligeramente la tecla numérica ( 1 a 6 ) en la que esté almacenada la emisora que desee recibir. Ajuste de las características del sonido INTRO 1 Seleccione el elemento que desee ajustar presionando repetidamente la tecla . SEL Nota Si mantiene presionada la tecla numérica de memorización durante más de dos segundos, se memorizará la emisora actual.
Silenciamiento de los pitidos 6 Presione la tecla manteniendo pulsada la tecla . Para volver a activar los pitidos, presione de nuevo estas teclas. SEL Nota Si conecta un amplificador de potencia opcional a la toma LINE OUT, el pitido se desactivará. Cambio del color de la iluminación INTRO Presione la tecla la tecla . 1 mientras presiona SEL Podrá elegir entre el color ámbar o el verde.
Desmontaje de la unidad 1 0 5 Llave de extracción (suministrada) 2 Notas sobre la utilización de un mando rotativo opcional RM-X2S Esta unidad puede utilizarse con el mando rotativo opcional (RM-X2S). Se suministran cuatro etiquetas de nombre de tecla con el mando rotativo. Adhiera la etiqueta correspondiente a las funciones de la unidad principal y a la posición de instalación del mando rotativo. En caso de conectar esta unidad, adhiera la etiqueta que contiene “DSPL”.
Ubicación de los controles OFF AMS/SEEK PRESET LOUD MUTE DSPL FM SEL RELEASE INTRO REPEAT SHUF 1 2 3 BTM CD SENS AM 4 5 6 Para obtener información detallada, consulte las páginas incluidas en r.
Mando a distancia inalámbrico opcional (RM-X40) OFF MODE – = – REW – MUTE SOURCE + SEEK AM 8 + PRESET DISC FF SEL + + DSPL Teclas con la misma función que los de la unidad principal. Teclas de funciones diferents 1 Tecla OFF 2 Tecla MODE Durante la recepción de radio: Cambian los grupos programados dentro de la banda que se recibe: 4 Tecla SEEK/AMS 5 Tecla PRESET/DISC Usted no podrá realizar la búsqueda manual ni la sintonía manual con el controlador remoto giratorio.
Especificaciones Sección del reproductor de CD Generales Sistema Conductor de salida Relación señal-rudio Respuesta en frecuencia Fluctuación y trémolo Sistema audiodigital de disco compactos 90 dB 10 – 20.
Guía para la solución de problemas La lista de comprobaciones siguiente le ayudará a solucionar la mayoría de los problemas más comunes. Antes de pasar a la lista de comprobaciones siguiente, repase los procedimientos de conexión y operación. Generales Problema Causa/Solución Ausencia de sonido • Ajuste el volumen con la tecla . • Con un sistema de dos altavoces, ponga el control de atenuación en la posición central. El contenido de la memoria se han borrado.
Indicaciones de error Las indicaciones siguientes parpadearán durante unos cinco segundos y se oirá un sonido de alarma. Indicación Causa Solución El CD está sucio o se ha insertado al revés. Limpie el CD o insértelo correctamente. El reproductor de CD no funciona debido a algún problema. Presione el botón de reposición . Si las soluciones mencionadas no ayudan a resolver la situación, consulte a su proveedor Sony más cercano.
ES 17 Actual total number: Sony CDX-5100 (ESC) 3-810-776-11(1)