
Operating Instructions Color Graphic Display
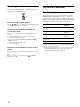
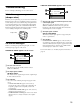
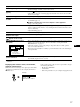
Table Of Contents
- Precautions
- Identifying parts and controls
- Setup
- Customizing Your Monitor
- Navigating the menu
- Adjusting the brightness and contrast
- Adjusting the size of the picture (SIZE/CENTER)
- Adjusting the centering of the picture (SIZE/CENTER)
- Enlarging or reducing the picture (ZOOM)
- Adjusting the shape of the picture (GEOMETRY)
- Adjusting the convergence (CONVERGENCE)
- Adjusting the quality of the picture (SCREEN)
- Adjusting the color of the picture (COLOR)
- Additional settings (OPTION)
- Resetting the adjustments
- Technical Features
- Troubleshooting
- Specifications
- Appendix
- FR.pdf
- Précautions
- Identification des composants et des commandes
- Installation
- Personnalisation de votre moniteur
- Pilotage par menus
- Réglage de la luminosité et du contraste
- Réglage de la taille de l’image (TAILLE/CENTRE)
- Réglage du centrage de l’image (TAILLE/CENTRE)
- Agrandir ou réduire l’image (ZOOM)
- Réglage de la forme de l’image (GEOMETRIE)
- Réglage de la convergence (CONVERGENCE)
- Réglage de la qualité de l’image (ECRAN)
- Réglage des couleurs de l’image (COULEUR)
- Réglages supplémentaires (OPTION)
- Réinitialisation des réglages
- Caractéristiques techniques
- Dépannage
- Spécifications
- DE.pdf
- Sicherheitsmaßnahmen
- Lage und Funktion der Teile und Bedienelemente
- Anschließen des Geräts
- Einstellen des Monitors
- Navigieren in den Menüs
- Einstellen von Helligkeit und Kontrast
- Einstellen der Bildgröße (GRÖSSE/ BILDLG)
- Einstellen der Bildposition (GRÖSSE/BILDLG)
- Vergrößern oder Verkleinern des Bildes (ZOOM)
- Einstellen der Form des Bildes (GEOMETRIE)
- Einstellen der Konvergenz (KONVERGENZ)
- Einstellen der Bildqualität (BILD)
- Einstellen der Farben des Bildes (FARBE)
- Weitere Einstellungen (OPTION)
- Zurücksetzen der Einstellungen
- Technische Merkmale
- Störungsbehebung
- Technische Daten
- ES.pdf
- Precauciones
- Identificación de los componentes y los controles
- Instalación
- Personalización del monitor
- Navegación por el menú
- Ajuste del brillo y del contraste
- Ajuste del tamaño de la imagen (TAMAÑO/CENTRO)
- Ajuste del centrado de la imagen (TAMAÑO/CENTRO)
- Ampliación o reducción de la imagen (ZOOM)
- Ajuste de la forma de la imagen (GEOMETRIA)
- Ajuste de la convergencia (CONVERGENCIA)
- Ajuste de la calidad de la imagen (PANTALLA)
- Ajuste del color de la imagen (COLOR)
- Ajustes complementarios (OPCION)
- Restauración de los ajustes
- Características técnicas
- Solución de problemas
- Especificaciones
- IT.pdf
- Precauzioni
- Identificazione dei componenti e dei comandi
- Installazione
- Personalizzazione del monitor
- Come spostarsi all’interno del menu
- Regolazione della luminosità e del contrasto
- Regolazione delle dimensioni dell’immagine (DIMENS/CENTRO)
- Regolazione della centratura dell’immagine (DIMENS/CENTRO)
- Ingrandimento o riduzione dell’immagine (ZOOM)
- Regolazione della forma dell’immagine (GEOMETRIA)
- Regolazione della convergenza (CONVERGENZA)
- Regolazione della qualità dell’immagine (SCHERMO)
- Regolazione del colore dell’immagine (COLORE)
- Impostazioni aggiuntive (OPZIONI)
- Ripristino delle regolazioni
- Caratteristiche
- Guida alla soluzione dei problemi
- Caratteristiche tecniche
18
Self-diagnosis function
This monitor is equipped with a self-diagnosis function. If there is
a problem with your monitor or computer(s), the screen will go
blank and the 1 (power) indicator will either light up green or
flash orange. If the 1 (power) indicator is lit in orange, the
computer is in power saving mode. Try pressing any key on the
keyboard.
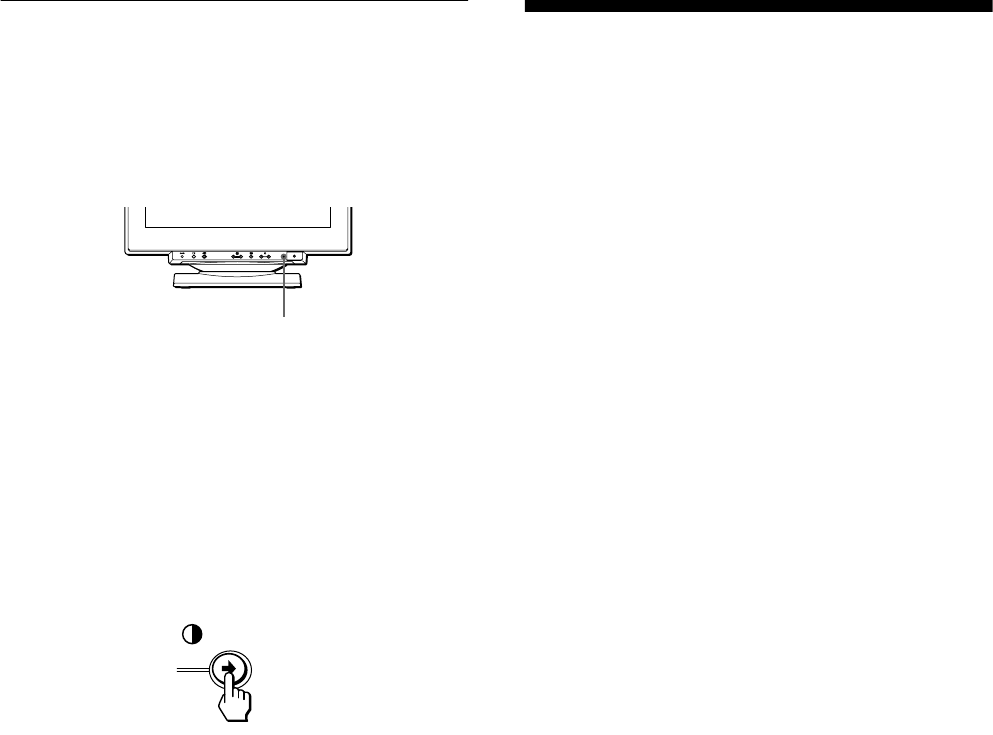
If the 1 (power) indicator is green
1
Remove any plugs from the video input 1 and 2
connectors, or turn off the connected computer(s).
2 Press the 1 (power) button twice to turn the monitor
off and then on.
3 Press the , button for 2 seconds before the
monitor enters power saving mode.
If all four color bars appear (white, red, green, blue), the monitor
is working properly. Reconnect the video input cables and check
the condition of your computer(s).
If the color bars do not appear, there is a potential monitor failure.
Inform your service representative of the monitor’s condition.
If the 1 (power) indicator is flashing orange
Press the 1 (power) button twice to turn the monitor off
and then on.
If the 1 (power) indicator lights up green, the monitor is working
properly.
If the 1 (power) indicator is still flashing, there is a potential
monitor failure. Count the number of seconds between orange
flashes of the 1 (power) indicator and inform your service
representative of the monitor’s condition. Be sure to note the
model name and serial number of your monitor. Also note the
make and model of your computer and video board.
Specifications
CRT 0.24 mm aperture grille pitch
21 inches measured diagonally
90-degree deflection
FD Trinitron
Viewable image size Approx. 403.8 × 302.2 mm (w/h)
(16 × 12 inches)
19.8" viewing image
Maximum resolution Horizontal: 1600 dots
Vertical: 1200 lines
Standard image area Approx. 388 × 291 mm (w/h)
(15
3
/8 × 11
1
/2 inches)
or
Approx. 364 × 291 mm (w/h)
(14
3
/8 × 11
1
/2 inches)
Deflection frequency* Horizontal: 30 to 121 kHz
Vertical: 48 to 160 Hz
AC input voltage/current 100 to 240 V, 50 – 60 Hz, 2.0 – 1.0 A
Power consumption Approx. 145 W
Dimensions
Approx. 498
×
491
×
478 mm (w/h/d)
(19
5
/8 × 19
3
/8 × 18
7
/8 inches)
Mass Approx. 32 kg (70 lb 9 oz)
Plug and Play DDC1/2B/2Bi, GTF**
* Recommended horizontal and vertical timing condition
• Horizontal sync width duty should be more than 4.8% of total
horizontal time or 0.8 µs, whichever is larger.
• Horizontal blanking width should be more than 2.3 µsec.
• Vertical blanking width should be more than 450 µsec.
** If the input signal is Generalized Timing Formula (GTF)
compliant, the GTF feature of the monitor will automatically
provide an optimal image for the screen.
Design and specifications are subject to change without notice.
12
1 (power) indicator