4-241-538-12(1) Mini Hi-Fi Component System Operating Instructions Owner’s Record The model and serial numbers are located on the rear panel of the unit. Record the serial number in the space provided below. Refer to them whenever you call upon your Sony dealer regarding this product. Model No. Serial No.
NOTICE FOR THE CUSTOMERS IN THE U.S.A. WARNING To prevent fire or shock hazard, do not expose the unit to rain or moisture. To prevent fire, do not cover the ventilation of the apparatus with news papers, table-cloths, curtains, etc. And don’t place lighted candles on the apparatus. To prevent fire or shock hazard, do not place objects filled with liquids, such as vases, on the apparatus. Do not install the appliance in a confined space, such as a bookcase or built-in cabinet.
WARNING This equipment has been tested and found to comply with the limits for a Class B digital device, pursuant to Part 15 of the FCC Rules. These limits are designed to provide reasonable protection against harmful interference in a residential installation. This equipment generates, uses, and can radiate radio frequency energy and, if not installed and used in accordance with the instructions, may cause harmful interference to radio communications.
Table of Contents List of Button Locations and Reference Pages Main unit ........................................................ 8 Remote control ............................................... 9 Sub woofer (MHC-GX90D and RV800D only) ...... 10 Getting Started Hooking up the system ................................ 11 Inserting two R6 (size AA) batteries into the remote ................................................... 16 Setting the clock ..........................................
Sound Adjustment Adjusting the sound ..................................... 51 Selecting the sound effect ............................ 51 Adjusting the graphic equalizer and storing ................................................... 52 Using the sub woofer (MHC-GX90D and RV800D only) ...... 53 Selecting the surround effect ....................... 53 Optional Components Hooking up optional components ................ 61 Listening to audio from a connected component ..........................................
This system can play the following discs DVD VIDEOs Audio CDs VIDEO CDs Audio + Video The “DVD VIDEO” logo is a trademark.
Note on VIDEO CDs Copyrights This system conforms to VIDEO CDs without PBC* functions (Ver. 1.1) and VIDEO CDs with PBC functions (Ver. 2.0) of VIDEO CD standards. You can enjoy two kinds of playback according to the disc type. This product incorporates copyright protection technology that is protected by method claims of certain U.S. patents, other intellectual property rights owned by Macrovision Corporation, and other rights owners.
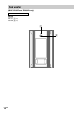
List of Button Locations and Reference Pages Illustration number How to use this page r Use this page to find the location of buttons and other parts of the system that are mentioned in the text.
Remote control A–M ALBUM +/– wd wl (19, 20, 26) AMP MENU wa (57) ANGLE w; (37) AUDIO ed (35) CLEAR qf (20, 22, 24, 31) CLOCK/TIMER SELECT 2 (51, 60) CLOCK/TIMER SET 3 (16, 50, 59) DISC +/– wg wj (19, 20, 23) DISPLAY qa (45, 53, 54, 55) DVD rd (18, 20, 21, 26, 27, 28, 36, 48, 49) DVD DISPLAY qd (18, 24, 34, 36, 37, 38, 41, 55) DVD MENU ef (26) DVD SETUP ek (28, 33, 40) DVD TOP MENU ef (26) EFFECT ON/OFF es (51, 52) ENTER wk (16, 18, 20, 21, 24, 26, 27, 28, 33, 34, 36, 37, 38, 40, 43, 46, 49, 50, 52, 55, 57,
Sub woofer (MHC-GX90D and RV800D only) ALPHABETICAL ORDER A–Z Indicator 1 (53) ON/OFF 2 (53) 1 2 10GB
Getting Started Hooking up the system Getting Started Perform the following procedures 1 to 9 to hook up your system using the supplied cords and accessories.
Hooking up the system (continued) 1 Connect the front speakers. Connect the speaker cords to the FRONT SPEAKER jacks as shown below. 4 Connect the sub woofer speaker. (MHC-GX90D and RV800D only) Connect the speaker cords to the SUB WOOFER jack and SUB WOOFER CONTROL jack as shown below. SUB WOOFER jack Insert only the stripped portion + – Gray/Solid (3) R L Black/Stripe (#) 2 Connect the rear speakers. (except for MHC-RV600D) Connect the speaker cords to the REAR SPEAKER jacks as shown below.
6 Connect the video input jack of your TV to the VIDEO OUT jack with the supplied video cable. MONIT OR OU VIDEO When using a TV Turn on the TV and select the video input so that you can view the pictures from this system. Tip For even higher quality video images, you can use an optional S-video cable to connect the S VIDEO input jack on your TV to the S VIDEO OUT jack (DVD only). 7 For models with a voltage selector, set VOLTAGE SELECTOR to the local power line voltage.
Hooking up the system (continued) To attach the speaker pads Attach the supplied speaker pads to the bottom of the speakers to stabilize the speakers and prevent them from slipping. Front speaker (Left (4)/Right (4)) Sub woofer*1 (4) Positioning the speakers (except for MHC-RV600D) 1 Place the front speakers at an angle of 45 degrees from your listening position.
Placing the sub woofer (MHC-GX90D and RV800D only) Tip You can enjoy 5.1 channel surround sound while playing a DVD. To adjust the speaker volume and level, see page 33. Notes • Always place the woofer vertically, keeping it a few centimeters away from the wall. • If the woofer is placed in the center of a room, the bass could be extremely weakened. This is due to the influence of the standing wave of the room.
Inserting two R6 (size AA) batteries into the remote Setting the clock 1 Press ?/1 to turn on the system. 2 Press CLOCK/TIMER SET on the remote. 3 Press M or m on the remote repeatedly to set the hour. 4 Press , on the remote. The minute indication flashes. e E E e 5 Press M or m on the remote repeatedly to set the minute. 6 Press ENTER. The clock starts working. Tip To adjust the clock With normal use, the batteries should last for about six months.
DVD/VIDEO CD/CD/MP3 Playing discs Loading a disc 1 Press Z OPEN/CLOSE. The disc tray opens. 2 Place a disc with the label side up on — Normal Play/Shuffle Play/Slowmotion Play You can play up to three discs (DVD, VIDEO CD, CD or MP3) in a row. Depending on the DVD or VIDEO CD, some operations may be different or restricted. Refer to the operating instructions supplied with the disc. DVD/VIDEO CD/CD/MP3 You can also load and play discs with MP3 audio tracks.
Playing a disc (continued) 4 Press one of the DISC 1 – 3 buttons. If you press hH (or nN on the remote) when DVD function is selected and the disc tray is closed, playback starts from the selected disc. When playing MP3 audio tracks: Disc tray number Track number Playing time Disc presence indicator 1 Turn on your TV and select the video input. Refer to the operating instructions supplied with your TV if you need help. 2 Press DVD.
Do this Select an album of MP3 Press ALBUM – or + repeatedly after step 3. Change the playback speed*1 (Slow-motion Play) (DVD/ VCD only) During pause, press SCAN/SLOW or *3 on the remote. Each time you press the button, the speed switches between two slowed play speeds. To return to Normal Play, press hH (or nN on the remote). Select a disc in stop mode Press one of the DISC 1 – 3 buttons or DISC SKIP/EXCHANGE (or DISC +/– on the remote).
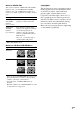
Creating your own program 6 Program additional discs or tracks. To program Repeat steps — Program Play Other tracks on the same disc 4 and 5 You can make a program of up to 25 steps from all discs except DVD in the order you want them to be played. Other tracks on other discs 3 to 5 7 Press hH (or nN on the remote). Using the front panel display 1 Press DVD. 2 In stop mode, press PLAY MODE repeatedly until “PGM” appears in the display.
Using the on-screen display 5 Select the album, or track you want to program. Use the remote for the operation. 1 Press DVD. 2 In stop mode, press PLAY MODE repeatedly until “PGM” appears in the display. x When programing a VIDEO CD or CD For example, select track “6”. Press M/m or the number buttons to select “6”, then press ENTER. DVD/VIDEO CD/CD/MP3 Selected track The Program Display appears on the screen. Program 1 2 3 4 5 6 7 8 9 10 3 Press ,, then press M or m repeatedly to select the disc.
Creating your own program (continued) 6 To program other discs, albums, or tracks, repeat steps 3 to 5. 7 Press nN. Program Play starts. Other Operations To Do this Return to Press CLEAR during playback. normal playback Turn off the Press PLAY MODE when the Program Display Program Play is stopped. Clear a track from the end of program Press CLEAR in step 2.
Notes Playing repeatedly — Repeat Play You can repeatedly play all the titles/tracks/ albums or a single title/chapter/track/album on a disc. DVD/VIDEO CD/CD/MP3 • Depending on where you stopped the disc, the player may resume playback from a different point. • Resume Play is canceled when: – you press the number buttons, PLAY MODE, x, DISC SKIP/EX-CHANGE (or DISC +/– on the remote) or ./>. – you remove the disc. – you unplug the system’s power cord.
Playing repeatedly (continued) To cancel Repeat Play Press CLEAR. Using the on-screen display Use the remote for the operation. 1 Press DVD DISPLAY. The Control Menu appears. 2 Press v or V repeatedly to select “REPEAT”, then press ENTER. 3 Select the Repeat Play setting. x Playing a DVD • OFF: does not play repeatedly. • ALL: repeats all the titles. • TITLE: repeats the current title on a disc.* • CHAPTER: repeats the current chapter.
Playing a disc with MP3 audio tracks About MP3 Notes on discs You can play MP3 audio tracks recorded on CD-ROMs, CD-Rs (recordable CDs), and CD-RWs (rewritable CDs). The disc must be in the ISO 9660* level 1 or level 2 format, or Joliet in the expansion format. • Only the letters in the alphabet and numbers can be used for album or track names. Anything else is displayed as “ ” (space). • When naming, be sure to add the file extension “MP3” to the file name.
Playing a disc with MP3 audio tracks (continued) Listening to MP3 audio tracks You can play discs with MP3 audio tracks on this system. 1 Press DVD. 2 Press ALBUM – or + repeatedly to select the desired album. Proceed to step 4 when you start playing from the first track in the album. 3 When you want to specify a track in the album, press . or > repeatedly to select the desired track. 4 Press hH (or nN on the remote).
Do this Stop play Press x. See the rest of a menu Press NEXT on the remote. — PBC Play Go back to the top of a menu Press PREV on the remote. You can use menus on your TV screen to enjoy the disc’s interactive software. The menu format and structure may differ depending on each disc. Go back to a previous menu Press RETURN O on the remote. Cancel playback with PBC functions (Ver. 2.0) In stop mode, press .
Setting up for DVD/VIDEO CD/CD/MP3 Using the Setup Display By using the Setup Display, you can make various adjustments to items such as picture and sound. You can also set a language for the subtitles and the Setup Display, among other things. For details on each Setup Display item, see pages 29 – 42. For an overall list of Setup Display items, see page 79. 4 Press M or m repeatedly to select an item, then press ENTER. The options for the selected item appear.
Setting the display or sound track language Settings for the display — SCREEN SETUP Select settings according to the connected TV. “LANGUAGE SETUP” allows you to set various languages for the on-screen display or sound track. Select “SCREEN SETUP” in the Setup Display. Select “LANGUAGE SETUP” in the Setup Display.
Settings for the display (continued) • 16:9: Select this when you connect a widescreen TV or a TV with a wide mode function. Custom settings — CUSTOM SETUP Select “CUSTOM SETUP” in the Setup Display. CUSTOM SETUP VCD COLOR SYSTEM PARENTAL CONTROL: TRACK SELECTION AUTO OFF Note Depending on the DVD, “4:3 LETTER BOX” may be selected automatically instead of “4:3 PAN SCAN” or vice versa. x SCREEN SAVER Turn on and off the screen saver.
x PARENTAL CONTROLt (DVD only) Set a password and playback limitation level for DVDs with playback limitation for children. For details, see “Limiting playback by children (Parental Control)” on page 40. x TRACK SELECTION (DVD only) • OFF: No priority given. • AUTO: Priority given. — SPEAKER SETUP To obtain the best possible surround sound, set the size of the speakers you have connected and their distance from your listening position.
Speaker settings (continued) REAR (except for MHC-RV600D) • YES: Normally select this position. • NONE: Select this when rear speakers are not used. SUBWOOFER (MHC-GX90D and RV800D only) • YES Notes • When you select an item, the sound cuts off for a moment. • Depending on the settings of other speakers, the sub woofer may output excessive sound. • When you play a DVD that does not have sub woofer output recorded, note that no sound is produced from the sub woofer, even if “SUBWOOFER” is set to “YES”.
x BALANCE You can vary the balance of the left and right speakers as follows. Be sure to set “TEST TONE” to “ON” for easy adjustment. The default settings are in parentheses. * except for MHC-RV600D x TEST TONE (except for MHC-RV600D) The speakers will emit a test tone to adjust “BALANCE” and “LEVEL”. • OFF: The test tone is not emitted from the speakers. • ON: The test tone is emitted from each speaker in sequence while adjusting balance or level.
Sound adjustment Speaker settings (continued) For MHC-RV600D 1 Press DVD SETUP in stop mode. 2 Press M or m repeatedly to select “SPEAKER SETUP”, then press ENTER. 3 Adjust the value of “SIZE”, “BALANCE” and “LEVEL” using M/m/
3 Press v or V (or M or m on the remote) repeatedly to select the audio signal you want. Displaying the audio information of the disc (DVD only) Depending on the DVD, the choice of the language varies. When 4 digits are displayed, they represent the language code (see “Language code list” on page 77). When the same language is displayed two or more times, the DVD is recorded in multiple audio formats. When you select “AUDIO”, the channels being played are displayed on the screen.
Enjoying movies Changing the sound (continued) The display examples are as follows: • PCM (stereo) PROGRAM FORMAT PCM 48kHz 24bit • Dolby Surround PROGRAM FORMAT DOLBY DIGITAL 2/0 DOLBY SURROUND • Dolby Digital 5.1ch PROGRAM FORMAT DOLBY DIGITAL 3/2.1 Searching for a title/ chapter/track/index You can search a DVD disc by title or chapter, and you can search a VIDEO CD by track or index and a CD or MP3 by track.
5 Press v or V (or M or m on the remote) repeatedly, or press the number buttons to select the title, chapter, track, index or album number you want to search. If you make a mistake 6 Press ENTER. Playback starts from the selected number. To search for a scene using the time code (Time Search) 1 In step 3, select “TIME”. “T **:**:**” (playing time of the current title) is displayed. 2 Press ENTER. “T **:**:**” changes to “– –:– –:– –”. 3 Input the time code using the number buttons, then press ENTER.
Using various additional functions Displaying the subtitles (DVD only) With DVDs on which multilingual subtitles are recorded, you can change the subtitle language while playing a DVD, or turn the subtitles on or off whenever you want. For example, you can select the language you want to master and turn the subtitles on for better understanding. Use the remote for the operation. 1 Press DVD DISPLAY during play. The Control Menu appears. 2 Press M or m repeatedly to select “SUBTITLE”, then press ENTER.
4 Press M or m repeatedly to select “ON t”, then press ENTER. x If you have not entered a password The display for registering a new password appears. Press RETURN O, then start from step 3 again. To turn off the Control Menu Press RETURN O, then press DVD DISPLAY repeatedly until the Control Menu disappears. To turn off the Custom Parental Control function Enter a new 4-digit password, then press ENTER . – – – 1 In step 4, select “OFF t”, then press ENTER.
Locking discs (continued) x If you have not entered a password Playing the disc for which Custom Parental Control is set The display for registering a new password appears. CUSTOM SETUP PARENTAL CONTROL Enter a new 4-digit password, then press ENTER . 1 Insert the disc for which Custom Parental Control is set. – – – – The “CUSTOM PARENTAL CONTROL” display appears. 2 Enter your 4-digit password using the number buttons, then press ENTER. The system is ready for playback.
5 Press M or m repeatedly to select “STANDARD”, then press ENTER. The options for “STANDARD” appear. If you make a mistake Press RETURN O to go back to the previous screen. To turn off the Control Menu OFF USA OTHERS Press DVD DISPLAY repeatedly until the Control Menu disappears. DVD/VIDEO CD/CD/MP3 CUSTOM SETUP PARENTAL CONTROL LEVEL: STANDARD: CHANGE PASSWORD To turn off the Parental Control function and play the DVD after entering your password Set “LEVEL” to “OFF” in step 8.
Locking discs (continued) Area code Standard Code number Tip Argentina 2044 If you forget your password, remove the disc and repeat steps 1 to 5 of “Limiting playback by children”. When you are asked to enter your password, enter “199703” using the number buttons, then press ENTER. The display will ask you to enter a new 4-digit password. After you enter a new 4-digit password in step 3, replace the disc in the system and press nN. When the “PARENTAL CONTROL” display appears, enter your new password.
Tuner 3 Press TUNER MEMORY. Presetting radio stations You can preset up to 20 FM stations and 10 AM stations. You can then tune in any of those stations simply by selecting the corresponding preset number. A preset number appears in the display. The stations are stored from preset number 1. Preset number There are two ways to store the station presets.
Presetting radio stations (continued) Other Operations To Do this Tune in a station Follow the procedure described in with a weak “Setting presets through manual signal tuning”. Set another station to an existing preset number Start over from step 1. After step 3, press . or > (or PRESET – or + on the remote) repeatedly to select the preset number you want to store the other station.
Listening to non-preset radio station — Manual Tuning Using the Radio Data System (RDS) (European model only) 1 Press TUNER/BAND repeatedly to select “FM” or “AM”. 2 Press – or + (or TUNING – or + on the remote) repeatedly to tune in the desired station. • When an FM stereo program has static noise, press FM MODE repeatedly until “MONO” appears. There will be no stereo effect, but the reception will improve. • To improve broadcast reception, adjust the supplied antennas.
Using the Radio Data System (RDS) (continued) To cancel the PTY search Locating a station by program type (PTY) Note You can locate a station you want by selecting a program type. The tuner tunes in the type of programs currently being broadcast from the RDS stations stored in the tuner’s preset memory.
Tape Other Operations Loading a tape 1 Press TAPE A/B repeatedly to select To Do this Stop play Press x. Pause Press X. Press again to resume play. Fast-forward or rewind Press M or m. Remove the cassette Press Z PUSH. deck A or B. 2 Press Z PUSH. 3 Insert a tape in deck A or B with the side you want to play/record facing forward. Searching for the beginning of the current or the next track (AMS)* To go forward Press > during playback when N lights in the display.
Recording to a tape — CD Synchro Recording/Recording Manually/Program Edit You can record from a disc (DVD, VIDEO CD, CD, MP3), tape, radio or other connected component. You can use TYPE I (normal) tapes. The recording level is adjusted automatically. Steps Recording from a disc (CD Synchro Recording) Recording from a disc/tape/radio manually 1 2 Load a recordable tape into deck B. Press DVD. Press a function button for the recording source. 3 Load the disc you want to record.
Recording a VIDEO CD/CD/ MP3 by specifying the track order — Program Edit When programing, make sure the playing time for each side do not exceed the length of one side of the tape. 1 Load a disc and load a recordable tape into deck B. repeatedly until “PGM” appears in the display. The Program Display appears on the screen. Program 1 2 3 4 5 6 7 8 9 10 4 Press B (or , on the remote), then press v or V (or M or m on the remote) repeatedly to select the disc.
Recording to a tape (continued) 8 Press CD SYNC. Deck B stands by to record in the direction of the indicator on hH (the right indicator lights to record on the front side and the left indicator lights to record on the reverse side). 9 Press DIRECTION repeatedly to select g to record on one side. Select j (or RELAY) to record on both sides. 10 Press REC PAUSE/START. Recording starts. To cancel Program Edit Press PLAY MODE repeatedly until “1 DISC” or “ALL DISCS” appears in the display.
Sound Adjustment Other Operations To Do this Check the setting Press CLOCK/TIMER SELECT on the remote and press v or V (or M or m on the remote) repeatedly to select “REC SELECT”. Then, press ENTER. Change the setting Start over from step 1. Cancel the timer Press CLOCK/TIMER SELECT on the remote and press v or V (or M or m on the remote) repeatedly to select “TIMER OFF”, then press ENTER. • If the system is on at the preset time, the recording will not be made.
Selecting the sound effect (continued) 2 Press b or B (or < or , on the remote) repeatedly to select a frequency band, then press v or V (or M or m on the remote) to adjust the level. Sound effect options “SURR” appears if you select an effect with surround effects. Frequency band Frequency level MUSIC EQ Effect ROCK POP JAZZ DANCE SOUL ORIENTAL Standard music sources 3 Press and hold P FILE. A personal file number appears in the display.
Display Using the sub woofer Turning off the display (MHC-GX90D and RV800D only) You can use the sound of the sub woofer to suit the sound source. Press ON/OFF on the sub woofer. The indicator lights up while the sub woofer turns on. Press the button again to turn off the sub woofer. Tip You can use VOLUME (or VOL – or + on the remote) to adjust the volume of the sub woofer linked to the front speakers. Press SURROUND on the remote.
Viewing information about the disc VIDEO CD with PBC (Ver. 2.0) Elapsed playing time on the current scene* t Clock display (for eight seconds) t Effect status You can check the playing time and remaing time of the current track or that of the disc. * May not appear with still images. When a DVD/CD-TEXT disc or a disc with MP3 is loaded, you can also check the information recorded on the disc, such as the titles.
VIDEO CDs, CD or MP3 Total number of tracks and the total playing time*1 t Disc title or album name*2 t Clock display (for eight seconds) t Effect status *1 When the playback is stopped and “RESUME” appears on the display, the point where playback was stopped is displayed. 2 * With DVD/CD-TEXT discs only (certain characters cannot be displayed). Depending on the disc, DVD/CD text does not appear and “NO TEXT” appears. For MP3 disc, album names may not be displayed depending on the play mode.
Other Features Enhancing video game sound Mixing video game sound with other sound source — Game Mixing — Game Sync You need to connect a video game machine (see “Hooking up optional components” on page 61). Press GAME. Tips • In the standby mode, the system automatically turns on. • The GAME EQ is automatically selected. • These operations cannot be performed in the Power Saving Mode. Note You cannot view game images while a S-video cable is connected.
Changing the spectrum analyzer display 1 Press AMP MENU on the remote. 2 Press v or V (or M or m on the remote) repeatedly until “PATTERN” appears. 3 Press b or B (or < or , on the remote) repeatedly to select the setting you want. t PATTERN 1 Y PATTERN 2* Y PATTERN 3 Y t PATTERN OFF (No display) 4 Press ENTER. Adjusting the brightness of the indicators 1 Press AMP MENU on the remote. 2 Press v or V (or M or m on the remote) repeatedly until “DIMMER” appears.
Singing along: Karaoke (continued) Other Operations To Do this Use VIDEO CDs or DVDs Turn on your TV and switch it to the appropriate video input. Cancel karaoke mode Turn MIC LEVEL to MIN and disconnect the microphone from MIC, then press KARAOKE PON* repeatedly until “m” disappears. Adjust the microphone echo* Turn ECHO LEVEL to adjust the echo effect. To cancel the echoing, turn ECHO LEVEL to MIN.
Falling asleep to music Waking up to music — Sleep Timer — Daily Timer You can set the system to turn off after a certain time, so that you can fall asleep to music. You can wake up to music at a preset time. Make sure you have set the clock (see “Setting the clock” on page 16). Press SLEEP on the remote.
Waking up to music (continued) 5 Set the time to start playing. Other Operations To Do this Check the setting Press CLOCK/TIMER SELECT on the remote and press v or V (or M or m on the remote) repeatedly to select the respective mode (DAILY 1 or DAILY 2), then press ENTER. Change the setting Start over from step 1. Cancel the timer Press CLOCK/TIMER SELECT on the remote and press v or V (or M or m on the remote) repeatedly to select “TIMER OFF”, then press ENTER.
Optional Components Hooking up optional components To enhance your system, you can connect optional components. Refer to the operating instructions provided with each component. Video game machine From the audio and video output of the video game machine Amplifier or MD deck To the digital input jack of the digital component MD deck or VCR, etc.
Hooking up optional components (continued) C MD (VIDEO) IN jacks (VIDEO (MD) IN jacks for North American model) Listening to audio from a connected component Use audio cords (not supplied) to connect the audio output of the optional component (such as MD deck or VCR) to these jacks. You can then output audio through this system. Listening to a connected MD deck D MD (VIDEO) OUT jacks (VIDEO (MD) OUT jacks for North American model) See “Hooking up optional components” on page 61.
Recording on a connected component Making a digital recording on an MD 1 Connect an optical cable. See “Hooking up optional components” on page 61. Recording audio from a connected component 1 Connect audio cords. See “Hooking up optional components” on page 61. 2 Start recording manually. See “Recording from a disc/tape/radio manually” on page 48. 2 Start recording. Refer to the operating instructions provided with the connected component. Making an analog recording 1 Connect the audio cords.
Troubleshooting There is no sound. Problems and remedies If you have any problem using this system, use the following check list. First, check that the power cord is connected firmly and the speakers are connected correctly and firmly. Should any problem persist, consult your nearest Sony dealer. General The display starts flashing as soon as you plug in the power cord even though you have not turned on the system (see step 8 of “Hooking up the system” on page 13).
There is acoustic feedback. • Reduce the volume. • Move the microphone away from the speakers or change the direction of the microphone. The color irregularity on a TV screen persists. • Turn off the TV set once, then turn it on after 15 to 30 minutes. If the color irregularity still persists, place the speakers farther away from the TV set. DVD/VIDEO CD/CD/MP3 Player There is no picture. • Check that the player is connected securely. • Make sure you operate the TV correctly.
Problems and remedies (continued) Picture There is no picture. MP3 audio track cannot be played back. • Recording was not performed according to the ISO 9660 level 1 or level 2 format, or Joliet in the expansion format. • The MP3 audio track does not have the extension “.MP3”. • The data is not stored in MP3 format. • Discs containing files other than MPEG 1 Audio Layer-3 files cannot be played. MP3 audio tracks take longer to play back than others.
The language for the sound track cannot be changed. • Multilingual tracks are not recorded on the DVD being played. • The DVD prohibits changing the language for the sound track. The subtitle language cannot be changed. • Multilingual subtitles are not recorded on the DVD being played. • The DVD prohibits changing the subtitles. The subtitle cannot be turned off. The tape does not erase completely. • The record/playback heads are magnetized (see “Demagnetizing the tape heads” on page 70).
Problems and remedies (continued) Optional components There is no sound. • Refer to General item “There is no sound.” on page 64 and check the condition of the system. • Connect the component properly (see page 61) while checking: — if the cords are connected properly. — if the cord plugs are firmly inserted all the way. • Turn on the connected component. • Refer to the operating instructions included with the connected component and start playing.
Additional Information Self-diagnosis function (When letters/numbers appear in the display) When the self-diagnosis function is activated to prevent the system from malfunctioning, a fivecharacter service number (e.g., C 13 00) with a combination of a letter and digits appears on the screen. In this case, check the following table. C:13:00 First three characters of the service number Cause and/or corrective action C 13 The disc is dirty. , Clean the disc with a soft cloth (see page 70).
Precautions (continued) Before placing a cassette in the tape deck On operation • If the system is brought directly from a cold to a warm location, or is placed in a very damp room, moisture may condense on the lens inside the CD player. Should this occur, the system will not operate properly. Remove the CD and leave the system turned on for about an hour until the moisture evaporates. • When you move the system, take out any discs.
Specifications AUDIO POWER SPECIFICATIONS: (MHC-GX90D USA model only) POWER OUTPUT AND TOTAL HARMONIC DISTORTION with 6 ohm loads both channels driven, from 120 – 10,000 Hz; rates 40 watts per channel minimum RMS power, with no more than 10% total harmonic distortion from 250 milliwatts to rated output.
Specifications (continued) Tape deck section Recording system Frequency response COMPONENT VIDEO OUT: Y: 1 Vp-p, 75 ohms PB, PR: 0.
Speaker Front speaker SS-RG99 for MHC-GX90D and RV800D Speaker system 3-way, 3-unit, bass-reflex type, magnetically shielded type Speaker units Mid: 5 cm, cone type Woofer: 13 cm, cone type Tweeter: 2 cm, cone type Nominal impedance 6 ohms Dimensions (w/h/d) Approx. 200 × 325 × 237 mm Mass Approx. 3.
Specifications (continued) Power consumption North American model: MHC-GX90D European model: MHC-RV800D Other models: MHC-RV900D MHC-RV600D Glossary Album 270 watts 270 watts 0.25 watts (in Power Saving Mode) 300 watts 0.4 watts (in Power Saving Mode) 230 watts 0.4 watts (in Power Saving Mode) Section of a music piece on a data CD containing MP3 audio tracks. Auto Pause An automatic pause according to the signal encoded on the disc while playing a VIDEO CD.
DTS Index (CD)/Video Index (VIDEO CD) Digital audio compression technology that the Digital Theater Systems, Inc. developed. This technology conforms to 5.1-channel surround. The rear channel is stereo and there is discrete sub woofer channel in this format. DTS provides the same 5.1 discrete channels of high quality digital audio. The good channel separation is realized because the all channel data is recorded discrete and processed in digital.
Glossary (continued) VIDEO CD A compact disc which contains moving pictures. Region Code This system is used to protect copyrights. A region number is allocated on each DVD system or DVD disc according to the sales region. Each region code is shown on the system as well as on the disc packaging. The system can play the discs that match its region code. The system can also play discs with the “ ” mark. Even when the region code is not shown on the DVD, the region limit may still be activated.
Language code list For details, see pages 29, 35 and 38. The language spellings conform to the ISO 639: 1988 (E/F) standard.
Control Menu item list Control Menu items Function DISC Displays the disc name inserted into the system. Selects the disc to be played. TITLE (DVD only) SCENE (VIDEO CD in PBC Playback only) TRACK (VIDEO CD or CD) ALBUM (MP3 only) Selects the title (DVD), the scene (VIDEO CD in PBC Playback), the track (VIDEO CD or CD), or the album (MP3) to be played. CHAPTER (DVD only) INDEX (VIDEO CD or CD) Selects the chapter (DVD) or the index (VIDEO CD or CD) to be played.
Setup Display item list You can set the following items in the Setup Display. The order of the displayed items may be different from the actual display. LANGUAGE OSD CUSTOM (Select the language you want to use from the displayed language list.) DVD MENU (Select the language you want to use from the displayed language list.) AUDIO (Select the language you want to use from the displayed language list.) SUBTITLE (Select the language you want to use from the displayed language list.
Setup Display item list (continued) SPEAKER SIZE FRONT YES CENTER* YES NONE REAR*2 YES NONE SUBWOOFER*3 YES NONE FRONT 0.