
Owner's manual

23
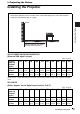
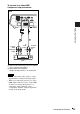
Connecting the Projector
Projecting the Picture
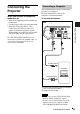
Connecting the
Projector
When you connect the projector,
make sure to:
• Turn off all equipment before making any
connections.
• Use the proper cables for each connection.
• Insert the cable plugs firmly; loose
connections may increase noise and
reduce performance of picture signals.
When pulling out a cable, be sure to pull it
out by the plug, not the cable itself.
For VPL-CX125/CX155/CW125, when
connecting to a LAN using a LAN cable, see
“Operating Instructions for Network”
stored on the CD-ROM.
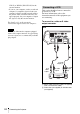
This section describes how to connect the
projector to a computer.
For more information, refer to the
computer’s instruction manual.
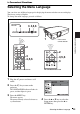
To connect a computer
A Stereo audio connecting cable (not supplied)
(Use a no-resistance cable.)
B HD D-sub 15-pin cable
• The projector accepts VGA, SVGA, XGA,
WXGA, SXGA and SXGA+ signals.
However, we recommend that you set the
output mode of your computer to XGA
(VPL-CX100/CX120/CX125/CX150/
Connecting a Computer
Notes
NETWORK
INPUT C
RGB AUDIO
INPUT A
MONITOR AUDIO
OUTPUT
S VIDEO
AUDIO RS-232C
REMOTE
VIDEO
VIDEO IN
RGB AUDIO
INPUT B
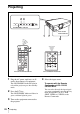
Side
to monitor output
Computer
to audio output