4-125-560-13 (1) Data Projector Operating Instructions Before operating the unit, please read this manual thoroughly and retain it for future reference. VPL-MX20/MX25 Not all models are available in all countries and area. Please check with your local Sony Authorized Dealer.
WARNING To reduce the risk of fire or electric shock, do not expose this apparatus to rain or moisture. To avoid electrical shock, do not open the cabinet. Refer servicing to qualified personnel only. WARNING THIS APPARATUS MUST BE EARTHED. WARNING When installing the unit, incorporate a readily accessible disconnect device in the fixed wiring, or connect the power plug to an easily accessible socket-outlet near the unit.
You are cautioned that any changes or modifications not expressly approved in this manual could void your authority to operate this equipment. All interface cables used to connect peripherals must be shielded in order to comply with the limits for a digital device pursuant to Subpart B of Part 15 of FCC Rules. This device complies with Part 15 of the FCC Rules.
For VPL-MX25 only For the customers in the U.S. A. and Canada This device complies with Part 15 of FCC Rules and RSS-Gen of IC Rules. Operation is subject to the following two conditions: (1) this device may not cause interference, and (2) this device must accept any interference, including interference that may cause undesired operation of this device.
Estonian Sony Corporation kinnitab käesolevaga seadme VPL-MX25/Data Projector vastavust 1999/5/EÜ direktiivi põhinõuetele ja nimetatud direktiivist tulenevatele teistele asjakohastele sätetele. Üksikasjalikum info: http:// www.compliance.sony.de/. Finnish Sony Corporation vakuuttaa täten että VPL-MX25/Data Projector tyyppinen laite on direktiivin 1999/5/EY oleellisten vaatimusten ja sitä koskevien direktiivin muiden ehtojen mukainen. Halutessasi lisätietoja, käy osoitteessa: http://www.compliance.sony.
Romanian Prin prezenta, Sony Corporation declară că acest VPL-MX25/Data Projector respectă cerinţele esenţiale şieste în conformitate cu prevederile Directivei 1999/5/EC. Pentru detalii, vă rugăm accesaţi următoarea adresă: http://www.compliance.sony.de/ Slovak Sony Corporation týmto vyhlasuje, že VPL-MX25/Data Projector splňa základné požiadavky a všetky príslušné ustanovenia Smernice 1999/5/ES. Podrobnosti získate na nasledovnej webovej adrese: http://www.compliance.sony.
For the customers in Norway Use of this radio equipment is not allowed in the geographical area within a radius of 20 km from the centre of Ny-Ålesund, Svalbard. For kunder i Norge Det er ikke tillatt å bruke dette radioutstyret innen en radius på 20 km fra sentrum av NyÅlesund, Svalbard.
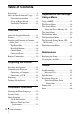
Table of Contents Precautions ......................................... 9 Notes on Installation and Usage ...... 10 Unsuitable Installation ............... 10 Usage in High Altitude ............... 11 Unsuitable Conditions ................ 12 Overview About the Supplied Manuals ............ 13 Features ............................................ 14 Location and Function of Controls (Main Unit) ................................... 16 Top/Front/Side ............................ 16 Rear/Side/Bottom ..........
Precautions On safety • Check that the operating voltage of your unit is identical with the voltage of your local power supply. If voltage adaptation is required, consult with qualified Sony personnel. • Should any liquid or solid object fall into the cabinet, unplug the unit and have it checked by qualified Sony personnel before operating it further. • Unplug the unit from the wall outlet if it is not to be used for several days. • To disconnect the cord, pull it out by the plug.
cabinet or remove the indications on the cabinet. Do not use these chemicals. • If you rub on the cabinet with a stained cloth, the cabinet may be scratched. • If the cabinet is in contact with a rubber or vinyl resin product for a long period of time, the finish of the cabinet may deteriorate or the coating may come off. On LCD projector The LCD projector is manufactured using high-precision technology.
Subject to direct cool or warm air from an air-conditioner Installing in such a location may cause malfunction of the unit due to moisture condensation or rise in temperature. Near a heat or smoke sensor Malfunction of the sensor may be caused. Very dusty, extremely smoky Usage in High Altitude When using the unit at an altitude of 1,500 m or higher, set the “High Altitude Mode” to “On” in the Setup menu.
Unsuitable Conditions Do not place a blocking object just in front of the lens Do not use the unit under the following conditions. Do not topple the unit Do not place any object just in front of the lens that may block the light during projection. Heat from the light may damage the object. Use the PIC MUTING key to cut off the picture. Avoid using as the unit topples over on its side. It may cause malfunction. Do not tilt right/left Avoid using as the unit tilts right or left more than 20 degrees.
B Overview About the Supplied Manuals Overview The following manuals are supplied with the projector. On Macintosh system, you can read only the Operating Instructions. This manual contains explanations for the VPL-MX20 and VPL-MX25 together. Be aware that the VPL-MX25 is mainly used for explanation of the display, and there may be an item that is not displayed due to the model.
Features High brightness, high picture quality High brightness Adopting Sony’s unique new optical system that incorporates newly developed LCD panels provides a high-efficiency optical system. It allows the 200 W Ultra High Pressure mercury lamp to give a light output of 2500 lumen. High picture quality Three super-high-aperture 0.
Streaming This function enables you to project motionpicture images via a wireless LAN. USB Memory Presentation without a Computer* (VPL-MX25 only) Overview By connecting USB memory directly to this unit, you can give a simple presentation without using a computer. You can view Power Point and Excel files, as well a Wmv (Microsoft) and Jpeg files stored in the USB memory.
Location and Function of Controls (Main Unit) Top/Front/Side 4 1 6 2 3 6 Rear/Side/Bottom 9 5 q; qa 7 6 9 6 7 3 8 6 a Front remote control detector b Lens cover glass c Powered tilt adjuster d Ventilation holes (exhaust) 16 Location and Function of Controls (Main Unit) 6 e Control Panel For details, see “Control Panel” on page 18.
g Adjusters (hind pad) Turn the appropriate adjuster to the right or left for minor tilt adjustment of the projected picture. h Lamp cover Overview i Ventilation holes (intake)/Air filter cover j Connector Panel For details, see “Connector Panel” on page 19. k Security lock Connects to an optional security cable (from Kensington). Web page address: http://www.kensington.com/ Notes on ventilation holes • Do not place anything near the ventilation holes as this may cause internal heat buildup.
Control Panel Rear 1 2 3 4 5 6 a LAMP/COVER indicators Flashes in orange under the following conditions: • A repetition rate of 2 flashes when the lamp cover is not secured firmly. • A repetition rate of 3 flashes when the lamp has reached the end of its life or reaches a high temperature. For details, see page 54. b ?/1 (On/Standby) key Turns on the projector when it is in standby mode. When you press ?/1 key, this key flashes in green and then lights in green when the projector is ready to operate.
(v/V/b/B) for adjustment on your desired menu. are displayed in turn. Use the arrow keys (v/V/b/B) for adjustment. i TILT/KEYSTONE (Trapezoidal distortion correction) key Used to enter the settings of items in the menu system, select a menu, or make various adjustments. Overview Adjusts the tilt of the projector, or the trapezoidal distortion of the image manually.
Remote Commander The keys that have the same names as those on the control panel function identically. f AUTO FOCUS key g D ZOOM (Digital Zoom) +/– key Enlarges the image at a desired location on the screen. h VOLUME +/– keys 9 1 INPUT NETWORK USB 2 3 MENU 4 APA 0 qa qs RESET AUTO FOCUS LENS KEYSTONE /TILT PIC MUTING D ZOOM VOLUME FREEZE AUDIO MUTING qd qf qg qh qj a NETWORK key Displays the home window of a Network presentation.
Before using the Remote Commander Pull out the clear film from the lithium battery holder. 1 2 Pull out the battery cover by a thin stick inserting to a hole, as shown the illustration. CAUTION Danger of explosion if battery is incorrectly replaced. Replace only with the same or equivalent type recommended by the manufacturer. When you dispose of the battery, you must obey the law in the relative area or country. Overview To replace a battery detector on the projector.
B Projecting the Picture Installing the Projector The distance between the foremost side in cabinet and the screen varies depending on the size of the projected image. Use the following table as a guide. Screen Distance between the foremost side in cabinet and the screen Unit: m (feet) Projected image size (diagonal) (inches) 30 40 60 80 100 120 150 Minimum Distance 0.86 (2.8) 1.2 (3.9) 1.8 (5.9) 2.4 (7.9) 3.0 (9.8) 3.6 (11.8) 4.5 (14.8) Maximum Distance 0.99 (3.2) 1.3 (4.3) 2.0 (6.
Connecting the Projector When you connect the projector, make sure to: This section describes how to connect the projector to a computer. For more information, refer to the computer’s instruction manual. To connect a computer Side For VPL-MX25, when connecting to the USB connector, see “Operating Instructions for Network/USB File Viewer” stored on the CD-ROM. to INPUT A connector Projecting the Picture • Turn off all equipment before making any connections. • Use the proper cables for each connection.
Note To connect a Macintosh computer equipped with a video output connector of a type having two rows of pins, use a commercially available plug adaptor. Connecting a VCR This section describes how to connect the projector to a VCR. For more information, refer to the instruction manuals of the equipment you are connecting.
To connect to a video GBR/ Component output connector Projecting Side Projecting the Picture to INPUT A connector Signal Cable (not supplied) HD D-sub 15-pin (male) y 3 × phono plug to video GBR/ component output VCR Notes • Set the aspect ratio using “Aspect” on the Screen menu according to the input signal.
Note The projection size that can be adjusted with the automatic focus adjustment is from 30-inch up to 150-inch. The focus cannot be fine adjusted, because of characteristics of the screen onto which the image is projected. In this case, adjust it manually in step 8 on page 27. 3 Turn on the equipment connected to the projector. 4 Press the INPUT key to select the input source.
Press the TILT/KEYSTONE key on the projector or KEYSTONE/TILT key on the Remote Commander to display the Tilt menu and adjust the tilt using the v/ V/b/B keys. TILT/KEYSTONE key 7 Powered tilt adjuster Notes • When you adjust the powered tilt adjuster with the TILT/KEYSTONE key, the V keystone adjustment is performed at the same time. If you do not want to perform the automatic keystone adjustment, set the “V Keystone” to “Manual.” (See page 44.
Turning Off the Power 1 Press the ?/1 key. “POWER OFF? Please press ?/1 key again.” appears to confirm that you want to turn off the power. Note The message disappears if you press any key other than the ?/1 key, or if you do not press any key for five seconds. 2 Press the ?/1 key again. The powered tilt adjuster is retracted into the projector. The ?/1 key flashes in green and the fan continues to run to reduce the internal heat.
B Convenient Functions Selecting the Menu Language You can select one of seventeen languages for displaying the menu and other on-screen displays. The factory setting is English. To change the menu language, proceed as follows: 3 Press the MENU key. The menu appears. The menu currently selected is shown as a yellow button. (VPL-MX25) 4 Convenient Functions 80 50 50 50 Low 50 Press the v or V key to select the Setup menu, then press the B or ENTER key. The selected menu appears.
Security Lock The projector is equipped with a security lock function. When you turn the power of the projector on, you are required to input the previously set password. If you do not input the correct password, you will not be able to project the picture. Notes 6 Press the v, V, b or B key to select a language, then press the ENTER key. The menu changes to the selected language. To clear the menu Press the MENU key. The menu also disappears automatically if a key is not pressed for one minute.
Note Security Lock Enter new password key. Power-on cannot be performed without the password. Use: 3 Cancel: Other key If you call the customer service center because you have forgotten the password, you will need to be able to verify the projector’s serial number and your identity. (This process may differ in other countries/regions.) Once your identity has been confirmed, we will provide you with the password. Enter the password again to confirm. Security Lock Re-enter new password key.
Other Functions Digital zoom icon Off & Go Function If you are leaving the conference room immediately, turn the projector off, and then, after the powered tilt adjuster is retracted into the projector, you can unplug the AC power cord. Notes • When unplugging the AC power cord, ensure that the powered tilt adjuster has been retracted into the projector. Moving the projector with the powered tilt adjuster extended may damage the adjuster.
B Adjustments and Settings Using a Menu Using a MENU 1 Press the MENU key. The menu appears. VPL-MX25 The projector is equipped with an on-screen menu for making various adjustments and settings. Some of the adjustable/setting items are displayed in a pop-up menu, in a setting menu or adjustment menu with no main menu, or in the next menu window. If you select an item name followed by an arrow (B), the next menu window with the setting items appears.
Pop-up menu Setting items • When changing the setting: Press the v or V key to change the setting. Press the ENTER key to restore the previous screen. You can restore the previous screen using b depending on the selected item. To clear the menu Press the MENU key. The menu disappears automatically if a key is not pressed for one minute. To reset items that have been adjusted Setting menu To reset the setting of the items, there are the following two ways. • Select “Reset” in the Picture menu.
If no signal is input If there is no input signal, “Cannot adjust this item.” appears on the screen.
The Picture Menu The Picture menu is used for adjusting the picture. Items that can be adjusted or set depend on the kind of input signals. For details, see “Input signals and adjustable/setting items” on page 47. When the video signal is input When the signal is input from a computer Setting items Functions Picture Mode Set according to Selects the picture mode. the input signal A setting value is stored for each setting item. • Dynamic: Emphasizes the contrast to produce a “dynamic” picture.
Setting items Functions Initial setting Sharpness Sharpens the outline of the picture, or reduces the noise. The higher the setting, the sharper the picture. The lower the setting, the softer the picture, thus reducing the noise. 50 DDE (Dynamic According to the film source you have selected, make a Film setting for playback. Detail • Film: Normally, select this option. Reproduces the 2-3 Enhancer) Pull-Down film sources with smooth picture movement.
The Screen Menu The Screen menu is used to adjust the input signal. You can also adjust the aspect ratio of the picture. Items that can be adjusted or set depend on the kind of input signals. For details, see “Input signals and adjustable/setting items” on page 47. Aspect Adjust Signal 38 Full 1 , Setting items Functions Aspect (When the video signal is input) You can set the aspect ratio of the picture to be Set according to displayed for the current input signal.
Setting items Functions Initial setting Adjust Signal APA (Auto Pixel Alignment) Pressing ENTER key automatically adjusts the “Phase,” “Pitch” and “Shift” to position the image correctly on a screen. Phase Adjusts the dot phase of the panel and the computer signal. Adjust the picture to the point where it looks clearest. Pitch Adjusts the horizontal size of the picture from a computer. The higher the setting, the wider the picture. The lower the setting, the narrower the picture.
The Setup Menu The Setup menu is used for changing the settings of the projector. 40 Setting items Functions Initial setting Status • On: Sets whether or not the on-screen display is displayed. • Off: Turns off the on-screen displays except for the menus, message when turning off the power, and warning messages. On Language English Selects the language used in the menu and on-screen displays.
Setting items Functions Input-A Signal Sel. Selects the type of signal input from the equipment connected to the INPUT A connector. Selects the type of signal input from the equipment by selecting “Input-A” with the INPUT key. • Auto: Selects the input signal type automatically. • Computer: Inputs the signal from a computer. • Video GBR: Inputs the signal from a TV game or HDTV broadcast. • Component: Inputs the component signal from a DVD player/recorder, Blu-ray Disc player, digital tuner, etc.
The Function Menu The Function menu is used for changing the settings of the various functions of the projector. 42 Setting items Functions Smart APA The APA (Auto Pixel Alignment) automatically On adjusts “Phase,” “Pitch” and “Shift” in the Screen menu for the input signal from a computer. When it is set to “On”, it will be executed whenever a signal is input. • On: When a signal is input from a computer, the APA functions automatically so that the picture can be seen clearly.
Setting items Functions Panel Key Lock Locks all the control panel keys of the projector so that Off the projector can be operated only with the Remote Commander. • On: Locks the control panel keys. To release the lock with the projector, press and hold the MENU key for about 10 seconds when the power is on. The lock will be released and “Panel Key Lock” is automatically set to “Off.” • Off: Select this when you wish to release the lock of the control panel keys.
The Installation Menu The Installation menu is used for changing the settings of the projector. Tilt Auto Lamp Mode Standard Auto Focus 44 Setting items Functions Tilt Adjusts the position (height) of the projected picture. V Keystone Auto Corrects the vertical trapezoidal distortion of the picture. • Auto: To have it adjusted automatically. • Manual: Lets you adjust it manually. When the bottom of the trapezoid is longer than the top ( ): Sets a lower value (– direction).
Setting items Functions Initial setting IR Receiver Selects the remote control detectors (IR Receiver) on the front and rear of the projector. • Front & Rear: Activates both the front and rear detectors. • Front: Activates the front detector only. • Rear: Activates the rear detector only. Front & Rear Note Since the V keystone function is an electronic correction, sometimes the image will be deteriorated.
The Network Setting Menu (VPL-MX25 only) The Network Setting menu is used to set the network of this unit. To Network Setting Switches to Network Setting window when you press [ENTER]. 46 Setting items Functions Network Setting The network setting window appears. For details, refer to “Operating Instructions For Network/USB File Viewer” included on the supplied CDROM.
The Information Menu The Information menu displays the model name, serial number, the horizontal and vertical frequencies of the input signal and the cumulated hours of usage of the lamp. VPL-MX25 Memory number Signal type Setting items Functions Model Name Displays the model name. Displays the serial number. fH (horizontal frequency) Displays the horizontal frequency of the input signal. fV (vertical frequency) Displays the vertical frequency of the input signal. Memory No.
Item Input signal Video Component Video GBR Computer *3 Network*5 z *3 USB*5 z*3 Color Temp. z z z z Sharpness z z z – – – DDE z z z – – – Black Level Adj. z z z – – – Gamma Mode – – z*4 z z z z : Adjustable/can be set – : Not adjustable/cannot be set *1 : Except B & W *2: NTSC3.58 and NTSC4.43 only, except B & W *3: Adjustable only when the “Picture Mode” is set to “Dynamic” or “Standard” *4 : Preset memory No.
B Maintenance Replacing the Lamp The lamp used as a light source is a consumable product. Thus, replace the lamp with a new one in the following cases. • When the lamp has burnt out or dims • “Please replace the Lamp.” appears on the screen • The LAMP/COVER indicator flashes in orange (Repetition rate of 3 flashes) (Refer to page 54 for another possible cause.) The lamp life varies depending on conditions of use. Use an LMP-M200 Projector Lamp as the replacement lamp.
Caution Do not put your hands into the lamp replacement slot, and do not allow any liquid or other objects into the slot to avoid electrical shock or fire. 5 Insert the new lamp all the way in until it is securely in place (a). Tighten the two screws (b). Fold down the handle to replace it (c). 9 Press the ?/1 key to turn the projector on. 10Press the MENU key, and then select the Setup menu. 11Select “Lamp Timer Reset”, and then press the ENTER key. Fold down the handle.
Cleaning the Air Filter The air filter should be cleaned after approximately 500 hours use. Remove the air filter covers in two places then remove the dust with a vacuum cleaner. The time needed to clean the air filter will vary depending on the environment or how the projector is used. 1 Turn the power off and unplug the ower cord. 2 Place a protective sheet (cloth) beneath the projector and turn the projector over. 5 Return the air filter cover. Notes Remove the air filter cover.
B Others Troubleshooting If the projector appears to be operating erratically, try to diagnose and correct the problem using the following instructions. If the problem persists, consult with qualified Sony personnel. Power Symptom Cause and Remedy The power is not turned on. • The lamp cover is not secured. c Close the lamp cover securely (see page 50). Picture Symptom Cause and Remedy No picture. • A cable is disconnected or the connections are wrong.
Symptom Cause and Remedy Color balance is incorrect. • The picture has not been adjusted properly. c Adjust the picture (see page 36). • The projector is set to the wrong color system. c Set “Color System” in the Setup menu to match the color system being input (see page 41). The picture is too dark. • Contrast or brightness has not been adjusted properly. c Adjust the Contrast or Brightness in the Picture menu properly (see page 36). • The lamp has burnt out or is dim.
Indicators Symptom Cause and Remedy • The lamp cover is detached. The LAMP/COVER indicator flashes in orange. c Attach the cover securely (see page 49). (Repetition rate of 2 flashes) • The interior of the unit reached a high temperature, and the The LAMP/COVER indicator flashes in orange. temperature sensor has been activated. (Repetition rate of 3 c Check to see that nothing is blocking the fresh-air inlet and flashes) exhaust outlet. • The lamp has reached a high temperature.
Messages List Warning Messages Use the list below to check the meaning of the messages displayed on the screen. Message Meaning and Remedy High temp.! Lamp off in 1 min. The internal temperature is too high. c Turn off the power. c Check to see that nothing is blocking the ventilation holes. Frequency is out of range! • This input signal cannot be projected as the frequency is out of the acceptable range of the projector. • The resolution setting of the output signal of the computer is too high.
Message Meaning and Remedy The panel keys are locked! “Panel Key Lock” in the Function menu is set to “On.” c All the keys on the control panel of the projector are locked. Operate the projector with the keys on the Remote Commander (see page 43). Auto Focus is disabled! Do “Auto Focus” on the Installation menu is set to “Off.” c To enable the Auto Focus function, set it to “On.
Specifications Optical characteristics Electrical characteristics Color system NTSC3.58/PAL/SECAM/ NTSC4.43/PAL-M/PAL-N/ PAL60 system, switched automatically/manually (NTSC4.43 is the color system used when playing back a video recorded in NTSC on a NTSC4.43 system VCR.
VPL-MX20: Max 290 W in standby (Standard): 6 W in standby (Low): 2 W Heat dissipation 990 BTU Operating temperature 0°C to 35°C (32°F to 95°F) Operating humidity 35% to 85% (no condensation) Storage temperature –20°C to +60°C (–4°F to +140°F) Storage humidity 10% to 90% Supplied accessories Remote Commander (1) Lithium battery CR2025 (1) HD D-sub 15 pin cable (2 m) (1) (1-791-992-51/Sony) Carrying case (1) AC power cord (1) Operating Instructions (CD-ROM) (1) Quick Reference Manual (1) Safety Regulations (1
Preset signals Memory Preset signal No. Video 60 Hz fH (kHz) fV (Hz) Sync Pitch 15.734 – – 1 Video 60 Hz 59.940 2 Video 50 Hz Video 50 Hz 15.625 50.000 – – 3 480/60i DTV 480/60i 15.734 59.940 S on G/Y – 4 575/50i DTV 575/50i 15.625 50.000 S on G/Y – 5 480/60p 480/60p (NTSC Progressive component) 31.470 60.000 S on G/Y – 6 575/50p 575/50p (PAL Progressive component) 31.250 50.000 S on G/Y – 7 1080/60i 1035/60i, 1080/60i 33.750 60.
Memory Preset signal No. 41 1152 × 864 42 43 44 1152 × 900 45 1280 × 960 46 47 1280 × 1024 48 fH (kHz) fV (Hz) Sync Pitch VESA 70 63.995 70.019 H-pos, V-pos 1472 VESA 75 67.500 75.000 H-pos, V-pos 1600 VESA 85 77.487 85.057 H-pos, V-pos 1568 SUN LO 61.795 65.960 H-neg, V-neg 1504 VESA 60 60.000 60.000 H-pos, V-pos 1800 VESA 75 75.000 75.000 H-pos, V-pos 1728 VESA 60 63.974 60.013 H-pos, V-pos 1688 SXGA VESA75 79.976 75.
Installation Diagram Floor Installation (Front Projection) Wall Center of the screen Center of the lens Floor Unit: mm (inches) This section describes the examples of installing the projector on a desk, etc. See the chart on page 62 concerning the installation measurements. Installation Diagram Others The alphabetical letters in the illustration indicate the distances below.
Unit: mm (inches) 30 40 60 80 100 120 150 N 860 (33 7/8) 1160 (45 3/4) 1760 (69 3/8) 2360 (93) 2950 (116 1/4) 3550 (139 7/8) 4450 (175 1/4) M 990 (39) 1330 (52 3/8) 2020 (79 5/8) 2700 (106 3/8) 3380 (133 1/8) 4070 (160 3/8) 5090 (200 1/2) b x-152 (x-6) x-203 (x-8) x-305 (x-12 ) x-406 (x-16) x-508 (x-20) x-610 (x-24) x-762 (x-30) c x-185 (x-7 3/8) x-236 (x-9 3/8) x-338 (x-13 3/8) x-439 (x-17 3/8) x-541 (x-21 3/8) x-642 (x-25 3/8) x-795 (x-31 3/8) PS a a (N) = {(PS ×
Dimensions Front Center of the lens 45 (1 13/16) 24.8 (1) 99 (4) 32) 3 (1/8) 20 (13/16) 8 (11/ 23.7 12.6 2 ( 3/32) ( 15/16) ( 1/2) 66 (2 5/8) Unit: mm (inches) 273 (10 3/4) 1.5 (1/16) Top 0.
Side USB connector (VPL-MX25 only) 104 (4 1/8) 76 (3) 72 (2 7/8) 110 (4 3/8) Unit: mm (inches) Rear 23.
Bottom 128 (5 1/8) 130 (5 1/8) 124 (5) 85 (3 3/8) 144 (5 3/ 4) 139 (5 1/2) 190 (7 1/2) 60 (2 3/8) 9 (3/8) 107 (4 5/8) 95 (3 3/4) Dimensions Others Unit: mm (inches) 65
Index A Adjust Signal APA ..................................................... 39 Phase ................................................... 39 Pitch ..................................................... 39 Shift ..................................................... 39 Aspect ..................................................... 38 Auto Focus .............................................. 44 Auto Input Search ................................... 42 B Background .............................................
Picture adjustment ...................................36 Picture Mode ...........................................36 Dynamic ..............................................36 Presentation .........................................36 Standard ...............................................36 Pin assignment .........................................58 Power turn on ..................................................25 Power Saving Mode ................................40 Precautions ................................
Sony Corporation