SON_ 2_590_768 DVD Home Theatre System Operating Instructions V|DEO OnGITAL AUDIO DA V-DX150 @2005 Sony Corporation
Model No DAV-DX 150 Serial No WARNING To prevent fire or shock hazard, do not expose the unit to rain or moisture, Caution -The with this hazard. use of optical product This equipment has been tested and found to comply with the limits tbr a Class B digital device, pursuant to Pa*t 15 of the FCC Rules These limits are designed provide reasonable protection against hannflfl interference in a residential installation.
outlet (mains), oft'. • Unplug even if the unit itself has been lmned the unit from the wall outlet (mains) if you do not intend disconnect the cord. to use it tbr an extended period of time. To the cord, pull it out by the plug, neve_ by please read this manual thoroughly lbr future reference. Installing • Allow Thank you for purchasing Sony DVD Home Theatre System.
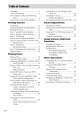
Welcome! ................................................ About This Manual 3 ................................. This System Can Play the Following Discs ................................................. Guide to the Control Getting 6 Menu Display ........ 9 ............................................. 12 Inserting Batteries Hookup Overview into the Remote System Step 2: Antenna (Aerial) Step 3: TV Hookup Hookup ......... 18 Cord Lead) ................................... ............
Settings Using and Adjustments the Setup Display Setting the Display Language Custom Settings .................................... for the Speakers 75 ....................... 76 SETUP] Information Precautions Notes 73 SETUP] [SPEAKER Additional ......................... SETUP] [CUSTOM Settings 72 SETUP] for the Display [SCREEN 71 Track ........................................ [LANGUAGE Settings ........................ or Sound ............................................
• The instructions controls in this manual describe the on the remote. You can also use the controls on the system if they have the same or similar names as those on the remote. • The Control Meml items may be different depending on the area. Format of discs • "DVD" may be used as a general term l_r DVD VIDEOs, DVD+RWsiDVD+Rs, and DVD-RWsiDVD-Rs. Symbol VIDEO DVD-RW • Measurements are expressed North American models. • The following mamlal.
material Example of discs that the system cannot play The system cannot play the I)llowing discs: • CD-ROMsiCD-Rsi(D-RWs other than those recorded in the I_rmats listed on page 6 • CD-ROMs recorded in PHOTO CD format • Data part of (D-Extras • DVD Audios with a different region code (page 7, 87). • A disc that has a non-standard card, heart). shape (e.g., • A disc that has the adhesive or a sticker still left on it.
DVD VIDEOs labeled {_ will also play on this system. If you tO- to play any other DVD VIDEO, the message [Playback prohibited by area limitations.] will appear on the TV screen. Depending on the DVD VIDEO, no region code indication may be given even though playing the DVD VIDEO is prohibited by area restrictions. Note on playback operations of DVDs and VIDEO CDs Some playback operations of DVDs and VIDEO CDs may be intentionally set by software producers.
i O C_ _::_iC:̧ ¸iH :{ O DISPLAY Use the Control Menu to select a function and to view related information. repeatedly I Press O DISPLAY to turn on or change the Control Menu display as lbllows: Control Men:: display 2 (appears tbr ce:lain discs only) ControlMenu display 1 Control Menu display off Control Menu display The Control Menu display 1 and 2 will show different items depending on the disc type. For details about each item, see the pages in parentheses.
Example: ( ontrol Menu display 1 when playing a DVD VIDEO. Currently playing title number .1 Currently playing chapter number .2 Total number of titles*: Playback status (IP- Playback, II Pause, • Stop, etc.) Total number of chapters .2 Control Menu Type of disc being played '_3 PIaying time .4 Selected item OFF Current setting Options Function name of Menu item Operation message * l Displays the scene munber DATA CDs.
[SHUFFLE] (page 32) Plays the track m random order [REPEAT] (page 33) Plays tile entire disc (all titles/all lepeatedly. [A/V SYNC] (page 44) Adjusts the delay between _ tracks/all the pictme albums) _ lepeatedly or one title/chapter'traclc'albunl _ _ _ _ _.1 and sound [PARENTAL CONTROL] (page 60) Sets to p_ohibit playback on this system.
You can control the system using the supplied Check that you have the fbllowing • Speakers items: (5) • Subwoofer (1) • AM loop antenna (aerial) (1) • FM wire antenna (aerial) (1) remote. Insert two Size AA (R6) batteries by matching the @ and @ ends on the batteries to the markings inside the compartment. When using the remote, point it at the remote sensor [] on the system. • Speaker cords (5 m × 4, 15 m × 2) (16.5 ft. × 4, 49.5 ft.
Perform all connections and settings by following Steps 1 to 7.
Connect the supplied speaker system using the supplied speaker cords by matching the colors of the jacks to those of the cords. Do not connect any speakers other than those supplied with this system. To obtain the best possible page 76. Required Speaker The connector connected. surround sound, speciI_v the speaker parameters level, etc.) on cords cords and the color tube of the speaker cords are the same color as the label of the .
Connecting the speakers Front speaker (R) Front speaker (L) Co,or,a e, Surround • Do not set the speakers speaker (R) in an inclined • Do not place the speakers Extremely m locations Subwoofer Surround 1,o (/) r, speaker (L) position that are: hot or cold Dusty or dirty Very hmnid Subject to vibrations Subject to direct sunlight • Use caution when placing the speake;s and/or speaker stands (not supplied) that are attached with the speakers a specially treated (waxed, oiled, polished, e
To connect the speaker cords Connect the speaker cords after bending the bare wire at the end of the insnlation. speaker insnlation from being inserted in the speaker temlinaL This prevents the • Do not catch the speaker cord insulation in the SPEAKER jack Avoiding short-circuiting Short-circnitmg the speakers of the speakers may damage the system. To prevent this, be sure to follow these precantions when connecting the speakers.
2 Fasten the screws to the wail. The screws should protrude 5 to 7 mm (7/32 to 9/32 inch). G) ¢D 5to7mm (7/32 to 9/32 inch) 3 Hang the satellite speakers on the screws. ........... 41"6"mm _(3/19 % Hoe on the back of rich) the speaker _L10mm _(13/32 inch) • Use screws that are suitable tbr tile wall material and strength As a plaster board wall is especially the screws securely to a beam and t:asten than to the wall.
Connect the snpplied AMFM antennas (aerials) for listening to the radio. FM wire antenna (aerial) • To prevent noise pickalp keep the AM loop antenna (aelial) • Be sure to fully extend the FM wire antemla • After connecting the FM wire antenna away flora the system and othe_ components (aelial) (aerial), keep it as horizontal as possible. iil • Wqlen you connect the supplied AM loop antenna • If you have poor FM reception, use a 75-ohms antenna (aerial) as shown below.
61 First, perform the video connection, and then audio connection. With your TV's andio outpt'4 connected to this system, yon can listen to TV sound throngh the system speakers. Connecting the video cords ID r_ Sends a played back DVD image to a TV. Check the jacks of your TV, and choose the O, O or _ from _ (standard) to _ (component). connection. Pictnre qnality improves in order To VIDEO S VIDEO ii T° O Q TV TV with _) To connect to a TV with Connect the video cord.
(_ To connect to a TV with the COMPONENT VIDEO IN jacks Connect a component video cord (not supplied). To use the COMPONENT CB, PRi(R) instead of the video jacks, your TV monitor must be equipped VIDEO OUT jacks (Y, PB with via COMPONENT VIDEO IN jacks (Y, PB,(B, PK (a). If your TV accepts progressive format signals, you must use this connection and set the output channel of the system to progressive format (page 20).
Not_ that the picture will not be clear or no pictnre will appear if you select these settings when either of the above conditions is not met. • P VIDEO (PROGRESSIVE Select this setting when: VIDEO) G3 signals, and, {_ i, your TV accepts progressive the TV is connected to the COMPONENT VIDEO OUT jacks, and, if) you want to fix the conversion method to PROGRESSIVE VIDEO lbr video-based Select this if the image is not clear when ?ion select PROGRESSIVE AUTO. software. _.
TV To VIDEO/SAT (AUDIO IN) To connect the AUDIO jacks of this system OUT jacks of a TV to the VIDEO/SAT (AUDIO IN) Connect a TV to the VIDEO/SAT (AUDIO IN) jacks using an audio cord (not supplied). When connecting a cord, be sure to match the color-coded sleeves to the appropriate jacks on the components.
You can ertioy sound using the speakers of this system by connecting the AUDIO OUT .jacks of another component. For video connection of other components, connect directly to the TV. • If you connect a TV to tile VIDEO/SAT jacks in Step 3 (page 19), you caimot connect othei components to the _" svsteli1. Connecting the system Outputs the other component and the other through the speakers component of this system.
• Wllen you connect a VCR or digital satellite receiver to the VIDEO/SAT jacks of this system, change the fimction by pressing FLZNCTION repealedly to select "VIDEO" or "SAT.
Before connecting the AC power cord (mains (,Q lead) of this system to a wall outlet (mains), connect the speakers to the system (page 14). ............... II_ (/) _i)¸ (? (7¸ : I/Cb ® .............. AMP MENU r, :> ¢ ................ I/_ ÷/4-/÷ : ............... ENTER r7 7 :¢77; :;:7 C:);::;l :7 ¸ :_7_ (_ _) Alter connecting the AC power cord (mains lead), the demonstration appears in the front panel display. When you press I/(_) on the remote, the demonstration turns oft'.
Follow the steps below to make the minimum number of basic ac_iustments for using the system. To skip an adjustment, press I_'IIH To return to the previous acliustment, press I'_. Press ,t,/4, to select The system displays in the selected a language. the menu and subtitles language. rm_ • The selectable language is different depending Oil the area. Press ENTER. The Setup Display _r selecting ratio of the TV to be connected the aspect appears. SETUP Press .
The Control Meml appears. Press ./4, to select ;:_1 then press ENTER. The options for [SETUP] 10 Press [SETUP], appear. ¢D Q. t'/4, to select the center speaker distance from the listening position, then press ENTER. Yon can set from 0.0 to 7.0 meters (0 to 23 ft). Press i'/4, to select [QUICK], then press ENTER. The Quick Setup display appears. 11 Press 'I'/4, to select the surround speaker distance from the listening position. Yon can set from 0.0 to 7.0 meters (0 to 23 ft).
irregularity occurs again, place the subwoofer farther away from the TV set. If color irregularity still occurs after peribnning Positioning the speakers For the best possible snrround sonnd, all the speakers other than the subwoofer should be the same distance from the listening position (O). However, this system allows you to place the center speaker up to 1.6 meters (5 it) closer (O) and the surround speakers up to 5.0 meters (16 ft) closer (_) to the listening position.
Press the button of the disc number you want. When no disc is in the disc tray you selected, "NO DISC" appears. Perform next Step while "*DISC-l* 5 6 * Asian, Australian, and Saudi Arabian models (eg., 2-5)" flashes. Press _. Load a disc. 5' Place one disc on the tray, and then press _. only. {,Q El O I/_ FUNCTION DISC 1-5 _ [2> N, \ / Disc tray Adjust the volume When you plan/an 8 cm disc, place it on the inner circle of the tray Be careful that the disc is not skewed on the ineer circle o
To save mode the power in standby Press I'(J) while the system turns on. To cancel standby mode, press Ii(J) once. Additional operations • The Instant Replay fimction is usefill when you want to review a scene or dialogue that you missed.
"RESUME" display, point appears so you where you If "RESUME" Play 2 in the front can restart stopped does panel the disc from the the disc. not appear, • If [MULTI-DISC RESUME] in [CUSTOM SETUP] is set to [ON] (page 75) and you playback a recorded Resume disc such as DVD-RW, the system may playback othe! recorded discs from tile same resmne point. is not available. Press The play from the beginning, D>. starts you playback stopped • If [MULTI-DISC from the disc in Step RESUME] 1.
press -). If you want to delete the track from the program, press CLEAR. The cursor moves to the track row [T] (in this case, [01]). PROGRAM :3 Follow Step 5 for new programming. To cancel a program, select [--] under [T], then press ENTER. 0:00:00 T To cancel all programmed 1 5 Select the track you want to program. For example, of the tracks in the order Follow steps 1 to 3 of "Creating program (Program Play)." your own 2 Press ,I, and select [ALL CLEAR]. :3 Press ENTER.
"0 E ,< 5' 3 ,e, Press .1,/.1,to select the item to be shuffled. Press I,/4, to select the item to be • When playing a VIDEO CD or CD • [TRACK]: shuffles tracks on the disc. The default setting is underlined. • When Program 4 Play is activated • When playing RW a DVD VIDEO or DVD- • [ON]: shuffles tracks selected in Program Play. • [OFFI: does not play repeatedly. Press ENTER. • [ONE DISC]: repeats all of the titles on the current disc. (When playing a DVD- Shnffle Play starts.
To turn off the Control Menu Press 0 DISPLAY repeatedly until the Control Menn is tnrned off. r_ • You can set Repeat Play while the system is stopped After selecting the [REPEAT] option, press C>. Repeat Play starts. • You can quickly display the [REPEAT] status by pressing REPEAT. Each time you press REPEAT, the [REPEAT] option changes. • You cannot use this fimction with VIDEO CDs and Super VCDs with PBC playback.
(PBC Playback) Some DVD-RWs in VR (Video Recording) mode have two types of titles for playback: originally recorded titles ([ORIGINAL]) and titles that can be created on recordable DVD With PBC (Playback players for editing ([PLAY PBC playback allows you to play VIDEO CDs interactively by following the menu on the TV screen. LIST]). You can select the type of title to be played. Control) functions, can enjoy simple interactive operations, functions, and other such operations.
• Depending on the VIDEO CD, [Press ENTER] Step 3 may appear as [Press SELECT] in the instructions C:>. supplied in with the disc. In this case, press • To play without using PBC, press _/It, ll or the nunlber buttons while the system is stopped to select a llack, then press [2> or ENTER. [Play without PBC] appears on the TV screen and the system starts continuous play You cailnot play still picnues such as a menu. To return to PBC playback, press • twice, then press [2>.
* "Design rule tbr Camera File system": Image standards fbr digital camaas regulated by Japan Electronics and Intbmlation Technology Industiies Association (JEITA) currently selected album take priority over the next album in the same tree. (Example: contains 1_ so @ is played beibre (_).) When you press MENU • The system will play any data with the extension ".MP3," ".JPG," or ".JPEG" even if they _e not in MP3 or JPEG lbrmat.
3(30) MY MP3 audio tracks and JPEG image files recorded on DATA (-Ds (CD-ROMs,( D-Rs, CD-RWs) can be played on this system. FAVOURITE SONG Press ,I,/4, to select the album you want and press E::>. The system starts playing the selected album. To stop playback Press II. NAVI To play the audio track ............. ............. MENU next or previous MP3 Press _ ilP,'II,,I.
The list of tracks contained in the album appears. 1 MY WALTZ FAVOURITE 1(256} FOR 2 3 4 5 6 7 8 9 10 11 12 13 14 15 16 SONG DEBBY "0 5" _Q u 3 Press <-1"t"14,1+ to select the image you want to view and press ENTER. Press .I'/4, to select ENTER. o a track and press The selected track starts playing. You can turn the track list off by pressing MENU. Pressing MENU again will display the album list. To stop Press m.
Press (?LEAR to return to normal view. • Nothing happens when you press <'-while playing the first image file of the album. • If you press ÷/+ to go to the next or previous the "Ro_'ating a JPEG image" fimction image, is canceled. • Tile slide show stops when you press t,,',1,. To stop playback Press II. You can play a slide show with sound by first placing both MP3 and JPEG files in the same album on a DATA CD.
4 Press ,t,/4, to select the setting you want and press ENTER, recommended kbps or lowa skips, then re&ice the size of the JPEG file The defauh setting is underlined. • [AUTO]: plays both the JPEG image files and MP3 audio tracks in the same album as a slide show. Specifying (JPEG "0 only) • [IMAGE (JPEG)]: plays only JPEG image files as a slide show. When you show, appear you can specify on the screen. Press 1 The MENU.
Selecting an effect for image files in the (JPEG only) slide show When you play a JPEG image file you can select the effect to be used when viewing the slide show. 1 Press _ DISPLAY The (ontrol 2 (Asian, models Australian, only) and Saudi Arabian twice. Menu for JPEG appears. Press ,P/,I,to select then press ENTER. _il;iii;i:i [EFFECT], The options for [EFFECT] appear. iii !::;;} iii :i iii ii:Z _::iii:ii! MENU ÷/_/_/÷ ENTER 3 Press want. ,t.
You can also play DATA CDs recorded in Multi r_ Session (page 36), ahhough DATA DVDs recorded in Multi Session are not playable. • You can view the disc infbrmation DivX video file (page 49). Refer to the instructions drives and the recording • If throe are no DivX video files recorded format. DVD, a message playback DATA CDs order or DATA of data on JPEG image files" (page 37).
Selecting 1 a DivX video After Step 2 of "Selecting file an album," press ENTER, The list of files in the albnm appears. MY (A/V S YNC) FAVOURITES 1(2) IHAWAII I 2004 * Asian. Austialian and Saudi Arabian models only When the sonnd does not match the pictnres on the screen, yon can adjust the delay between pictnre and sonnd. l_ Press t'/4, to select ENTER, The selected To stop a file and press _C _ 'C_ _ C!,'_i_ii17_7 file starts playing. 2 playback Press II.
Playback direction x21_----_ I1_----_ 21_ ----_31_ t (Scan, Slow-motion I 31_,- (DVD VIDEO/DVD-NW/DivXvideo*/VIDEO Play, Freeze CO only) Frame) x21b (DVD "0 VIDEO/CD only) 1< * Asia::, Aust:alian. and Saudi Arabia:: models only Opposite * Asian, Australian, and Saudi ._dabian models only. You can quickly locate a particular disc by monitoring slowly.
_*/_tI (step) to go to the preceding frame (DVD VIDEOiDVD-RW only). To return to normal playback, press I2> • You cannot search for a still picture on a DVD-RW in VR mode • For DATA CDs, this fimction works only for DivX video files. (Asian, Australian, and Saudi Arabian models only) You can search a DVD by title or chapter, and you can search a VIDEO CDi(DiDATA CDi DATA DVD* by track, index, or scene.
• When playing a VIDEO CD/Super VCD without PBC Playback • When playing a VIDEO CD/Super VCD with PBC Playback 5" I,Q • When playing a CD Press t,/,1, or the number buttons to select the title, chapter, track, index, If you [ALBUM] make a mistake ( ancel the number by pressing then select another number. a DATA CD (JPEG file) The system starts playback selected munber.
1 (Picture 2 3 5 6 Navigation) i4 You can divide the screen into 9 subscreens and find the desired scene quickly. 4 Press <..1t"14,1-) to select a title, chapter, or track, and press ENTER. Playhack NAVI iii i::i;: r_ ENTER © DISPLAY The lbllowing NAVI during playback. display appears. Press PICTURE select an item. NAVI repeatedly to • [TITLE VIEWER] (DVD VIDEO only): displays the first scene of each title.
When playing DVD-RW a DVD VIDEO or --+ Playing time and nnmber of the cnrrent title Remaining time of the current title 5' * Asian, Australian, and Saudi ._abian models only.
When playing a VIDEO CD (without PBC functions) or CD -'4" Playing time Remaining o1"the current time Viewing the Station Name or Frequency in the front panel display track of the current When the system is set to "TUNER AM" or "TLYNER FM," you can check the frequency track using the front panel display. Playing time of the disc Press DISPLAY, Remaining Disc time Each time you press DISPLAY, changes as shown in the charts. of the disc name E m the display The display 2 seconds.
Playing time of the current chapter Remaining time of the current chapter EBRANMS SYMPHONY ] • When playing a VIDEO CD (with PBC functions) -o To check Playing time of the current scene • When playing a VIDEO CD (without PBC functions) or CD Playing time of the current track DATA CD (MP3 DivX video*l)/DATA video) text audio/ DVD *l (DivX _' 0 By pressing DISPLAY while playing MP3 audio tracks on a DATA CD or DivX video o files .
Date information * "Exchangeable camera image Eled!onics Association Image File Format" is a digital format defined by the Japan and Inlbnnation (JEITA) • Date intbmmtion MM: Month Technology In&_stries is [MMiDD&WYY].
• When playing a DVD VIDEO Depending on the DVD VIDEO, of language varies. the choice When 4 digits are displayed, they indicate a language code. Refer to "Language Code List" (page 89) to see which language the code represents. When the same language is displayed two or more times, the DVD When playing a DVD VIDEO DATA DVD* muhiple audio MPEG audio, audio lbmlat.
• [2:liL]: the sound of the left channel of the audio track 2 (monaural) • [2:2/R]: the sound of the right channel the audio track 2 (monanral) of • When playing a DATA CD (DivX video) or DATA DVD (DivX video) (Asian, Australian, and Saudi Arabian models only) Example: MP3 audio • While playing a Super VCD on which the audio track 2 is not recorded, no sound will come out when you select [2:STEREO], [2:liL], or [2:2/R] Bit rate Checking the audio signal format (DVD, DivX video* About only) * A
Sound field Display NIGHT NIGHT 2 CHANNEL STEREO HEADPHONE 2CH STEREO VIRTUAL HEADPHONE2CHANNEL HP VIRTUAL HP 2CH STEREO @, * Asian, Australian, and Saudi Alabian models only. You can take advantage of surround sound simply by selecting one of system's preprogrammed sound fields. They bring the exciting and powerfifl sonnd of movie theaters into your home. Automatic outputting original sound of the 0.
surround decoder that extracts the spatial properties of the original recording without adding any new sounds or tonal colorations. Outputting 2 channel sources from the surround speakers • MULTI ST. • V_qlenthe input signal is multi channel source, Dolby Pro Logic, Dolby Pro Logic II MOVIE/MUSIC are canceled and the multi channel source is output directly• This mode outputs 2 channel sources from the front speakers and surround speakers simuhaneouslv.
To turn the surround effect off Press SOL_NDFIELD repeatedly until "A.F.D. AUTO" or "2CH STEREO" appears in the front panel display• You can enjoy TV or VCR sound from all speakers of this system. For details, see "Step 3: TV Hookup" and "Step 4: Other Component (page 23) (page 19) Hookup" O er-, iil;i ¸ i:i? (_i _;iiii_ e, ............FUNCTION .............
C21i ;iii_i i2!2i¸ if!f!ll: ¸iii Reinforcing Yon Press Bass bass frequencies can reinibrce bass freqnencies. DSGX. freqnencies are dTectively reinforced. To turn off the sound effect Press DSGX again. • Wllen you connect headphones DSGX fimction does not wink. to the system, file • Depending the DSGX fimction on the input stream, may not be effective.
* Asia::. Aust:alian. and Saudi Arabia:: models only If subtitles are recorded If various angles (muhi-angles) for a scene are the subtitles muhilingual on a disc, you can tnrn on or offwhile playing. If subtitles are recorded on the disc, recorded on a DVD VIDEO, you can change the viewing angle. you can change the subtitle language while playing, or turn the subtitles on or offwhenever For example, while playing a scene of a train in motion, you can display the view from either the you want.
Press 'I'/4, to select [PARENTAL CONTROL], ENTER. (CUSTOM PARENTAL PARENTAL CONTROL, Parental CONTROL] appear. You can set 2 kinds of playback the desired disc. • (ustom The options for [PARENTAL CONTROL) then press restrictions for Control You can set playback restrictions so that the system will not play inappropriate discs. • Parental Control Playback of some DVD VIDEOs can be limited according to a predetermined level such as the age of the users.
To turn off Control function 1 the Custom Parental Press ,I,/4, to select [PARENTAL CONTROL], ENTER. Follow steps 1 through 3 of "Preventing playback of specific discs [CUSTOM PARENTAL CONTROL]." The options for [PARENTAL then press CONTROL] appear.
The display for setting the playback limitation level appears. PARENTAL CONTROL PARENTAL CONTROL LEVEL: OFF The lower the value, the stricter the limitation. 5 Press .I'/4, to select [STANDARD], press ENTER. The selection displayed. items for [STANDARD] then are To turn off the function Set [LEVEL] Parental to [OFF] in Step Control 8. To play a disc for which Control 1 PARENTAL CONTROL is Insert the disc The display OTHERS_ your number The area is selected.
Area O Code To confirm your password, re-enter it using the number buttons, then press ENTER.
You can select munber To select buttons, the TV channels by using the buttons. the TV then channels, press the number ENTER. • Depending on the TV, you may not be able to control yore TV o2 to use some of the buttons above. You can control your TV (SONY only) with the supplied remote. : > Number buttons ENTER "------ Z TV Controlling remote To : @ control TVs with the the TV Yon can control the TV by using following buttons.
By pressing Number TV's input source TV/\'IDEO 0 No input source (Defaul0 1 VIDEO1 2 VIDEO2 SONY TV and this system, chmlges the system mode to "DVD," and then switches the TV's 3 VIDEO3 4 VIDEO4 input source you set with one button push.
• This fimction is only for SONY TVs. (This fimction may not wolk on some SONY TVs.) • If distance between TV and this system is too tar, this fimction may not work Install the system near the TV • Keep the remote pointed in the direction of the TV and this system while enteling the code FUNCTION : i _/_/÷ ENTER Selecting the connected component You can use a VCR or o_er components connected to the VIDEO/SAT jacks on the rear panel.
Using a digital satellite receiver or other components with a high audio output level Connect the satellite receiver to the VIDEO ...... TUNER MENU SAT jacks oll the rear panel. You can also connect the components with a high audio ............FUNCTION output level (including 2V r.m.s components, such as MD, etc.) to the VIDEO 'SAT jacks, and perform the following occurring. 1 4 distortion Press FUNCTION repeatedly "VIDEO" display. 2 3 to prevent appears o <-/I"/4,/-> ENTER Press AMP MENU.
Each time you press TL%TER, BAND, the I 6 _ I _ U T_D I_ band changes between FM and AM. t Press 'I'/4, to select the preset number you want. Adjust the volume by pressing VOLUME +/-. To turn off the radio Press I/_). 7 Press ENTER. To listen stations The station is stored. Use manual E Repeat 1 to 7 to store other stations, To change (except preset the AM for Saudi + tuning. number from Step l. To change tuning in Step 2. For automatic tuning, press and hold TUNING or .
5 6 Press ENTER. Create a name by using the cursor buttons, Press '1"/4, to select a character, then press -1' to move the cursor to the next position. Letters, numbers, and other symbols can be input for a radio station name. If you make You can set the system to turn off at a preset time, so you can tall asleep listening to nmsic. You can preset the time in 10 minutes decrements. a mistake Press ¢ei-), repeatedly until the character iii;17y;;i;i'T'iiii to sLEEP ..........
The brightness of the front panel display can be set to either of 2 levels. _i) _¸ iiil} Hi-- AMP You can return the system parameters, such as speaker settings and preset stations, to the default settings. MENU I/(b £ • _:i:i ¸ i;i;:_ ¸ _;i__!;:ii/ i! ENTER .... 1 2 iii iii Press I/_ to turn on the system. Press II, _, and I/(_ on the system at the same time. "COLD RESET" appears in _e front panel display and the default settings are returned. 1 2 3 4 Press AMP MENU, Press .
3 Press't'/,l, to select [CUSTOM], then press ENTER. The Setup Display appears. By using the Setup Display, you can make various ac!iustments to items such as picture and sound. You can also set a language for the subtitles and the Setup Display, among other things. For details on each Setup Display item, see pages from 72 to 78. For an overall list of Setup Display Press ,t,/4, to select the setup item from the displayed list: [LANGUAGE SETUP], [SCREEN SETUP], [CUSTOM items, see page 94.
[LANGUAGE Selected setting To reset all of the [LANGUAGE SETUP] allows you to set various languages for the on-screen display or sound track. [SETUP] settings 1 SETUP] Select [RESET] in Step 3 and press ENTER. Select [LANGUAGE SETUP] in the Setup Display. To use the display, see "Using the Setup Display" (page 71). 2 Select [YES] using I,/4,. You can also quit the process and return to the Control Menu by selecting [NO] here. 3 Press ENTER.
[4:3 LETTER BOX] [SCREEN SETUP] [4:3 PAN SCAN] Choose settings according connected. to the TV to be Select [SCREEN m the Setup Display. SETUP] To use the display, see "Using the Setup Display" (page 71). [16:9] The default settings are underlined. SCREEN SETUP • Depending on the DVD, [4:3 LETTER selected automatically vice versa.
[OFF] Turns offthe (page screen saver. 73). Adjust progressive ratio • [BACKGROUND] Selects TV the background screen or DATA color in stop mode CD (MP3 [JACKET PICTURE] or picture or while on the playing a CD on your compatible picture is already recorded on the disc (CD-EXTRA, etc.).
selects PCNI, DTS, Dolby Digital audio tracks in this older. • [MULTI-DISC RESUME] VIDEO CD only) [CUSTOM SETUP] Use this to set up playback settings. Select [(USTOM sound, and MPEG (DVD VIDEO/ Switches the Multi-disc Resume setting on or off. Resume playback point can be stored in related and other SETUP] in the Setup Display. To use the display, see "Using the Setup Display" (page 71). memory for up to 40 different DVD VIDEO/ VIDEO CD discs (page 30).
Position diagram [SPEAKER SETUP] To obtain the best possible surround sound, set for the size of the speakers you have connected and their distance from yottr listening position. Then use the test tone to acliust the level and the balance of the speakers to the same level. Select [SPEAKER SETUP] in the Setup Display. For details, see "Using the Setnp Display" (page 71). The default settings are nnderlined.
[L] 0 dB Set this between [R] Set this between 6 dB and 0 dB in 1 dB increments 0 dB Set this between [CENTER] 0 dB 1.0 - 7.0 m/ 4 - 23 ft 6 dB and 0 dB in 1 dB increments 6 dB and +6 dB in 1 dB increments (appears when you 0,0 _]7.0 m/ 0 - 23 ft set [(;ENTER] to ['iT S] izl tile [SIZE] setting.) [SUBWOOFER] 0 dB • [LEVEL Be sure to change the value in the Setnp Display when yon move the speakers. [FRONT] 3.
The Control Menu appears. 2 Press `}/4, to select then press ENTER. [SETUP], The options lbr [SETUP] appear. 3 Press `}/4, to select [CUSTOM], then press ENTER. The Setup Display appears. 4 Press ,}/4, repeatedly to select [SPEAKER SETUP], then press ENTER or-). _1 Press ,}/4, repeatedly to select [TEST TONE], then press ENTER or -). 6 Press ,}/4, repeatedly to select [ON], then press ENTER. You will hear the test tone from each speaker in sequence.
If you have any questions or problems concerning your system, please consult your nearest Sony dealer. On cleaning discs • Do not use a commercially cleaning On power sources available CDiDVD It may canse a malfimction. On your TV's color • AC power cord (mains lead) must be changed the qualified disc only at seladce shop.
On handling discs • To keep the disc clean, handle the disc by its edge. Do not touch the snrface. • Do not stick paper or tape on the disc. If you experience aW of the following difficuhies while using the system, use this troubleshooting guide to help remedy the problem before requesting repairs. Should any problem dealer.
could affect picture quality If you still experience problems even when you connect your system directly to you! TV, tl), connecting yore system to your TV's S video input (page 19, 23). Even though you set the aspect ratio in [TV TYPE] of [SCREEN SETUP], the picture does not fill the screen. • The aspect ratio on the disc is fixed. • Depending on tile DVD, the output signal may not be the entire 5.1 channel.
• MoisUlre has condensed inside the system and :nay cause dan:age to the lenses. Remove the disc and leave the system t:u::ed on tbr about half an hour The MP3 audio track cannot be played.
The angles cannot • Multi-angles played be changed. are not recorded • The DVD prohibits A disc cannot appears on the DVD being (page 59). changing be ejected (When letters/numbers display) the angles and "LOCKED" in the front panel display. When the self-diagnosis • Contact yore Sony deale_ 05 local autholized sezvice facility [Data error] appears appear in the on the TV screen Sony when thnction is activated to prevent the system from malfunctioning, a 5character service number (e.g.
(CD: k Emission 790 mn) dmation: continllOllS AUDIO POWER SPECIFICATIONS Signal Ibrma* system North American, Latin, and Mexican NTSC for the US model POWER TOTAL OUTPUT AND HARMONIC DISTORTION: Other models: Frequency NTSCiPAL response (at 2 CH STEREO With 3 ohm loads, both CD: 2 Hz to 20 kHz (±1.0 dB) 55 watts per channel Amplifier Nolth .
Speaker unit 65 man (2 is inches) Rated impedance Dimensions (approx) cone type 2.7 olnns 90 x 132 × 107 mm dia. Design and specificalions without notice. are subject to change (3 's x 5 1/4 x 4 '4 inches) (wil_/d) Mass (approx.) 0.6 kg (1 lb 6 oz) Center Speaker syslem Speaker unit Rated impedance Dimensions (approx) Bass reflex 65 iron (2 is inches) dia. cone type 2.7 olnns 200 × 92 × 107 mm (7 's x 3 is × 4 '4 inches) Mass (approx.) (w %'d) 0.
Dolby Surround Pro Logic As one method of decoding Dolby Surround, Dolby Surround Pro Logic produces/)ur Album Section of a music piece or an image on a data CD containing MP3 audio tracks or JPEG files. Chapter Subdivision composed o1"a title on a DVD. A title is of several chapters. channels from 2 channel sound. ( ompared with the/)rmer Dolby Surround system, Dolby Surround Pro Logic reprodnces left-to-right panning more natnrally and localizes sounds more precisely.
and Video mode. DVD-RWs created inVideo mode have thesame format asaDVDVIDEO, while discs created inVR(Video Recording) mode allow thecontents tobeprogrammed or edited. DVD+RW A DVD+RW (plus RW) is a recordable and rewritable disc. DVD+RWs use a recording fomrat that is comparable to the DVD VIDEO fomrat. Control A JPEG image recorded on a DATA CD or a DivX video on a DATA CD DATA DVD*. ("File" is an exclusive definition for this system.) A single file consists of a single image or movie.
VIDEO CDs also contain compact audio data. Sounds outside the range of human hearing are compressed while sounds we can hear are not compressed. VIDEO CDs can hold 6 times the audio information of conventional andio CDs. There are 2 versions of VIDEO CDs. • Version 1.1 : You can play only moving pictures and sounds. • Version 2.0: You can play high-resolution pictures and el_ioy PBC functions. This system conl)rms 88 G8 to both versions.
The language spellings confornl to the ISO 639:1988 (E/F) standard.
For more iN)m_ation, Front refer to the pages indicated in parentheses.
Front panel display About the indications [] in the front panel display Lights up during PBC playback. [] (VIDEO CD only) (35) [] [] Lights up when the time information of Current sound effect (Except for JPEG) (58) [] Current surround format (Except a title or chapter appears in the front panel display.
Rear panel 92c8 [] SPEAKER jacks (14) [] VIDEO/SAT [] COMPONENT AUDIO IN jacks [] MONITOR OUT (VIDEO / S VIDEO) jacks (19) [] AM terminal [] FM 75£_COAXlALjack (21,23) VIDEO OUT jacks (19) (18) (18)
Remote .............. _ F_2"2Z'2 .................. ,,% [] CLEAR, -/-- (26, 31, 65) [] TOP MENU (34) [] ('-/'t'/4,/-)/ENTER 71) [] d'-'* RETURN (35) [] _®/ (play) (29) The E:>-button has a tactile dot.
You can set the following items with the DVD Setup Display. The order of the displayed LANGUAGE items may be different SETUP OSD -- SCREEN displayed SETUP - TV TYPE .2- (Select the language you want to use from the MENU-- from the actual display. 4:3 ETTER BOX 4:3 PAN SCAN 16:9 language list.) (Select the language you want to use from the COLOR , SYSTEM*L F PAL [- NTSC displayed language list.
SPEAKER SETUP - SIZE--- FRONT -• CENTER_ L. YES YES NONE - SURROUND T BEHIND _SIDE NONE 8UBWOOFER- YES - DISTANCE _ FRONT -1.0 m - 7.0 m/ | 4 ft - 23 ft I-CENTER -- 0.0 m - 7.0 ml | 0 ft - 23 ft L SURROUND-0.0 m- 7.
i_i_ii_'i_i,i_i _i!_i!_i_i_i_i_iiiiil _!iii_!i!_ii_!i_!i_!i_!i_!i_!i_!i_!i_!i_!i_!i_ You can set the following AMP items with AMP MENU menu LDIMMER f DEMO --]-DEMO DIMMER _DIMMER LDEMO ATTENUATE 96c8 OFF _ATT LATT ON ON OFF ON OFF on the remote.
Numerics 16:9 73 4:3 LETTER BOX 73 4:3 OUTPUT 74 4:3 PAN SCAN 73 5.
Scan 45 SCENE 46 Scene 87 SCREEN SCREEN SAYER SETUP 73 73 Searching 45 SETUP 71 Setup Display 71, 94 Shuffle Play 32 SIZE 76 SLEEP 69 Slide show 40 Slow-motion play 45 Sound Field 55 SPEAKER SETUP 76 Speaker setup 28 Speaker System Hookup SUBTITLE 59, 72 14 T TEST TONE 77 THEATRE SYNC TIME/TEXT 65 47 TITLE 46 Title 87 TRACK 46 Track 87 TRACK SELECTION Troubleshooting TU_'ER MENU TV Hookup 19 TV TYPE 73 U Usable discs 6 V VIDEO 98c8 CD 87 80 67 75
Sony Corporation Printed in Korea http://www.sony.