DVD Home Theatre System Operating Instructions O,O,T.LAUD,O_'_J7 v lD E0 Twin _ _,_ito, _,_ Drive 5ubwonfer DA V-FX500 02006 Sony Corporation (_ H .
To reduce the risk of fire or electric shock, do not expose this apparatus to rain or moisture. Caution - The use of optical instruments with this product hazard. will increase eye Do not install tile appliance in a confined space, such as a bookcase or builtqn cabinet. To prevent fire, do not cover tile ventilation of tile apparatus with news papers, table-cloths, curtains, etc. And don't place lighted candles on the apparatus.
•Donotinstall tileunitinaninclined position. Itis designed tobeoperated inahorizontal position only. •Keep tileunitand discs away from equipment with magnets, s/Ich as microwave ovens, or large loudspeakers. • Do not place heavy olziects on flaeunit. strong • If the unit is brought directly from a cold to a warm location, moisture may condense inside the DVD Home Theatre System and cause damage to the lenses.
Welcome! ................................................ About This Manual ................................. 3 6 This System Can Play the Following Discs ................................................. 6 Getting Started - BASIC- Step 1: Assembling the Speakers ............................ 10 Step 2: Connecting the System and TV .............................................. 13 Step 3: Positioning the System ...17 Step 4: Performing the Quick Setup ........................................
Changing the Brightness Panel Display of the Front .................................. Advanced Settings Adjustments Locking Discs 65 and ....................................... (CUSTOM CONTROL, (,6 PARENTAL PARENTAL CONTROL) Getting Optimal Surround Sound for a Room .............................................. 69 (SPEAKER Calibrating FORMATION) the Appropriate Automatically (AUTO Using Display the Display L:mguage ........................
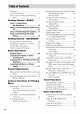
• The instructions in this manual describe the COll[rolson the remote. You call also use the controls on the system if they have the same or similar names as those on the remote. • The Control Menu items may be different depending on the area. • "DVD" may be used as a general term R)r DVD VIDEOs, DVD+RWs/DVD+Rs, and DVD-RWs/DVD-Rs. Format of discs • Measurements are expressed in feet (ft) lot Norlh American models. DVD-R Disc logo DVD VIDEO VIDEO DVD-RW/ _ RW R R4.
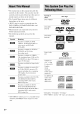
Note about The disc will not play if it has not been correctly CDs/DVDs finalized. operating The system can play CD-ROMs/CD-Rs/CDRWs recorded in the following Note that some playback functions may not work with some DVD+RWs/DVD+Rs, even if lormats: - audio CD format - CD Graphics For more inMrmation, see the instructions for the recording device. they have been correctly (Latin American models only) finalized. In this case, - vide() CD lk)rmat view the disc by normal playback.
Region code You[" system has a region code printed oll the rear of the unit and will only play DVDs labeled with the same region code. DVD VIDEOs labeled _ will also play on this system. If you try to play any other DVD VIDE(), the message [Playback prohibited by area limitations.] will appear on the TV screen. Depending on the DVD VIDEO, ilo region code indication may be given even though playing the DVD VIDE() is prohibited by area restrictions.
See Unpacking in Specifications, page 86. Inserting batteries into the remote You can control tile s>stem using tile supplied remote. Insert two R6 (size AA) batteries b> matching the @ and @ ends on tile batteries to the markings inside the compartment. When using the remote, point it at the remote sensor [] on the system. m • Do not leave the remote • Do not use a new battery in an extremely hot or humid place. with an old one.
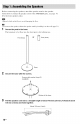
Belore connecting the speakers, attach the speaker stand to the speaker. About how to connect the speaker cords to the SPEAKER .jacks, see page 14. (For the front speakers only.) • Spread a clog1 on the floor to avoid damaging the floor. • You can use tile speaker withoul the speaker sland by installing it on Ille wall (page 21). 1 Secure the post to the base. The long post is lor lloor use. 1he short post is [or tabletop use. Post (long) or _ Post(sho_) Base Secure the base with the screws.
4 Draw the speaker cord through the hole on the base. Then stand the speaker up, and untwist and straighten out the speaker cord. Untwist and straighten out the speaker cord. __ _t_mo, the spea keroo rd 5 Secure the pedestal to the post with the screws. Screws with washer (long) (3) (supplied) 6 Connect the speaker cords to the speaker, then run them through the slots (O, 0, O, and 0) all the way.
Slide the speaker down slowly onto the pedestal. o (b Adjust the length of the speaker cord• m • Do not catch the speaker cord between • Do not drop the speaker when mounting. Secure the speaker with the Screws with washer (short) (2) (supplied) 12us the speaker screws and the pedestal. in order @ to @.
This hookup is the hasic connection of the system to the speakers and TV. For other TV connections, see page 22. For other component connection, see page 26. To accept progressive signals, see page 24. Refer to the c(mnection lollowing diagram below, and read the additional information from (_) to @ on the pages.
(_) Connecting Required The connector the Speakers cords and coh)r tube ollhe speaker cords are Ihe same color as the label of Ihe jacks to be coRIlected. • Do notcatch the speakercord insulationin tileSPEAKERjack. To avoid short-circuiting the speakers Short-circuitiug of tile speakers ma> damage the s>stem. To prevent this, be sure to folh)w these precautions when c(muecting the speakers.
• When you wahl Io outpul tile TV sound o1 stereo sound of a 2 channel source from tile 6 speakers, selecl tile "Dolby Pro Logic," "Dolby Pro Logic I1 MOVIE," or "Dolby Pro Logic 11MUSIC '_ sound field (page 32). Connecting the Antenna (Aerial) To connect the AM antenna (aerial) _i upplied) Antenna (aerial) The shape and the lenglh ol the antemm (aerial) is designed or roll up Ihe antenna (aerial). to receive AM signals. Do m)l dismantle 1 Remove only the loop part from the plastic stand.
To connect the FM wire antenna (aerial) ( onnecl the FM wire :mlenna (aerial) lo the (_OAX1AL FM 75 £_jack. a FM wire antenna (supplied) (aerial) FM wire antenna (supplied) (aerial) O¥ _ COAXIAL • Be sure to fully extend • Afler connecting _ FM 75 _jack Ihe FM _.x, rireantenlla COAXIAL FM 75 _jack (aerial). tile FM wire anlenna/aerial) keep il as horizontal as possible.
• When you change tile positions of tile speakers, it is recommended that you change the settings. For details, see "Getting Optimal Surround Sound for a Room" (page 69) and "Calibrating the Appropriate Settings Automatically" (page 71). Positioning the speakers For the best possible surround sound, all the speakers other than the subwouli2r shuuld be the same distance lq'omthe lislening positiun tO). The li'ont speakers can be placed l)'om 0.0 to 7.
Follow Ihe sleps below to make the minimum number el basic ad ustrnenls lk)r using lhe systern. -- I/1_ 5 Press -1,/,1,to select a language. The system displays in the selected 6 © :a :} ©: <2 the menu and subtitles language. Press @. The Setup Displa_ fur selecting the aspect ratio of the TV to be connected appears. 0 :7 7 1 Turn on theTV. 2 Press |/@. 7 Press .I,14.to select the setting that matches your TV type.
10Connect the calibration mic to the • Avoid being in the measurement area and making noise during the measurement (which takes about 1 minute), as it may interim:rewith A.CAL MIC jack on the front panel and press .1"/4,to select [YES], then press ®. llleas/irement. Set up the calibration mic at the ear level using a tripod, etc. (nut supplied). The li'ont 11Unplug the calibration mic and press <-/ -> to select [YES].
• DEMO OFF: sels the demonslralion olT. 4 Press @. The selling is reflected. 5 Press AMP MENU. The AMP mellu turns o[1. ; f77 : : ) b : ;7) 7 MENU LE_ 7_ APler connecting the AC power cord (nmins lead), the demonslralion appears in the h'ont panel disphty. When you press I/_ on the remote, Ihe demonslra'.iOll itlrlls oil _. • When you press i/(/) on the system, filedemonstration does not turn off.
4,6 rnm (3/16 inch) 10 mm (13/32 inch) Prepare screws (not supplied) that are suitable for the hole on the back of o each speaker. See the illustrations below. o, 4 k mrn (5/32 ca i i ii ii !ii inch) o,. I 4 30 rnm (1 3/16 inch) Hole on the back of the speaker • Use screws that are suitable strength. As a plaster l_r tile wall material board wall is especially and fragile, attach the screws securely to a beam and listen them to the wall.
Selecl a hookup Connecting suitable for lhe jacks on your TV. the video/HDMl* cords Sends a played back DVD image to a TV. Check the jacks of your TV, and choose conneclion in order l_x)m _ (slandard) to _ (HDMI). O melhod _, 0, _, or _. Picture quality improves TV with HDMl'jack To HDMb IN To COMPONENT VIDEO OUT To HDMP OUT To VIDEO To S VIDEO Q TV with VIDEO IN jack TV with S VIDEO IN jack TV with COMPONENT VIDEO IN jacks ": HDMI (high-definition multimedia interl.
HDMI, the HDMI logo and High-Definition Multimedia Interlace trademarks or registered trademarks of HDMI Licensing LLC. _) To connect to a TV with the VIDEO IN jack Connect the video cord. _ _) To connect to a TV with the S VIDEO Yellow IN jack Connecl an S video cord (not supplied). When using the S video jack instead of the video jacks, your TV monitor must also be connected via an S video jack.
Does your TV accept progressive signals? Progressive is the method for displaying TV images which reduces flickering, and sharpens the image. To display usillg this method, you need Io connecl Io a TV that accepts progressive signals. .............................................. i_i PROGRESSIVE iil iii i!:ii! i_ ,- FUNCTION +/- "PROGRE" lighls up in the front panel display when the system oulputs progressive signals. 1 Press FUNCTION +/- repeatedly to select "DVD." 2 Press PROGRESSIVE.
• INTERLACE Select this selling when: - your TV does not accept progressive signals, or, - your TV is connecled to jacks oilier Ihan lhe COMPONENT OUT (V1DEO/S VIDEO)). You cannot select NORMAL About DVD software (INTERLACE) types and the while "HDMI" conversion VIDE() OUT jacks (MONITOR lights up in tile front panel display. method O _" _Q DVD software can be divided ii'_lo 2 types: lilmq_ased sollware and video-based sofPa_are.
You can enjoy other componenl by' connecling lhe V1DEO/AUD10 OUT jacks ol another componenl. Connecting the system and the other component Outputs the other component through the speakers of this s_stem. VCR digital satellite receiver or PlayStation 2, etc. To TV/VCR1 (COMPONENT _,_ _ IN) AUDIO To TV/VCR1 _ VIDEO IN) (VIDEO IN/ COAXIAL) _)::@il To TV/VCR2 (VIDEO To TV/VCR2 (OPTICAL DIGITAL IN) IN/ AUDIO IN) VCR, digital satellite receiver or PlayStation 2, etc.
To listen to the portable audio source sound through the system Connecl lhe audio outpul jacks of lhe portable audio source lo lhe AUDIO 1N jack on lhe front panel of Ihe syslem with lhe stereo mini-plug cord (nol supplied). O ii •When listening Io MP3 format recordings using a portable audio source, you can enhance the sound. Press FUNCTION +1-to select "AUDIO." Connect Ihe porlable audio source. Press SOUND FIELD repeatedly "_ I._ m unlil "A.F.D. STD" appears in the fronl panel display.
4 Press DISC 1-5. Press the button of the disc number you waut. When no disc is in the disc stocker you selected, "No Disc" appears. PerR)rm next Step while "*DISC- 1* (eg., 2-5)" flashes. ||||| 5 6 Disc slot _ FUNCTION Adjustthe volume Press _. Load a disc. Push the disc into the disc slot until the disc is pulled in automatically. The disc is drawn into the system automatically.
To save mode the power in standby About DVD 5-DISC changer Press I/(_) while the syslem tm'ns on. To cancel standby rhode, press I/(_) once. Additional Stocker operations Disc [ To Press Stop • Pause II Resume play after pause II or D> Go to the next chapter, track, or scene _ (except for JPEG) Go back to the preceding chapter, track, or scene _ (except for JPEG) Mute the sound MUTING. To cancel stocker which transports and the playing unit.
Changing the input level of the sound from connected components Distortion may occur when listening to a component connected to the TV/VCR 1 or 2 ,jacks on the rear of the unit or to the AUDIO IN ,jack on the front panel. This is not a mallunction and will depend on the component connected. _i © © To prevent this. you Call chauge the input level from the sound of the other components. 1 Press FUNCTION +/- repeatedly until "TV/VCRI," "TV/VCR2," or "AUDIO" appears in the front panel display. °_.........
You can enjoy TV or VCR sound l?'om all the ||||| speakers ill this system. For details, see "TV Hookup (Advanced)" (page 22) and "Other Component (page 26). Hookup" Mus,c ! ? i _ i iii : g2:2 : 4 I 2 sound mode for MOVIE/ : ) SOUND FIELD You can choose a suitable movies or music. Press FUNCTION +/- repeatedly until "TV/VCRI" or "TV/VCR2" appears in the front panel display, Press MOVIE/MUSIC Press SOUND FIELD repeatedly until display.
Sound field Display 2 CHANNEL STEREO 2CH STEREO HEADPHONE THEATER HP THEATER HEADPHONE 2 CHANNEL STEREO HP 2CH ,i, Use DCS Technology mm_ You can take advantage of surround sound simply by selecting one of system's preprogrammed sound fields. They bring the exciting and powerful into your home.
mode reproduces • When the input signal is multi channel source, Dolby Pro Logic and Dolby Pro Logic 1I MOVIE/MUSIC are canceled and the multi cllannel source is output directly. • When the bilingual broadcast sound is input, Dolby Pro Logic and Dolby Pro Logic 1I MOVIE/MUSIC are not effective. Enjoying Sound About DCS Digital Cinema environment of their studios and imegraled the data <51the measuremenl and Sony's own DSP (Digital Signal Processor) technology lo develop "Digital Cinema Sound.
Mulli channel surround formals are dowumixed lo two channels. To turn the surround effect off Press SOUND FIELD repeatedl_r until "A.F.D. ST[)" or "2CH STERE()" appears in the front panel display. • Tile system memorizes the last sound field selected for each function mode. Whenever you select a filnction such as DVD or TUNER, the sound field that was last applied to function is automatically applied again.
Watching frame by frame (Slow-motion Play) (DVD VIDEO, CD only) DVD-R, Press -',1/<1_ or )"l_/l'_ (Scan, Slow-motion Play, DVD-RW, VIDEO when the s2rstem is in pause mode. To return to the normal playback speed, press I2:>. Each lime you press <|/<1_ or Freeze Frame) ),.1_/11_ during Slow-motion Play, the playback speed changes. Two speeds are available.
Selected row ||||| 3 You can search a DVD by litle er chapter, and Press @. [** (*_')1 changes Io 1- - (**)]. you can search a VIDEO CD/Super Audk) CD/ ( D/DATA CD/DATA DVD by track, index, or scene. As tides and tracks are assigned unique numbers on Ihe disc, you can select the desired one by entering its number. Or, you can search lor a scene using the lime code. 1 Press C_ DISPLAY. (When playing a DATA CD/DATA DVD with JPEG image files, press O DISPLAY twice.) The Co,ltre, Me.u .ppe.
• When Ihe Control Menu display is turned off, you can search li_r a chapter (DVD VIDEO/DVD-R/DVDRW) or track (VIDEO CD/Super Audio CD/CD) by pressing tile number buttons and ,<). r_ • You cannot search fiwa scene on a DVD+RW/ DVD+R using the time code. (Picture Navigation) You can divide the screen into 9 subscreens and find the desired scel_e quickly. 1 Press PICTURE RAVI during playback. The lollowing display appears.
• To playfiom thebeginningofthe disc,press• twice, then press [2:>. (Resume To enjoy a disc that is played before by resume playback (Multi-disc Resume) Play) (DVD VIDEO, VIDEO CD only) This system stores the point where you stopped the disc lor up to 40 discs and resumes playback When _ou stop the disc. the system remembers the point where you pressed • and "Resume" the next time you insert the same disc. If you store a resume playback point lk_r the 41st disc. appears in the front panel display.
PROGRAM (Program 0:00:00 T Play) You can play the contents of a disc in the order yOU w_tnt by arranging lhe order nf Ihe tracks on lhe disc to creale your ()_,_nprngraln. You call program Select the track you want to program. For example, select track [02]. up Io 99 tracks. Press I'/4, to select [02] under [T], then press _.). The track number may be displayed in 3 digits fbr a Super Audio CD. • You can prograln the Irack on Ihe current disc only. 1 Press O DISPLAY. 1- The Conlrol Menu appears.
To 1 change or cancel a program Follow steps 1 to 3 of "Creating Your Own Program." 2 Select the program number of the track you want to change or cancel using ,1-/4,. If you want to delete the track from the program, press CLEAR. 3 Follow Step 5 for new programming. To cancel a program, select [--] under [T], then press Q. To cancel programmed 1 all of the tracks in the order Follow steps 1 to 3 of "Creating Your Own Program." 2 Press I, and select [ALL CLEAR]. 3 Press Q.
To return to normal play Press CLEAR, or select [OFF] in Step 3. To turn the off Control Press O DISPLAY repeatedly Menu is turned off. Menu until the Control • You cannot use this function with VIDEO CDs and Super VCDs with PBC playback. (Repeat Play) ||||| You can play all 1he tilles, lracks or albums on a disc or a single litle, chapler, Irack, or album repeatedly. You can use a combinalion ol Shullle or Program Play' modes. 1 Press Q DISPLAY during playback.
• When playing a DATA CD or DATA DVD iiiiiii_! )!i!g{il] i]i_ii_ i]!!]ii]]!i]i !))iii ii]iiiii_!!_i!i;]i _ill]i]i]]i!: !i!I i!ii !ii!!_ii_ i;_i i_ii I_;:ilili!ii!i_i_i ;i]i!!]!!!!!i!!!ii i!i!_ii_ii_ililili !]i_]i! !!ilili! !iiliI! !!iliiii! !!ilili! !iiliI! !!iliiii! !! ilili! !iiliI! !!iliiii! !!ilili! !iilii! !! !iiiii!!; i]i!i • [OFF]: does not play repeatedly. • [ALL DISCS]: repeats all of the discs. • [ONE DISC]: repems all of the albums on the current disc.
m •12: MAIN], 12: SUBI, and 12: MAIN+SUB] do not appear when one audio stream is recorded on the disc. • When playing a VIDEO CD, CD, DATA CD (MP3 audio), or DATA DVD (MP3 audio) The defaull setting is underlined. When playing a DVD VIDE() recorded in multiple audio formats (PCM, Dolby Digital, MPEG audio, or DTS), you can change the audio format. If tile DVD VIDEO is recorded with multilingual • [STERE()]: tracks, you can also change the language.
• When playing a DVD Example: Dolb_ Digital 5.1 ch Surround LFE (Low Frequency (L/R) Effect) Some DVD-Rs/DVD-RWs in VR (Video Recording) mode have two types of titles lor playback: originally recorded titles ([ORIGINAL]) and titles that can be created on recordable Currently playing program format 1 Example: DVD players for editing ([PLAY LIST]). You can select the type of title to be played. Press O DISPLAY when the system is in stop mode. Dolb_ Digital 3 ch The Control Menu appears.
• When playing VIDEO CDs with PBC functions, the playing time is displayed. mlra • The system can only display the first level of the DVD/CD text, such as the Disc name or title. Viewing the playing time and remaining time in the front panel display You can check disc information remaining Each time _ou press DISPLAY while pla2ring the disc, the display changes (!) ---+ @ ---+ ... ---+ Checking remaining items may disappear playing # ..._.
• When playing a VIDEO CD (without PBC functions), Super Audio CD, or CD • T Bit rate* >::>:=: >::_ Pl:cring time or"the current truck • T **:** Remaining time of the current track Playing time of the currenl Remaining disc time of the current disc • When playing a DATA CD (MP3 audio) or DATA DVD (MP3 audio) • T Album name Track name >:=>:: : >:=_ Pla2ring time of the ctlrrent truck • Only alphabetical letters and numbers can be displayed.
| If various angles (multi-angles) || for a scene are If subtitles are recorded on a disc, you can turn recorded on a DVD VIDE(), you can change the viewing angle. the subtitles multilingual Press ANGLE during playback. you can change the subtitle language while playing, or turn the subtitles on or off whenever Each time you press ANGLE, the :ingle changes. • Depending on tile DVD VIDEO, you may notbe able to change tile angle even if multi-angles are recorded on tile DVD VIDEO.
(A/V S YN C) When the sound does not match the pictures on the screen, you can adjust the delay between the Press Q DISPLAY when the system is in stop mode. Press I"1,I,,to select :: :{{{_' then press @. [A/V SYNC], The options appear. lot [A/V SYNC] playback area and a multi-chamtel playback area. You can select the playback area you want to listen to. 1 The Control Menu at)i'_e:u's. 2 on Some Super Audit) CDs consist of a 2 channel picture and sound.
m • Each selected play mode layer function or phlyback works only within the area. • When you select a CD layer, you cannot playback area. change a • Super Audio CD audio signals are not output from the HDMI OUT (high-definition out)jack. muhimedia interface What is MP3/JPEG? MP3 is audio compression lechnology that salisfies Ihe 1SO/MPEG regulations. JPEG is image cornpression technology.
• which have the extension ".MP3" (MP3 audio track) or ".JPG"/".JPEG" (JPEG image file) • which conlorm to the DCF* image file format ,i, "Design rule for Camera File system": linage standards lk)r digital cameras regulated by Japan Electronics and Information Tecbnology Industries Association (JEITA). • The system will play any data with the extension ".MP3," ".JPG," or ".JPEG" even if they are not in MP3 or JPEG format. Playing this data may generate a loud noise which could damage your speaker system.
The selected track starts playing. You can turn the track list off by pressing MENU• Pressing MENU again will display the album list. To stop Press II. playback To play the audio next or previous MP3 track Press 1'91"11/1_1. Note that )ou can select the Selecting or album 1 an MP3 audio track Load a DATA CD or DATA DVD. The systern starls playing h'om the first album. 2 Press MENU. The albums recorded • _, played, cannot return to the previous album by pressing I',_1.
• When selecting an image Press PICTURE NAV1. Rotating direction hnages of files in the album appear in 16 subscreens. 1 2 3 4 5 6 7 8 9 10 11 12 13 14 15 16 Press÷/1"/,l,/@to to view and selectthe press image Press CLEAR you wanl to return to normal view. To stop playback Press I. @. • A scroll box is displayed at the right side of the screen. To display the additional image files, select tile bottom image and press 4,.
Press .1"14, to select the album you want and press [=>. Tile s2rstem starts pl:t_ lug the selected album. You can turn the album list on and off by pressing MENU repeatedly. You can play a slide show with sound by first placing both MP3 and JPEG files in lhe same album on a DATA CD or DATA DVD. When you play back Ihe DATA CD or DATA DVD, selecl [AUTO] mode as explained below. 1 Load a DATA CD or DATA DVD. The system slarls playing from the first album. 2 Press II. The system stops playback.
3 Press t-14, to select the setting you want. • [MODE2]: The image stretches The default setting is underlined. • [MODE3]: The image stretches the center of lhe screen. • [NORMAL]: sets the duration to about 6 to 9 seconds. (hnages that are four million pixels or more will lengthen the duration.) • [FAST]: sets the duration shorter than [NORMAL1. • [SLOW1]: Sets the duration [NORMAL]. longer than • [SLOW2]: longer than Sets the duration [SLOW ll. 4 Press @.
(PBC Playback) With PBC (Playback Control) functions, can enjoy simple interactive operations, functions, and other such operations. you search PBC playback allows you to play VIDEO CDs interactively by lollowing the menu on the TV screen. 1 2 3 4 Start playing a VIDEO CD with PBC functions. -% O The menu for _our selection €{n -rl €- appears. Select the item number you want by the number buttons. Press @. {n Follow the instructions in the menu for interactive operations.
To change the AM tuning Russian and (except for Eastern models) interval Middle The AM tuning interval can be set to either 10 kHz or 9 kHz. You can preset 20 FM stations, stations. Be|k)re luning, the "_:oltlme to lI'liniII1Ull'l.
Naming preset stations You can enter a nanle for preset stations. These names (R)r example, "XYZ") appear ill the Preset radio stafions ill the system's memory first (see "Presetting Radio Stations" (page 56)). 1 Press FUNCTION +/- repeatedly until lk)r each preset station. "TUNER FM" or "TUNER AM" appears in the front panel display. Tile last received 2 system's front panel display when a station is selected. Note that 11omore than ()lie name Call be entered 1 station is tuned in.
Viewing the station name or frequency in the front panel display When the system is set to "TUNER AM" or "TUNER FM." you can check the l?'equeucy using the li'ont panel display. Broadcasting live daily. XM Radio oilers 160 digital radio channels olleriug music, news. sports, comedy, talk, entertainment, traffic and weather reports, with high qualily digilal sound. Press DISPLAY. Each time _ou press DISPLAY, changes as shown.
Press TUNING channel. • Residents in Canada please see information about XM Canada at the following webpage: (bttp://www.xn/radio.ca/). + or - to select a For slow tuning, press TUNING briefly. + or - For fasl luning, press and hold TUNING Connecting the XM Radio or Adjust the volume by pressing VOLUME +/-. Before operaling the system connecl Ihe XM Connecl-and-Play amenna to Ihe XM jack.
Selecting channels by inputting the channel number directly (Direct Tuning) 1 Press FUNCTION +/- repeatedly until "XM" appears in the front panel display. 2 3 4 You can select the channels you want directly' by presetting them using the preset numbers. You can preset up to 30 XM Radio channels. Press D.TUNING. Enter the channel number using the number buttons. Presetting 1 Press @. The selected channel channels Press FUNCTION +/- repeatedly until "XM" appears in the front panel display.
You can select a preset channel 30. from 1 to • The preset channel information will be updated depending on tile service provided by tile XM Satellite Radio lnc. that you have subscribed • When tile XM Radio ID appears display ("channel 0 ' is selected) to. in the front panel (page 59), tile MENU button is not available, and you cannot preset XM Radio channels. The XM Radio ID disappears when other than "channel 0 ' is selected.
Manufacturer Code number RCA_ROSCAN 503,510, SAMSUNG 515,517,544, 544 557,566, 569, 574 By adjusting your TV the remote with signal, the supplied you can control remote. • When you replace tile batteries of tile remote, the code number may reset itself to tile default (SONY) setting. Reset tile appropriate code number. Controlling remote TVs with the Press and hold TV I/_ while entering your TV's manufacturer's code (see the table) using the number buttons, Then release TV I/_.
• Depending on Ihe TV, you may not be able to control your TV or to use some of tile buttons above. • The TV mode turns off when you do not operate the remote for 10 seconds. THEATRE SYNC allows you to turn on your SONY TV and this system, changes the system mode to "DVD," and then switches the TV's input source you set with one button push. Preparing for the THEATRE SYNC function Register the TV's input source connected to this system.
By pressing Number TV's input source MOVIE/ MUSIC" HDMI 4 DYNAMIC BASS" HDMI 5 Reinforcing ,i. Except for North American models. You Operating for the THEATRE SYNC function Bass can reinl_)rce Press Pointthe remote to the directionofTVand this system,then pressTHEATRESYNConce. While tr:msmitting the code from the remote, tile TV button flashes. If this ftmction does not work, change the transmit trine. The transmit trine varies depending on the TV.
You can set the system to turn off at a preset time, so yuu can fall asleep listening to music. You can preset the time in 10 minutes decrements. The brighlness of the l):ont panel display can be sel Io eilher 7)12 levels. Press SLEEP. 1 Each lime you press this button, lhe minutes display (lhe remaining lime) changes as lollows: 2 Press AMP MENU. Press I,/4, repeatedly until "DIMMER" appears in the front panel display, then press @ or +. SLEEP 90M ---+ SLEEP 80M ---+ SLEEP 70M 3 Press .
Press .1-14,to select [ON -+], then press @. • If you have not entered a password Tile displa_ for registering appears. (CUSTOM PARENTAL PARENTAL a new password CONTROL, CONTROL) PARENTAL CONTROL Enter a new &digit You can set 2 kinds of phcrhack the desired disc. • Custom Parental restrictions for Control You can set playback restrictions so that the system will not play inappropriate discs. • Parental Control Playback password, then press [ENTER.
To play Parental 1 a disc for which Control is set Custom Insert the disc for which Custom Parental Control is set The [CUSTOM PARENTAL CONTROL] display appears. Press ,1"14,to select [PLAYER --*], then press (_. CUSTOM PARENTAL CONTROL Custom parental control is already set. To play, enter your password • If you have not entered a password The displa_ fop registering a new password and press _. appears. 2 Enter your 4-digit password using the PARENTAL CONTROL number buttons, then press @.
PARENTAL CONTROL PARENTAL CONTROL [LEVEL: _TAND_SB: 5 [LEVEL: OFF _ _A Press .1,/4,to select [STANDARD], 4: PG13 The lower Ihe value, lhe stricter the limilalion. then press @. The selection displayed. items for [STANDARD] are To turn off the Parental Control function Set [LEVEL] To play Control PARENTALCONTROL OTHERS_ 1 to [OFF] in Slep 8. a disc is set for which Parental Insert the disc and press L::>. The display lk)r entering your password appears.
Changing the password 1 Press 0 DISPLAY while the system is in stop mode, The Conh'ol Menu appears. 2 Press -I"/+ to select [PARENTAL CONTROL], (SPEAKER FORMATION) then press Q. The options lot [PARENTAL CONTROL] appear. 3 Press*14, to select [PASSWORD--*], Depending on the shape ol the room, there will be some speakers you cannot instalh For the better surlx)und SOtlnd, il is recommended Ihat firsl you decide the position 1 "DVD" appears display. then press @.
5 Press (-/--) to select a setting. • [ALL FRONT • [NO CENTER]: when installing and surround speakers. - NO CENTER]: when installing the fronl and surwund speakers ill lront of"the listening posilion. • STANDARD]: when installing all the _eakers normally. the front • [SECOND ROOM]: when installing the frolll speakers ill one speakers in another. roolIl alld surroulld • [NO SURROUND]: when installing the center and fl'ont speakers. 6 Press @. The selected setting takes effect.
• In order to enjoy the surround sound after you change the position of the speakers, it is recommended you set [SPEAKER FORMATION], and then set [AUTO CALIBRATION]. • To set [AUTO CALIBRATION], you need to connect the supplied calibration mic. • The front panel display indicates the selected [SPEAKER FORMATION]. It does not indicate tile speakers which output sound. • When you change tile [SIZE[ setting in [SPEAKER SETUP], Ibe [SPEAKER FORMATION] setting returns to [STANDARD]. (AUTO CALIBRATION) D. C. A.
face the calibration mic, and there should be no obstruction between the speakers and the calibration mic. Be quiet during the measurement. • lfan error message then select [YES]. All error message appears when: are not correctly connected. surround speakers connected. are not correctly front and surround connected. speakers subwoofcr mic follow tile message, the headphones are connected. the calibration mic is not connected.
Selected item SCREEN SETUP TV TYPE: By using the Setup Display, you can make various adjustments to items such as picture and SOUlld. For an overall list of Setup Display page 98. Displayed model. items differ depending items, see on the country iv .......................... Setup items Select an item using -1,/4,,then press m • Playback setlings stored in tile disc take priority over Ihe Setup Display seltings and not all Ihe functions described 1 16:9 may work. ®.
To reset all of the [SETUP] settings 1 Select [RESET] in Step 3 and press @. 2 Select [YES] using I,/4,. You can also quit the process and return to the Control Menu by selecting [NO] here. 3 Press @. All the settings explained on pages 74 to 80 return to the default settings. Do not press I/ (_) while resetting the system as it takes a few seconds to complete. [LANGUAGE SETUP] [LANGUAGE SETUP] allows you to set various languages for the oa-screen display or sound track.
[4:3 LETTER BOX] [SCREEN SETUP] Choose settings according COllllecled. [4:3 PAN SCAN] It) the TV Io be Select [SCREEN SETUP] in the Setup Display. To use the display, see "Using the Setup Display" (page 73). The default settings are underlined. [16:9] SCREENSETUP m • Depending on Ihe DVD, [4:3 LETTER BOX] may be selected i,utomatically instead of [4:3 PAN SCAN] or vice versa. • [HDMI RESOLUTION] • [TV TYPE] Selects the aspect ratio of the connected TV (4:3 standard or wide).
[YCBCR] Oulputs [RGB] [OFF] YCBCR signals. Lowers the standard Outputs RGB signals. • If tile playback picture becomes distorted, set [YCBCR] to [RGB]. • If the HDMI OUT jack is connected to equipment with a DVI.jack, [RGB] signals will be automatically output even when you select [YCBCR].
+ [CUSTOM SETUP] Use this to set up playback relaled and other settings. Select [CUSTOM SETUP] in the Setup Display. To use the display, see "Using the Setup • [MULTI-DISC RESUME] (DVD VIDEO/ VIDEO CD only) Switches oil. the Multi-disc [ON] Stores the resume settings in memory %r up to 40 discs. [OFF] Does not store the resume settings in memory. Playback restarts at the resume point only for the current disc in the system. Display" (page 73). The default settings are underlined.
m • When you select an item, the sound culs off for a moment. [SPEAKER SETUP] • When you change the [SIZE] setting, the [SPEAKER FORMATION] setting returns to [STANDARD]. To obtain lhe best possible surround sound, set for the size of the speakers you have connected and their distance from your listening position. Then use the test tone to adjust the level and lhe balance of the speakers to the same level. Select [SPEAKER Display.
• [DISTANCE (SURROUND)] Tile delimit distance setting lk)rthe speakers in relation to the listening position is shown below. When you set the distance using the Quick Setup (page 18), the settings is atttomatically displayed. [CENTER] 0.0 dB (appears when you set [CENTERI 1o [YESI in the [SIZE] setting.) Set this between 15.0 dB aM +10./) dB in 1.0 dB incremenls. [SUBWOOFER] 0,0 dB Selthis between 15.0 dB aM +10.0 dB in 1.0 dB incremenls.
The Setup Display' appears. 4 5 6 Press I'-1,1,repeatedly to select [SPEAKER SETUP], then press @ or ->. Press .1,/4,repeatedly to select [TEST TONE], then press @ or -.>. You can return Ihe system paramelers, such as preset stalions, Io the defitult settings. Press .1"14,repeatedly to select [ON], then press @. 1/6 _ • You will hear file test tone Item each speaker in sequence. 7 From your listening position,adjust the value of [LEVEL (FRONT)] or [LEVEL (SURROUND)] using ÷1.1"14,1->.
On your TV's color •If the speakers shouM cause the TV screen to have color irregularity, turn off the TV Ihen turn it on after 15 to 30 minutes. If color irregularity should persist, place the speakers farther away from the set. Onplacement • Place the system in a location with adequate ventilation to prevent heat build-up in the system. • At high volume, over long period s of time, the cabinet becomes hot to the touch. This is not a malfunction. However, touching Ihe cabinet should be avoided.
On handling discs • To keep the disc clean, haudle tire disc" hN ils edge. Do not touch tire surface. • Do not stick paper or tape on the disc. If you experience any of the followiug difficulties while using the system, use this troubleshootiug guide to help remedy the problem before requesting repairs. Should any problem dealer. persist, consult your nearest Souy Note thai if service persom_el changes some parts during repair, these parts may be retained.
•IftileHDMI OUT jack isused forvideo output, changing tile[HDMI RESOLUTION] setting in [SCREEN SETUP] may solve Iheproblem (page 75). Connect tileTVand tilesystem using avideo jack other than theHDMI OUT, and switch theTV's input totheconnected video input sothat you can see tileon-screen displays. Change tile[HDMI RESOLUTION] setting in[SCREEN SETUP], and switch theTV'sinput back toHDMI. Ifthe picture stilldoes notappear, repeat thesteps and tryother options.
The sound VIDEO loses stereo effect when you play a • Set IAUDIOI to ISTEREOI by pressing The surround is connected effect is difficult • Check Ihe speaker conneciions • The remote is on {page 32). and settings (page 13, 78). • Depending on the DVD, the output signal may not be Ihe entire 5.1 dnmnel. I1 n'my be mommral or stereo even if the sound track is recorded in Dolby Digital or MPEG The sound audio format.
• Tile [MODE (MP3, JPEG)] setting has been set to [AUDIO (MP3)] (page 53). • If you cannot change the [MODE (MP3, JPEG)] setting, re-load the disc or turn the system oft', then on. The MP3 audio tracks and JPEG image file starts playing simultaneously. • IAUTOI has been selected in IMODE (MP3. JPEG)] (page 53). The titles of album/track/file name are not displayed correctly. • The system can only display numbers and letters of the alphabets. Other characters are displayed as ['[.
(When letters/numbers display) appear in the When the self-diagnosis function is activated to prevent the system h'om mallhnctioning, a 5character service number (e.g., C 13 50) with a combination of a letter and 4 digits appears on the screen and the front panel display. In this case, check the following table. First 3 characters of the service number Cause and/or corrective action C13 The disc is dirty.
Oulputs (Analog) Tweeter: 25mm (1inch) Phones Accepls low-and highdia. bahmced dome type impedance headphones.Raled impedance 3.0ohms Super Audio CD/DVD Laser system Dimensions/approx.
Standby: 0.3 W (at tile Power Saving mode) 445 x 71 x 400 mm (175/s x 27/s x 15V4 inches) (w/h/d) incl. pr_iecting parts 6.0 kg (13 lb 4 oz) Dimensions (approx.) Mass (approx./ Design and specifications without notice. arc subject to change Album Section of a music piece ur an image (m a data CD containing MP3 audio tracks or JPEG files. Chapter Suhdivision composed of a tide on a DVD. A title is of several chapters.
• Movie mode The Movie mode is for use with stere() television shows and all programs encoded ill Dolby Surround. The result is euhanced soundfield directionality that approaches the quality of discrete 5.1-channel sound. processes • Music mode as the multi-angle, multilingual, and Parental Control functions are provided with the DVD. The Music mode is for use with ally stere<) music recordings, space.
an HDMI -DVI (digital visual interface) converter cord. The HDMI specification supports HDCP (high-baudwidth digital contents protection), a copy protection technology thai incorporates coding technology for digital video signals. Progressive (sequential Interlace format (Interlaced scanning) Tile Iuterlace furmat is tile NTSC standard method lor displaying TV images at 30 fl'ames per second.
Track Single layer disc (a disc with a single Super Audio CD layer) Section of a picture or a music piece on a VIDE() CD, CD, Super Audit) CD, or MP3. An album is composed of several tracks (MP3 only). Super Audio CD layer Hybrid disc 2/ (a disc with a Super Audio CD layer and a CD layer) VIDEO CD A compact disc that cunt:dns moving pictures. The picture data uses the MPEG 1 format, one of a worldwide standard of digital compression technology.
The language spellings conform to the IS() 639:1988 (E/F) standard.
For more inh)rmation, Front refer to lhe pages indicaled in parentheses. panel [] Disc slot (28) [] PHONES jack (28) [] Front panel display (94) [] AUDIO IN/A.CAL MIC jack (18, 30) [] Disc operation [] FUNCTION (28) [] _ (eject) (28) (28) [] VOLUME-/+ [] [] (remote sensor) (9) (28) [] DISC 1-5 (28) [] I/_ (on/standby) (28) _> Q. Rear panel = =.
Front panel display About g4us the indications in the front panel [] Lights up when the sleep timer is set. (65) [] Lights up when the music or movie mode is selected. (31) [] Current surround format (Except for JPEG and Super Audio CD) [] Indicates the selected [SPEAKER FORMATION]. (69) [] Lights up when the DYNAMIC selected. (64) [] [] Lights up when the one category mode is selected.
iil@ @ _:!i ¸i¸i !iil@ @ _() G Use the Conlrol Menu to selec( a function and to view relaled informalion. repeatedly I Press Q DISPLAY to turn on or change Ille Conlrol Menu display' as lollows: 1> Q. Q. Control Menu display 2 appears fi_r certain discs only Control Menu display I Control Menu display off -,,I 5" Control Menu display 8" .... " <7 ) The Conh'ol Menu display' 1 and 2 will show dlfferenl items de I_)endm e _n the disc type.
-- Currently playing title number b Currently playing chapter number 2) Total number of titles b Playback status (IP- Playback, II Pause, • Stop, etc.) Total number of chapters 2/ Control Menu Type of disc being played 31 Playing time 4) Selected item Current setting OFF Function name of selected Menu item Operation message bDisplays tile scene number lbr VIDEO album number for DATA CDs/DATA CDs (PBC is on), track ntunber DVDs.
[TIMEf'FEXT] (page 36) Checks tile elapsed time and tilL'remaining pla)q_ack time. Input the time code for picture and music searching. Displays the DVD/UD text or the MP3 track name. [SPEAKER FORMATION] (pages 69, 71) Sets tilL'speaker formation.lAd just the level of each speaker automatically. [MULTI/2CH] (page 48) Selects Ihe playback area on Super Audio CDs when available. [PROGRAM] (page 39) Selects Ihe Irack to play in the order you wahl. [SHUFFLE] (page 40) Plays the track in random order.
You can set the following items with the DVD Setup Display. The order of the displayed LANGUAGE items may be different SETUP CUSTOM MENU"' f from the actual display.
You call set the following AMP items with AMP MENU on the remote. menu DIMMER DEMO _DIMMER LDIMMER ON OFF --]-DEMOON L DEMO OFF ATTENUATE'' _ATT LATT ON OFF * "ATTENUATE" may not appear depending on die selected lkmclion.
Numerics 16:9 75 4:3 LETTER BOX 75 4:3 OUTPUT 76 4:3 PAN SCAN 75 5.1 Channel Surround 43 A A/V SYNC 48 ALBUM 36 Album 88 AMP MENU 20. 30. 65 AMP men,/is( 99 ANGLE 47 ATTENUATE 30 AUDIO 74 AUDIO (HDMI) 77 AUDIO DRC 77 Aulo Calibration 7L 88 B (COMPONENT OUT) 76 c 36 Chapter 88 CINEMA STUDIO EX 33 COLD RESET 8(I COMPONENT VIDE() OUT 24 Continoous play 28 Control Menu Display 95 ControlIing the TV 62 CUSTOM 73 CUSTOM PARENTAL CONTROL 66 CUSTOM SETUP 77 D D. C. A. C. 71.
Rear Panel 93 Region Code 8,9(I Remote 9,62 Repeat Play 4I RESET 74 Resume Play 38 $ S VIDEO 23 Scan 35 SCENE 36 Scene 90 SCREEN SAVER 76 SCREEN SETUP 75 Searching 35 Selecting 31 SETUP 73 Setup Display 73, 98 Shuffle Play 40 SLEEP 65 Slide Show 53 Slow-motion Play 35 Sound Field 32 SPEAKER FORMATION 69 SPEAKER SETUP 78 DISTANCE 78 LEVEL 79 SIZE 78 SUBTITLE 47, 74 Super Audio CD 48, 90 T TEST TONE 79 THEATRE SYNC 63 TIME/TEXT 36 TITLE 36 Title 91 TRACK 36 Track 91 TRACK SELECTION 77 Troubleshooting 82 TV H