
User Manual
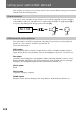


Table Of Contents
- Before you begin
- Getting started
- Basic operations
- Advanced operations
- Using alternative power sources
- Changing the mode settings
- Photo recording
- Shooting with all the pixels ミ PROG. SCAN
- Using the FADER function
- Shooting with backlighting
- Using the wide mode function
- Enjoying picture effect
- Recording with various effects ミ digital effect
- Shooting with manual adjustment
- Using the PROGRAM AE function
- Focusing manually
- Interval recording
- Cut recording
- Superimposing a title
- Making a custom title
- Labeling a cassette
- Watching on a TV screen
- Viewing the picture with the picture effect
- Viewing the picture with the digital effect
- Searching the boundaries of recorded tape with date ミ date search
- Searching the boundaries of recorded tape with title ミ title search
- Searching for a photo ミ photo search/photo scan
- Returning to a pre-registered position
- Displaying recording data ミ data code function
- Editing onto another tape
- Editing partially on a mini DV tape ミ DV synchro-editing
- Recording from a VCR or TV
- Replacing recording on a tape ミ insert editing
- Audio dubbing
- Memory card slot operations
- Using the memory card slot ミ introduction
- Recording an image from a mini DV tape as a still image
- Copying still images from a mini DV tape ミ photo save
- Recording still images on PC cards (not supplied) ミ memory photo recording
- Viewing a still picture ミ memory photo playback
- Preventing accidental erasure ミ PROTECT
- Deleting images
- Copying the image recorded with the memory card slot to mini DV tapes
- Playing back images in a continuous loop ミ SLIDE SHOW
- Additional information
- Usable cassettes and playback modes
- Charging the vanadium-lithium battery in the camcorder
- Resetting the date and time
- Simple setting of clock by time difference
- Tips for using the battery pack
- Maintenance information and precautions
- Using your camcorder abroad
- Trouble check
- Self-diagnosis function
- Specifications
- Identifying the parts
- Warning indicators
- Index

122
Tips for using the battery pack
Why the remaining battery indication does not match the
continuous recording time in the operating instruction
The recording time is affected by the environmental temperature and conditions. The
recording time becomes very short in a cold environment. The continuous recording time in
the operating instruction is measured under the condition of using a fully charged (or
normal charged
2)
) battery pack in 77 °F (25 °C). As the environmental temperature and
condition are different when you actually use the camcorder, the remaining battery time is
not same as the continuous recording time in the operating instruction.
1)
Full charge: Charging for about 1 hour after the charge lamp of the AC power adaptor goes
off.
2)
Normal charge: Charging just until the charge lamp of the AC power adaptor goes off.
Notes on charging
A brand-new battery pack
A brand-new battery pack is not charged. Before using the battery pack, charge it
completely.
Recharge the battery pack whenever you like
You do not have to discharge it before recharging. If you charged the battery pack fully but
you did not use it for a long time, it becomes discharged. Then recharge the battery pack
before use.
Notes on the terminals
If the terminals (metal parts on the back) are not clean, the battery charge
duration will be shortened
When the terminals are not clean or when the battery pack has not been used for a long time,
repeatedly install and remove the battery pack a few times. This improves the contact
condition. Also, wipe the +, – and C terminals with a soft cloth or paper.
Be sure to observe the following
•Keep the battery pack away from fire.
•Keep the battery pack dry.
•Do not open nor try to disassemble the battery pack.
•Do not expose the battery pack to any mechanical shock.