3-280-122-11 (1) Wireless Stereo Headset Operating Instructions DR-BT22iK © 2007 Sony Corporation
WARNING To reduce the risk of fire or electric shock, do not expose this apparatus to rain or moisture. To reduce the risk of electrical shock, do not open the cabinet. Refer servicing to qualified personnel only. Do not install the appliance in a confined space, such as a bookcase or built-in cabinet. To reduce the risk of fire, do not cover the ventilation of the apparatus with newspapers, tablecloths, curtains, etc. And do not place lighted candles on the apparatus.
Compatible iPod models The compatible iPod models are as follows. Update your iPod to use the latest software before you use it. iPod nano 2nd generation (aluminium) iPod nano 1st generation iPod 4th generation iPod 5th generation (video) iPod 4th generation (color display) iPod mini 1st generation Notes This Bluetooth transmitter is designed for iPod only. You cannot connect any other portable audio players.
Table of Contents What is Bluetooth wireless technology?................................6 Features..........................................7 Getting Started Checking supplied items.............8 Location and Function of Parts.............................................9 Bluetooth headset.......................... 9 Bluetooth transmitter.................10 Basic use of headset...................11 Charging the headset.................11 Folding.............................................14 Unfolding....
What is Bluetooth wireless technology? Bluetooth™ wireless technology is a short-range wireless technology that enables wireless data communication between digital devices, such as a computer or digital camera. Bluetooth wireless technology operates within a range of about 10 meters (about 30 feet). Connecting two devices as necessary is common, but some devices can be connected to multiple devices at the same time.
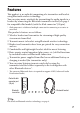
Features This product is an audio kit comprising of a transmitter and headset using Bluetooth wireless technology. You can enjoy music wirelessly by transmitting the audio signals to a headset by connecting the Bluetooth transmitter to iPod (see page 3 for compatible iPod models) with the iPod connector* (30 pin). * iPod connector is a dedicated multiple connector for connecting accessories to your iPod.
Getting Started Checking supplied items Bluetooth headset DR-BT22 (1) Bluetooth transmitter TMR-BT8iP (1) AC power adaptor (1) Operating Instructions (this book) (1) Warranty Card (1)
Location and Function of Parts Bluetooth headset RE L RT RB R R Right housing Multi function button Controls various functions when calling with a headset by combining with a Bluetooth mobile phone. POWER button Microphone RESET button Headset indicator (blue) Indicates the communication status of the headset. Headset indicator (red) Indicates the power status of the headset. Jog switch Controls various functions when listening to music with a headset.
Bluetooth transmitter iPod connector (30 pin) Connects to the dock connector of an iPod (page 16). Transmitter indicator Indicates the transmitter’s status (page 23). Power button Performs the following: • Turning on/off of the transmitter (page 16). • Pairing (page 21). • Initializing the transmitter (page 41). Hereafter, “Bluetooth headset” is abbreviated as “headset,” and “Bluetooth transmitter” as “transmitter.
Basic use of headset Charging the headset The headset contains a rechargeable Lithium-Ion battery, which should be charged before using for the first time. 1 Connect the supplied AC power adaptor to the DC IN 3 V jack on the headset. To an AC outlet Bluetooth headset To DC IN 3 V jack AC power adaptor (supplied) When the AC power adaptor is connected to an AC outlet, charging starts.
Caution If the headset detects a problem while charging, the headset indicator (red) may turn off, although charging is not complete. Check for the following causes: – Ambient temperature exceeds the range of 0 °C – 40 °C (32 °F – 104 °F). – There is a problem with the battery. In this case, charge again within the above-mentioned temperature range. If the problem persists, consult your nearest Sony dealer.
Checking the remaining battery When pressing the POWER button while the headset is turned on, the headset indicator (red) flashes. You can check the remaining battery by the number of times the headset indicator (red) flashes. Headset Indicator (red) Status 3 times Full 2 times Mid 1 time Low (needs to charge) Note You cannot check the remaining battery immediately after the headset is turned on, or while pairing.
Folding 1 Hold near the foldable part with both hands and lift up the right housing to fold it as illustrated. Unfolding 1 2 2 14 Expand the center part of the headband. Close the center part of the headband. 3 3 Unfold the left housing of the headband as illustrated. Fold the left housing of the headband. Unfold the right housing of the headband.
Notes Do not pull open this way. Wearing 1 Unfold the headset according to the procedures on page 14, then extend the headset to adjust the length. Be careful not to hit your face or eyes with the top of the headband. 2 Put the housing with indication on your left ear and indication on your right ear, then place the headset over your head.
Connecting to an iPod Connect the transmitter to the dock connector port of an iPod (see page 3 for compatible iPod models) firmly. Dock connector port (30 pin) Power button To turn on the transmitter 1 2 Connect the transmitter to the iPod. Press the power button of the transmitter for about 1 second to turn it on, or start to play back on iPod. When the transmitter turns on, the indicator flashes twice. Note If the transmitter cannot turn on, operate the iPod.
Notes To listen to music from the headphone jack of the iPod, disconnect the transmitter from the iPod. While the transmitter is turned on, it consumes power from the iPod. We recommend disconnect the transmitter from iPod when not using the Bluetooth function. If the headphone is connected to the iPod while the iPod is playing back, it consumes power from iPod. If you turn off the transmitter while the iPod is playing back, iPod will power off.
Operating Listening to music of the iPod You can listen to music of the iPod (see page 3 for compatible iPod models) on the headset. 1 2 Press and hold the POWER button on the headset for about 3 seconds. The headset indicator (blue) and headset indicator (red) flash together twice and the headset is turned on. Connect the transmitter to the iPod then turn on the iPod and start playback on the iPod.
Tip You can control the volume on the headset. (The volume of the iPod is not changed.) You can also fast-forward or fast-rewind while playing back (page 20). Notes Even if you control the volume on the iPod, sound from the headset will not change. If the transmitter and the headset become out of range and the Bluetooth connection terminates, repeat the procedure from step 1.
Controlling an iPod with the headset You can control an iPod (see page 3 for compatible iPod models) using the control button of the headset. Before starting remote control operation, check that step 1 and 2 of “Listening to music of the iPod” are completed (page 18). Transmitter Remote control Bluetooth headset (playback, pause, etc.) Control for the iPod You can playback or pause the iPod by pressing the button on the headset.
Advanced operation Pairing with other Bluetooth devices What is pairing? Bluetooth devices need to be “paired” with each other beforehand. Once Bluetooth devices are paired, there is no need for pairing again, except in the following cases: Pairing information is deleted after repair, etc. This product is paired with 9 or more receiving devices. This product can be paired with up to 8 Bluetooth device respectively.
5 Press and hold the power button of the transmitter for about 7 seconds or more to enter “Pairing in process.” After about 1 second, the transmitter indicator will flash twice, but keep pressing the power button. Notes When first power on the transmitter after initialized, the transmitter will enter “Pairing in process” automatically. Th e pairing information is initialized if you press and hold the power button for 15 seconds.
Tip When pairing the transmitter with a number of Bluetooth receiving devices, repeat steps 3 to 5 for each device individually. Note For using the Bluetooth function, it is required that the Bluetooth device on the other side is corresponding with the same profile as the transmitter. However, even if it is corresponding with the same profile, functions may differ depending on the specification of the Bluetooth device.
Pairing headset with other Bluetooth transmitting devices 1 2 3 Place the Bluetooth transmitting device to be paired together within 1 m (3 ft) of the headset. Press and hold the POWER button of the headset for about 7 seconds or more to enter “Pairing in process” while the headset is turned off. Release the POWER button when the headset indicator starts flashing quickly. The headset enters the pairing process. Turning Bluetooth transmitting device to pairing standby mode.
Note Passcode* of the headset is fixed at “0000.” Depending on the Bluetooth receiving device, it may be necessary to input the passcode (in this case, “0000”). Th e headset cannot be paired with a Bluetooth receiving device whose passcode is not “0000.” * Passcode may be called “Passkey,” “PIN code,” “PIN number,” or “Password.” When not completed pairing Repeat the procedure from step 2.
On Headset Indicators B : Headset indicator (blue) R : Headset indicator (red) Connected Connecting Pairing Status Searching Music Phone B R – – – – – – – – – – – – –… – – –… Connectable B – – R– – – – – – – – – … Connecting B R – – – – – – – – – – – – – – – – … … – – – – HFP/HSP or A2DP B – – – – – – – – – R– – – – – –… HFP/HSP and A2DP B – R– – Listening B R– Listening during standby for telephone call B R– Incoming call B R– Talking B R– – – – – – –
Re-pairing the transmitter and the headset 1 2 3 4 Turn on the power of iPod. (Make sure the iPod is in pause mode.) Connect the transmitter to the iPod (page 16). Place the transmitter and the headset to be paired together within 1 m (3 ft). Press and hold the POWER button of the headset for about 7 seconds or more to enter “Pairing in process” while the headset is turned off.
Notes When first power on the transmitter after initialized, the transmitter will enter “Pairing in process” automatically. Th e pairing information is initialized if you press and hold the power button for 15 seconds. Th e transmitter indicator lights up for 5 seconds before the initialization starts. Release the button immediately when the transmitter indicator lights up. “Pairing in process” is released after about 5 minutes.
Calling with headset Preparation for calling (Bluetooth connection) Check the following before operating the headset. – The Bluetooth function is active on the mobile phone. – Pairing of the headset and the Bluetooth mobile phone is complete. VOL + button VOL – button Headset indicator (blue) Headset indicator (red) Multi function button POWER button 1 Press and hold the POWER button for about 3 seconds while the headset is turned off.
To make a connection by operating Bluetooth mobile phone 1 Make the Bluetooth connection (HFP or HSP*) from the Bluetooth mobile phone to the headset. Refer to the manual supplied with your Bluetooth mobile phone for operation details. The list of recognized devices appears on the display of the Bluetooth mobile phone. The headset is displayed as “DR-BT22.” When you use the Bluetooth mobile phone features both HFP (Hands-free Profile) and HSP (Headset Profile), set to HFP.
To receive a call When an incoming call arrives, a ring tone will be heard from the headset. 1 Press the multi function button on the headset. The ring tone differs in the following ways, depending on your mobile phone. – ring tone set on the headset – ring tone set on the mobile phone – ring tone set on the mobile phone only for Bluetooth connection Note If you received a call by pressing the button on the Bluetooth mobile phone, some Bluetooth mobile phones may have handset use priority.
Controlling the Bluetooth mobile phone – HFP, HSP The operation of the buttons on the headset varies depending on your mobile phone. HFP (Hands-free Profile) or HSP (Headset Profile) is used for Bluetooth mobile phone. Refer to the operating instructions supplied with your Bluetooth mobile phone on supported Bluetooth profiles or how to operate.
Calling while playing back music The Bluetooth connection using HFP or HSP as well as A2DP is necessary to make a call while playing back music. For example, to make a call using a Bluetooth mobile phone while listening to music on a Bluetooth compatible music player, the headset needs to be connected to the mobile phone using HFP or HSP. Make a Bluetooth connection between the headset and the device in use following the procedures outlined below.
Additional Information Precautions On Bluetooth communication Bluetooth wireless technology operates within a range of about 10 meters (about 30 feet). Maximum communication range may vary depending on obstacles (human body, metal, wall, etc.) or electromagnetic environment. Steel cabinet The transmitter Optimal performance Limited performance The aerial of the headset is built into the right housing as illustrated in the dotted line.
This unit supports security capabilities that comply with the Bluetooth standard to provide a secure connection when the Bluetooth wireless technology is used, but security may not be enough depending on the setting. Be careful when communicating using Bluetooth wireless technology. We do not take any responsibility for leakage of information during Bluetooth communication. Connection with all Bluetooth devices cannot be guaranteed.
On the supplied AC power adaptor Use the AC power adaptor supplied with this product. Do not use any other AC power adaptor since it may cause the headset to malfunction. Polarity of the plug If you are not going to use the AC power adaptor for a long time, unplug it from the AC outlet. To remove the AC power adaptor from the wall outlet, grasp the adaptor plug itself; never pull the cord. 36 Others Be careful not to pinch your fingers when folding the headset.
Disposing of the headset The headset has a Lithium-ion rechargeable battery built in the left housing. For environmental conservation, be sure to remove the built-in rechargeable batteries from the headset before disposing, and dispose of the battery appropriately. 1 Remove the ear pad on the left housing, and then detach the left housing. The housing is fixed with claws (3 places). As illustrated, insert an object such as flathead screwdriver into the gap and lift up the housing to detach it.
4 Pull out the connector and remove the rechargeable battery. The rechargeable battery is fixed with adhesive tape. Insert an object such as flathead screwdriver and lift up the battery to remove it.
Troubleshooting If you run into any problems using this product, use the following checklist and read the product support information on our website. Should any problem persist, consult your nearest Sony dealer. Symptom Cause / Remedy The transmitter is not turned on. (Or turns off shortly after turning on.) Press and hold the transmitter’s power button for about 1 second. Check the remaining battery of the iPod. If the remaining battery is not enough, charge the iPod. Reset your iPod.
Symptom Cause / Remedy Sound break, noise or playback speed change. If a device that generates electromagnetic radiation, such as a wireless LAN, other Bluetooth device(s), or a microwave oven is nearby, move away from such sources. Remove any obstacle between the transmitter and the headset or move away from the obstacle. Locate the transmitter and the headset as near as possible. Re-position or re-orient the transmitter and the headset. The headset does not operate properly.
Initializing Initializing the transmitter You can reset the transmitter to its default and delete all pairing information. 1 2 Connect the transmitter to the iPod. Press and hold the power button for more than about 15 seconds.
Specifications General Headset Output Communication System Maximum communication range Compatible Bluetooth Profiles*3 Bluetooth Specification Power Class 2 Line of sight approx. 10 m (30 ft)*1 Frequency band 2.4 GHz band (2.4000 GHz – 2.4835 GHz) Modulation method FHSS Transmission range (A2DP) 20 - 20,000 Hz (Sampling frequency 44.1 kHz) Bluetooth Specification version 2.
*1 The actual range will vary depending on factors such as obstacles between devices, magnetic fields around a microwave oven, static electricity, reception sensitivity, aerial’s performance, operating system, software application, etc. *2 Enhanced Data Rate *3 Bluetooth standard profiles indicate the purpose of Bluetooth communication between devices. *4 Codec: Audio signal compression and conversion format *5 Subband Codec Design and specifications are subject to change without notice.
Printed in Malaysia (1)