
User manual


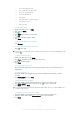
Table Of Contents
- Contents
- Getting started
- Device security
- Learning the basics
- Downloading applications
- Internet and networks
- Synchronizing data on your device
- Basic settings
- Typing text
- Calling
- Contacts
- Messaging and chat
- Music
- FM radio
- Camera
- Photos and videos in Album
- Videos
- Connectivity
- Smart apps and features that save you time
- Travel and maps
- Calendar and alarm clock
- Accessibility
- Support and maintenance
- Support for your device
- Computer Tools
- Updating your device
- Memory and Storage
- Managing files using a computer
- Backing up and Restoring Content
- Running Diagnostic Tests on Your Device
- Restarting and resetting your device
- Warranty, SAR, and Usage Guidelines
- Limitations to services and features
- Legal information

To Set up File Sharing with other DLNA Certified™ Devices
1
Connect your device to a Wi-Fi® network.
2
From your Homescreen, tap , then find and tap Settings > Device connection >
Media server.
3
Drag the Share media slider to the right.
4
Use your computer or other DLNA™ client device on the same Wi-Fi® network to
connect to your device.
5
A notification appears in the status bar of your device. Open the notification and
set access permissions for each client device attempting to connect to your
device.
The steps for accessing media on your device using a DLNA™ client differ between client
devices. Refer to your client device User guide for more information. If your device is
inaccessible to a client on the network, check if your Wi-Fi® network is working.
You can also access the Media server menu from certain applications like Music or Album by
tapping , and then tapping Settings > Media server.
To stop sharing files with other DLNA Certified™ devices
1
From your Homescreen, tap
.
2
Find and tap Settings > Device connection > Media server.
3
Drag the slider beside Share media to the left.
To set access permissions for a pending device
1
From your Homescreen, tap
.
2
Find and tap
Settings
>
Device connection
>
Media server
.
3
Select a device from the Pending devices list.
4
Select an access permission level.
To Change the Name of a Registered Device
1
From your Homescreen, tap .
2
Find and tap Settings > Device connection > Media server.
3
Select a device from the
Registered devices
list, then select
Change name
.
4
Enter a new name for the device, then tap OK.
To change the access level of a registered device
1
From your Homescreen, tap
.
2
Find and tap
Settings
>
Device connection
>
Media server
.
3
Select a device from the Registered devices list.
4
Tap
Change access level
and select an option.
To get help about sharing content with other DLNA Certified™ devices
1
From your Homescreen, tap
.
2
Find and tap Settings > Device connection > Media server.
3
Tap
and then tap Help.
NFC
Use Near Field Communications (NFC) to share data with other devices, such as a video,
photo, web page address, music file or contact. You can also use NFC to scan tags that
give you more information about a product or service as well as tags that activate certain
functions on your device.
NFC is a wireless technology with a maximum range of one centimeter, so the devices
sharing data must be held close to each other. Before you can use NFC, you must first
turn on the NFC function, and the screen of your device must be active.
NFC may not be available in all countries and/or regions. Some apps on compatible devices
can use NFC when the device has no power. Note that not all devices support this feature.
101
This is an Internet version of this publication. © Print only for private use.