2-687-435-18 (1) Data Projector Operating Instructions VPL-FE40/FE40L VPL-FX40/FX40L VPL-FX41/FX41L VPL-FW41/FW41L © 2006 Sony Corporation
WARNING To reduce the risk of fire or electric shock, do not expose this apparatus to rain or moisture. To avoid electrical shock, do not open the cabinet. Refer servicing to qualified personnel only. WARNING If you have questions on the use of the above Power Cord / Appliance Connector / Plug, please consult a qualified service personnel. THIS APPARATUS MUST BE EARTHED. IMPORTANT The nameplate is located on the bottom.
this device must accept any interference received, including interference that may cause undesired operation. For safety Be sure to attach the air filter to the unit. For the customers in Taiwan only For the State of California, USA only Perchlorate Material - special handling may apply, See www.dtsc. ca.gov/hazardouswaste/ perchlorate Perchlorate Material: Lithium battery contains perchlorate. For the customers in Canada This Class A digital apparatus complies with Canadian ICES-003.
Table of Contents Precautions ......................................... 5 Notes on Installation and Usage ........ 6 Unsuitable Installation ................. 6 Usage in High Altitude ................. 7 Unsuitable Conditions .................. 7 Overview About the Supplied Manuals .............. 8 Features .............................................. 8 Location and Function of Controls .. 10 Top/Front/Side ............................ 10 Rear/Side/Bottom ....................... 10 Control Panel ........
Precautions Warning The Installation Manual contained in the CD-ROM is for dealers. If customers perform the installation described in this manual, an accident may occur, causing serious injury. Never install it by yourself. For installation, be sure to consult with a Sony dealer. On safety • Check that the operating voltage of your unit is identical with the voltage of your local power supply. If voltage adaptation is required, consult with qualified Sony personnel.
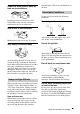
On LCD projector The LCD projector is manufactured using high-precision technology. You may, however, see tiny black points and/or bright points (red, blue, or green) that continuously appear on the LCD projector. This is a normal result of the manufacturing process and does not indicate a malfunction.
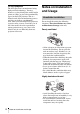
Subject to direct cool or warm air from an air-conditioner magnifications. This is not a malfunction of the unit. Unsuitable Conditions Do not use the unit under the following conditions. Installing in such a location may cause malfunction of the unit due to moisture condensation or rise in temperature. Do not topple the unit Near a heat or smoke sensor Malfunction of the sensor may be caused. Avoid using as the unit topples over on its side. It may cause malfunction.
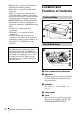
B Overview About the Supplied Manuals The following manuals and softwares are supplied with the projector. On Macintosh system, you can read only the Operating Instructions and Installation Manual for Dealers. Manuals Safety Regulations (separately printed manual) This manual describes important notes and cautions to which you have to pay attention when handling and using this projector.
* The optional lens VPLL-1008 can adjust the focus manually. been specified. Also, this projector is available for SNMP. Also, optional lenses are available for the projector, depending on your setup condition. Multi scan compatibility Center positioned lens The projector is designed to locate the lens in the center of the projector. This enables easy setup, as the lens center aligns with the center of the screen.
• Kensington is a registered trademark of Kensington Technology Group. • Macintosh is a registered trademark of Apple Inc. • VESA is a registered trademark of the Video Electronics Standard Association. • Display Data Channel is a trademark of the Video Electronics Standard Association. • HDMI, HDMI logo and High-Definition Multimedia Interface are trademarks or registered trademarks of HDMI Licensing LLC. • Air Shot is a trademark of Sony corporation. • “BrightEra” is a trademark of Sony corporation.
f Air filter covers The air filter of VPL-FX41/FW41 can be set on one side only. Control Panel Note 1 2 For details, see “Cleaning the Air Filter” on page 44. Overview To maintain optimal performance, clean the air filter whenever you replace the lamp. g Rear remote control detector h Connector Panel For details, see “Connector Panel” on page 12. i Security lock Connects to an optional security cable (from Kensington). Web page address: http://www.kensington.
– Flashes in red when the internal temperature is high or the electrical system has failed. – Lights in green when the projector is turned on, and when it is ready to operate. – Flashes in green from the time when the projector is turned on until the projector is ready to operate. Also, flashes in green while the cooling fan is running after the power is turned off with the ?/1 key. The fan runs for about 90 seconds after the power is turned off. – Lights in orange when the power saving mode is on.
AUDIO input L (MONO)/R (phono type) Connect to the audio output of video equipment. For stereo equipment use both the L and R jacks; for monaural equipment use the L (MONO) jack only. Analog RGB connector (HD D-sub 15-pin, female) Connects to external equipment such as a computer. Connects to the monitor output of a computer using an optional cable. AUDIO jack (stereo minijack) To listen to sound output from a computer, connect via this jack to the audio output of the computer.
For details, see “APA” in “The Screen Menu” on page 31. Remote Commander The keys that have the same names as those on the control panel function identically. e ENTER key f RESET key Resets the value of an item to its factory preset value. This key functions when a setting item is displayed on the screen.
m MUTING keys Be sure to install the battery from the # side. n D ZOOM (Digital Zoom) +/– key This function is not provided in this projector. o ZOOM +/– keys Adjusts the picture size. p FOCUS +/– keys Adjusts the picture focus. q SHIFT +/– keys Adjusts the vertical/horizontal position of the picture. r M/m/
B Projecting the Picture Installing the Projector The following table gives an example of installing the standard lens supplied with VPL-FE40/ FX40/FX41/FW41. For details on installation, ceiling installation or when you use an optional lens, be sure to refer to the operating instructions of “Installation Manual for Dealers”. The distance between the lens and the screen varies depending on the size of the screen. Use the following table as a guide.
Connecting the Projector To connect a computer (Analog) Side When you connect the projector, make sure to: Projecting the Picture • Turn off all equipment before making any connections. • Use the proper cables for each connection. • Insert the cable plugs firmly; loose connections may increase noise and reduce performance of picture signals. When pulling out a cable, be sure to pull it out by the plug, not the cable itself.
appear properly. Set your computer to output the signal to only the external monitor. For details, refer to the operating instructions supplied with your computer. Note To connect a Macintosh computer equipped with a video output connector of a type having two rows of pins, use a commercially available plug adaptor. To connect a computer (Digital) or video equipment (Digital) Note Be sure to use the HDMI cable with an HDMI logo.
To connect to a video GBR/ Component output connector Connecting a VCR This section describes how to connect the projector to a VCR. For more information, refer to the instruction manuals of the equipment you are connecting.
4 Projecting Press the INPUT key to select the input source. You can select directly the input signal you want to project by pressing one key from among INPUT A, B, C, D or E on the Remote Commander.
For details, see “Auto Input Search” in the Function menu on page 36. • The Smart APA feature is effective for the input (analog) signal from a computer only. (It is not effective for digital computer signal.) 5 To adjust the tilt of the installation surface If the projector is installed on an uneven surface, use the adjusters to keep the projector level. Switch the equipment connected to output to the projector.
Turning Off the Power 1 Press the ?/1 key. “POWER OFF? Please press ?/1 key again.” appears to confirm that you want to turn off the power. Note The message disappears if you press any key other than the ?/1 key, or if you do not press any key for approximately five seconds. 2 Press the ?/1 key again. The ON/STANDBY indicator flashes in green and the fan continues to run to reduce the internal heat. Also, the ON/ STANDBY indicator flashes quickly.
B Convenient Functions Selecting the Menu Language 3 Press the MENU key. The menu appears. The menu currently selected is shown as a yellow button. You can select one of sixteen languages for displaying the menu and other on-screen displays. The factory setting is English. To change the menu language, proceed as follows: 80 50 50 50 Low 50 3 2 4 ON/ STANDBY indicator Press the M or m key to select the (Setup) menu, then press the , or ENTER key. The selected menu appears.
The menu changes to the selected language. To clear the menu Press the MENU key. The menu disappears automatically if a key is not pressed for one minute. Security Lock The projector is equipped with a security lock function. When you turn the power of the projector on, you are required to input the previously set password. If you do not input the correct password, you will not be able to project the picture.
Enter the password on this screen. Security Lock Enter new password key. Power-on cannot be performed without the password. Use: 3 Cancel: Other key Note If you call the customer service center because you have forgotten the password, you will need to be able to verify the projector’s serial number and your identity. (This process may differ in other countries/regions.) Once your identity has been confirmed, we will provide you with the password. Enter the password again to confirm.
Other Functions Direct Power On/Off Function If you will be using a circuit breaker to turn the power for the entire system on and off, set the direct power on function to “On.” You can turn the power on/off without pressing the power key on the projector. After the power is turned off, the internal circuitry will cause the fan to automatically operate for a certain time. Note The fan does not turn in the VPL-FX41/FW41. However, the Direct Power On/Off function has the same performance.
B Adjustments and Settings Using a Menu Using a MENU 2 Use the M or m key to select a menu, then press the , or ENTER key. The items that can be set or adjusted with the selected menu appear. The item presently selected is shown in yellow. The projector is equipped with an on-screen menu for making various adjustments and settings. Some of the adjustable/setting items are displayed in a pop-up menu, in a setting menu or adjustment menu with no main menu, or in the next menu window.
Next menu window Setting items 4 Make the setting or adjustment of an item. • When changing the adjustment level: To increase the number, press the M or , key. To decrease the number, press the m or < key. Press the ENTER key to restore the previous screen. • When changing the setting: Press the M or m key to change the setting. Press the ENTER key to restore the previous screen. You can restore the previous screen using < depending on the selected item. To clear the menu Press the MENU key.
The Picture Menu The Picture menu is used for adjusting the picture. Items that can be adjusted or set depend on the kind of input signals. For details, see “Input signals and adjustable/setting items” on page 40. When the video signal is input When the signal is input from a computer Functions Initial setting Picture Mode Selects the picture mode. Standard • Dynamic: Emphasizes the contrast to produce a “dynamic” picture. • Standard: Normally select this setting.
Setting items Functions Initial setting DDE (Dynamic According to the film source you have selected, make a Film setting for playback. Detail • Film: Normally, select this option. Reproduces the 2-3 Enhancer) Pull-Down film sources with smooth picture movement. When the video signal with a format other than the 2-3 Pull-Down is input, “Progressive” is automatically selected. • Progressive: Converts an interlace format video signal to a progressive format.
The Screen Menu The Screen menu is used to adjust the input signal. You can also adjust the aspect ratio of the picture. Items that can be adjusted or set depend on the kind of input signals. For details, see “Input signals and adjustable/setting items” on page 40. Aspect Over Scan V Center Vertical Size Adjust Signal Full 2 On 0 0 Functions Aspect (When the video signal is input) You can set the aspect ratio of the picture to be Set according to displayed for the current input signal.
Setting items Functions Over Scan Hides the outline of the picture. On • On: Hides the outline of the input picture. Select this setting when noise appears along the edge of the picture. • Off: Projects the whole of the input picture. To adjust the displayable area within the four directions of the screen, refer to “Blanking” in the Installation menu (page 39) Initial setting V Center Adjusts the whole picture by moving up and down on the screen.
• For Aspect, “Aspect” itself or a part of the setting items cannot be displayed on the screen according to the input signal. Also, “Full 1” and “Full 2,” or “Full 1” and “4:3” may become the same images. About the Preset Memory No. Adjustments and Settings Using a Menu This projector has 48 types of preset data for input signals (the preset memory).
The Setup Menu The Setup menu is used for changing the settings of the projector. 34 Setting items Functions Status Sets whether or not the on-screen display is displayed. On Set to “Off” to turn off the on-screen displays except for the menus, message when turning off the power, and warning messages. Initial setting Language English Selects the language used in the menu and on-screen displays.
Setting items Functions Input-C Signal Sel. Selects the type of signal input from the equipment connected to the INPUT C connector. Selects the type of signal input from the equipment by selecting “Input-C” with the INPUT key. • Auto: Selects the input signal type automatically. • Computer: Inputs the signal from a computer. • Video GBR: Inputs the signal from a TV game or HDTV broadcast. • Component: Inputs the component signal from a DVD player/recorder, Blu-ray Disc player, digital tuner, etc.
The Function Menu The Function menu is used for changing the settings of the various functions of the projector. 36 Setting items Functions Smart APA The APA (Auto Pixel Alignment) automatically On adjusts “Phase,” “Pitch” and “Shift” in the Screen menu for the input signal from a computer. • On: When a signal is input from a computer, the APA functions automatically so that the picture can be seen clearly.
Setting items Functions Panel Key Lock Off Locks all the control panel keys on the side panel of the projector so that the projector can be operated only with the Remote Commander. To lock the control panel keys, set to “On.” When it is set to “On,” keeping the ?/1 key on the control panel pressed for 10 seconds turns the projector on when it is in standby mode, and turns the projector to standby mode when the power is on.
The Installation Menu The Installation menu is used for changing the settings of the projector. 38 Lamp Mode Standard ID Mode Illumination Direct Power On All Setting items Functions V Keystone 0 Corrects the vertical trapezoidal distortion of the picture. When the bottom of the trapezoid is longer than the top ( ): Sets a lower value (– direction). When the top of the trapezoid is longer than the bottom ( ): Sets a higher value (+ direction).
Setting items Functions ID Mode All Assigns an ID number (1 to 3) to the projector when you want control two or more projectors individually with the supplied Remote Commander. When this item is set to “1,” you can control the projector with the Remote Commander with the ID MODE key set to “1.” When it is set to “All,” you can control all the projectors with the Remote Commander independently of the ID MODE keys of the Remote Commander.
The Information Menu The Information menu displays the model name, serial number, the horizontal and vertical frequencies of the input signal and the cumulated hours of usage of the lamp. Memory number Signal type Setting items Functions Model Name Displays the model name. Serial No. Displays the serial number. fH (horizontal frequency) Displays the horizontal frequency of the input signal. fV (vertical frequency) Displays the vertical frequency of the input signal.
Item Input signal Video/S-Video (Y/C) Component Video GBR Computer Network Sharpness z z z – DDE z z*4 z*4 – – Black Level Adj. z z z – – Gamma Mode – – z*3 z z – z : Adjustable/can be set – : Not adjustable/cannot be set *1: Except B & W *2: NTSC3.58 and NTSC4.43 only, except B & W *3 : Preset memory No. 3, 4 only *4: Preset memory No.
B Maintenance Replacing the Lamp The lamp used as a light source is a consumable product. Thus replace this lamp with a new one in the following cases. • When the lamp has burnt out or dims • “Please replace the Lamp and clean the Filter.” appears on the screen. • The LAMP/COVER indicator flashes in red. (Repetition rate of 3 flashes) The lamp life varies depending on conditions of use. Use an LMP-F270 Projector Lamp as the replacement lamp.
12Select “OK.” Caution Do not put your hands into the lamp replacement slot, and do not allow any liquid or other objects into the slot to avoid electrical shock or fire. Note To erase a message, press any key on the control panel of the projector or on the Remote Commander. Notes • Be careful not to touch the glass surface of the lamp. • The power will not turn on if the lamp is not secured properly. 6 Disposal of the used lamp For the customers in the USA Lamp in this product contains mercury.
Cleaning the Air Filter The air filter should be cleaned whenever you replace the lamp. Remove the air filter, and then remove the dust with a vacuum cleaner. The time needed to clean the air filter will vary depending on the environment or how the projector is used. 1 Turn the power off and unplug the power cord. 2 Remove the air filter covers. The air filter of the VPL-FX41/FW41 is on one side only. 3 Remove the air filter from the each claws (6 positions) on the air filter cover.
B Others Troubleshooting If the projector appears to be operating erratically, try to diagnose and correct the problem using the following instructions. If the problem persists, consult with qualified Sony personnel. Power Symptom Cause and Remedy The power is not turned on. • The power has been turned off and on with the ?/1 key at a short interval. c Wait for about 60 seconds before turning on the power (see page 22). • The lamp cover is not secured. c Close the lamp cover securely (see page 43).
Symptom Cause and Remedy “Please check Input-C Signal Sel.” appears in spite of inputting the correct signal from INPUT C. The setting of “Input-C Signal Sel.” in the Setup menu is incorrect. c Select “Computer,” “Video GBR” or “Component” correctly according to the input signal (see page 35). On-screen display does not “Status” in the Setup menu has been set to “Off.” c Set “Status” in the Setup menu to “On” (see page 34). appear. Color balance is incorrect.
Remote Commander Symptom The Remote Commander does not work. Cause and Remedy • The Remote Commander batteries are dead. c Replace them with new batteries (see page 15). • The COMMAND ON/OFF switch is set to OFF. c Set it to ON. • The ID number of the projector assigned in “ID Mode” in the Installation menu does not match the ID number of the ID MODE keys on the Remote Commander. c Assigns the same ID number to the projector and the Remote Commander, or set “ID Mode” in the Installation menu to “All.
Messages List Warning Messages Use the list below to check the meaning of the messages displayed on the screen. Message Meaning and Remedy High temp.! Lamp off in 1 min. The internal temperature is too high. c Turn off the power. c Check to see that nothing is blocking the ventilation holes. Frequency is out of range! • This input signal cannot be projected as the frequency is out of the acceptable range of the projector. • The resolution setting of the output signal of the computer is too high.
Specifications Optical characteristics Projection system 3 LCD panels, 1 lens, 3 primary color shutter system LCD panel VPL-FE40: 0.79-inch SXGA+ panel, 4,410,000 pixels (1400 × 1050 × 3) VPL-FX40/FX41: 0.79-inch XGA panel, 2,359,296 pixels (1024 × 768 × 3) VPL-FW41: 0.75-inch WXGA panel, 3,072,000 pixels (1280 × 800 × 3) Lens 1.3 times zoom lens (powered) f 30.6 to 39.7 mm/F1.66 to 2.18 * The lens is not supplied with the VPL-FE40L/FX40L/FX41L/ FW41L.
range of acceptable preset signals of the projector. Applicable video signals 15 k RGB 50/60 Hz, Progressive component 50/60 Hz, DTV (480/60i, 575/50i, 480/60p, 575/50p, 720/60p, 720/50p, 1080/60i, 1080/50i, 1080/60p, 1080/50p, 1080/24p, 1080/ 30p), Composite video, Y/C video Speaker Stereo speaker system, 40 × 70 mm (1 5/8 × 2 7/8 inches) Speaker output 1.
Operating temperature 0°C to 35°C (32°F to 95°F) Operating humidity 35% to 85% (no condensation) Storage temperature –20°C to +60°C (–4°F to +140°F) Storage humidity 10% to 90% Supplied accessories Remote Commander (1) Size AA (R6) batteries (2) Lens cap (1) (VPL-FE40/FX40/ FX41/FW41) Lens hole cover (1) (VPL-FE40L/ FX40L/FX41L/FW41L) AC power cord (1) CD-ROM (Operating Instructions, Application Software) (1) Quick Reference Manual (1) Safety Regulations (1) Security Label (1) Design and specifications are
Projection distance VPL-FE40/FX40/FX41: 100 inches: 6580 to 10060 mm 200 inches: 13310 to 20240 mm 300 inches: 20040 to 30430 mm VPL-FW41: 100 inches: 6910 to 10560 mm 200 inches: 13980 to 21250 mm 300 inches: 21040 to 31950 mm Maximum external dimensions 97 × 87 × 177 mm (W × H × D) Weight 1140 g Some of the items may not be available in some areas. For details, please consult your nearest Sony dealer.
Preset signals Memory Preset signal No. fH (kHz) fV (Hz) Sync Analog signals Digital signals 1 Video 60 Hz Video 60 Hz 15.734 59.940 – z 2 Video 50 Hz Video 50 Hz 15.625 50.000 – z 3 480/60i DTV 480/60i 15.734 59.940 S on G/Y z z 4 575/50i DTV 575/50i 15.625 50.000 S on G/Y z z 5 480/60p 480/60p (NTSC Progressive component) 31.470 60.000 S on G/Y z z 575/50p (PAL Progressive component) 31.250 z z 6 575/50p 50.000 S on G/Y 1080/60i 1035/60i, 1080/60i 33.
Memory Preset signal No. fH (kHz) fV (Hz) Sync VESA 56 35.156 56.250 H-pos, V-pos z 32 VESA 60 37.879 60.317 H-pos, V-pos z 33 VESA 72 48.077 72.188 H-pos, V-pos z 34 VESA 75 (IBM M5) 46.875 75.000 H-pos, V-pos z 35 VESA 85 53.674 85.061 H-pos, V-pos z 31 800 × 600 Digital signals z 36 832 × 624 Mac 16 49.724 74.550 H-neg, V-neg z z 37 1024 × 768 VESA 60 48.363 60.004 H-neg, V-neg z z 38 VESA 70 56.476 70.069 H-neg, V-neg z 39 VESA 75 60.023 75.
Memory Preset signal No. 63 1280 × 800 1280 × 800/60 fH (kHz) fV (Hz) Sync 49.702 59.810 H-neg, V-pos Analog signals Digital signals z z Preset memory No. at the input signal Analog signals Signal Preset memory No. Video (Video, S video connector) 1, 2 Component (Input-C connector) 3-8, 10-11 Video GBR (Input-C connector) 3-8, 10-11 Computer (Input-A, Input-B, Input-C connector) 21-40, 45-51, 55, 56, 60-63 Digital signals Signal Preset memory No.
Dimensions Front 26 (1 1/16) 532 (21) 71 (2 7/8) 116 (4 5/8) 133 (5 1/4) 65.4 65.4 (2 5/8) (2 5/8) 27.5(1 1/8) 100 (4) 13 (17/32) 47.5 (1 7/8) 87.5 (3 1/2) 145 (5 3/4) 24.5 (31/32) 7.6 (5/16) 497 (19 5/8) 29.
Side 133 (5 1/4) 55 (2 1/4) 34.7 (1 3/8) 112 (4 1/2) 34 (1 3/8) 9.5 (3/8) 16.5 (21/32) 41.6 (1 11/16) 27 (11/8) 279 (11) 298 (11 3/4) 352 (13 7/8) 77 (3 1/32) 95 (3 3/4) 80 (3 1/4) Removable panel for lamp replacement Others 24.
Rear 40 (15/8) 120 (4 3/4) 40 (15/8) 90 (3 5/8) 96 (3 7/8) 15 (19/32) 10 (13/32) 33.6 (1 3/8) 82 (3 1/4) 16.7 (11/16) 24.3 (31/32) 71 (2 7/8) 25 (1) 25 (1) Ventilation holes (Exhaust) Speakers Bottom 163 (6 1/2) 76.6 (3 1/8) 140 (5 1/2) 99 (4) 124 (5) 150.6 (6) 110 (4 3/8) 124.3 (5) 170 (6 3/4) 24.5 (31/32) 124 (5) 66.9 (2 41/64) 18.3 (3/4) 454.8 (18) 30 (1 3/16) 42.6 (1 43/64) 32.7 (1 5/16) 52.
Index H High Altitude Mode ................................ 34 Hue .......................................................... 29 A Adjust Signal APA .....................................................32 Phase ....................................................32 Pitch .....................................................32 Shift .....................................................32 Adjusting memory of the settings ........................28 Air filter .................................................
Power turn off ................................................. 22 Precautions ................................................ 5 Projecting ................................................ 20 R Remote Commander ............................... 14 front remote control detector ............... 10 location and function of controls ......... 14 rear remote control detector ................ 11 Reset ........................................................ 29 resetting an item ..................................
Sony Corporation