Blu-ray DiscTM/ DVD Home Theatre System
I LASER Do not install the appliance in a confined space, such as a bookcase or built-in cabinet. To reduce the risk of fire, do not cover the ventilation opening of the appliance with newspapers, tablecloths, curtains, etc. Do not expose the appliance to naked flame sources (for example, lighted candles). Do not expose batteries or appliances with battery-installed to excessive heat, such as sunshine and fire.
NOTE: This equipment has been tested and found to comply with the limits for a Class B digital device, pursuant to Part 15 of the FCC Rules. These limits are designed to provide reasonable protection against harmfld interference in a residential installation. This Blu-ray Disc/DVD receiver (HBD-E6100/H BD-E4100/ HBD-E3100/HBD-E2100) This equipment must not be co-located or operated in conjunction with any other antenna or transmitter.
12) Use only with the cart, stand, tripod, bracket, or table specified by the manufacturer, or sold with the apparatus. When a cart is used, use caution when moving the cart/apparatus combination avoid injury from tip-over. This equipment complies with IC radiation exposure limits set forth t_r an uncontrolled environment and meets RSS-102 of the IC to radio frequency (RF) Exposure rules.
Copy Protection • Please be a&ised of tile ad_.anced content protection systems used in both Blu-ray Disc and DVD media. These systems, called AACS (Advanced Access Content System) and CSS (Content Scramble System), may contain some restrictions on playback, analog output, and other similar features. The operation of this product and the restrictions placed may vary depending on the date of purchase, as the governing board of the AACS may adopt or change its restriction rules alter the time of purchase.
• Music and video recognition technology and related data are provided by Gracenote ('°. Gracenote is the industry standard in music recognition technology and related content delivery. For more information, please visit www.gracenote.com. CD, DVD, Blu-ray Disc, and music and video-related data t}om Gracenote, Inc., copyright {) 2000-present Gracenote. Gracenote Software, copyright {) 2000present Gracenote. One or more patents owned by Gracenote apply to this product and service.
• Opera ® Devices SDK from Opera Software ASA. Copyright 1995 - 2013 Opera Software ASA. All rights reser_.ed. POWERED BY OPERA® • All other trademarks respective are trademarks of their owners. • Other system and product names are generally trademarks or registered trademarks of the manufacturers. TMand @ marks are not indicated in this document. End User License Information Gracenote ® End Agreement User License This application or de_.ice contains software from Gracenote, Inc.
GRACENOTE DISCLAIMS ALL WARRANTIES EXPRESS OR IMPLIED, INCLUDING, BUT NOT LIMITED TO, IMPLIED WARRANTIES OF MERCHANTABILITY, FITNESS FOR A PARTICULAR PURPOSE, TITLE, AND NON-INFRINGEMENT. GRACENOTE DOES NOT WARRANT THE RESULTS THAT WILL BE OBTAINED USE OF THE GRACENOTE BY YOUR SOFTWARE OR ANY GRACENOTE SERVER. IN NO CASE WILL GRACENOTE BE LIABLE FOR ANY CONSEQUENTIAL OR INCIDENTAL DAMAGES OR FOR ANY LOST PROFITS OR LOST Q Gracenote, Inc. 2009 REVENUES.
Table of Contents About These Operating [nstructions Unpacking .......................................... Guide to Parts and Controls ............... Getting .... 8 10 13 Tuner Listening Other Started Using Step 1: Installing the Speakers .............................. Step 2: Connecting 17 the System ................................. Connecting the speakers ....... 18 18 Connecting Connecting 19 the TV .................. the other equipment ...........................
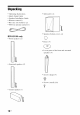
Unpacking • Subwoofer (1) • Operating [nstructions • Quick Setup Guide • Speaker • Remote [nstallation control (1) Guide • R6 (size AA) batteries (2) • FM wire antenna (aerial) (1) • Speaker-bottom BDV-E6100 • Front covers (4) only s _eakers (2) • Bases (4) • Lower parts of the front and surround speakers (4) L • Surround speakers i L • Center 10uS speaker (1) (2) • Screws (large) (4) • Screws (small) (16)
BDV-E4100 only • Front speakers • Lower parts i • Screws L • Surround of the front speakers (2) (2) speakers (large) (2) (small) (8) 0 (2) • Screws BDV-E3100 only • Front speakers (2) • Center speaker • Subwoofer (1) • Surround (1) • Center • Speaker-bottom covers speakers speaker (2) (1) (2) q) • Bases (2) 11us
• Subwoofer (1) BDV-E2100 only • Front speakers (2) • Surround • Center speakers speaker • Subwoofer 12uS (1) (1) (2)
Guide to Parts and Controls For more information, refer to the pages indicated ill parentheses. Slot [] I/@ (on/standby) Turns mode. on the unit, [] Disc tray (page [] _ (N-Mark) I ,' m'l'l or sets it to standby 26) (page [] Play operation [] 31) Position the NFC-compatible near this indication to activate function. During the demonstration, the volume level may be higher than the volume level you have set.
[] [] [] Lights up when stereo sound is received. (Radio only) [] Lights up when repeat play is activated. Lights up when muting is on. [] Lights up when the HDMI (OUT) jack is correctly connected to an HDCP (High-bandwidth Digital Content Protection) compliant equipment with HDMI input. system's When you press DISPLAY, status, frequency, etc. the stream The stream is is set to information/decoding status may not appear depending on the stream or item being decoded.
[] --_(open/close) Opens or closes the disc tray. SPEAKERS TV*--,AUDIO Selects whether from the system' TV sound s speakers is output or the TV' s speaker(s). This function works only when you set [Control for HDM[] to [On] (page TV I/_) TOP t_ENU POP 50). (on/standby) _ TUNrNG _LAY [] TV buttons or sets it to (pages Enters the title/chapter station number, etc.
.Itlal. I_ Moves the highlight to a displayed item. Starts or re-starts playback (resume play). Activates One-Touch Play (page 40) when the system is on and set to the "BD/DVD" function. @ (enter) Enters the selected item. [] MUSmEO Selects the pre-programmed when listening to music. II PAUSE equalizer Pauses or re-starts playback. • STOP HOME (pages 23, 40, 45) Stops playback and remembers the stop point (resume point).
[] BLUETOOTH Selects the "BT" function. When the blue LED indicator lights off during "BT" function, press to start pairing device. or connect FUNCTION Selects [] SLEEP to paired (page the playback (page Sets the sleep 42) 24) Bluetooth Step1: Installingthe Speakers source. Install the speakers by referring to the illustration below'. tiruer.
Installing all speakers in front position (Speaker layout: [All Front]) Step 2: Connecting the System Do not connect the AC power cord (mains lead) of the unit to a wall outlet (mains) until all the other connections are made. (BDV-E6100/BDV-E4100 only) To assemble the speakers, refer to the supplied "Speaker [nstallation Guide".
Select one of the following Video connection methods according to the input jacks on your TV. connection HDMI cable l) (not supplied) HDNIIN(ARC)or HDMIIN ,=======_ l)High Speed HDMI cable 2) The Audio Return Channel (ARC) function enables the TV to output sound through the s_stem with an HDMI connection, without perlorming the (_) or @ connection below. To set the ARC Rmction on this system, see [Audio Return Channel] (page 50).
If your TV is compatible with Audio Return Channel (ARC) function Connect audio and video jacks of your equipruent to the TV. The equipment sotmd call be output through the TV to the systeru by just making the HDM[ connection O ill "Connecting the TV" (page 19). TV Equipment (Set-top box, VCR, PlayStation _'°,or digital satellite receiver, etc.) Signal flow El _ ! ____. r_-_-_-_-J ..
Step 3: Preparing for Network Connection k_ To connect [Easy the system Network Performing to your Settings]. the Easy network, For details, Setup" (page perform see "Step 4: 23). Select the method based on your LAN (Local Area Network) environment. • If you use a wireless LAN The system has built-in Wi-Fi, and you can connect the system to the network making the network settings.
Before performing network settings When your wireless the • No Security LAN router Although you can easily make anyone can intercept wireless (access point) is Wi-Fi Protected Setup (WPS)compatible, you can easily set the network settings with the WPS button. If not, check the following information advance, below. and record ill it ill the space provided identifies name (SSID*) that WPA of data.
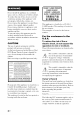
Step 4: Performing the Easy Setup Before Make performing sure then connect lead), all connections the AC power Step 1 settings using ./4,/_/, and @. and (mains ,*/t/,!_/* ® Follow' the Steps below to make the basic adjustments and network settings for the system. Displayed area, Perform [Easy Initial Settings].
Step5: Selectingthe PlaybackSource Step 6: Enjoying SurroundSound Press After FUNCTION the function front repeatedly you want panel appears until in the display. When you press FUNCTION once, the current function appears in the fl'ont panel display, then each time you press FUNCTION, the function changes cyclically the previous to different kinds of sound sources. They bring the exciting and powerful sound of movie theaters into your home.
To select from 1 the the sound option mode menu Press OPTIONS and t/,!, to select [Sound Mode], then press @. Press 2 Press t/,!, to select the sound mode, To select the preprogrammed music equalizer MUSIC appears during playback. on the TV screen. You call experience a feeling of presence the stadium when watching a football match broadcasting. then press @.
Some BD-ROMs with "BD-LIVE Logo*" have bonus content and other data that call Playing a Disc be downloaded for enjoyment. For playable (page 60). 1 2 discs, see "Playable Discs" Switch the input selector on your TV so that the signal from the system appears on your TV screen. Press -_, and place a disc on the disc tray. 1 Connect (USB) the USB port For local storage, USB memory. 2 Prepare for device (page to the 28). use a l GB or larger BD-LIVE (BD-LIVE only).
You call enjoy Blu-ray 3D Discs with the 3D logo*. 1 Prepare for Blu-ray 3D Disc playback. • Connect the system to your 3D-compatible TV using a High Speed HDM[ cable (page 19), • Set [3D Output Setting] and [TV Screen Size Setting for 3D] ill [Screen Settings] (page 46), 2 You can check the playback etc., by pressing DISPLAY. information, The displayed information differs depending on the disc type and system status. Example: when playing ¢3 a BD-ROM Insert a Blu-ray 3D Disc.
Playing from a USB Device You can play video/music/photo connected USB device. Enjoying music from a Bluetooth device files on a For playable types of files, see "Playable Types of Files" (page 61 ). 1 Connect the USB device to the (USB) port. Refer to the operating instructions of the USB device before connecting. Bluetooth wireless technology is a shortrange wireless technology that enables wireless data communication between digital devices. technology 10 meters Bluetooth operates (33 feet).
5 • To be able to use the Bluetnnth Bluetnoth device the same device profile supports to be connected as this system. the same may diffi_r depending the Blueu_oth device. • The audio function, must the Even profile, support playback because of the characteristics wireless technology. Device name appears on the TV screen. the lhnctions on this system from that on the Bluetnoth of may be You can pair up to 9 Bluetnnth devices.
3 Press t/_ [Device repeatedly List], to select then A list of paired press Blu(,tooth @. devices appears. 4 Press t/_ repeatedly the device to select you want, then press Connecting to a smartphone by Onetouch listening function (NFC) ®. By holding 5 6 Press ID_ to start Adjust playback. the volume. Adjust device the volume of the Blu('tooth first, if the volume level is still too low', adjust unit.
Two-dimensional direct code* for 11,' ['rli_ access r Use a two-dimensional code reader app. • The system only can recognizes and connects to one NFC-compatible device at a time. • Depending on your smartphone, you may need to turn on the NFC function on your smartphone in advance. For details, refer to the operating instructions of the smartphone. "13 o" O If pairing and the Blut, toodl connection lhil, do and move the the follnwing.
Playing via a Network Video panel streaming The control panel control appears when a video file starts playing. The displayed items may differ depending on the Internet content provider. To display Sony Entertainment Network serves again, press DISPLAY. as a gateway delivering selected [nternet content and a variety of on-demand entertainment straight to your unit. r_ • Some lnternet content requires registration via a PC before it can be played.
To play files stored on a DLNA server via the system (DLNA Player) Select You can play video/music/photo other DLNA-certified equipment connecting them to your This unit call be used renderer. • Server: Stores contents • Player: content files on by home network. as a player and shares H server j'J the home menu, want to play. oriel then select [Photo] in the file that you O media _-_\ Finds and plays digital from the DMS icon from [Music], Server and digital the DLNA [Video], 2_,,
To use the system PARTY host Select a track in ,_ music at the same time on all Sony equipment which are compatible with the PARTY STREAMING function and connected your home to a radio station AUDIO] in _ press OPTIONS. Then PARTY] to start. select To close, press OPTIONS, [Close PARTY]. [Input], [Start then select network. Contents ill J'J [Music] and the "FM", "BT" and "AUDIO" functions can be used with the PARTY STREAMING function.
3 Press ./. to select H [Video] or _'_ [Music]. 4 Press tit Search] to select or _ _ [Music [Video History] and [Search displayed. as title, History] performed via the [Video [Music Search] function. To search for further information items differ depending O" [Football] Turns on or off the football mode (page 25). [Repeat Setting] Sets repeat playback. searches Search] options [Sound Mode] Changes the sound mode setting (page 24).
H [Video] only _ [A/V SYNC] Adjusts the time gap between sound (page 37). picture and [3D Output Setting] Sets whether or not to output 3D _,ideo automatically. [Video Settings] • [Picture Quality Mode]: Selects tile picture settings for different lighting environments. • [BNR]: Reduces the mosaic-like block noise in the picture. • [MNR]: Reduces minor noise around the picture outlines (mosquito noise). [Pause] Pauses playback.
(A/V S YNC) When the sound does not match the pictures on the TV screen, you call adjust the delay between the picture and sound for each function separately. The setting method the function. differs depending on When other than the "BT" or "TV" function is selected 1 2 menu appears on the TV Press t_/_ to select [A/V SYNC], then press @. 3 Press */* to adjust the delay, (PCM, Dolby Digital, MPEG audio, or DTS) or multilingual tracks, you can change the audio format or language.
Ik, m'l'_ [j5 Stereo (Audinl)l and Ij5 Stereo/Audio2)] dn not appear il only one audin slream is recorded nn tlle disc. ICD • [j_ Stereo]: The standard stereo sound. • [,b I/L]: The sound of the left channel (monaural). • [b 21R]: The sound of the right channel (monaural). • [j_ L+R]: The sound of both the left and right channels output from each individual speaker. Listening to the Radio 1 Press FUNCTION repeatedly until "FM" appears in the front panel display. L Select the radio station.
To turn off the radio Press I/_. 1 You call preset up to 20 stations. Before tuning, make sure to turn down the volume to minimum. 1 2 Press FUNCTION repeatedly until "FM" appears in the front panel display. Hold down TUNING +/- until the auto scanning Press OPTIONS. The option menu appears on the TV screen, 4 5 6 Press PRESET +/- repeatedly to select the preset station. The preset number and frequency appear on the TV screen and front panel display.
System Audio Control You can enjoy the sound from TV or other equipment by a simple operation. Using the Control for HDMI Function for "BRAVIA" Sync This function is available on TVs with the "BRAVIA" Sync function. By connecting Sony equipment that is compatible with the Control for HDM[ function via all HDM[ cable, operation is simplified. To use the "BRAVIA" Sync ftmclion, be sure to turn on lhe syslem and all connected equipment after completed lhe HDMI conneclion.
2 Press */. to select _ 3 Press *It to select [Audio Settings], then press @. Press t/_ to select [Speaker • [Level] Settings], then press @. You can adjust the sound 4 [Setup]. You can change file unit of measuremem (feet or meters) by pressing the color button (RE[)). The [Select speaker layout.] display appears. 5 Press t/_ to select setting according to your speakers placement, then press @. • [Standard]: The surround speakers are installed ill the rear position.
7 Press RETURN, The system display. 8 Press returns t/,!, to select press Q), 9 Press t/,!, to the previous [Test Tone], then (Child Lock) to select [off], then press Q, You can deactivate the buttons on the unit (except for I/Q)) for preventing misoperation, such as child mischief. The lesl tnne signals are nnl nutpul lrnm lhe HDMI (OUT) jack. To adjusl time, Deactivating the Buttons on the Unit the volume press VOL nl all the speakers at one +/ .
Browsing Websites 1 While holding down TV I/_, number buttons to enter your TV's manufacturer's code (see the table). Then release TV I/(_. Manufacturer Code number SONY 01 (default) LG 02 PANASONIC 05 Prepare for Internet Connect tile system (page 21 ). press 2 Press HOME. Tile home screen. 3 browsing. to a network Press menu appears to select */* on tile TV l_) [Network].
You call check website information pressing DISPLAY. The display information differs depending website and page status. by on the Various settings and operations are available by pressing OPTIONS. The available items differ depending on the situation. [Browser Setup] Displays the lnternet Browser settings. • [Zoom]: Increases or decreases the size of the displayed contents. • [JavaScript Setup]: Sets whether to enable or disable JavaScript. • [Cookie Setup]: Sets whether or not to accept browser cookies.
[Display certificate] Displays server certificates that support SSL. sent from pages [Inputl Displays the software keyboard to enter characters while browsing a website. Using the Setup Display [Break] Moves the cursor input field. You call make various adjustments such as picture and sound. to the next line in the text [Delete] Erases one character cursor during The default settings to items are underlined. on the left side of the text input.
Icon Explanation [Screen Settings] _==_ '_(_'_ I _'_ 1-2-3 ,_ Settings] [Parental (page Control49) Makes detailed settings the Parental Control flmction. t_r • [3D Output [Auto]: Normally this. [Off]: 2D. [Network Settings] (page 51 ) Makes detailed settings Internet and network. • [TV Screen Size Setting for 3D] Sets the screen size of your 3D-compatible TV.
• [DVD [Letter black Aspect Box]: bands Ratio] Displays • [BD-ROM a wide picture with on the top and bottom. [Auto]: 24p Output] Outputs 24p video signals only when you connect a 1080/24p-compatible TV via an HDM[ connection and the [Output Video or [ 1080p]. [On]: Select this when compatible [Pan & Scan]: Displays a full-height picture on the entire screen, with trimmed sides. [Offl: with Select compatible Resolution] your 1080/24p this when with TV is video signals.
• [Pause Mode] (BD/DVD DVD-R/DVD-RW [Auto]: VIDEO/ • [Audio only) The picture, Output] You call select the output including subjects move dynamically, is output with Normally select this position. that no jitter. audio signal [Speaker]: method ill high resolution. Outputs multi-channel [Offl: Outputs • [Audio MIX Setting] the audio obtaiued by mixing audio and secondary audio audio. the primary audio only.
[Off]: The sound effects are disabled. You call hear sound as it is recorded. • [Speaker Settings] To obtain optimum surround sound, set the speakers. For details, see "Setting the Speakers" (page 40). • [Bluetooth AUDIO - AAC] You call enable and disable AAC audio. • [Subtitle When you select enabled. h'om high In case your quality sound if the AAC you cannol listen lo AAC device, select Language Code], the display for entering the language code appears.
[Audio • [BD Parental Control]/[DVD Parental Control]/[Internet Parental Control] By setting Parental Control, blocked or replaced Follow the on-screen your four-digit • [Internet Video scenes can be with different scenes. instructions and enter password. Video Allows videos, the playback [Block]: Internet Blocks videos, the playback Channel] off.
• [System Information] • [Renderer Options] You call display the system's software version information and the MAC address, [Auto • [Smart Select]: Allows a Sony DLNA controller to find the system as the target [Software License You call display Information. Information] the Software License Access Permission]: Sets whether not to allow automatic access detected DLNA controller. or from a newly equipment to operate by using the infrared ray. You can set this function to on or off.
-,¢ [Easy Network Settings] 1-2-3 Precautions Runs [Easy Network Settings] basic network settings. screen instructions. to make the Follow' the on- On safety • Should any solid object or liquid fall into the cabinet, unplug the system and have it checked by qualified personnel operating it any further. [Resetting] • [Reset to Factory Default Settings] You call reset the system settings to the factory default by selecting the group of settings. All the settings will be reset.
• Keep the system components microwave and discs away On replacement fl'om with strong magnets, such as ovens, or large loudspeakers. • Do not place heavy objects on the system. • Do not place metal objects in fl'ont of the front panel. It may limit reception of radio waves. • Do not place medical the system equipment ill a place where is ill use. It may cause a malfunction of medical equipment.
On Bluetooth communication • Blue'tooth • This unit supports devices approximately (unobstructed should be used within 10 meters (33 feet) distance) of each other. The effective communication range become shorter under the following conditions. - When a person, other obstruction connection a wireless microwave ovens LAN is that are in waves devices and wireless LAN 802.1 I b/g) use the same frequency band (2.4 GHz). When using your Bhwtooth device near a device with inability to connect.
Notes about Discs Troubleshooting On handling ff you experience ally of the following difficulties while using the system, use this discs • To keep the disc clean, handle the disc by its edge. Do not touch the surface. • Do not stick paper or tape on the disc. troubleshooting problem before ally problem Sony dealer.
appearswithoutanymessages on theentireTVscreen. [Anewsoftwareversionisavailable. Pleasego to the "Setup" section of the menu andselect "Network Update" to performthe update.] appearson the TV screen. --+ See [Network Update] update the system version.
Animageisnotdisplayedonthe entireTVscreen. Check the setting of [TV Type] [Screen Settings] (page 46). The aspect ratio ill Set [Audio on the disc is fixed. ColorirregularityoccursontheTV screen. [f the speakers based are used TV or projector, with a CRTinstall speakers at least 0.3 meters from the TV set. the (1 foot) Settings] sure that no magnetic object (magnetic latch on a TV stand, health care device, toy, etc.) is placed near the speakers.
lii iii llllllllllllllllllllllll iliIPlayback llllll!idoesnotstartfromthe resumepointwhereyoulaststopped i!i Radiostationscannotbe tunedin. ---* Check that tile antenna connected (aerial). securely. The signal too weak automatic (aerial) Adjust strength is the antenna of the stations is (when tuning in with tuning). Use manual tuning. playing. The resume point may be cleared from memory depending on the disc when • you open the disc tray. • you disconnect the USB device.
If the USB USB device is connected hub, disconnect the USB device via a it and connect directly to the trait. Thepicture/soundis poor/certain programs displaywitha lossofdetail, especiallyduringfast-motionordark scenes. Picture/sound quality depending on [nternet may be poor content providers. Picture/sound quality improved by changing may be the connection speed. Sony recommends a connection speed of at least 2.5 Mbps for standarddefinition definition video and 10 Mbps video.
Devices that use a 2.4 GHz frequency band, such as a microwave, Bluetooth, or digital cordless device, may interrupt communication. Move the unit away from such devices, or turn off such devices. The wireless LAN unstable depending environment, connection may be on the usage especially while using the Bhu, tooth function of the system. [n this case, adjust the usage environment. Thewirelessrouteryouwantis not showninthewirelessnetworklist.
l)Since Blu-ray Disc specifications are new and evolving, some discs may not be playable depending on the disc type and version. Also, the audio nt/tput diffbrs depending on the source, connected outpnt,jack, and selected audio settings. 2) BD-RE: Vet.2.1 Note on double-layer BDs/DVDs BD-R: Ver. l.l, 1.2, 1.3 including organic pigment type BD-R (LTH type) BD-Rs recorded on a PC cannot be played if postscripts are recordable. 3) A CD or DVD disc will not play if it has not been correctly finalized.
Music MP3 (MPEG-I Layer lib Audio .rap3, .mka .6 AAC"I .m4a, .aac .6, .mka '6 WMA9 Standard *l .wma LPCM .way, .mka '6 FLAC *(_ .flac, .fla AC3 % .ac3, .mka Photo !! !!!!!!i',,i JPEG .jpeg, .jpg, .jpe PNG .png t9 GIF .gif *° MPO .mpo*(_*l° i!ii!ii!ii!iiii' *1 The syslem may not play' this file lk)rmal nn a DLNA server. *2 The syslem can only play slandard delinitinn video on a DLNA server. *3 The syslem dnes not play' DTS %rmat files on a DLNA server.
Supported Audio Formats Specifications Audio formats supported by this system are as follows. U.S.A. model only: AUDIO POWER SPECIFICATIONS POWER OUTPUT AND TOTAL HARMONIC DISTORTION: Amplifier Function Format "BD/DVD .... TV" (DIGITAL IN) LPCM 2ch O LPCM 5.1ch, LPCM 7.1ch © Dolby Digital O Dolby TrueHD, Dolby Digital Plus © DTS O O DTS-ES Discrete 6.1, DTS-ES Matrix 6.1 O* O* D TS 9 6124 O DTS-HD High Resolution Audio © DTS-HD Master Audio O O: Supported O O* format.
LAN Section LAN (100) terminal 100BASE-TX Terminal FM Tuner Wireless LAN Section Blu-ray Disc/DVD receiver (HBD-E6100/HBD-E4100/ HBD-E3100/HBD-E2100) Standards Compliance IEEE 802.11 b/g/n Frequency and Channel 2.4 GHz band: channels Bluetooth Speakers Front/Surround BDV-E6100 1 11 Section Comnmnication system Blur, tooth Specification version 3.0 Output Bluetooth Specification Power Class 2 Maximum communication range Line of sight approx. 10 m (33 ft) l) Frequency band 2.
Center (SS-CTB122) BDV-E4100/BDV-E3100 for BDV-E6100/ Dimensions (w/h/d) (approx.) 240 mmx 90 mmx 85 mm (9 1/2 in x 3 5/8 in x 3 3/8 in) Mass (approx.) 0.58 kg (1 lb 5 oz) (with speaker cord) Center (SS-CTB121) for BDV-E2100 Dimensions (w/hid) (approx.) 225 mmx 84 mm x 75 mm (8 7/8 in x 3 3/8 in x 3 in) Mass (approx.) 0.5 kg (1 lb 2 oz) (with speaker cord) Subwoofer (SS-WSB123) for BDV-E6100/BDV-E4100/BDV-E3100 Dimensions (w/h/d) (approx.
Language Code List The language spellings Code 1027 Language Afar 1028 1032 1039 1044 1045 1051 1052 1053 1057 1059 1060 1061 1066 conform to the [SO (739:1988 (E/F) standard.
Code Area Code Area Code Area Code Area 2044 2047 Argentina Australia 2109 2200 Germany Greece 2362 2376 Mexico Netherlands 2499 2086 Sweden Switzerland 2046 2057 2070 Austria Belgium Brazil 2219 2248 2238 Hong Kong India Indonesia 2390 2379 2427 New Zealand Norway Pakistan 2543 2528 2184 Taiwan Thailand United 2090 2092 2093 2115 Chile China Colombia Denmark 2239 2254 2276 2304 Ireland Italy Japan Korea 2424 2428 2436 2489 Philippines Poland Portugal Russia 2165 2174 Finland
Index Numerics D 3D 27 DLNA 3D Output Setting 46 33, 51 Dolby Digital DTS 37 37 A DVD 60 A/V SYNC DVD DVD Aspect Ratio 47 Parental Control 50 Attenuate 37 - AUDIO Audio DRC 48 Audio Language Audio Audio Output Return Audio Settings Auto 48 DVD-ROM 49 47 E 48 Channel 50 48 Display 24p Output Easy Network Easy Setup Settings 52 23 50 F B FM Mode BD Audio MIX Setting 48 BD Hybrid Disc Playback Layer BD Internet Connection 49 BD Parental Control 50 BD/DVD Me
IV1 S Main Unit illumination Multiplex broadcast 50 sound 38 N Network Connection Network Settings Network NFC 30 Update Diagnostics 51 51 Screen Format Screen Saver 50 Screen SLEEP Settings 42 36 Software License Effect Level Language 50 51 40, 49 41 Subtitle Language System [nformation 49 51 T P Parental Control Parental PARTY Control Settings Auto Start 51 Password Pause [nformation 48 Speaker Settings Distance 41 o OSD 46 Slideshow Sound 46 46 Area Code
The software of this system may be updated in the future. available updates, please visit the following URL. To find out details on any http://www.sony.com/blurayhtsupport/ I_ i_:::lI"1"111 ,IP gracenoL, e° Java B/u-ray B'l_-r_y _isc http://www.sony.