2-887-519-11(1) Digital HD Video Camera Recorder Digital HD Video Camera Recorder Caméscope numérique HD Operating Guide Before operating the unit, please read this manual thoroughly, and retain it for future reference The supplied CD-ROM includes Operating Guide for the HVR-V1 series. (Japanese, English, French, German, Italian, Spanish, and Simplified Chinese versions). For more details, see “Using the CD-ROM Manual” on page 12. US http://www.sony.
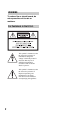
WARNING To reduce fire or shock hazard, do not expose the unit to rain or moisture. For Customers in the U.S.A. This symbol is intended to alert the user to the presence of uninsulated “dangerous voltage” within the product’s enclosure that may be of sufficient magnitude to constitute a risk of electric shock to persons. This symbol is intended to alert the user to the presence of important operating and maintenance (servicing) instructions in the literature accompanying the appliance.
IMPORTANT SAFEGUARDS For your protection, please read these safety instructions completely before operating the appliance, and keep this manual for future reference. Carefully observe all warnings, precautions and instructions on the appliance, or the one described in the operating instructions and adhere to them. Cleaning Unplug the set from the wall outlet before cleaning or polishing it. Do not use liquid cleaners or aerosol cleaners.
IMPORTANT SAFEGUARDS (Continued) Lightning Safety Check For added protection for this set during a lightning storm, or when it is left unattended and unused for long periods of time, unplug it from the wall outlet and disconnect the antenna or cable system. This will prevent damage to the set due to lightning and power-line surges.
Read this first English Before operating the unit, please read this manual thoroughly, and retain it for future reference. CAUTION Replace the battery with the specified type only. Otherwise, fire or injury may result. For customers in the U.S.A. and CANADA HVR-V1U only RECYCLING LITHIUM-ION BATTERIES Lithium-Ion batteries are recyclable. You can help preserve our environment by returning your used rechargeable batteries to the collection and recycling location nearest you.
Read this first (Continued) For the State of California, USA only Perchlorate Material - special handling may apply, See www.dtsc.ca.gov/hazardouswaste/perchlorate Perchlorate Material: Lithium battery contains perchlorate. Notes on use Types of cassette you can use in your camcorder Your camcorder is capable of recording in HDV, DVCAM and DV formats. When recording in HDV/DV format, it is recommended to use mini DV cassettes. When recording in DVCAM format, it is recommended to use mini DVCAM cassettes.
“Memory Stick” (You cannot use it in your camcorder.) Microphone b Notes • You cannot use any type of memory card except “Memory Stick Duo.” • “Memory Stick PRO” and “Memory Stick PRO Duo” can be used only with “Memory Stick PRO” compatible equipment. • Do not attach a label or the like on a “Memory Stick Duo” or a Memory Stick Duo Adaptor. When using a “Memory Stick Duo” with “Memory Stick” compatible equipment Be sure to insert the “Memory Stick Duo” into the Memory Stick Duo Adaptor.
Read this first (Continued) • Exposing the LCD screen, the viewfinder, or the lens to direct sunlight for long periods of time may cause malfunctions. • Do not aim at the sun. Doing so might cause your camcorder to malfunction. Take pictures of the sun only in low light conditions, such as at dusk. On recording • Before starting to record, test the recording function to make sure the picture and sound are recorded without any problems.
Table of Contents IMPORTANT SAFEGUARDS ..................................................................3 Read this first ...........................................................................................5 Using the CD-ROM Manual ....................................................................12 Getting Started Step 1: Checking supplied items ............................................................13 Step 2: Attaching the supplied microphone and the lens hood with lens cover .............
Locating a scene on a tape .................................................................... 50 Searching for a scene by date of recording (Date search) ................ 50 Searching for a recording start point (Index search) .......................... 50 Playing the picture on a TV .................................................................... 52 Using the Menu Using the menu items ........................................................... 57 Menu items .........................................
Using a Computer Connecting to a computer ......................................................................95 Copying still images to a computer ........................................................95 Copying movies on a tape to a computer ...............................................98 Troubleshooting Troubleshooting ....................................................................................101 Warning indicators and messages .......................................................
Using the CD-ROM Manual English The supplied CD-ROM includes versions of the Operating Guide for the HVR-V1 series in Japanese, English, French, German, Italian, Spanish, and Simplified Chinese in PDF format. Preparation The following program must be installed on your computer in order to read the Operating Guide contained on the CDROM. • Adobe Reader Version 7.0 or higher z Tip • If Adobe Reader is not installed, you can download it from the following URL: http://www.adobe.
Getting Started Step 1: Checking supplied items Make sure that you have following items supplied with your camcorder. The number in the parentheses indicates the number of that item supplied. • The cassette tape and “Memory Stick Duo” are not included. See page 24, 114 and 118 for compatible cassettes and “Memory Stick Duo” for your camcorder. Rechargeable battery pack NP-F570 (1) (p. 16, 120) Lens hood with lens cover (1) (p. 15) Getting Started AC Adaptor (1) (p. 16) Large eyecup(1) (p.
Step 2: Attaching the supplied microphone and the lens hood with lens cover Attaching the supplied microphone 4 Connect the plug of the microphone to the INPUT1 jack 5. 1 2 5 Put the microphone cable into the cable holder 4. 3 6 Select the channel with the REC CH SELECT switch 6. The REC CH SELECT switch positions and the channels to be used at the switch positions are shown in the table below.
Attaching lens hood with lens cover To open the shutter of the Lens hood with lens cover Move the lens cover lever up and down to open or close the lens cover. Getting Started 2 1 Lens hood fixing screw Move the lens cover lever to OPEN to open the lens cover, and move the lever to CLOSE to close the lens cover. Align the marks on the lens hood to those on the camcorder, and turn the lens hood in the direction of the arrow. Tighten the lens hood fixing screw.
Step 3: Charging the battery pack You can charge the battery by attaching the “InfoLITHIUM” battery pack (L series) to your camcorder. b Note 2 With the B mark on the DC plug facing the cassette compartment, connect the AC Adaptor to the DC IN jack on your camcorder. • You cannot use batteries other than the “InfoLITHIUM” battery pack (L series) (p. 120). B mark 3 Connect the power cord to the AC DC plug DC IN jack To the wall outlet AC Adaptor Adaptor. 4 Connect the power cord to the wall outlet.
After charging the battery Recording time The CHARGE lamp turns off when the battery is fully charged. Disconnect the AC Adaptor from the DC IN jack. Approximate time (min.) available when you use a fully charged battery pack. Recording in the HDV format z Tip • You can check the remaining battery with Battery info (p. 49). Battery pack Slide the POWER switch to OFF (CHG). Push the BATT RELEASE (battery release) button and remove the battery pack.
Step 3: Charging the battery pack (Continued) Playing time Approximate time (min.) available when you use a fully charged battery pack.
Step 4: Turning the power on and holding your camcorder properly To record or play back, slide the POWER switch to the respective direction. When using it for the first time, [CLOCK SET] screen appears (p. 22). 2 Hold the camcorder properly. Getting Started POWER switch 1 While pressing the green button, 3 Ensure a good grip, then fasten the grip belt. set the POWER switch. If the POWER switch is set to OFF (CHG), slide it while pressing the green button. CAMERA: To record pictures.
Step 5: Adjusting the LCD panel and viewfinder To turn off the LCD backlight to make the battery last longer The LCD panel Open the LCD panel while pressing the OPEN button 90 degrees to the camcorder (1), then rotate it to the best angle to record or play (2). Press and hold the DISPLAY/BATT INFO button for a few seconds until appears. This setting is practical when you use your camcorder in bright conditions or where you want to save battery power.
When the picture in the viewfinder is hard to see b Note • Do not remove the pre-attached eyecup. Large eyecup (supplied) Getting Started If you cannot see the picture in the viewfinder clearly under bright circumstances, use the supplied large eyecup. To attach the large eyecup, stretch it slightly and align it with the eyecup groove in the viewfinder. You can attach the large eyecup facing either the right or left side. Attach with the protruding part at the top.
Step 6: Setting the date and time Set the date and time when using this camcorder for the first time. If you do not set the date and time, [CLOCK SET] screen appears every time you turn on your camcorder or change the POWER switch position. z Tip • If you do not use your camcorder for about 3 months, the built-in rechargeable battery gets discharged and the date and time settings may be cleared from the memory. In that case, charge the rechargeable battery and then set the date and time again (p. 125).
z Tip • The date and time do not appear during recording, but they are automatically recorded on the tape, and can be displayed during playback ([DATA CODE] (p. 73)). Changing the language setting Getting Started You can change the on-screen displays to show messages in a specified language. Select the screen language in [LANGUAGE] (p. 83).
Step 7: Inserting a tape or a “Memory Stick Duo” b Note Cassette tape See page 114 for details of usable cassettes and prevention of accidental erasure. 1 Slide and hold the OPEN/ EJECT lever in the direction of the arrow and open the lid. • Do not push the portion marked {DO NOT PUSH} while it is sliding in. It may cause a malfunction. 3 Close the lid. z Tip OPEN/EJECT lever • The recordable time varies depending on [DV REC MODE] (p. 75).
2 Insert the “Memory Stick Duo” into the “Memory Stick Duo” slot in the right direction until it clicks. Getting Started Access lamp b Note • If you insert the “Memory Stick Duo” into the slot in the wrong direction, the “Memory Stick Duo,” the “Memory Stick Duo” slot, or image data may be damaged. To eject a “Memory Stick Duo” Lightly push the “Memory Stick Duo” once. b Notes • When the access lamp is lit or flashing, your camcorder is reading/writing data.
Recording/Playback Recording Rec lamp REC START/STOP button B Lens hood PHOTO/EXPANDED FOCUS button POWER switch Rec lamp REC START/STOP button A This camcorder records movies on tape and still images on “Memory Stick Duo.” The procedure for recording movies is below. • This camcorder can record movies in HDV or DVCAM (DV) format. The factory setting is HDV format ([REC FORMAT] p. 75). 1 Open the shutter of the lens hood. 2 While pressing the green button, set the POWER switch to CAMERA.
3 Press the REC START/STOP button A (or B). 410min REC 00:04:50:04 60min [STBY] t [REC] The Rec lamp lights up during recording. To stop the movie recording, press the REC START/STOP button again. • When recording in HDV format, the aspect ratio is fixed to 16:9. When recording in DVCAM (DV) format, you can switch the aspect ratio to 4:3 ([DV WIDE REC] p. 76). • You can change the screen display during recording (p. 48). • Indicators displayed on the screen during recording are shown on page 137.
Recording (Continued) To record still images Press the PHOTO/EXPANDED FOCUS button. The image is recorded on a “Memory Stick Duo.” Recording is complete when disappears. You can also record still images during movie recording. z Tips • When you are not recording a movie, you will hear the shutter click. • The still image size is as follows: – When recording in HDV or DVCAM (DV) (16:9) format: 1.2M (1,440 × 810 dots) – When recording in DVCAM (DV) (4:3) format: 0.
Playback Zoom lever POWER switch PLAY button SEL/PUSH EXEC dial Recording/Playback VOLUME/MEMORY button MEMORY/PLAY button MEMORY/INDEX button You can play back movies as follows. 1 While pressing the green button, set the POWER switch to VCR. 2 Start playing back. Press m (rewind) to go to the point you want to view, then press N (play) to start playback.
Playback (Continued) • Time code and user bits are not displayed correctly unless time code and user bits are recorded on the tape, or the recorded time code is compatible with your camcorder. z Tips • Indicators displayed on the screen during playback are shown on page 138. • You can change the screen display during playback (p. 48). To search for a scene while viewing a movie Press M/m during playback (Picture Search).
Changing the settings of your camcorder recordings Using the handle zoom Adjusting the zoom A 1 Set the handle zoom switch B to H (high) or L (low). C B z Tip • You can set the zoom speed of the handle zoom lever in [HANDLE ZOOM] (p. 65). D 2 Press the handle zoom lever A to zoom in or out. Move the power zoom lever C slightly for a slower zoom. Move it further for a faster zoom. Wide view: (Wide angle) • You cannot adjust the zoom speed by pressing the handle zoom lever.
Changing the settings of your camcorder recordings (Continued) Adjusting the focus manually 2 Rotate the focus ring D and adjust the focus. 9 changes to when the focus cannot be adjusted any farther. 9 changes to when the focus cannot be adjusted any closer. z Tips For focusing manually • It is easier to focus on the subject when you use the zoom function. Move the power zoom lever towards T (telephoto) to adjust the focus, and then, towards W (wide angle) to adjust the zoom for recording.
z Tip • The focal distance information (for when it is dark and hard to adjust the focus) appears for about 3 seconds in the following cases. (It will not be displayed correctly if you are using a conversion lens (optional)). – When the focus mode is switched from automatic to manual. – When you rotate the focus ring.
Changing the settings of your camcorder recordings (Continued) z Tip z Tips • This is handy for changing the brightness of the screen and setting the desired brightness by dial operation. • The range of focus, an important effect of the aperture, is called the depth of field. The depth of field gets shallower as the aperture is opened, and deeper as the aperture is closed. Use the aperture creatively to obtain the desired effect in your photography.
3 Adjust the picture quality by turning the EXPOSURE/IRIS dial G. z Tip • If you set the AUTO LOCK switch A to HOLD after manual adjustment, the manually adjusted items are saved. To restore automatic adjustment b Notes • If you set the AUTO LOCK switch A to AUTO LOCK, other manually adjusted items (gain, shutter speed, white balance) also become temporarily automatic. • As you shift the zoom from W (wide) to T (telephoto), the aperture value varies from F1.6 to F2.8.
Changing the settings of your camcorder recordings (Continued) To hide the zebra pattern • Set the ZEBRA switch E to OFF. b Note • The zebra pattern is not recorded on the tape. z Tip • This is convenient for adjusting the brightness while a histogram (p. 71) is displayed. Adjusting the gain You can adjust the gain manually when shooting blackish or dark objects if you do not want the AGC (auto gain control) to be activated.
Adjusting to Natural Color (White balance) A Indicator Shooting conditions A (MEMORY A) B (MEMORY B) • White balance values adjusted for light sources can be stored in memory A and memory B. Follow the steps below (Outdoor) B C You can adjust the white balance according to the light of the recording environment. You can set two sets of white balance adjustment data separately in memory A and memory B for two different recording conditions with A and B.
Changing the settings of your camcorder recordings (Continued) To restore the automatic white balance Press the WHT BAL button B, or set the AUTO LOCK switch A to AUTO LOCK. Customizing the picture quality (Picture profile) b Note • If you set the AUTO LOCK switch A to AUTO LOCK, other manually adjusted items (iris, gain, shutter speed) also become temporarily automatic. C B A You can customize the picture quality by adjusting [COLOR LEVEL], [SHARPNESS], etc.
To change the picture profile Picture profile number (setting name) Recording condition You can change the settings in [PP1] through [PP6]. PP6 :------ You can assign your own setting. 1 Press the PICTURE PROFILE button C. 1 During standby, press the PICTURE PROFILE button C. 2 Select a picture profile number by You can shoot with the settings of the selected picture profile. 3 Select [OK] by turning the SEL/ PUSH EXEC dial A.
Changing the settings of your camcorder recordings (Continued) Item Adjustment Item Adjustment [KNEE POINT] The starting point of video signal compression, set in order to prevent overexposed highlights by keeping the subject's highbrightness area signal within the dynamic range of your camcorder. [AUTO] To automatically set the knee point. [HIGH] To set a relatively high knee point. [MIDDLE] To set an average knee point. [LOW] To set a relatively low knee point.
6 Repeat steps 4 and 5 to adjust other items. 7 Select [ RETURN] by turning the SEL/PUSH EXEC dial A, then press the dial. 8 Select [OK] by turning the SEL/PUSH EXEC dial A, then press the dial. A picture profile indicator appears. b Note • In the case of [TYPE3] of [SKINTONE DTL], the effect may also be applied to a color that is not a skin color. z Tip • Each name can be up to 12 characters long. Characters that can be used in profile names: • A~Z • 0~9 • -_ /# & : .
Changing the settings of your camcorder recordings (Continued) Adjusting the volume You can adjust the volume of a microphone connected to INPUT1/INPUT2. z Tip • You can find how to attach the supplied microphone on page 14. A B 1 Set the AUTO/MAN switch A of the channel to be adjusted to MAN. appears on the screen. 2 Turn the AUDIO LEVEL dial B to adjust the volume. You can adjust the volume of the microphone connected to INPUT1 by CH1, and that of the microphone connected to INPUT2 by CH2.
Assigning the functions to the ASSIGN buttons You may need to assign some functions to the ASSIGN buttons. You can assign a single function to each the ASSIGN button 1 to 6. ASSIGN button 1-3 Functions you can assign to the ASSIGN buttons LAST SCN RVW (p. 45) MARKER (p. 71) HYPER GAIN (p. 67) D.EXTENDER (p. 67) ALLSCAN MODE (p. 72) FOCUS INFNTY (p. 44) REC REVIEW (p. 45) END SEARCH (p. 45) INDEX MARK (p. 44) PEAKING (p. 70) STEADYSHOT (p. 63) COLOR BAR (p. 63) FOCUS MACRO (p. 64) SPOTLIGHT (p.
Assigning the functions to the ASSIGN buttons (Continued) 5 Select [OK] by turning the SEL/ PUSH EXEC dial B, then press the dial. 6 Press the MENU button A to hide the menu. z Tips • Shot transition is assigned to the ASSIGN buttons 1, 2 and 3 (p. 46). Cancel the shot transition assignment to return to the pre-setting assignment. • To cancel the shot transition, select [SHOT TRANS] t [YES] in step 3.
Reviewing the most recently recorded scenes (Rec review) You can view about 2 seconds of the scene recorded just before you stopped the tape. This is convenient during playback of the latest scene check. 1 Press the ASSIGN button assigned to [REC REVIEW] during standby mode. The last 2 seconds (approx.) of the most recently recorded scene are played back. Then, your camcorder is set to standby.
Assigning the functions to the ASSIGN buttons (Continued) z Tip • If you press the ASSIGN button again during the last scene review, your camcorder plays back the last 5 seconds of the most recently recorded movie, then goes to standby at the end of the recording.
2 Press the ASSIGN button 2 to check the SHOT-A. Press the ASSIGN button 3 to check the SHOT-B. The selected setting will take effect on the picture on the screen. The focus, zoom, and so on, are automatically adjusted as stored in the setting. b Note • You cannot check the transition time and curve set using [SHOT TRANS] (p. 65). 4 Record using the shot transition 1 Press the ASSIGN button 1 repeatedly to bring up the SHOT TRANSITION EXEC screen.
Changing/checking the settings in your camcorder Displaying the settings in your camcorder (Status check) You can check the setup value of the following items. A C • Audio setup such as [DV AUDIO MIX] (p. 70) • Output signal setup ([VCR HDV/DV], etc.) (p. 75) • Functions assigned to the ASSIGN buttons (p. 43) • Camera setup. (p. 62) • Picture profile (p. 38) B 1 Press the STATUS CHECK button B.
Checking the remaining battery (Battery Info) Set the POWER switch to OFF (CHG), then press the DISPLAY/BATT INFO button C. The approximate recordable time in the selected format and battery information appear for about 7 seconds. You can view the battery information for up to 20 seconds by pressing the button again while the information is displayed. Remaining battery (approx.) Recording capacity (approx.
Locating a scene on a tape 3 Press . (previous)/> (next) 2 on the Remote Commander to select a recording date. You can select the previous or the next date of the present point on the tape. 1 Playback starts automatically from the point where the date changes. 2 3 To cancel the operation Press STOP 3 on the Remote Commander. b Notes b Note • See page 136 for details on how to use the Remote Commander.
3 Press . (previous)/> (next) 2 on the Remote Commander to select an index point. You can select the index signal of the point that you want to start playing back the tape. Playback starts automatically from the point where the selected index signal is recorded. Press STOP 6 on the Remote Commander. b Notes • If index recording is less than 2 minutes, your camcorder may not accurately find the index point.
Playing the picture on a TV Connection methods and image quality differ depending on what type of TV is connected and connectors used. Use the supplied AC Adaptor to obtain AC power (p. 16). Refer also to the instruction manuals supplied with the device to be connected. Selecting the connection method according to your TV type and connectors High definition TV HD (high definition) image quality* • An HDV formatted picture is played back as it is (HD image quality).
Jacks on your camcorder Open the jack cover and connect the cable. 2 3 4 1 : Signal flow Type Camcorder A 2 Cable TV Component video cable (supplied) (Green) Y (Blue) PB/CB (Red) PR/CR 3 A/V connecting cable (supplied) Menu Setting Recording/Playback Connecting to a high definition TV (IN/OUT REC) menu t [VCR HDV/DV] t [AUTO] (p. 75) [COMPONENT] t [1080i/480i] (p. 76) (Red) (White) (Yellow) b Note • An A/V connecting cable is also needed to output audio signals.
Playing the picture on a TV (Continued) : Signal flow Type Camcorder B 1 Cable HDMI cable (optional) TV HDMI IN Menu Setting (IN/OUT REC) menu t [VCR HDV/DV] t [AUTO] (p. 75) b Notes • Use an HDMI cable with the HDMI logo. • Pictures in the DVCAM (DV) format are not output from the HDMI OUT jack, if copyright protection signals are recorded in the pictures. • DVCAM (DV) format pictures input to the camcorder via i.LINK cable (p. 89) cannot be output.
Connecting to a 16:9 (wide) or 4:3 TV To set the aspect ratio according to the connected TV (16:9/4:3) Change [DOWN CONVERT] setting to match your TV (p. 77). b Note • When you play back a tape recorded in the DVCAM (DV) format on a 4:3 TV not compatible with the 16:9 signal, set [DV WIDE REC] to [OFF] on your camcorder when recording a picture (p. 76).
Playing the picture on a TV (Continued) : Signal flow Type Camcorder Cable TV A/V connecting cable with S VIDEO (optional) 3 (Red) (White) (Yellow) Menu Setting (IN/OUT REC) menu t [VCR HDV/DV] t [AUTO] (p. 75) [DOWN CONVERT] t [SQUEEZE]/[LETTER BOX]/[EDGE CROP]* (p. 77) b Notes • When connecting only an S VIDEO plug (S VIDEO channel), audio signals are not output.
Using the Menu Using the menu items You can change various settings or make detailed adjustments using the menu items displayed on the screen. 3 Select the icon of the desired menu by turning the SEL/PUSH EXEC dial, then press the dial. CAMERA SET (p. 62) AUDIO SET (p. 68) DISPLAY SET (p. 70) IN/OUT REC (p. 75) TC/UB SET (p. 78) MEMORY SET (p. 80) OTHERS (p. 82) POWER switch SEL/PUSH EXEC dial 1 While pressing the green button, set the POWER switch.
5 Select the desired setting by turning the SEL/PUSH EXEC dial, then press the dial. 1 2 0 min --:--:--:-- REMOTE CTRL ON OFF [ MENU ] : END 6 Press the MENU button to hide the menu screen. To return to the previous screen, select [ RETURN].
. Menu items Available menu items (z) vary depending on the POWER switch position. Position of POWER switch: CAMERA VCR z z z z z z z z z z z z z z z z z z z z z z z – – – – – – – – – – – – – – – – – – – – – – – z z z – – – – – z z z z z z z z z z z z – – – – – – – – – – (CAMERA SET) menu (p. 62) Using the Menu EXPOSURE/IRIS SMTH SLW REC CNTRST ENHCR PROG.
Menu items (Continued) Position of POWER switch: LCD BRIGHT LCD COLOR LCD BL LEVEL VF B.LIGHT VF COLOR VF POWERMODE DATA CODE LETTER SIZE REMAINING DISP OUTPUT CAMERA VCR z z z z z z – z z z z z z z z z z z z z z – z z z z z z – z z – – z z z z z z z z z z z z z z z z – z z z – z z z z – z z z z z z z z z z z z z (IN/OUT REC) menu (p. 75) REC FORMAT VCR HDV/DV DV REC MODE DV WIDE REC EXT REC CTRL COMPONENT i.LINK CONV DOWN CONVERT (TC/UB SET) menu (p.
Position of POWER switch: CLOCK SET WORLD TIME LANGUAGE USB SELECT PB ZOOM QUICK REC DATE REC BEEP REC LAMP REMOTE CTRL HOURS METER CAMERA VCR z z z – – z z z z z z z z z z z – – z – z z Using the Menu 61
(CAMERA SET) menu Settings to adjust your camcorder to the recording conditions (EXPOSURE/IRIS/ STEADYSHOT/BACK LIGHT, etc.) The default settings are marked with B. The indicators in parentheses appear when the items are selected. See page 57 for details on selecting menu items. Press the MENU button t select the (CAMERA SET) by turning the SEL/ PUSH EXEC dial.
b Notes • Sounds cannot be recorded • [SMTH SLW REC] settings are automatically canceled if you turn the power off and back on. • The shutter speed is automatically set to 1/250 even if you set it to a speed slower than 1/250. • The recording time may be shorter than the set time, depending on recording conditions. • The image quality is lower than with the regular recording. x TYPE You can select the type of the SteadyShot function that compensates for camerashake.
Press the MENU button t select the dial. (CAMERA SET) by turning the SEL/PUSH EXEC x TYPE You can select the color bar type. TYPE 1 FOCUS MACRO Since the default setting is [ON], you can focus on a subject within 80 cm (about 2 5/ 8 feet). When [FOCUS MACRO] is set to [OFF] ( ), you cannot focus on a subject within 80 cm (about 2 5/8 feet) but you can easily find the focal point of a subject at 80 cm (about 2 5/8 feet) or further regardless of the zoom position.
b Note • If you adjust the iris manually, you cannot obtain the effect of [AT IRIS LMT]. ATW SENS You can set the auto white balance for operation under a reddish light source such as an incandescent lamp or candle, or under a blueish light source such as in outdoor shade. B INTELLIGENT Adjustment is automatically performed to achieve a natural atmosphere according to the brightness of the scene. HIGH MIDDLE LOW Redness or blueness will increase.
Press the MENU button t select the dial. (CAMERA SET) by turning the SEL/PUSH EXEC SOFT TRANS Make the transition slowly at the beginning and end, and linearly in between. *1 *2 b Note • You cannot change [TRANS TIME] and [TRANS CURVE] settings during store, check, or execution of [SHOT TRANS]. Cancel [SHOT TRANS] setting by pressing the ASSIGN button 1 several times before changing [TRANS TIME] or [TRANS CURVE] setting. x START TIMER You can set the timer for starting the shot transition.
DV FRAME REC You can record pictures with a stop-motion animated effect by alternately recording a few frames and then moving the subject a little. Operate your camcorder using the Remote Commander to prevent camera shake. B OFF Select to record in the standard recording mode. ON ( ) b Note • When you use frame recording continuously, the remaining tape time will not be indicated correctly. • The last scene will be longer than other scenes. • You cannot record index signals during frame recording.
Press the MENU button t select the (CAMERA SET) by turning the SEL/ PUSH EXEC dial. FADER You can record a transition with the following effects adding to the interval between scenes. 1 Select the desired effect in [STBY] (during fading in) or [REC] (during fading out) mode. 2 Press the REC START/STOP button. The fader indicator stops flashing and disappears when the fade is complete. To cancel before starting the operation, select [OFF] in step 1.
b Notes LINE • This function is effective only when the AUTO/ MAN switches of both CH1and CH2 are set to MAN (p. 42). • When [LINKED] is set, you can adjust the volume with the AUDIO LEVEL dial of CH1 (p. 42). Select to input audio signals from an audio device through the INPUT2 jack. appears on the status check screen. x INPUT1 LEVEL You can switch between microphone and line for input from the INPUT1 jack. B MIC Select to input audio signals from an external microphone through the INPUT1 jack.
Press the MENU button t select the (AUDIO SET) by turning the SEL/ PUSH EXEC dial. AUDIO CH SEL (DISPLAY SET) menu Display settings of the display and the viewfinder (MARKER/VF B.LIGHT/DATA CODE, etc.) B CH1,CH2 Select to output sound of CH1 and CH2 from respective channels. CH1 Select to output sound of CH1 from channel 1/2. CH2 Select to output sound of CH2 from channel 1/2. z Tip • When you select [CH1,CH2] and output from the stereo of your camcorder, sound is mixed sound of CH1 and CH2.
HISTOGRAM When you set [HISTOGRAM] to [ON], [HISTOGRAM] (a graph to display a distribution of tones in your picture) window appears on the screen (the default setting is [OFF]). This item is useful when you adjust exposure. You can adjust EXPOSURE/ IRIS while checking [HISTOGRAM] window (p. 33). [HISTOGRAM] will not be recorded on a tape or “Memory Stick Duo.” x ASPECT You can select whether to display the markers at an aspect of [4:3], [13:9], [14:9] of [15:9] (the default setting is [OFF]).
Press the MENU button t select the dial. (DISPLAY SET) by turning the SEL/PUSH EXEC TYPE 2 Enlarges and shows images in white and black. AU.LVL DISP (Audio level display) Since the default setting is [ON], the audio level meter is displayed. ALLSCAN MODE When you set [ALLSCAN MODE] to [ON], you can check the area surrounding the picture frame, which you cannot check on a TV screen (the default setting is [OFF]). During the simple all scan display, a black frame appears around the screen.
DEGREE b Notes Select to display the shutter speed in degrees, where the shutter speed equivalent to the data reading cycle from the image sensor is displayed as 360°. • When you connect your camcorder to outside power sources, [LCD BL LEVEL] is automatically set to [BRIGHT]. • When you select [BRIGHT], the recordable time with the battery is slightly reduced. – When [PROG. SCAN] is set to [OFF], 1/60 is equal to 360°. – When [PROG. SCAN] is set to [24], 1/24 is equal to 360°. – When [PROG.
Press the MENU button t select the dial. (DISPLAY SET) by turning the SEL/PUSH EXEC B OFF 2x Data code is not displayed. DATE Displays the date and time. Select to display the selected menu item at double the normal height. REMAINING CAMERA DATA Displays camera setting data. 6 0 min 00:00:00:00 60min HDV1080i AUTO F 1 .7 6 dB 1 00 B AUTO Displays the remaining tape indicator for about 8 seconds in situations such as those described below.
(IN/OUT REC) menu Recording settings, input and output settings (VCR HDV/DV/DV REC MODE/ DV WIDE REC/ DOWN CONVERT, etc.) The default settings are marked with B. The indicators in parentheses appear when the items are selected. See page 57 for details on selecting menu items. Press the MENU button t select the (IN/OUT REC) by turning the SEL/ PUSH EXEC dial. REC FORMAT You can select a recording format. ) ) Plays back only the portions recorded in HDV format. During i.
Press the MENU button t select the dial. DV SP ( (IN/OUT REC) by turning the SEL/PUSH EXEC ) Record in the SP (Standard Play) mode of the DV format to record for a longer time on a tape than in the DVCAM format. b Notes • If you record in the DV SP mode, a mosaic-like disturbance of picture may appear or sound may be interrupted when you play back the tape on other camcorders or VCRs.
480i Select when connecting your camcorder to a TV with the component input jack. B SQUEEZE Select to output video signals to a 16:9 wide TV or compatible. B 1080i/480i Select when connecting your camcorder to a TV that has the component input jack and is capable of displaying the 1080i signal. i.LINK CONV You can convert HDV format signals to DV format signals, and output the DV format signals from the HDV/DV interface (i.LINK).
(TC/UB SET) menu (TC PRESET/UB PRESET/TC LINK, etc.) The default settings are marked with B. The indicators in parentheses appear when the items are selected. See page 57 for details on selecting menu items. Press the MENU button t select the (TC/UB SET) by turning the SEL/PUSH EXEC dial. TC PRESET x PRESET You can preset the time code. 1 Select [TC PRESET] by turning the SEL/ PUSH EXEC dial, then press the dial. 2 Select [PRESET] by turning the SEL/ PUSH EXEC dial, then press the dial.
TC MAKE B REGENERATE Select to make the time code continuous at backspace editing. Regardless of the [TC RUN] setting, the running mode is automatically set to [REC RUN]. PRESET Select when you do not want to make the time code continuous at backspace editing. b Notes • If you want to execute [TC LINK] for more than three camcorders, repeat the steps for multiple sub camcorders with one main camcorder. • Some frame shifting may occur over time after time code synchronization.
(MEMORY SET) menu Settings for the “Memory Stick Duo” (QUALITY/ALL ERASE, etc.) 1.2M 1440 × 810 The default settings are marked with B. The indicators in parentheses appear when the items are selected. See page 57 for details on selecting menu items. Press the MENU button t select the (MEMORY SET) by turning the SEL/ PUSH EXEC dial. ) Records still images at the fine image quality level. STANDARD ( ) Records still images at the standard image quality level.
2 Select [YES] t [YES] by using the SEL/ PUSH EXEC dial. [ Erasing all data...] is displayed. [Completed] is displayed when all unprotected images are deleted. b Notes FORMAT You do not need to format the “Memory Stick Duo” since it is already formatted at the factory. If you want to format the “Memory Stick Duo,” select [YES]t[YES]. b Notes • Do not do any of the following while [ Formatting…] is displayed: – Operate the POWER switch/operation buttons. – Eject the “Memory Stick Duo.
(OTHERS) menu Settings while recording on a tape or other basic settings (USB SELECT/QUICK REC/ BEEP, etc.) The default settings are marked with B. The indicators in parentheses appear when the items are selected. See page 57 for details on selecting menu items. Press the MENU button t select the (OTHERS) by turning the SEL/PUSH EXEC dial. CAMERA PROF. (Camera profile) You can save up to 20 camera setting profiles on a “Memory Stick Duo” and 2 in your camcorder.
x To delete camera profile settings 1 Select [DELETE] by the SEL/PUSH EXEC dial. 2 Select the camera profile you want to delete by the SEL/PUSH EXEC dial. 3 Select [YES] in the check screen. ASSIGN BTN See page 43. PHOTO/EXP.FOCUS You can select a function to assign to the PHOTO/EXPANDED FOCUS button (p. 33). Records a still image (p. 28). EXP.FOCUS The PHOTO/EXPANDED FOCUS button acts the same function as the EXPANDED FOCUS button (p. 33). b Note • If [EXP.
Press the MENU button t select the (OTHERS) by turning the SEL/PUSH EXEC dial. B OFF It takes some time to restart recording from the state that the drum has stopped rotating, but the transition from the last recorded scene is smooth. ON ( The camera recording lamp will not light up during recording when you set this to [OFF] (the default setting is [ON]).
Dubbing/Editing Dubbing to VCR, DVD/HDD device, etc. Connect your camcorder to the wall outlet using the supplied AC Adaptor for this operation (p. 16). Refer also to the instruction manuals supplied with the devices to be connected. Connecting to external devices The connection method and the image quality will differ depending on the VCR, DVD/HDD device and the connectors used. : Signal flow Camcorder 2 Cable External device HDV1080i compatible device t HD quality*1 i.LINK cable (optional) • i.
Dubbing to VCR, DVD/HDD device, etc. (Continued) Jacks on your camcorder Open the jack cover and connect the cable. 1 2 Using an i.LINK cable (optional) The dubbed format (HDV/DV) differs depending on the recording format or the format supported by the VCR/DVD device. See the table below for selecting the appropriate settings, and perform necessary menu setting. b Note • Disconnect the i.
Copy format Camcorder recording format Format supported by the VCR/DVD device HDV format*1 DVCAM (DV) format Copy HDV recording as HDV HDV HDV –*3 Convert HDV recording to DVCAM (DV) HDV DVCAM (DV) DVCAM (DV) DVCAM (DV) DVCAM (DV) DVCAM (DV) Copy DVCAM (DV) recording as DVCAM (DV) Menu setting [VCR HDV/DV] (p. 75) [i.LINK CONV] (p.
Dubbing to VCR, DVD/HDD device, etc. (Continued) Dubbing to another device 1 Prepare your camcorder for playback. Insert the recorded cassette. Slide the POWER switch to VCR. Set [DOWN CONVERT] according to the playback device (TV, etc.) (p. 77). 2 Prepare your VCR/DVD device for recording. When dubbing to the VCR, insert a cassette for recording. When dubbing to the DVD recorder, insert a DVD for recording.
Recording pictures from a VCR You can record pictures from a VCR on a tape. You can record a scene as a still image on a “Memory Stick Duo.” You can record pictures in the HDV format by connecting an HDV1080i specification compatible device. Be sure to insert a cassette or a “Memory Stick Duo” for recording in your camcorder beforehand. You can connect your camcorder to a VCR device using an i.LINK cable. Connect your camcorder to the wall outlet using the supplied AC Adaptor for this operation (p. 16).
Recording pictures from a VCR (Continued) 3 Connect your VCR as a player to your camcorder. When an i.LINK cable is connected, the format of the input signal ( or ) will be indicated on the LCD screen of your camcorder (This indicator may appear on the screen of the playback device, however, it will not be recorded). 4 Insert a cassette into the VCR. 5 Set your camcorder to recording pause. While pressing X (PAUSE), press both z REC (record) buttons simultaneously.
b Note • Movies will be fixed to image size [ 1.2M] when playing back in the HDV format. Movies will be fixed to image size [ 0.2M] (16:9) or [VGA (0.3M)] (4:3) when playing back in the DVCAM (DV) format. Copying movies from tape to “Memory Stick Duo” as still images You can record still images on a “Memory Stick Duo.” Be sure to insert a recorded tape and a “Memory Stick Duo” in your camcorder, and set [PHOTO/EXP.FOCUS] to [PHOTO] (the default setting) (p. 83) beforehand.
Deleting recorded pictures from the “Memory Stick Duo” 1 Set the POWER switch to VCR. 2 Playback a picture you want to delete (p. 30). 3 Press the MEMORY/DELETE button. MEMORY/ DELETE [Delete this image?] will be displayed. 4 Select [YES] by turning the SEL/ PUSH EXEC dial, then press the dial. The picture is deleted. b Note • The pictures cannot be restored once they are deleted.
Printing recorded images (PictBridge compliant printer) You can print out pictures using a PictBridge compliant printer without connecting the camcorder to a computer. Connect the AC Adaptor to your camcorder to obtain power from the wall outlet. Insert the “Memory Stick Duo”, containing still images into your camcorder and turn on the printer. Connecting your camcorder to the printer One of the images stored on the “Memory Stick Duo” will be displayed.
Printing recorded images (PictBridge compliant printer) (Continued) 1 Select [SET] t [DATE/TIME] t [DATE] or [DAY & TIME] with the SEL/PUSH EXEC dial. 2 Select [ RETURN] by turning the SEL/PUSH EXEC dial, then press the dial. The PictBridge selection screen appears again. 4 Select [EXEC] t [YES] with the SEL/PUSH EXEC dial. When printing is finished, [Printing...] disappears and the image selection screen appears again. Press the MENU button when printing is completed.
Using a Computer Connecting to a computer When connecting your camcorder to a computer, the following operations are available: Copying the still images on a “Memory Stick Duo” to the computer t p. 95 Copying the movie on a tape in the HDV format to the computer t p. 98 Copying the movie on a tape in the DVCAM (DV) format to the computer t p.
Copying still images to a computer (Continued) 4 Set the POWER switch to VCR. 5 Press the MENU button. The menu index screen is displayed. To USB jack USB cable (supplied) To USB jack 6 Select (OTHERS) t [USB SELECT] t [ Memory Stick] with the SEL/PUSH EXEC dial (p. 83). 7 Connect the USB cable to the (USB) jacks on your camcorder and your computer. • Do not connect your camcorder to the computer at this point.
Step:2 Copying the pictures Disconnecting the USB cable For Windows users For Windows users Double-click the [Removable Disk] icon displayed in [My Computer]. Then, drag and drop a picture in the folder onto the hard disk drive of your computer. If [USB CONNECTING] appears on the LCD screen, follow the procedure below to disconnect the USB cable. 1 Click the [Unplug or eject hardware] icon on the task tray. Click this icon. Task tray 1 2 2 Click [Safely remove USB Mass Storage Device-Drive].
Copying still images to a computer (Continued) Copying movies on a tape to a computer b Notes Connect your camcorder to the computer with an i.LINK cable. The computer needs to have an i.LINK connector and be installed with editing software that can copy video signals. The software required depends on the format of the recorded pictures and the format for copying to the computer (HDV or DVCAM (DV)) as shown in the table below.
Recorded format Format for copying to Menu setting* the computer HDV DVCAM (DV) [VCR HDV/DV] t [HDV] [i.LINK CONV] t [ON] DVCAM (DV) DVCAM (DV) [VCR HDV/DV] t [DV] [i.LINK CONV] t [OFF] * See page 57 for menu settings. z Tips • Connect the i.LINK cable to the computer first, then to your camcorder. Connecting in the opposite order may cause static electricity to build up, resulting in a malfunction of your camcorder.
Copying movies on a tape to a computer (Continued) z Tip • When images recorded in HDV format are copied to a computer, the file size is about 2GB (almost the same as a DV file) for a 10-minute movie if the video compression format is MPEG2. When copying the movie in the HDV format from the computer to your camcorder Set [VCR HDV/DV] to [HDV] and [i.LINK CONV] to [OFF] (p. 75, 77).
Troubleshooting Troubleshooting If you run into any problems using your camcorder, use the following table to troubleshoot the problem. If the problem persists, disconnect the power source and contact your Sony dealer. • Power sources/LCD screen/Remote Commander···p. 101 • Cassette tapes/“Memory Stick Duo”···p. 102 • Recording···p. 103 • Playback···p. 105 • Connecting to TV···p. 107 • Dubbing/Editing/Connecting to other devices···p. 108 • Connecting to a computer···p.
Troubleshooting (Continued) The battery pack discharges too quickly. • Ambient temperature is too high or low, or the battery pack has not been charged enough. This is not a malfunction. • Fully charge the battery again. If the problem persists, the battery may be worn-out. Replace it with a new one (p. 16, 120). The picture remains on the LCD screen. • This occurs if you disconnect the DC plug or remove the battery pack without turning off the power first. This is not a malfunction.
The cassette is noisier during rewinding or fast-forwarding. • When using the AC Adaptor, rewind/fast forward speed increases (compared with battery operation) and therefore increases noise. This is not a malfunction. You cannot delete pictures or format the “Memory Stick Duo.” • Release the lock on the write-protect tab of the “Memory Stick Duo” if there is one (p. 118). • The pictures are protected. Release the protect function on your computer, etc.
Troubleshooting (Continued) The shutter sound is not heard when you record a still image. • Set [BEEP] to [ON] (p. 84). • There is no shutter sound while during movie shooting. End search does not work. • Do not eject the cassette after recording (p. 45). • There is nothing recorded on the cassette. • There is a blank section between recorded sections of the tape. This is not a malfunction. Auto focus does not function. • Press the FOCUS button to set to auto focus (p. 32).
Shutter speed, gain, white balance or iris cannot be adjusted manually. • Set the AUTO LOCK switch to the center position to release the auto lock mode. Tiny spots in white, red, blue, or green appear on the screen. • This phenomenon appears when using a slow shutter speed (p. 36). This is not a malfunction. The subjects passing by the frame very fast appear crooked. • This is called the focal plane phenomenon. This is not a malfunction.
Troubleshooting (Continued) Image data stored on a “Memory Stick Duo” cannot be played back correctly. • Image data cannot be played back if you have modified file names or folders, or have edited the data on a computer (In this case, the file name flashes). This is not a malfunction (p. 119). • Pictures recorded on other devices may not be played back correctly. This is not a malfunction. The data file name is displayed incorrectly, or flashing. • The file is damaged.
Date Search does not work correctly. • Be sure to record more than 2 minutes after the date changed. If one day’s recording is too short, your camcorder may not accurately find the point where the recording date changes. • There is a blank section between recorded sections of the tape. This is not a malfunction. No picture appears during End search, Rec review or Last scene review. • The tape was recorded in both HDV and DVCAM (DV) formats. This is not a malfunction.
Troubleshooting (Continued) • DVCAM (DV) format pictures input to the camcorder via i.LINK cable (p. 89) cannot be output. • This occurs if you record on a tape in both HDV and DVCAM (DV) formats. Disconnect and connect the HDMI cable, or slide the POWER switch to turn on your camcorder again. The picture appears distorted on the 4:3 TV. • This happens when viewing a picture recorded in the 16:9 (wide) mode on a 4:3 TV. Set [DOWN CONVERT] and play back the picture(p. 77).
When you copy a movie shot in wide (16:9) format using an i.LINK cable, the screen stretches vertically. • You cannot output the aspect ratio setting using an i.LINK cable. Set the aspect ratio of the TV instead. • Connect using an AV cable instead. Connecting to a computer The computer does not recognize your camcorder. • Disconnect the cable from the computer and camcorder, then connect it again securely.
Warning indicators and messages Self-diagnosis display/Warning indicators If indicators appear on the LCD screen or in the viewfinder, check the following. Some symptoms you can fix by yourself. If the problem persists even after you have tried a couple of times, contact your Sony dealer or local authorized Sony service facility. C:(or E:) ss:ss (Self-diagnosis display) C:04:ss • The battery pack is not an “InfoLITHIUM” battery pack. Use an “InfoLITHIUM” battery pack (p. 120).
Fast flashing: • The tape has run out.* Z (Eject cassette warning)* QZ The tape is locked - check the tab. (p. 114) Slow flashing: Cannot record due to copyright protection. (p. 114) • The write-protect tab on the cassette is set to lock (p. 114). x “Memory Stick Duo” Fast flashing: • Moisture condensation has occurred (p. 123). • The self-diagnosis display code is displayed (p. 110).
Warning indicators and messages (Continued) Cannot record still images on Memory Stick. • You cannot record still images in the following cases: – When the shutter speed is 1/60 or less – While using [FADER] – While using [SMTH SLW REC] – While checking or executing shot transition – While [PROG. SCAN] is set to [24] or [30]. x PictBridge compliant printer Check the connected device. • Switch off the printer and switch it on again, then disconnect the USB cable and reconnect it. Error. Cancel the task.
Additional Information Using your camcorder abroad Power supply You can use your camcorder in any country/region using the AC Adaptor supplied with your camcorder within the AC 100 V to 240 V, 50/60 Hz range. Use a commercially available AC plug adaptor [a], if necessary, depending on the design of the wall outlet [b]. Viewing HDV format pictures recorded in HDV format You need an HDV1080i compatible TV (or monitor) with a component jack and AUDIO/VIDEO input jack.
HDV format and recording/playback Your camcorder is capable of recording in HDV/DVCAM/DV formats. It is recommended to use a cassette with the mark to record in the HDV/ DVCAM/DV format. It is recommended to use a cassette with the mark to record in the DVCAM format. Your camcorder is not compatible with the Cassette Memory function. What is the HDV format? The HDV format is a video format developed to record and play back digital high definition (HD) video signals on a DV cassette.
On Sony HDV1080i compliant TVs REC: The cassette can be recorded. SAVE: The cassette cannot be recorded (write-protected). REC SAVE An HDV format compatible TV with the component input jack is required to view playback pictures recorded in the HDV format. x When labeling the cassette Be sure to place the label only on the locations shown in the following illustration so as not to cause a malfunction of your camcorder. Do not put a label along this border.
Compatibility of the DVCAM/DV formats The DVCAM format was developed as a more reliable and higher-end format than the consumer DV format. Explained here are the differences, compatibility, and limitations on editing for the DVCAM and DV formats. Differences between the DVCAM and DV formats Specification DVCAM DV TRACK Pitch 15 µm 10 µm Audio sampling frequency 12 bit:32 kHz 16 bit:48 kHz 12 bit:32 kHz 16 bit:48 kHz 44.
Compatibility on editing using DV jacks When this camcorder is connected to other digital video equipment using an i.LINK cable, the recording format of edited tapes is defined according to the source tape and the recorder’s format as described below. Playback or editing using the edited tape may be limited depending on dubbing operation. Start dubbing after reading “Limitations on editing” (p. 115).
About the “Memory Stick” A “Memory Stick” is a compact, portable IC recording medium with a large data capacity. You can use only a “Memory Stick Duo,” which is about the half size of a standard “Memory Stick,” with your camcorder. However, we do not guarantee the operation of all types of “Memory Stick Duo” on your camcorder. (See the list below for more details.
• Do not insert anything other than a “Memory Stick Duo” into the “Memory Stick Duo” slot. Doing so may cause a malfunction. x On a location for use Do not use or keep the “Memory Stick Duo” in the following locations. • Places subject to extremely high temperature, such as a car parked outside in the summer. • Places under direct sunlight. • Places with extremely high humidity or subject to corrosive gases.
About the “InfoLITHIUM” battery pack This unit is compatible with an “InfoLITHIUM” battery pack (L series). Your camcorder operates only with an “InfoLITHIUM” battery pack. “InfoLITHIUM” L series battery packs have the mark. What is an “InfoLITHIUM” battery pack? An “InfoLITHIUM” battery pack is a lithium-ion battery pack that has functions for communicating information related to operating conditions between your camcorder and an optional AC Adaptor/ charger.
About i.LINK About storage of the battery pack • If the battery pack is not used for a long time, fully charge the battery pack and use it up on your camcorder once a year to maintain proper function. To store the battery pack, remove it from your camcorder and put it in a dry, cool place. • To discharge the battery pack on your camcorder completely, leave your camcorder in tape recording standby until the power goes off (p. 19).
About i.LINK (Continued) About the i.LINK Baud rate About the required i.LINK cable i.LINK’s maximum baud rate varies according to the device. There are 3 types. Use the Sony i.LINK 4-pin-to-4-pin cable (during HDV/DVCAM (DV) dubbing). S100 (approx. 100Mbps*) S200 (approx. 200Mbps) S400 (approx. 400Mbps) The baud rate is listed under “Specifications” in the operating instructions of each piece of equipment. It is also indicated near the i.LINK interface on some devices.
Maintenance and precautions On use and care • Keep the Remote Commander and button-type battery out of children’s reach. If the battery is accidentally swallowed, consult a doctor immediately. • If the battery electrolytic liquid has leaked, – consult your local authorized Sony service facility. – wash off any liquid that may have contacted your skin. – if any liquid gets in your eyes, wash with plenty of water and consult a doctor.
Maintenance and precautions (Continued) x If moisture condensation has occurred None of the functions except cassette ejection will work. Eject the cassette, turn off your camcorder, and leave it for about one hour with the cassette lid open. Your camcorder can be used again when both of the following conditions are met: • The warning message does not appear when the power is turned on. • Neither % nor Z flashes when a cassette is inserted and the video operation buttons are pressed.
About care and storage of the lens The playback screen goes blank. (Solid blue screen) • The video heads will be worn after long use. If you cannot obtain a clear image even after using a cleaning cassette (optional), the video heads may be worn out. Please contact your Sony dealer or local authorized Sony service facility to have the video heads replaced. LCD screen • Do not exert excessive pressure on the LCD screen, as it may cause damage.
Maintenance and precautions (Continued) Removing dust from inside the viewfinder 1 Remove the viewfinder. While sliding the viewfinder release lever to the left 1, remove the viewfinder 2. 2 1 2 Remove dust from inside the viewfinder and the part shown below with a blower. 3 Attach the viewfinder following the reverse procedure of step 1.
Specifications System Fast forward/rewind time Approx. 2 min 40 s (using a PHDVM63DM cassette and rechargeable battery pack) Approx. 1 min 45 s (using a PHDVM63DM cassette and AC Adaptor) Viewfinder Electric viewfinder (color, black and white) Image device 4.5 mm (1/4 type) 3CMOS sensor Recording Pixels (HDV/DV 16:9 still recording): Max. 1.20 Mega (1 440 × 810) pixels *2 Gross: Approx.
Specifications (Continued) Minimum illumination 4 lx (lux) (F 1.6) *1 “Exif” is a file format for still images, established by the JEITA (Japan Electronics and Information Technology Industries Association). Files in this format can have additional information such as your camcorder’s setting information at the time of recording. *2 Still image resolution is obtained by the unique pixel array of Sony’s ClearVid CMOS Sensor and image processing system (new Enhanced Imaging Processor).
Mass (approx.) 1.5 kg (3 lb 6 oz) main unit only 1.9 kg (4 lb 2 oz) including the NPF570 rechargeable battery pack, cassette (PHDVM-63DM), and lens hood with lens cover, microphone Supplied accessories See page 13. Operating temperature 0 °C to 40 °C (32 °F to 104 °F) Type Lithium ion Design and specifications are subject to change without notice. * When using the supplied microphone AC Adaptor AC-L15A * See the label on the AC Adaptor for other specifications.
On trademarks Notes on the License • “Memory Stick,” “ ,” “Memory Stick Duo,” “ ,” “Memory Stick PRO Duo,” “ ,” “MagicGate,” “ ,” “MagicGate Memory Stick” and “MagicGate Memory Stick Duo” are trademarks of Sony Corporation. • “InfoLITHIUM” is a trademark of Sony Corporation. • i.LINK and are trademarks of Sony Corporation.
Quick Reference Identifying parts and controls The numbers in ( ) are reference pages. 1 2 3 4 5 6 7 8 9 qa qs qd qf qg 0 qh qj qk ql A Zoom lever (31) L Focus ring (32) B Viewfinder (20) M Zoom ring (31) C Viewfinder lens adjustment lever (20) N D Viewfinder release lever (126) E Handle zoom lever (31) LANC jack The LANC control jack is used for controlling the tape transport of video device and peripherals connected to it.
Identifying parts and controls (Continued) 6 1 7 2 3 8 9 0 qa qs 4 5 qj qd ql qk A Hook for the shoulder strap (133) B EXPOSURE/IRIS button (33) C EXPOSURE/IRIS dial (33) D PUSH AUTO FOCUS button (32) E ND FILTER switch (1/2/OFF) (35) F REC START/STOP button (26) G ASSIGN buttons (1/2/3)*(43) H AUTO LOCK switch I GAIN button (36) J SHUTTER SPEED button (36) K WHT BAL (white balance) button (37) L MENU button (57) M SEL/PUSH EXEC dial (22) N STATUS CHECK button (48) O PICTURE PROFILE button (38) P i
1 5 2 6 3 4 7 8 A BATT RELEASE (battery release) button (17) B Hook for the shoulder strap (133) C To attach the shoulder strap Attach the shoulder strap (optional) to the hooks for the shoulder strap.
Identifying parts and controls (Continued) 2 3 1 qs qa 0 A LCD screen (20) B Video control buttons (REW, PLAY*, FF, PAUSE, STOP, SLOW, REC) (29) C ZEBRA switch (35) D ASSIGN 6, MEMORY/DELETE button (43, 92) E ASSIGN 5, MEMORY/INDEX button(29, 43) F ASSIGN 4, MEMORY/PLAY button (29, 43) G DISPLAY/BATT INFO button (48, 49) H VOLUME/MEMORY button* (30) I RESET button If you press the RESET button, all settings including the clock setting (except the Picture profile and Camera profile settings) return to
1 3 4 5 6 7 2 9 8 A Remote sensor (front) (136) B Rec lamp (front) The rec lamp flashes if the remaining tape or battery is low.
Identifying parts and controls (Continued) b Notes Remote Commander Remove the insulation sheet before using the Remote Commander. Insulation sheet 7 1 8 2 3 9 4 5 6 • Aim the Remote Commander towards the remote sensor to operate your camcorder. • Point the remote sensor away from strong light sources such as direct sunlight or overhead lighting. Otherwise, the Remote Commander may not function properly.
Indicators for the LCD screen and viewfinder The numbers in ( ) are reference pages. The indicators will not be recorded on the tape during recording. Recording movies 1 2 126min HDV1080i Recording still images 3 REC 4 5 00:04:50:04 12min 2 7 163min 89 1.2M 0 FINE 101 6 A Recording format ( , ) (75) or G Recording folder (81) H Image size (80) B Remaining battery (approx.
Indicators for the LCD screen and viewfinder (Continued) Viewing movies 1 2 120min HDV1080i Viewing still images 4 qa 2 5 00:04:50:04 12min K Tape transport indicator Recording mode (DVCAM or DV SP) appears when a tape recorded in the DVCAM or DV SP format is played back.DV. qs 125min 101-0011 8 1.
Bottom Indicators when you made changes Upper left Indicator Meaning HISTOGRAM (71) Upper right DV AU. MODE (DV Audio mode) (68)* 00:00:00:00 Manual volume control(42) Center Bottom Manual focus (32) 9 ~ Picture profile (38) SPOTLIGHT (67) Upper left Backlight (67) . Indicator Meaning SteadyShot off (63) Recording format (75) PEAKING (70) D.
Index Numeric Battery Battery Info................... 49 1080i/480i.............................76 +48V switch ...........14, 42, 135 A AC Adaptor ..........................16 Access lamp..........................25 AE RESPONSE....................64 TV ................................. 52 BEEP.................................... 84 VCR .............................. 85 BLACK FADER.................. 68 COPY ................................... 40 BLK COMPNSTN............... 40 CURRNT FOLDER .......
D.EXTENDER (Digital Extender) .........67, 104 E GAIN button ........................ 36 INTELLIGENT ....................65 Grip belt ............................... 19 INTERVAL ..........................66 GUIDEFRAME ................... 71 INTERVAL REC .........66, 104 IN/OUT REC menu ..............75 EDGE CROP ........................77 H IRIS.......................................34 End search.............................45 HANDLE ZOOM ................ 65 i.LINK .............................
Index (Continued) MEMORY SET menu ..........80 NEW FOLDER.................... 81 Memory Stick ...........6, 83, 118 NTSC ......................... 106, 113 Memory Stick Duo .......24, 118 NUMBER ............................ 72 Insert/Eject ....................24 Number of recordable pictures ..........................80 QUICK REC ........................ 83 Memory Stick Duo adaptor ............................................119 OPEN/EJECT lever ............. 24 MEMORY/DELETE button .............
SEL/PUSH EXEC dial .........22 TC MAKE............................ 79 SEPARATE ..........................68 TC PRESET ......................... 78 VOLUME/MEMORY button ..............................................29 SHARPNESS........................39 TC RUN ............................... 78 V-OUT/PANEL....................74 SHOT TRANS................46, 65 TC/UB DISP ........................ 79 Shot transition .......................46 TC/UB SET menu ................ 78 Shoulder strap .......
2-887-519-11(1) Digital HD Video Camera Recorder Digital HD Video Camera Recorder Caméscope numérique HD Operating Guide Before operating the unit, please read this manual thoroughly, and retain it for future reference The supplied CD-ROM includes Operating Guide for the HVR-V1 series. (Japanese, English, French, German, Italian, Spanish, and Simplified Chinese versions). For more details, see “Using the CD-ROM Manual” on page 12. US http://www.sony.