4-690-670-11(1) Interchangeable Lens Digital Camera E-mount Instruction Manual “Help Guide” (Web manual) Refer to “Help Guide” for in-depth instructions on the many functions of the camera. http://rd1.sony.
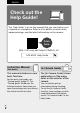
English Check out the Help Guide! The “Help Guide” is an on-line manual that you can read on your computer or smartphone. Refer to it for details on menu items, advanced usage, and the latest information on the camera. Scan here http://rd1.sony.net/help/ilc/1640/h_zz/ ILCE-6500 Help Guide Instruction Manual In-Camera Guide This manual introduces some basic functions. The [In-Camera Guide] shows explanations of the menu items on the monitor of the camera.
Owner’s Record Record the model and serial number (which are located on the product) in the space provided below. Refer to these numbers whenever you call your Sony dealer regarding this product. Model No. ILCESerial No. WARNING To reduce fire or shock hazard, do not expose the unit to rain or moisture.
Use a nearby wall outlet (wall socket) when using the AC Adaptor/battery charger. If any malfunction occurs, disconnect the plug from the wall outlet (wall socket) immediately to disconnect from the power source. If you use the product with a charge lamp, note that the product is not disconnected from the power source even when the lamp turns off. The power cord (mains lead), if supplied, is designed specifically for use with this equipment only, and should not be used with other electrical equipment.
This equipment complies with FCC radiation exposure limits set forth for an uncontrolled environment and meets the FCC radio frequency (RF) Exposure Guidelines. This equipment has very low levels of RF energy that is deemed to comply without testing of specific absorption rate(SAR). The available scientific evidence does not show that any health problems are associated with using low power wireless devices. There is no proof, however, that these low power wireless devices are absolutely safe.
CAUTION You are cautioned that any changes or modifications not expressly approved in this manual could void your authority to operate this equipment. Note: This equipment has been tested and found to comply with the limits for a Class B digital device, pursuant to Part 15 of the FCC Rules. These limits are designed to provide reasonable protection against harmful interference in a residential installation.
Disposal of waste batteries and electrical and electronic equipment (applicable in the European Union and other European countries with separate collection systems) This symbol on the product, the battery or on the packaging indicates that the product and the battery shall not be treated as household waste. On certain batteries this symbol might be used in combination with a chemical symbol. The chemical symbols for mercury (Hg) or lead (Pb) are added if the battery contains more than 0.0005% mercury or 0.
Notes on using your camera Along with this section, also see “Precautions” in the Help Guide (page 2). Screen language You can select the language displayed on the screen using the menu (page 41). Notes on recording/playback ••Once you format the memory card, all the data recorded on the memory card will be deleted and cannot be restored. Before formatting, copy the data to a computer or other device. ••Before you start recording, make a trial recording to make sure that the camera is working correctly.
••Do not leave the lens or the viewfinder exposed to a strong light source such as sunlight. Because of the lens’s condensing function, doing so may cause smoke, fire, or a malfunction inside the camera body or the lens. If you have to leave the camera exposed to a light source such as sunlight, attach the lens cap to the lens. ••When you shoot with backlighting, keep the sun sufficiently far away from the angle of view. Otherwise, the sunlight may enter the focus inside the camera and cause smoke or fire.
••If you pan the camera while looking into the viewfinder or move your eyes around, the image in the viewfinder may be distorted or the color of the image may change. This is a characteristic of the lens or display device and is not a malfunction. When you shoot an image, we recommend that you look at the center area of the viewfinder. ••When shooting with the viewfinder, you may experience symptoms such as eyestrain, fatigue, travel sickness, or nausea.
Pay special attention in the following situations and use a tripod, etc. ––When using the camera in a hightemperature environment ––When someone with poor circulation or impaired skin sensation uses the camera ––When using the camera with the [Auto Pwr OFF Temp.] set to [High] ••Especially during 4K movie shooting, the recording time may be shorter under low temperature conditions. Warm up the battery pack or replace it with a new battery.
Checking the camera and the supplied items The number in parentheses indicates the number of pieces. •• Shoulder strap (1) •• Camera (1) •• Power cord (mains lead) (1)* (supplied in some countries/ regions) •• Eyepiece cup (1) •• Body cap (1) (attached to the camera) * Multiple power cords may be supplied with your camera. Use the appropriate one that matches your country/region. See page 4.
Identifying parts When the lens is removed Shutter button Remote sensor Wi-Fi antenna (built-in) ON/OFF (Power) switch Self-timer lamp/AF illuminator Multi Interface Shoe* Some accessories may not go in all the way and protrude backward from the Multi interface shoe. However, when the accessory reaches the front end of the shoe, the connection is completed. Lens release button Microphone* Mount Image sensor** Lens contacts** * Do not cover this part during movie recording.
Image sensor position mark The image sensor is the sensor that converts light into an electric signal. The mark shows the location of the image sensor. When you measure the exact distance between the camera and the subject, refer to the position of the horizontal line. The distance from the lens contact surface to the image sensor is about 18 mm (23/32 in.). Speaker Flash •• Press the (Flash pop-up) button to use the flash. The flash does not pop up automatically.
Multi/Micro USB Terminal* This terminal supports Micro USB-compatible devices. Charge lamp HDMI micro jack (Microphone) jack When an external microphone is connected, the internal microphone turns off automatically. When the external microphone is a plugin-power type, the power of the microphone is supplied by the camera.
Monitor (For touch operation: Touch panel/Touch pad) You can adjust the monitor to an easily viewable angle and shoot from any position. For shooting: AF/MF button/AEL button (Enlarge) For viewing: button MOVIE (Movie) button For shooting: Fn (Function) You may not be able to adjust the monitor angle depending on the type of a tripod you use. In such a case, release the tripod screw once to adjust the monitor angle.
Battery/memory card cover Memory card slot Battery lock lever Battery insertion slot •• NFC (Near Field Communication) is an international standard of the short-range wireless communication technology. Connection plate cover Use this when using an AC‑PW20 AC Adaptor (sold separately). Insert the connection plate into the battery compartment, and then pass the cord through the connection plate cover as shown below. Make sure that the cord is not pinched when you close the cover.
Basic operations Using the control wheel •• You can select setting items by turning or pressing the top/bottom/ left/right side of the control wheel. Your selection is determined when you press the center of the control wheel. •• The default settings for the top/bottom/left/right side and the center of the control wheel are as follows. Top side: DISP (Display Setting) ) Bottom side: Exposure Comp.
Using the Fn (Function) button You can register frequently used functions to the Fn (Function) button and recall them while shooting. Up to 12 frequently used functions can be registered to the Fn (Function) button. 1 Press the DISP button repeatedly to display a screen mode other than [For viewfinder], and then press the Fn (Function) button. Fn 2 Select the desired function by pressing the top/bottom/left/ right side of the control wheel.
Using the AF/MF/AEL switch lever You can switch the function of the AF/MF/AEL button to AF/MF or AEL by changing the position of the AF/MF/AEL switch lever. When you move the AF/MF/AEL switch lever to the AF/MF position and press the button, the focusing mode temporarily switches between auto and manual (AF/MF control). When you move the AF/MF/AEL switch lever to the AEL position and press the button, the exposure is locked (AE lock).
Startup guide Step 1: Inserting the battery pack/memory card into the camera For details on memory cards that can be used with this camera, refer to page 44. 1 Open the battery/memory card cover. 2 Insert the battery pack while Lock lever pressing the lock lever with the tip of the battery until the battery locks into place. 3 Insert the memory card. •• With the notched corner facing in the direction illustrated, insert the memory card until it clicks into place. Otherwise, it may cause a malfunction.
Hint ••When you use a memory card with the camera for the first time, it is recommended that you format the card on the camera for more stable performance of the memory card (page 42). To remove the battery pack Make sure that the access lamp (page 17) is not lit, and turn off the camera. Then, slide the lock lever and remove the battery pack. Be careful not to drop the battery pack.
Step 2: Charging the battery pack while it is inserted in the camera 1 Turn the power off. 2 Connect the camera with the battery pack inserted to the AC Adaptor (supplied) using the micro USB cable (supplied), and connect the AC Adaptor to the wall outlet (wall socket).
Step 3: Attaching a lens 1 Remove the body cap from the camera and the rear lens cap from the rear of the lens. •• When changing the lens, work quickly in a dust-free environment to keep dust or debris from getting inside the camera. Body cap Rear lens cap 2 Mount the lens by aligning the two white index marks (mounting indexes) on the lens and camera. •• Hold the camera with the lens facing down to prevent dust or debris from entering the camera.
Note ••Be sure to hold the lens straight and do not use force when attaching a lens. ••Do not press the lens release button when attaching a lens. ••The Mount Adaptor (sold separately) is required to use an A-mount lens (sold separately). For details, refer to the operating manual supplied with the Mount Adaptor. ••When carrying the camera with a lens attached, hold both the camera and the lens firmly. ••Do not hold the part of the lens that is extended for zoom or focus adjustment.
Step 4: Setting the language and the clock 1 Set the ON/OFF (Power) switch to “ON” to turn on the camera. ON/OFF (Power) switch 2 Select the desired language and then press the center of the control wheel. 3 Make sure that [Enter] is selected on the screen and then press the center. 4 Select the desired geographic location and then press the center. 5 Select a setting item using the top/bottom of the control wheel or by turning the control wheel, and then press the center.
Hint ••If you want to set the date and time later, you can cancel the date and time setting procedure by pressing the MENU button. In this case, the setting screen for the date and time will reappear the next time you turn on the camera. ••To reset the date and time setting, use MENU (page 42). Note ••This camera does not have a function for inserting the date into images. You can insert the date into images and then save and print them using PlayMemories Home (for Windows only).
To shoot movies Press the MOVIE button to start/stop recording. To play back images Press the (Playback) button to play back images. You can select the desired image using the control wheel. To delete displayed image Press the (Delete) button while an image is displayed to delete it. Select [Delete] using the control wheel on the confirmation screen, and then press the center of the control wheel to delete the image.
Using the Wi-Fi / One-touch (NFC) / Bluetooth functions You can perform the following operations using the camera's Wi-Fi, NFC One-touch, and Bluetooth functions.
Introduction to computer software / PlayMemories Camera Apps We offer the following computer software and PlayMemories Camera Apps to enhance your enjoyment of photos/ movies. To take advantage of the computer software, access one of the following URLs using your Internet browser and then download the software by following the onscreen instructions. If one of these programs is already installed on your computer, update it to the latest version before use. Windows: http://www.sony.co.
Image Data Converter You can develop and edit RAW images using various adjustment functions like tone curve and sharpness. Remote Camera Control With Remote Camera Control, you can change the camera settings or release the shutter from a computer connected via a USB cable. (Setup) To use Remote Camera Control, first select MENU [USB Connection] [PC Remote], then connect the camera to a computer via a USB cable.
List of MENU items For details on each MENU items, refer to the Help Guide. (Camera Settings1) Red tab Quality/Image Size Quality Sets the image quality for still images. ([RAW] / [Fine], etc.) Image Size Selects the size of still images. (L / M / S) Aspect Ratio Selects the aspect ratio for still images. Panorama: Size Selects the size of panoramic images. Panorama: Direction Sets the shooting direction for panoramic images.
Bracket Settings Sets self-timer shooting in bracket mode, shooting order for exposure bracketing, and white balance bracketing. / Recall Calls up settings pre-registered to Memory]. [ / / Memory Registers the desired modes and camera settings. AF Focus Mode Selects the focus mode. ([Single-shot AF] / [Continuous AF], etc.) Priority Set in AF-S Sets the timing of the shutter release when [Focus Mode] is set to [Single-shot AF], [DMF] or [Automatic AF] with a still subject.
AF Micro Adj. Finely adjusts the autofocused position, when using the LA-EA2 or LA-EA4 Mount Adaptor (sold separately). Exposure Exposure Comp. Compensates for the brightness of the entire image. ISO Sets the ISO sensitivity. ([ISO AUTO], etc.) ISO AUTO Min. SS Sets the slowest shutter speed at which ISO sensitivity will start to change in [ISO AUTO] mode. Metering Mode Selects the method for measuring brightness. ([Multi] / [Spot], etc.
DRO/Auto HDR Analyzes the contrast of light and shadow between the subject and the background by dividing the image into small areas, and creates an image with the optimal brightness and gradation. Creative Style Selects the desired image processing. You can also adjust contrast, saturation, and sharpness. ([Vivid] / [Portrait], etc.) Picture Effect Shoots images with a texture unique to the selected effect. ([Toy Camera] / [Rich-tone Mono.], etc.
Auto Obj. Framing Analyzes the scene when capturing faces, close-ups, or subjects tracked by the Lock-on AF function, and automatically trims and saves another copy of the image with a more impressive composition. (Camera Settings2) Purple tab Movie Movie/S&Q Motion File Format Selects the movie file format. ([XAVC S 4K] / [AVCHD], etc.) Record Setting Selects the bit rate and frame rate for the movie size. S&Q Settings Changes the settings for slow-motion and quick-motion movie shooting.
Marker Settings Sets which markers to displayed on the monitor when recording movies. Shutter/SteadyShot Silent Shooting Shoots images without a shutter sound. e-Front Curtain Shut. Sets whether to use the electronic front curtain shutter function. Release w/o Lens Sets whether to release the shutter when the lens is not attached. Release w/o Card Sets whether to release the shutter when a memory card is not inserted. SteadyShot Sets whether to activate SteadyShot for shooting.
Live View Display Sets whether to reflect settings such as exposure compensation in screen display. Auto Review Sets auto review to display the captured image after shooting. Custom Operation Custom Key(Shoot.) Assigns functions to the various keys so that you can perform operations more quickly by pressing the keys when shooting images. Custom Key(PB) Assigns functions to the keys so that you can perform operations more quickly by pressing the keys when playing back images. Function Menu Set.
One-touch(NFC) Assigns an application to One-touch (NFC). You can call up the application when shooting by touching an NFC-enabled smartphone to the camera. Airplane Mode Disables wireless communications from the device such as Wi-Fi, NFC, and Bluetooth function. Wi-Fi Settings Allows you to register your access point and check or change the Wi-Fi connection information. Bluetooth Settings Controls the settings for connecting the camera with a smartphone via a Bluetooth connection. Loc. Info.
Rotate Enlarge Image Rotates the image. Enlarges the playback images. Protect Protects recorded images against accidental erasure. Specify Printing Specifies in advance on the memory card which still images to print out later. Photo Capture Captures a chosen scene in a movie to save as a still image. (Setup) GB 40 Yellow tab Monitor Brightness Adjusts the brightness of the screen. Viewfinder Bright. Sets the brightness of the electronic viewfinder. Finder Color Temp.
NTSC/PAL Selector*1 Changes the TV format of the device so that you can shoot in a different movie format. Cleaning Mode Starts the cleaning mode to clean the image sensor. Touch Operation Sets whether or not to activate the touch operation of the monitor. Touch Pad (vertical) Sets whether to operate the camera using the touch pad when you use the viewfinder in the vertical position. Touch Pad Area Set. Sets the area to be used in the touch pad operation at the time of shooting by viewfinder.
Date/Time Setup Sets the date, time, and daylight savings. Area Setting Sets the location of use. Copyright Info Sets copyright information for still images. Format Formats the memory card. File Number Sets the method used to assign file numbers. Set File Name Changes the first 3 characters of the file names for still images. Select REC Folder Changes the folder selected for storing still images and movies (MP4). New Folder Creates a new folder for storing still images and movies (MP4).
Specifications Battery life and number of recordable images Battery life Number of images Shooting (still images) Screen mode ― Approx. 350 Viewfinder mode ― Approx. 310 Actual shooting (movies) Screen mode Approx. 70 min. ― Viewfinder mode Approx. 65 min. ― Continuous shooting (movies) Screen mode Approx. 105 min. ― Viewfinder mode Approx. 105 min. ― •• The above estimates for battery life and number of recordable images apply when the battery pack has been fully charged.
•• The number of minutes for movie shooting is based on the CIPA standard and shooting under the following conditions: –– The image quality is set to XAVC S HD 60p 50M /50p 50M . –– Actual shooting (movies): Battery life based on repeatedly shooting, zooming, shooting stand-by, turning on/off, etc. –– Continuous shooting (movies): Battery life based on non-stop shooting until the limit (29 minutes) has been reached, and then continued by pressing the MOVIE (Movie) button again.
Note ••When an SDHC memory card is used to record an XAVC S movie over extended periods of time, the recorded movies will be divided into files 4 GB in size. The divided files can be handled as a single file by importing them to a computer using PlayMemories Home. Number of recordable images When you insert a memory card into the camera and set the ON/OFF (Power) switch to “ON,” the number of images that can be recorded (should you continue to shoot using the current settings) is displayed on the screen.
The number of images that can be recorded on a memory card The table below shows the approximate number of images that can be recorded on a memory card formatted with this camera. The values are defined using Sony standard memory cards for testing. The values may vary depending on the shooting conditions and the type of memory card used.
Recordable movie times The table below shows the approximate total recording times using a memory card formatted with this camera. The values may vary depending on the shooting conditions and the type of memory card File Format] is set to [XAVC S 4K], used. The recording times for when [ [XAVC S HD], and [AVCHD] are recording times when shooting with [Dual Video REC] set to [Off].
File Format MP4 8 GB 16 GB 32 GB 64 GB 1920×1080 60p 28M / 50p 28M Record Setting 35 m 1 h 15 m 2 h 35 m 5 h 20 m 1920×1080 30p 16M / 25p 16M 1h 2h 4 h 10 m 8 h 25 m 1280×720 30p 6M / 25p 6M 2 h 35 m 5 h 20 m 10 h 55 m 22 h * Only when [NTSC/PAL Selector] is set to NTSC •• Continuous shooting is possible for approximately 29 minutes (a product specification limit).
Notes on continuous movie recording •• It requires a lot of power to perform high quality movie recording or continuous shooting. Therefore, if you continue to shoot, the temperature inside the camera will rise, especially that of the image sensor. In such cases, the camera will turn off automatically because the surface of the camera is heated to a high temperature that can affect the quality of the images or the internal mechanism of the camera.
Specifications Camera [System] Metering range EV–2 to EV20 (at ISO 100 equivalent, with F2.0 lens) [Image sensor] ISO sensitivity (Recommended exposure index) Still images: AUTO, ISO 100 – ISO 25 600 (Extended ISO: Maximum ISO 51 200) Movies: AUTO, ISO 100 – ISO 25 600 equivalent Image sensor APS-C format (23.5 mm × 15.6 mm) CMOS image sensor Exposure compensation ±5.0 EV (switchable between 1/3 and 1/2 EV steps) Effective pixel number of camera Approx.
Total number of dots 921 600 dots [Electronic viewfinder] Type Electronic viewfinder Total number of dots 2 359 296 dots Frame coverage 100% Magnification Approx. 1.07× Approx. 0.70× (35 mm-format equivalent) with 50 mm lens at infinity, –1 m–1 (diopter) Eye point (CIPA compliant) Approx. 23 mm from the eyepiece, approx. 21.4 mm from the eyepiece frame at –1 m–1 Diopter Adjustment –4.0 m–1 to +3.0 m–1 [Input/output terminals] Multi/Micro USB Terminal* Hi-Speed USB (USB 2.
[Flash] Flash guide number 6 (in meters at ISO 100) Recycling time Approx. 4 seconds Flash coverage Covering 16 mm lens (focal length that the lens indicates) Flash compensation ±3.0 EV (switchable between 1/3 and 1/2 EV steps) [Wireless LAN] Supported format IEEE 802.11 b/g/n Frequency band 2.
On focal length The picture angle of this camera is narrower than that of a 35 mmformat camera. You can find the approximate equivalent of the focal length of a 35 mm-format camera, and shoot with the same picture angle, by increasing the focal length of your lens by half. For example, by using a 50 mm lens, you can get the approximate equivalent of a 75 mm lens of a 35 mm-format camera. Trademarks ••Memory Stick and are trademarks or registered trademarks of Sony Corporation.
••Facebook and the “f” logo are trademarks or registered trademarks of Facebook, Inc. ••Android and Google Play are trademarks or registered trademarks of Google Inc. ••YouTube and the YouTube logo are trademarks or registered trademarks of Google Inc. ••Wi-Fi, the Wi-Fi logo and Wi-Fi Protected Setup are registered trademarks or trademarks of the Wi-Fi Alliance. ••The N Mark is a trademark or registered trademark of NFC Forum, Inc. in the United States and in other countries.
GB 55
©2016 Sony Corporation Printed in Thailand