
RSMA Installation Sheet
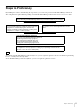
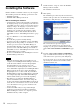

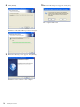

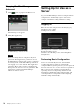
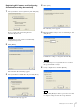
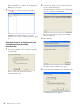
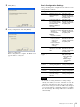

Table Of Contents
- Table of Contents
- Copyright Notice
- Features of RealShot Manager Advanced
- Example System Layouts
- Operating Environment
- END-USER LICENSE AGREEMENT
- MPEG-4 Video Patent Portfolio License
- Steps to Proficiency
- Installing the Software
- Starting and Stopping RealShot Manager Advanced
- Setting Up for Use as a Server
- Setting Up for Use as a Client
- Monitoring Camera Images
- Recording, Searching, and Playing Images
- Uninstalling the Software
- Troubleshooting

13
Installing the Software
4
Select a destination folder for installation, and click
[Next].
The folder “C:\Program Files\Sony\RealShot Manager
Advanced” is selected by default.
To change the destination folder, click [Change] and
specify a folder to use for installation.
5
Click [Next].
Installation of PostgreSQL begins.
When installation of PostgreSQL completes, the
following screen appears.
6
Select the type of RealShot Manager Advanced to
install, and click [Next].
To install and use the [Client] type software, a
computer running the [Server] type or an NSR series
master server must exist on the same network. For
details, refer to the User’s Guide (PDF).
7
Select the user interface languages to install, and click
[Next].
You can select multiple languages.
The languages that you specify here are the language
modules that will be installed. This is not a
specification of the language that will be displayed
when RealShot Manager Advanced runs.
A confirmation message appears.
Note
Caution