
MiniDisc Deck Operating Instructions

14
GB
Tips
• The MDLP indicator lights up when you select LP2
or LP4 in step 2 above.
• The deck is set at the factory to add “LP:” at the
beginning of a track name automatically. This
indication is displayed when the track is played on a
deck that does not support long-time recording.
To turn off this function, do the following procedure.
1 While the deck is stopped, playing, or
paused, press MENU/NO.
2 Turn AMS (or press ./> repeatedly)
until “Setup?” appears, then press AMS or
YES.
3 Turn AMS (or press ./> repeatedly)
until “LPstamp On” (factory setting)
appears, then press AMS or YES.
4 Turn AMS (or press ./> repeatedly)
to select “LPstamp Off”, and then press
AMS or YES.
5 Press MENU/NO.
To add “LP:” automatically again, select “LPstamp
On” in step 4 above.
Notes
• The recorded “LP:” is a stamp which appears to
indicate that the track cannot be played back when
you try to play the track on a system that does not
support MDLP mode. It does not appear for systems
that support MDLP mode.
• When set to “On”, “LP:” is recorded as the track
name, so the number of characters that can be input
to an MD is reduced. If you divide an “LP:” track
using the Divide function, “LP:” is also added to the
latter track.
• The selected recording mode is kept even after
recording has finished, so be sure to check the
recording mode before recording.
• Tracks recorded in MDLP (LP2 or LP4) Stereo
mode cannot be played back on a system that does
not support MDLP mode.
• Even if you press REC MODE during recording,
you cannot change the recording mode.
• Even if you press REC MODE repeatedly to select
MONO, the monitor signal during recording does
not become monaural.
• You cannot use S.F Edit and some other MD edit
functions for tracks recorded in MDLP mode.
Marking track numbers while
recording
— Manual/Automatic Track Marking
You can mark track numbers either manually or
automatically while recording. By marking
track numbers at specific points, you can
quickly locate the points later or edit the MD
easily.
Marking track numbers manually
(Manual Track Marking)
While recording, press REC z at the point
where you want to add a track number.
Marking track numbers automatically
(Automatic Track Marking)
When recording from a CD player or MD deck
connected to a DIGITAL IN connector, the deck
marks track numbers in the same sequence as
the source.
When recording from other sources connected
to the DIGITAL IN connector or a source
connected to the ANALOG IN jacks, do the
procedure below to mark track numbers
automatically. However, you cannot mark track
numbers automatically if the sound source to be
recorded is noisy (e.g., tapes or radio
programmes).
1 While the deck is stopped, press MENU/
NO.
2 Turn AMS (or press ./>
repeatedly) until “Setup?” appears,
then press AMS or YES.
3 Turn AMS (or press ./>
repeatedly) until “T.Mark LSyn(c)”
appears, then press AMS or YES.
4 Turn AMS (or press ./>
repeatedly) to select the setting, then
press AMS or YES.
When you select “T.Mark LSyn(c)”,
“
L.SYNC” lights up.
5 Press MENU/NO.
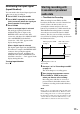
To Select
Turn on Automatic
Track Marking
T.Mark LSyn(c) (factory
setting)
Turn off Automatic
Track Marking
T.Mark Off