4-563-800-13(2) Bluetooth® Audio System Owner’s Record The model and serial numbers are located on the bottom of the unit. Record the serial number in the space provided below. Refer to these numbers whenever you call upon your Sony dealer regarding this product. Model No. MEX-XB100BT Serial No. For the connection/installation, see page 32. Pour le raccordement/l’installation, reportez-vous à la page 36. To cancel the demonstration (DEMO) display, see page 19.
For safety, be sure to install this unit in the dashboard of the car as the left side of the unit becomes hot during use. For details, see “Connection/Installation” (page 32). The nameplate indicating operating voltage, etc., is located on the bottom of the chassis. Warning FOR THE CUSTOMERS IN THE USA. NOT APPLICABLE IN CANADA, INCLUDING IN THE PROVINCE OF QUEBEC. POUR LES CLIENTS AUX ÉTATS-UNIS. NON APPLICABLE AU CANADA, Y COMPRIS LA PROVINCE DE QUÉBEC.
Warning if your car’s ignition has no ACC position Be sure to set the AUTO OFF function (page 19). The unit will shut off completely and automatically in the set time after the unit is turned off, which prevents battery drain. If you do not set the AUTO OFF function, press and hold OFF until the display disappears each time you turn the ignition off. Disclaimer regarding services offered by third parties Services offered by third parties may be changed, suspended, or terminated without prior notice.
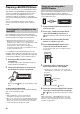
Additional Information Table of Contents Warning . . . . . . . . . . . . . . . . . . . . . . . . . . . . . . . . . . . 2 Guide to Parts and Controls . . . . . . . . . . . . . . . . . . . 5 Getting Started Detaching the Front Panel . . . . . . . . . . . . . . . . . . . . 7 Resetting the unit . . . . . . . . . . . . . . . . . . . . . . . . . . . 7 Setting the Clock . . . . . . . . . . . . . . . . . . . . . . . . . . . . 7 Preparing a BLUETOOTH Device. . . . . . . . . . . . . . . .
Guide to Parts and Controls Main unit Front panel removed (inner panel) N-Mark Touch the control dial with Android phone to make BLUETOOTH connection. Disc slot Display window Front panel release button SRC (source) Turn on the power. Change the source. OFF Press and hold for 1 second to turn the source off and display the clock. Press and hold for more than 2 seconds to turn off the power and the display.
Press to thumbs up, or to thumbs down in Pandora® (page 15). RM-X231 Remote commander (repeat) (shuffle) MIC (page 16) PAUSE MEGA BASS Press to turn on/off the MEGA BASS function. PTY (program type) Select PTY in RDS. CAT (category) Select radio channels in SiriusXM. AUX input jack DSPL (display) Press to change display items. SCRL (scroll) Press and hold to scroll a display item. USB port RESET (inner panel) (page 7) The VOL (volume) + button has a tactile dot.
Getting Started Detaching the Front Panel You can detach the front panel of this unit to prevent theft. 1 Resetting the unit Before operating the unit for the first time, after replacing the car battery, or changing the connections, you must reset the unit. Press RESET on the inner panel with a ball-point pen, etc., after detaching the front panel. Press and hold OFF until the unit turns off, press the front panel release button , then pull the panel towards you to remove.
Preparing a BLUETOOTH Device You can enjoy music, or perform handsfree calling depending on the BLUETOOTH compatible device such as a smartphone, cellular phone and audio device (hereafter “BLUETOOTH device” if not otherwise specified). For details on connecting, refer to the operating instructions supplied with the device. Before connecting the device, turn down the volume of this unit; otherwise, loud sound may result.
To start playback To install the microphone For details, see “Playing a BLUETOOTH Device” (page 13). For details, see “Installing the microphone” (page 35). To cancel pairing Perform step 2 to cancel the pairing mode after this unit and the BLUETOOTH device are paired. Connecting with a paired BLUETOOTH device To use a paired device, connection with this unit is required. Some paired devices will connect automatically.
Connecting Other Portable Audio Device 1 2 3 Listening to the Radio Turn off the portable audio device. Listening to the Radio Turn down the volume on the unit. To listen to the radio, press SRC to select [TUNER]. Connect the portable audio device to the AUX input jack (stereo mini jack) on the unit with a connecting cord (not supplied)*. * Be sure to use a straight type plug. Storing automatically (BTM) 1 Press MODE to change the band (FM1, FM2, FM3, AM1 or AM2).
Using Radio Data System (RDS) Selecting program types (PTY) 1 2 Press PTY during FM reception. Rotate the control dial until the desired program type appears, then press it. The unit starts to search for a station broadcasting the selected program type.
To set a parental control The parental control feature allows you to limit access to SiriusXM channels with mature content. When enabled, the parental control feature requires you to enter a passcode to tune to the locked channels. Information on setting up the passcode and locking channels can be found below. 1 2 3 4 Press MENU and rotate the control dial. Select [SET GENERAL] [SET PARENTAL] [SET LOCK SELECT] [SET LOCK-ON].
To stop playback Press and hold OFF for 1 second. To remove the device Stop playback, then remove the device. Caution for iPhone When you connect an iPhone via USB, phone call volume is controlled by the iPhone, not the unit. Do not inadvertently increase the volume on the unit during a call, as a sudden loud sound may result when the call ends.
Searching by skipping items (Jump mode) 1 2 3 Press Press SEEK +. Rotate the control dial to select the item. The list is jumped in steps of 10% of the total number of items. 4 5 Listening to Pandora® (browse). Press ENTER to return to the QuickBrowZer mode. Pandora® is available to stream music through your iPhone and Android phone. You can control Pandora® on a BLUETOOTH connected iPhone/ Android phone from this unit. The Pandora® service is not available in some countries/regions.
Available Operations in Pandora® “Thumbs” feedback “Thumbs Up” or “Thumbs Down” feedback allows you to personalize stations. 1 Handsfree Calling (via BLUETOOTH only) To use a cellular phone, connect it with this unit. For details, see “Preparing a BLUETOOTH Device” (page 8). During playback, press (Thumbs Up) or (Thumbs Down). Using the station list The station list allows you to easily select a desired station. 1 2 3 During playback, press (browse).
From the call history 1 Press CALL, rotate the control dial to select [SET RECENT CALL], then press it. A list of the call history appears. 2 Rotate the control dial to select a name or phone number from the call history, then press it. By voice tags You can make a call by saying the voice tag stored in a connected cellular phone that has a voice dialing function. 1 Alternatively, press VOICE while the “SongPal” function is off. The phone call starts.
Selecting the source or application Useful Functions SongPal with iPhone/Android Phone Downloading the “SongPal” application (version 2.1 or later) is required from the App Store for iPhone or from Google Play for Android phone. Notes For your safety, follow your local traffic laws and regulations, and do not operate the application while driving. “SongPal” is an app for controlling Sony audio devices which are compatible with “SongPal”, by your iPhone/ Android phone.
Activating voice recognition (Android phone only) By registering applications, you can control an application by voice command. For details, refer to the help of the application. To activate voice recognition 1 2 Press VOICE to activate voice recognition. Say the desired voice command into the microphone when [Say Source or App] appears on the Android phone. Using Siri Eyes Free Siri Eyes Free allows you to use an iPhone handsfree by simply speaking into the microphone.
BEEP Activates the beep sound: [ON], [OFF]. Settings Canceling the DEMO Mode You can cancel the demonstration display which appears when the source is off and the clock is displayed. 1 Press MENU, rotate the control dial to select [SET DISPLAY], then press it. 2 Rotate the control dial to select [SET DEMO], then press it. 3 Rotate the control dial to select [SET DEMO-OFF], then press it. The setting is complete. 4 Press (back) twice. The display returns to normal reception/play mode.
CT (clock time) Activates the CT function: [ON], [OFF]. BTM (page 10) (Available only when the tuner is selected.) PARENTAL Sets the parental lock to [ON], [OFF], and edits the passcode (page 12). (Available only when SiriusXM is selected.) SXM RESET (SiriusXM reset) Initializes the SiriusXM Connect Vehicle Tuner settings (preset channels/parental lock): [YES], [NO]. (Available only when SiriusXM is selected.) FIRMWARE Checks/updates the firmware version.
REARBAS ENH (rear bass enhancer) Rear Bass Enhancer enhances the bass sound by applying a low pass filter setting to the rear speakers. This function allows the rear speakers to work as a subwoofer if one is not connected. (Available only when [SUBW DIRECT] is set to [OFF].) RBE MODE (rear bass enhancer mode) Selects the rear bass enhancer mode: [1], [2], [3], [OFF]. LPF FREQ (low pass filter frequency) Selects the subwoofer cut-off frequency: [50Hz], [60Hz], [80Hz], [100Hz], [120Hz].
ALL COLOR Sets a preset color or customized color for the display and buttons. COLOR Selects from 15 presets colors, 1 customized color. CUSTOM COLOR Registers a customized color for the display and buttons. RGB RED, RGB GREEN, RGB BLUE Adjustable color range: [0] – [32] ([0] cannot be set for all color ranges). SOUND SYNC (sound synchronization) Selects the color with sound synchronization: [ON], [OFF]. WHITE MENU You can display the menu more clearly (white) without concern for color setting: [ON], [OFF].
Notes on CD-R/CD-RW discs Additional Information Updating the Firmware You can update the firmware of this unit from the following support site: http://esupport.sony.com/ To update the firmware, visit the support site, then follow the online instructions. Precautions Cool off the unit beforehand if your car has been parked in direct sunlight. Do not leave the front panel or audio devices brought in inside the car, or it may cause malfunction due to high temperature in direct sunlight.
Compatible Model Bluetooth® USB iPod classic* iPod nano (7th generation)* iPod nano (6th generation)* iPod nano (5th generation)* iPod nano (4th generation)* iPod nano (3rd generation)* Notes on the lithium battery Keep the lithium battery out of the reach of children. Should the battery be swallowed, immediately consult a doctor. Wipe the battery with a dry cloth to ensure a good contact. Be sure to observe the correct polarity when installing the battery.
Separation: 50 dB at 1 kHz Frequency response: 20 – 15,000 Hz AM Tuning range: 530 – 1,710 kHz Antenna (aerial) terminal: External antenna (aerial) connector Sensitivity: 26 μV CD Player section Signal-to-noise ratio: 120 dB Frequency response: 10 – 20,000 Hz Wow and flutter: Below measurable limit The maximum number of: (CD-R/CD-RW only) folders (albums): 150 (including root folder) files (tracks) and folders: 300 (may less than 300 if folder/file names contain many characters) displayable character
Copyrights SiriusXM Connect Vehicle Tuner and Subscription sold separately. www.siriusxm.com Sirius, XM and all related marks and logos are trademarks of Sirius XM Radio Inc. All rights reserved. The Bluetooth® word mark and logos are registered trademarks owned by Bluetooth SIG, Inc. and any use of such marks by Sony Corporation is under license. Other trademarks and trade names are those of their respective owners. The N-Mark is a trademark or registered trademark of NFC Forum, Inc.
No sound or the sound is very low. The position of the fader control [FADER] is not set for a 2-speaker system. The volume of the unit and/or connected device is very low. Increase the volume of the unit and connected device. No beep sound. An optional power amplifier is connected and you are not using the built-in amplifier. The contents of the memory have been erased. The reset button has been pressed. Store again into the memory.
NFC function One touch connection (NFC) is not possible. If the smartphone does not respond to the touching. Check that the NFC function of the smartphone is turned on. Move the N-Mark part of the smartphone closer to the N-Mark part on this unit. If the smartphone is in a case, remove it. NFC receiving sensitivity depends on the device. If One touch connection with the smartphone fails several times, make BLUETOOTH connection manually.
BLUETOOTH function cannot operate. Turn off the unit by pressing OFF for more than 2 seconds, then turn the unit on again. No sound is output from the car speakers during handsfree call. If the sound is output from the cellular phone, set the cellular phone to output the sound from the car speakers. Siri Eyes Free is not activated. Perform the handsfree registration for an iPhone that supports Siri Eyes Free. Set the Siri function on the iPhone to on.
P EMPTY: No phone numbers are stored. UNKNOWN: A name or phone number cannot be displayed. WITHHELD: The phone number is hidden by the caller. For SongPal operation: APP --------: A connection with the application is not established. Make the “SongPal” connection again (page 17). NO STATION: No stations on your account. Create the station on the mobile device. NOT ALLOWED: The selected operation is not allowed. “Thumbs” feedback is not allowed. Wait until the commercial ends.
CHAN UNSUB The channel that you have requested is not included in your SiriusXM subscription package or the channel that you were listening to is no longer included in your SiriusXM subscription package. If you have questions about your subscription package or would like to subscribe to this channel, please contact SiriusXM. In the USA, visit www.siriusxm.com or call 1-866-635-2349. In Canada, visit www.siriusxm.ca or call 1-877-438-9677. CHK ANT The radio has detected a fault with the SiriusXM antenna.
Connection/Installation Parts List for Installation Cautions Run all ground (earth) leads to a common ground (earth) point. Do not get the leads trapped under a screw, or caught in moving parts (e.g., seat railing). Before making connections, turn the car ignition off to avoid short circuits. Connect the yellow and red power supply leads only after all other leads have been connected. Be sure to insulate any loose unconnected leads with electrical tape for safety. ×2 5 × max.
Connection Subwoofer*1 *3 *3 *3 Power amplifier*1 Satellite radio tuner (SiriusXM)*1 from a wired remote control (not supplied)*4 White White/black striped Front speaker*1*2*7 Gray Gray/black striped Green Green/black striped Rear speaker*1*2*7 Purple Purple/black striped Red Blue/white striped (MAX 0.4A) Orange/white striped Black Yellow For details, see “Making connections” (page 34).
*1 *2 *3 *4 *5 *6 *7 *8 Not supplied Speaker impedance: 4 – 8 Ω × 4 RCA pin cord (not supplied) Depending on the type of car, use an adaptor for a wired remote control (not supplied). For details on using the wired remote control, see “Using the wired remote control” (page 35). Whether in use or not, route the microphone input cord such that it does not interfere with driving operations. Secure the cord with a clamp, etc., if it is installed around your feet.
When using the wired remote control Installing the microphone 1 To capture your voice during handsfree calling, you need to install the microphone . To enable the wired remote control, set [SET STR CONTROL] in [SET STEERING] to [EXTERNAL] (page 19). Installation Removing the protection collar and the bracket Before installing the unit, remove the protection collar and the bracket from the unit. Clip (not supplied) 1 Pinch both edges of the protection collar , then pull it out.
Mounting the unit in the dashboard Before installing, make sure the catches on both sides of the bracket are bent inwards 2 mm (3/32 in). When mounting in a Japanese car, see “Mounting the unit in a Japanese car” (page 36). 1 Position the bracket inside the dashboard, then bend the claws outward for a tight fit. Mounting the unit in a Japanese car You may not be able to install this unit in some makes of Japanese cars. In such a case, consult your Sony dealer.
Fuse replacement When replacing the fuse, be sure to use one matching the amperage rating stated on the original fuse. If the fuse blows, check the power connection and replace the fuse. If the fuse blows again after replacement, there may be an internal malfunction. In such a case, consult your nearest Sony dealer. Fuse (15 A) Note Use an appropriate tool to replace a fuse.
Pour plus de sécurité, installez cet appareil dans le tableau de bord du véhicule, car la partie gauche de l’appareil devient chaude en cours de fonctionnement. Pour plus de détails, reportez-vous à la section « Raccordement/Installation » (page 36). La plaque signalétique indiquant la tension d’alimentation, etc. se trouve sur le dessous du châssis. Avertissement Le présent appareil est conforme aux CNR d’Industrie Canada applicables aux appareils radio exempts de licence.
Avis important Attention SONY NE PEUT EN AUCUN CAS ÊTRE TENU RESPONSABLE DE TOUT DOMMAGE DIRECT, INDIRECT OU CONSÉCUTIF OU DE TOUT AUTRE DOMMAGE, Y COMPRIS, SANS LIMITATION, TOUTE PERTE DE PROFITS, DE REVENU, DE DONNÉES, D’UTILISATION DU PRODUIT OU DE TOUT APPAREIL ASSOCIÉ, DE DISPONIBILITÉ ET DE TEMPS DE L’UTILISATEUR LIÉE À OU DÉCOULANT DE L’UTILISATION DE CE PRODUIT, MATÉRIEL ET/OU LOGICIEL. Cher client, ce produit comprend un émetteur radio.
Informations complémentaires Table des matières Avertissement . . . . . . . . . . . . . . . . . . . . . . . . . . . . . . 2 Guide des pièces et commandes . . . . . . . . . . . . . . 5 Préparation Retrait de la façade . . . . . . . . . . . . . . . . . . . . . . . . . . 7 Réinitialisation de l’appareil . . . . . . . . . . . . . . . . . . . 7 Réglage de l’horloge . . . . . . . . . . . . . . . . . . . . . . . . 7 Préparation d’un périphérique BLUETOOTH . . . . . . 8 Raccordement d’un iPod/périphérique USB . .
Guide des pièces et commandes Appareil principal Sans la façade (panneau interne) VOICE (pages 17, 19, 20) Permet d’activer la composition vocale, la reconnaissance vocale lorsque la fonction « SongPal » est activée (téléphone Android™ uniquement) ou la fonction Siri (iPhone uniquement). Symbole N Touchez à la molette de réglage avec un téléphone Android pour établir une connexion BLUETOOTH. Touche de déverrouillage de la façade SRC (source) Permet de mettre l’appareil en marche.
MENU* Permet d’ouvrir le menu de configuration. Télécommande RM-X231 * Non disponible lorsque le téléphone BT est sélectionné. Touches numériques (1 à 6) Permettent de capter des stations de radio mémorisées. Appuyez sur la touche et maintenez-la enfoncée pour mémoriser des stations. Permettent de composer un numéro de téléphone mémorisé. Appuyez sur la touche et maintenez-la enfoncée pour mémoriser un numéro de téléphone. ALBUM / Permet de sauter un album sur un appareil audio.
Préparation Retrait de la façade Vous pouvez retirer la façade de cet appareil pour le protéger du vol. 1 Appuyez sur la touche OFF et maintenez-la enfoncée jusqu’à ce que l’appareil s’éteigne. Appuyez sur la touche de déverrouillage de la façade , puis retirez la façade en la tirant vers vous. Réinitialisation de l’appareil Avant la première utilisation de l’appareil ou après avoir remplacé la batterie du véhicule ou modifié les raccordements, vous devez réinitialiser l’appareil.
Préparation d’un périphérique BLUETOOTH Vous pouvez écouter de la musique ou effectuer un appel en mains libres selon le périphérique compatible BLUETOOTH, tel que téléphone intelligent, téléphone cellulaire ou périphérique audio (ci-après nommé « périphérique BLUETOOTH », sauf en cas d’indication différente). Pour plus de détails sur la connexion, reportez-vous au mode d’emploi fourni avec le périphérique.
5 Si la saisie d’un code d’authentification* est requise sur le périphérique BLUETOOTH, saisissez [0000]. * Le code d’authentification peut également être nommé « clé d’authentification », « code NIP », « numéro NIP » ou « mot de passe », etc., en fonction du périphérique. Entrez le code d’authentification [0000] Une fois le pairage effectué, allumé. 6 demeure Sélectionnez cet appareil sur le périphérique BLUETOOTH pour établir la connexion BLUETOOTH. ou s’allume lorsque la connexion est établie.
Raccordement d’un iPhone/iPod (pairage BLUETOOTH automatique) Lorsqu’un iPhone/iPod muni d’iOS5 ou version ultérieure est raccordé au port USB, l’appareil est automatiquement jumelé et connecté avec le iPhone/iPod. Pour permettre le pairage BLUETOOTH automatique, assurez-vous de régler [SET AUTO PAIR] dans [BT] à [ON] (page 24). 1 Activez la fonction BLUETOOTH sur le iPhone/iPod. 2 Raccordez un iPhone/iPod au port USB. 1 2 3 Éteignez l’appareil audio portatif. Réduisez le volume de l’appareil.
Écoute de la radio Écoute de la radio Pour écouter la radio, appuyez sur SRC pour sélectionner [TUNER]. Mémorisation automatique (BTM) 1 Appuyez sur MODE pour changer de bande (FM1, FM2, FM3, AM1 ou AM2). 2 Appuyez sur MENU, tournez la molette de réglage pour sélectionner [SET GENERAL], puis appuyez dessus. 3 Tournez la molette de réglage pour sélectionner [SET BTM], puis appuyez dessus. L’appareil mémorise les stations sur les touches numériques en respectant l’ordre des fréquences.
Écoute de la radio SiriusXM Activation de votre abonnement SiriusXM Seule la radio SiriusXM vous permet d’écouter encore plus de canaux que vous aimez, le tout au même endroit. Obtenez plus de 140 canaux, y compris des chaînes musicales exemptes de publicité, ainsi que les meilleures émissions de sports, de nouvelles, d’infovariétés, d’humour et de divertissement. Bienvenue dans le monde de la radio satellite. Un récepteur SiriusXM Connect Voiture et un abonnement sont requis.
Pour changer les éléments d’affichage Appuyez sur DSPL pour les changer comme suit : Numéro de canal (par défaut) Nom de canal Nom de l’artiste Titre de chanson Informations de contenu Nom de catégorie Horloge* * Ne s’affiche pas lorsque [SUB DISPLAY] est réglé à [CLOCK] (page 24). Lecture Lecture d’un disque 1 Insérez le disque (côté imprimé vers le haut). La lecture démarre automatiquement.
1 Raccordez un iPod/périphérique USB au port USB (page 10). La lecture commence. Si un périphérique est déjà raccordé, appuyez sur SRC pour sélectionner [USB] afin de lancer la lecture ([IPD] apparaît dans l’affichage lorsque le iPod est reconnu). 2 Lecture d’un périphérique BLUETOOTH Vous pouvez lire les contenus d’un périphérique connecté qui prend en charge le profil BLUETOOTH A2DP (Advanced Audio Distribution Profile). Réglez le volume sur cet appareil.
Recherche d’une plage par nom (QuickBrowZer™) 1 En cours de lecture CD, USB ou BT (navigation)*2 AUDIO*1, appuyez sur pour afficher la liste des catégories de recherche. Lorsque la liste de plages apparaît, appuyez plusieurs fois sur (retour) pour afficher la catégorie de recherche souhaitée. *1 Disponible uniquement pour les périphériques audio prenant en charge AVRCP (Audio Video Remote Control Profile) 1.4 ou version ultérieure.
Opérations disponibles dans Pandora® Appréciation positive ou négative L’appréciation positive ou négative vous permet de personnaliser les stations. 1 Appel en mains libres (via BLUETOOTH uniquement) Pour utiliser un téléphone cellulaire, connectez-le à cet appareil. Pour plus de détails, reportez-vous à la section « Préparation d’un périphérique BLUETOOTH » (page 8). En cours de lecture, appuyez sur (appréciation positive) ou (appréciation négative).
4 Tournez la molette de réglage pour sélectionner un numéro dans la liste des numéros, puis appuyez dessus. Préréglage des numéros de téléphone L’appel téléphonique commence. 1 Vous pouvez mémoriser un maximum de 6 contacts dans la fonction de présélection. À partir de l’historique des appels 1 Appuyez sur la touche CALL, tournez la molette de réglage pour sélectionner [SET RECENT CALL], puis appuyez dessus. 2 Une liste de l’historique des appels apparaît.
Pour alterner entre le mode mains libres et le mode téléphone cellulaire Pendant un appel, appuyez sur MODE pour faire passer le son de l’appel téléphonique entre l’appareil et le téléphone cellulaire. Remarque Selon le téléphone cellulaire utilisé, cette opération pourrait ne pas être disponible. Fonctions pratiques SongPal avec iPhone/ téléphone Android Le téléchargement de l’application « SongPal » (version 2.
Sélection de la source ou de l’application Vous pouvez utiliser l’appareil pour sélectionner la source ou l’application souhaitée sur le iPhone/ téléphone Android. Pour sélectionner la source Appuyez plusieurs fois sur SRC. Vous pouvez également appuyer sur SRC, tourner la molette de réglage pour sélectionner la source souhaitée, puis appuyer sur ENTER.
Divers réglages Vous pouvez ajuster les divers réglages via le iPhone/téléphone Android. Pour plus de détails sur les réglages, consultez la section d’aide de l’application. Utilisation de Siri Eyes Free Siri Eyes Free vous permet d’utiliser un iPhone en mains libres en parlant simplement dans le microphone. Cette fonction nécessite la connexion d’un iPhone à l’appareil à l’aide du pairage BLUETOOTH automatique. La disponibilité est limitée aux iPhone 4s ou modèles ultérieurs.
Configuration générale (GENERAL) Réglages Annulation du mode DEMO Vous pouvez désactiver l’affichage de démonstration qui apparaît lorsque la source est désactivée et que l’horloge est affichée. 1 Appuyez sur MENU, tournez la molette de réglage pour sélectionner [SET DISPLAY], puis appuyez dessus. 2 Tournez la molette de réglage pour sélectionner [SET DEMO], puis appuyez dessus. 3 Tournez la molette de réglage pour sélectionner [SET DEMO-OFF], puis appuyez dessus. Le réglage est terminé.
Pour enregistrer d’autres fonctions, répétez les étapes et . STR RESET (réinitialisation du volant) Permet de réinitialiser le réglage de la télécommande du volant : [YES], [NO]. Remarques Pendant que vous effectuez les réglages, seul le fonctionnement à l’aide des touches de l’appareil est disponible. Par mesure de sécurité, stationnez votre voiture avant d’effectuer ce réglage.
SW POSITION* (position du caisson de graves) [NEAR] (rapprochée), [NORMAL] (normale), [FAR] (éloignée) BALANCE Permet de régler l’équilibre du son : [RIGHT-15] – [CENTER] – [LEFT-15]. FADER Permet de régler le niveau relatif : [FRONT-15] – [CENTER] – [REAR-15]. DSEE (moteur d’amélioration sonore numérique) Permet d’améliorer la qualité des sons compressés numériquement en restaurant les hautes fréquences supprimées lors du processus de compression.
Configuration d’affichage (DISPLAY) SOUND SYNC (synchronisation sonore) Permet de sélectionner la couleur avec la synchronisation sonore : [ON], [OFF]. DEMO (démonstration) Permet d’activer le mode de démonstration : [ON], [OFF]. WHITE MENU Vous pouvez afficher le menu avec plus de clarté (blanc) sans affecter le réglage de couleur : [ON], [OFF].
BT INIT (initialisation BLUETOOTH) Permet d’initialiser tous les réglages BLUETOOTH (informations de pairage, numéro de présélection, informations sur le périphérique, etc.) : [YES], [NO]. Avant de mettre l’appareil au rebut, initialisez tous les réglages. (Disponible uniquement lorsque la source est désactivée et que l’horloge est affichée.) Configuration SongPal (SONGPAL) Cette configuration permet d’activer et de désactiver la fonction « SongPal » (connexion).
Disques ne pouvant PAS être lus sur cet appareil Les disques sur lesquels sont collés des étiquettes, des autocollants, du ruban adhésif ou du papier. De tels disques peuvent provoquer des problèmes de fonctionnement ou être endommagés. Les disques de forme non standard (notamment en forme de cœur, de carré ou d’étoile). Vous risquez d’endommager votre appareil si vous essayez de lire ces types de disques. Les disques de 8 cm (3 1/4 po).
Si vous avez des questions ou des problèmes concernant cet appareil qui ne sont pas abordés dans ce mode d’emploi, contactez votre détaillant Sony le plus proche. Entretien Remplacement de la pile au lithium de la télécommande Sous des conditions normales d’utilisation, la pile durera environ 1 an (selon les conditions d’utilisation, la durée de vie utile peut être réduite). Lorsque la pile est faible, la portée de la télécommande diminue.
Méthode de modulation : FHSS Profils BLUETOOTH compatibles*2 : A2DP (Advanced Audio Distribution Profile) 1.3 AVRCP (Audio Video Remote Control Profile) 1.5 HFP (Handsfree Profile) 1.6 PBAP (Phone Book Access Profile) SPP (Serial Port Profile) MAP (Message Access Profile) HID (Human Interface Device Profile) Codecs correspondants : SBC (.sbc) et AAC (.
libFLAC Copyright (C) 2000-2009 Josh Coalson Copyright (C) 2011-2013 Fondation Xiph.Org La redistribution et l’utilisation sous formes binaire et source, avec ou sans modification, sont permises sous réserve des conditions suivantes : Les redistributions du code source doivent conserver l’avis de droit d’auteur ci-dessus, cette liste de conditions et la renonciation suivante.
Les stations mémorisées sont effacées et l’heure est remise à zéro. Le fusible est grillé. Émission d’un bruit lorsque la position de la clé de contact est modifiée. Les câbles ne sont pas raccordés correctement au connecteur d’alimentation du véhicule destiné aux accessoires. Pendant la lecture ou la réception, l’écran du mode de démonstration apparaît. Si aucune opération n’est effectuée pendant 5 minutes alors que le réglage [DEMO-ON] est sélectionné, l’écran du mode de démonstration apparaît.
Fonction NFC Impossible d’établir la connexion par simple contact (NFC). Si le téléphone intelligent ne répond pas au contact. Vérifiez que la fonction NFC du téléphone intelligent est activée. Rapprochez le symbole N du téléphone intelligent du symbole N de cet appareil. Si le téléphone intelligent est placé dans un étui, retirez ce dernier. La sensibilité de réception NFC varie en fonction du périphérique.
Impossible de commander le périphérique audio BLUETOOTH connecté. Assurez-vous que le périphérique audio BLUETOOTH connecté soit compatible avec le profil AVRCP. Certaines fonctions sont inopérantes. Assurez-vous que le périphérique à connecter soit compatible avec les fonctions en question. Un appel commence involontairement. Le téléphone à connecter est réglé pour répondre à un appel automatiquement. Échec du pairage dans le temps alloué.
USB NO MUSIC : Il n’y a aucun fichier à lire. Raccordez un périphérique USB avec des fichiers lisibles (page 27). USB NO SUPRT : Le périphérique USB n’est pas pris en charge. Pour plus de détails sur la compatibilité de votre périphérique USB, visitez notre site d’assistance à l’adresse indiquée sur la couverture arrière. ou ou le début a été atteint. APP MENU : Un affichage de réglage de l’application est ouvert.
PAN MAINT : Le serveur Pandora® est en cours d’entretien. Attendez un instant, puis essayez à nouveau. PAN OPEN APP - PRESS PAUSE : L’application Pandora® ne fonctionne pas actuellement. Démarrez l’application Pandora® sur le périphérique mobile, puis appuyez sur PAUSE. PAN RESTRICT : Pandora® n’est pas offert à l’extérieur de votre pays. PLEASE LOGIN - PANDORA APP : Aucune session n’est ouverte à votre compte Pandora®.
Pour l’utilisation de la télécommande du volant : ERROR : Une erreur s’est produite pendant l’enregistrement de la fonction. Enregistrez de nouveau à partir de la fonction où l’erreur s’est produite (page 21). TIMEOUT : Échec de l’enregistrement de la fonction dans le temps alloué. Essayez de compléter l’enregistrement pendant que [REGISTER] clignote (environ 6 secondes) (page 21). Si ces solutions ne permettent pas d’améliorer la situation, contactez votre détaillant Sony le plus proche.
Raccordement/Installation Mises en garde Rassemblez tous les câbles de mises à la masse en un point de masse commun. Évitez de fixer des vis sur les câbles ou de coincer ceux-ci dans les pièces mobiles (par exemple, le rail du siège). Avant d’effectuer les raccordements, coupez le contact du véhicule pour éviter un court-circuit. Raccordez les câbles d’alimentation jaune et rouge seulement après avoir terminé le raccordement de tous les autres câbles.
Raccordement Caisson de graves*1 *3 *3 *3 Amplificateur de puissance*1 Récepteur radio satellite (SiriusXM)*1 d’une télécommande filaire (non fournie)*4 Blanc Rayé blanc/noir Haut-parleur avant*1*2*7 Gris Rayé gris/noir Vert Rayé vert/noir Haut-parleur arrière*1*2*7 Violet Rayé violet/noir Rouge Rayé bleu/blanc (MAX. 0.4 A) Rayé orange/blanc Noir Pour plus de détails, reportezvous à la section « Raccordements » (page 38).
*1 *2 *3 *4 *5 *6 *7 *8 Non fourni Impédance des haut-parleurs : 4 à 8 ohms x 4 Cordon à broche RCA (non fourni) Selon le type de véhicule, utilisez un adaptateur pour une télécommande filaire (non fourni). Pour plus de détails sur l’utilisation de la télécommande filaire, reportez-vous à la section « Utilisation de la télécommande filaire » (page 39). Qu’il soit utilisé ou non, faites passer le cordon d’entrée du microphone de manière à ce qu’il ne gêne pas la conduite.
Raccordement pour la conservation de la mémoire Lorsque le câble d’alimentation jaune est raccordé, le circuit de la mémoire est alimenté en permanence même si la clé de contact est à la position d’arrêt. Utilisation de la télécommande filaire Lors de l’utilisation de la télécommande du volant L’installation du câble de raccordement RC-SR1 (non fourni) est requise avant l’utilisation. 1 Raccordement des haut-parleurs Avant de raccorder les haut-parleurs, éteignez l’appareil.
2 Insérez les clés de déblocage en même temps jusqu’au déclic. Tirez le support vers le bas, puis tirez sur l’appareil vers le haut pour les séparer. Tourner le crochet vers l’intérieur. Installation de l’appareil dans le tableau de bord Avant l’installation, assurez-vous que les loquets des deux côtés du support sont bien pliés de 2 mm (3/32 po) vers l’intérieur.
Retrait et fixation de la façade Pour plus de détails, reportez-vous à la section « Retrait de la façade » (page 7). Réinitialisation de l’appareil Pour plus de détails, reportez-vous à la section « Réinitialisation de l’appareil » (page 7). Remplacement du fusible Lorsque vous remplacez le fusible, veillez à utiliser un fusible dont l’intensité, en ampères, correspond à la valeur indiquée sur le fusible original. Si le fusible grille, vérifiez le raccordement de l’alimentation et remplacez le fusible.
Support site Site d’assistance If you have any questions or for the latest support information on this product, please visit the web site below: Si vous avez des questions ou si vous souhaitez consulter les toutes dernières informations techniques sur ce produit, rendez-vous sur le site Web suivant : http://esupport.sony.com/ If you have any questions/problems regarding this product, try the following: 1 Read Troubleshooting in these Operating Instructions. 2 Please contact (U.S.A.