S ON'Y.
WARNING To prevent fire or shock hazard, do not expose the unit to rain or moisture. NOTICE FOR THE CUSTOMERS IN THE U. S. A. CH TON T LEONOR T K OF KESTREL SHOOK. 0001 SOV COVER R BAR! HOUSECLEANING PARTS S0 REFER DEFICIT TO NOUN 120 SCREE PERSONNEL. This symbol is intended to alert the user to the presence of insulated “dangerous voltage” within the product’s enclosure that may be of sufficient magnitude to constitute 2 risk of electric shock to persons.
Chapter 1: Setting Up Connecting the Stereo 4 Inserting the Batteries 6 Setting the Clock & Chapter 2: the CD Player Playing a CD (normal play) 7 Playing Tracks in Random Order (shuffle play) 8 Playing Tracks in the Desired Order {(program play) & Playing Tracks Repeatedly (repeat play) 9 Chapter 3: the Radio Listening to the Radio 10 Presetting Radio Stations 11 Playing Preset Radio Stations 11 Chapter 4: the Tape Player Playing a Tape 12 Recording 13 Recording a CD: Selecting Tape Length (tape select edit
Chapter 1: Connecting the Stereo inserting the Batteries Setting the Clock 4 | Chapter 1: Setting up Connecting the Stereo Use the frustration below {o connect your stereo, CHM-550 is the model used for the whole illustration of the stereo. Efl" Connecting the Speakers 1 Twist the speaker cable coating and strip it from the end of the cable. 2 Connect the right speaker to R connectors and the left speaker to L.
*This illustration shows CHM-550, *FH-B511 medal is equipped with 2 handle for portability. The handle pops out when you press PUSH on the top of the unit. /' #FH-B51) model is equipped with wawalicutiet Q=5 1Bo this connection fast! telescopic antenna and speaker cords, AM poof antenna connection Connect a su loop antennas to the mmnmcfingflw AM and the /b terminals. Power You can attach the Loop antenna on the wall using commercially available screws.
R inserting the Batteries Insert twa size AA (R6) batteries in the supplied remote commander for resole control. 1 Parenthetic. 2 terse two size AA (R6) batteries. Match the + and indications to the diagram the battery compartment. + 3 Close the lid. Battery life You can expect the remote commander to operate for about six months {(using Sony SUM-3 (NS batteries) before the batteries run down, When the batteries no longer operate the remote commander, replace all the batteries with new ones.
Chapter E\VTg Playing a CD (normal play) Playing Tracks in Random Order {shuffle play) Playing Tracks in the Desired Order {program play) Playing Tracks Repeatedly (repeat play) T Playing a CD (normal play) You can play CDs in four modes: normal, shuffle, programmer and repeat. The mode decides which tracks (songs) you will listen to, in which order and whether or not they will . Also, play 12 cm (5 inch) and 8 cm (3 inch) CDs. If the CD s supplied with an adapter, remove it before playing the CD.
2 continued To check the remaining or total Playing ‘l‘racks n Laying time i Random Order Used ME button on the player. shim check Press. ( play Remaining TIME acne during play. You can play all the tracks on the CD in time in a track random order. 3 vas Use the buttons on the unit 10 do this . MR operation. Remaining TIME twice during play | POWER—ON l time on the CD of the tracks left. Downplaying TIME in stop mode.
5 Repeat steps 3 and 4 to program the remaining tracks you want { be played in the order you want them to play. 6 Press 1. All the tracks play in the order you chase, To Check the program_ CHECK. repeatedly®, Programmable 4 Sop play @ Cancel the program CONTINUE ™ SR Playing Tracks Repeatedly (repeat play) You can choose between twa different repeat play dames. One repeats all the tracks in the current play mode; the other repeats a single track.
Chapter 3: the Radio Listening to the Radio Presetting Radio Stations Playing Preset Radio Stations O | Chapter 3: the Radii Listening to the Radio ‘When you want to play a radio program, you can have the tuner automatically scan the radio frequencies and tune in the stations with clear signals. This feature saves you time in searching for stations with clear signals. However, stations with weak signals may be skipped by automatic fining.
] Presetting Radio Stations You can store radio frequencies in the tuner's memory to tune in your favorite stations quickly, You can preset stations, 10AM (MW) stations and 10 SW stations in any order. (20 FM stations. and 10 AM stations for US.A. and Canada) Use the buttons on the unit ko do this operation. POWER—ON Qs L aaafi%—i a2t LB ETE e 8 Exile Make sure that the PRESET lamp is not on, If the PRESET Jap is on, press PRESET/TUNING to turn it off.
Chapter 4: the Tape 4 EYV/Tg Playing a Tape Recording a CD Recording a CD: Selecting Tape Length (tape select edit) Recording a CD: Specifying Tape Length (time edit/ just edit) Recording a CD: Specifying Track Order (program edit} Recording From the Radio Recording From Another Tape {(dubbing) 12 | Chapter 4 the Tape Player AR Playing a Tape You can use TYPE [ (normal) and TYPE Hl (Cr On) tape. When you insert a tape, the deck detects the tape type automatically.
One Touch Play feature Press « or £ {on deck -on; the remote commander) when the power is off. When 2 tape is in the player, you will immediately be able to listen to the pale without pressing any chert buttons. ‘When a tape is not in the player, only the power will be turned on, Recording a CD You can record from tape. Use TYPE I (normal) or TYPE 11 (Crop) tape. Do not use TYPE 1V {metal) tape for recording. To listen to other sources while recording, you must stop recording.
-» continued 2 Press @ and insert a blank tape into dock 8. Make sure the tabs on the cassette have a0t been removed. 3 sect dual o single-sided recording. To record Switch DIRECTION to One side = Both sides* =0 *» Recording always stops at the end of the reverse side. Be sure 10 start from the front side. A When you want to reduce the hiss noise in tow-level high-frequency signals, set DOLBY pres @ REC. Deck B stands by for recording.
To stop recording Press B on deck B or the CD player. Notes *Tape select edit does not work when you want to record CIY which has more than 20 tracks, * Be sure to release program or you cannot set tape select edit. When you record from a CD without space between tracks Record on manual recording (see “Recording 2 CD Manually”). When you use the CD SYNCHRONY button, the recorded tape has three-second blanks between the tracks automatically.
«» continued ¥ programming takes too long Some CDs with many tracks may take a while for the CD player to program in just edit mode. In this case, press . Programming will stop. When you record from 8 CD without space between tracks Record on manual recording (see “Recording a CD Manually”). When you use the CD SYNCHRONY button, the recorded tape has three-second blanks between the tracks automatically.
To reduce noise during AM recording 1f a whistling noise is heard while retarding, replace the AM loop antenna for optimum reception. A — Recording From Another Tape (dubbing) Dubbing Another Tape Automatically You can record the whole tape onto anther automatically by using high speed dubbing. While dubbing at high speed, you can listen to the radio pressing TUNER or D Use the buttons on the unit and TYPE {normal) or TYPE 11 (Crop) tape for dubbing.
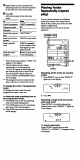
Chapter 5: Sound Adjustment Adjusting the Sound Adjusting the Sound Quality | 18 | chapter 5: Sound Adjustment S Adjusting the Sound To fully enjoy the sound coming from your stereo system, make the following audio adjustments. See the sections following this ane for additional sound adjustments. l POWER--ON l Volumes [—ql ~, e, . @D-S-SIR HEADPHONES Yo adjust the volume Turn the VOLUME control or press VOL on the remote commander, To reinforce bass Press DB* 5o that the indicator lights up.
Chapter 6: Additional Features Falling Asleep to Music Waking Up to Music Timer-Recording Radio Programs Microphone Mixing (for FH-BST1 only) Karaoke: Singing Along (for FH-B511 only) Connecting Optional Equipment R Falling Asleep to Music You can set the stereo system to turn off automatically so you can g to sleep to rustic, Before setting sleep timer, make sure the clock has been set correctly. Use the buttons on the remote commander to do this operation.
2 continued 6 Folio the table below. To pay Do this the Radii The station to be set is the one which is being received at the tire of the timer setting. aCD Insert a CD and then playing starts from the beginning of the tracks, #Tape Insertatapeindack A Orb with the side you want to play facing towards you. 7 press MEMORY/NEXT so that “DAILY TIMER” appears in the display. The preset ems appear in the display sequentially.
Microphone Mixing (for FH-B511 only) You can “mix” sounds by playing one of the components and singing or speaking into a microphone, The mixed sounds can then be recorded on a tape. l POWER—ON l 15115 et R Tum VOLUME to MIN to turn down the microphone control level. 2 Connect a microphone ta the MIX MIC jack. 3 Play your favorite sound source. & Sing or speak into the microphone. 5 Turn VOLUME clockwise ta adjust the microphone level, 6 Adjust VOLUME.
For Your Information Precautions Troubleshooting Guide Maintenance Specifications index to Parts and Controls index i 22 | For Your information UET— Precautions H you have any questions or problems concerning yous stereo system, please consult your nearest Sony dealer. ‘On operating voltage Before operating the stereo system, check that the operating voltage of your stereo system is identical with the voltage of your local power supply. US.A.
Tape Player Tho tape does not record, ~»No tape in the tape compartment, > The tab hay been removed from the cassette. ~+The tape has reeled to the end. The tape does not record nor playback or there is a decrease in sound level. »'The heads are dirty. Clean them, ~»Magnetic deposits have built-upon the record/ playback head. There Is excessive wow or fitter, or tha sound drops out. -3 The capstans or pinch rollers are contaminated. The tape does not erase completely.
= continued Antenna Telescopic antenna (for FH-B511) FM lead antenna riot CHM-530) Antenna terminals 75 ohm unbalanced intermediate frequency 10.7 MHz AM (MW,SW} tuner section Tuning range US.A. and Canadian models: AM: 530 1,710 kHz (10 kHz step) 531 1,602 kid (9 kHz step) Australian models: MW: 530 1,710 kHz (10 kHz step) 531 ~ 1,602 kHz {9 XHz step) SW: 595~ 17.
[BI DIRECTION switch (1) [B] DOLBY NR switch (12) 7109 PAUSE button (12} [8]® REC button (14, 16) HIGH SPEED DUBBING button (17 i@ 4 button tor deck B) (12) F SYNCHRONY button (13,14, 15) €0 player ? ™r 9 Mahdi &4 APy (2] OPEN/CLOSE button (7} [BID player operating buttons ®i {play and pause) (7} M (stop play) (7} I/ DI (manual search/ {B] PROGRAM button (8 [7)REPEAT button (9) (8] TIME button (8) [B]CHECK button () CLEAR button (9) EDIT button {14) MIX MIC jack (for FH-BS11 only} (21) HEADPHONES jack (18)