Table of contents Operation Search Settings Search Index Handbook Mobile HD Snap Camera MHS-TS55 © 2012 Sony Corporation 4-412-628-11(1) US
Table of contents How to use this handbook Click on a button on the right to jump to the corresponding page. This is convenient when searching for a function you want to view. Operation Search Search for information by operation. Settings Search Search for information in a listing of Settings items. Marks and notations used in this handbook Settings Search Index Search for information by keyword. Operation Search Table of contents Search for information by function.
Notes on the battery pack Be sure to make a backup copy to protect your data. • The battery pack is built into the camera. Charge the camera before using for the first time. • You can charge the battery pack even if it is not completely discharged. In addition, even if the battery pack is not fully charged, you can use the partially charged capacity of the battery pack as is. • For details on the usable battery pack, see page 70.
On image data compatibility • Security settings are absolutely critical when using a wireless network. Sony bears no responsibility for any damages that may arise due to security problems occurring due to failure to implement security measures or unavoidable circumstances associated with the use of a wireless network. Operation Search Security precautions when using wireless network products Table of contents Settings Search • This camera supports “MP4 format” as movie file format.
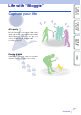
Table of contents Life with “Bloggie” Capture your life Operation Search At a party Settings Search Record still images at maximum 12M (4128 × 3096) and movies at maximum 1920 × 1080 30p full high-vision (page 33, 34). Also, you can record still images during movie recording (page 30). During a walk Index Take compact “Bloggie” with you anywhere, anytime. Take it out, and record casually.
You can use Wi-Fi to directly upload and share recorded images from the camera (page 47). You can also transfer images to a device, such as a smartphone, etc (page 49). Operation Search Import and upload captured moments Table of contents Share your life Settings Search Index Connect to TV Connect your “Bloggie” to a TV with an HDMI cable (sold separately), and enjoy images on the big screen (page 60).
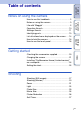
Notes on using the camera Operation Search Settings Search How to use this handbook····································· 2 Notes on using the camera ··································· 3 Life with “Bloggie”·················································· 5 Operation Search ················································ 10 Settings Search··················································· 11 Identifying parts··················································· 13 List of buttons/icons displayed on the s
Viewing································································ 38 Playback zoom···················································· 40 Delete·································································· 41 Volume control ···················································· 42 Settings Search What you can do with Wi-Fi ································ 43 Setting Wi-Fi························································ 44 Live Broadcast (Live Streaming) ························· 46 Upload
Troubleshooting ·················································· 62 Warning indicators and messages ······················ 67 Number of still images and recordable time of movies································································· 69 Built-in battery pack············································· 70 Precautions ························································· 71 Specifications ······················································ 73 Operation Search Others Table of contents
Shooting (Movies) ··············································· 29 Changing image size Photo Size ····························································· 33 Movie Size ····························································· 35 Deleting images Delete ······································································ 41 Format ···································································· 58 Displaying enlarged images Playback zoom ················································
Table of contents Settings Search Setting items All settings can be changed in both shooting and playback mode. Items Shooting/Playback mode Operation Search Wi-Fi Settings Beep Demo Mode Initialize HDMI Output LUN Settings(USB) Format Settings Search Date & Time Setting How to set items 1 Press the ON/OFF (Power) button. Index ON/OFF (Power) button 2 Tap [MENU] t [Main Settings].
3 Tap the items. Table of contents The displayed items scroll by dragging the LCD screen up and down with your finger. Operation Search 4 Tap the desired mode. 5 Tap [Back].
A Built-in antenna • Do not cover the built-in antenna part with your hand when using Wi-Fi. Table of contents Identifying parts B Lens C Light E LCD screen/Touch panel F Speaker G Movie button H Microphone Operation Search D Hook for wrist strap I ON/OFF (Power) button J Charge lamp K (Shutter) button Settings Search • Press and hold the ON/OFF (Power) button for at least 7 seconds to force-quit the camera. L Tripod receptacle • Do not hold the camera when attaching the tripod.
Buttons and icons are displayed on the screen to indicate the camera status.
Notes Table of contents • Indicators and their positions are approximate and differ from what you actually see. • The screen display shifts both horizontally and vertically depending on the camera aspect. • The screen display disappears automatically after about 4 seconds. You can display it again by tapping the LCD screen.
Be careful not to block the lens, microphone, light or built-in antenna with your finger when shooting. Table of contents How to hold the camera Operation Search Settings Search Note Index • Do not cover the built-in antenna part with your hand if Wi-Fi connection is difficult. Do not hold the USB jack or HDMI OUT jack cover. Attach the strap and place your hand through its loop to prevent the camera from damage by being dropped.
vertically Portrait images are recorded. Black bands appear on the left and right of the screen during playback on TV or computer. This is useful when shooting portrait objects.
You can operate the camera by tapping the buttons on the LCD screen or dragging the screen. Note Table of contents How to use the touch panel • Do not operate with a sharp-pointed object, such as pen or finger nail. Lightly touch the buttons or items on the screen with your finger. Operation Search Select the items (Tap) Settings Search Index Scroll the screen (Drag) Touch and slide the screen with your finger.
Drag the screen quickly. To stop the screen, tap with your finger.
• USB connection support cable (1) Operation Search Use this if the USB jack of the camera cannot be connected to the computer (page 21). • Wrist strap (1) • Software (page 24) The following contents are included in the internal memory of this camera.
The camera’s battery is continuously recharged whenever the camera is connected to a running computer. Table of contents Charging the camera 1 Press the ON/OFF (Power) button to turn off the camera. Operation Search ON/OFF (Power) button Settings Search 2 Push the “PUSH” part at the bottom of the camera. The USB jack comes out as shown in the illustration. Index PUSH USB jack 3 Connect the camera to the computer that is turned on. The charge lamp lights up in orange, and charging starts.
Notes Operation Search Deleting the USB connection Table of contents • While the camera is connected to a computer, you cannot operate the camera. Be sure to disconnect the camera before operation. • Do not apply force to the camera, when you connect the camera to a computer. This may cause damage to the camera or the computer. • When you connect the camera to a notebook computer that is not connected to an AC power source, the battery of the notebook computer may be depleted rapidly.
Charging time Full charge time Table of contents z How long does it take to charge the camera? Approx. xx min. Operation Search • Time required to charge a fully depleted battery at a temperature of 25°C (77°F). Charging may take longer under certain circumstances or conditions. • You can rapid-charge the camera with a USB charger AC-UD20 (sold separately). To use, connect the USB charger to the USB jack of the supplied USB connection support cable, or directly to the USB jack of the camera.
Install the built-in software “PlayMemories Home” on a computer (Windows). You can import and view recorded images on a computer using “PlayMemories Home”. Operation Search 1 Press the ON/OFF (Power) button to turn on the camera. Table of contents Installing “PlayMemories Home (Limited version)” on a computer 2 Connect the camera (turned on) to the computer (page 21). Settings Search ON/OFF (Power) button Windows 7: Device Stage appears. Windows XP/Windows Vista: AutoPlay Wizard appears.
Table of contents Setting the clock 1 Press the ON/OFF (Power) button. The camera is turned on. The demonstration movie plays back when you turn on the camera for the first time. Operation Search ON/OFF (Power) button 2 Select the desired date display format, then tap [Next]. Settings Search Index 3 Select Daylight Savings [On]/[Off], then tap [Next]. 4 Scroll each item up or down to set the desired date and time, and tap [OK]. Midnight is indicated as 12:00 AM, and noon as 12:00 PM.
Tap [MENU] t [Main Settings] t [Date & Time Setting] (page 59).
1 Press the ON/OFF (Power) button. ON/OFF (Power) button Table of contents Shooting (Still images) Operation Search 2 Compose the shot. Be sure not to place fingers on the lens. Touch and hold T on the T/W (zoom) bar to zoom in, W to zoom out. Settings Search (Shutter) button halfway AE/AF lock indicator (Shutter) button When the image is in focus, a beep sounds and the z indicator (AE/AF lock) lights on the top of the display. 4 Press the Index 3 Press the down. (Shutter) button fully down.
to focus on Index • When the camera detects faces, the white frames appear, and the focus and exposure are adjusted to the faces automatically. • The frames turn green when the faces are in focus by pressing the (Shutter) button half way down. • The camera may not detect faces depending on the shooting condition. Settings Search z When shooting portrait Operation Search • The shortest shooting distance is approximately 10 cm (4 inches).
1 Press the ON/OFF (Power) button. ON/OFF (Power) button Table of contents Shooting (Movies) Operation Search 2 Compose the shot. Be sure not to place fingers on the lens. Touch and hold T on the T/W (zoom) bar to zoom in, W to zoom out. Settings Search To finish shooting the movie, press the movie button again. Movie button Index 3 Press the movie button. Notes • Continuous recording is possible for approximately 29 minutes. • The maximum size of a single movie file is approximately 2 GB.
• Press the (Shutter) button fully down during movie recording. • The recorded still image appears small on the LCD screen of the camera. – 1920 × 1080 30p: 1920 × 1080 Operation Search • The image sizes are as follows, depending on the movie size. Table of contents z To shoot still images during movie recording – 1280 × 720 30p/60p: 1280 × 720 For MPEG-4 AVC/H.264, the camera supports high definition images with an effective total number of scanning lines of 1080 or 720.
You can enlarge the image when shooting. The camera’s zoom function can enlarge images up to 4×. 1 Touch and hold T or W. Table of contents Zoom T side Touch and hold T to zoom in, W to zoom out. Operation Search W side Settings Search Notes Index • Only Digital zoom is available with this camera. • You may not be able to zoom in or out images smoothly when using zoom function. • Image quality decreases as the images are digitally processed.
You can shoot with the light of the camera turned on. 1 Press on the shooting screen. To turn off the light, press Table of contents Light again. Operation Search Notes Settings Search • You can use the light in shooting mode only. • The camera emits very bright light. Do not aim directly at eyes at close range. • Battery power wears down faster when the light is turned on.
The photo size determines the size of the image file that is recorded when you take an image. The larger the photo size, the more detail will be reproduced when the image is printed on largeformat paper. The smaller the photo size, the more images can be recorded. Table of contents Photo Size 1 Tap [MENU] t [Shooting Settings]. Tap the LCD screen when the screen display is not shown. Operation Search Settings Search 2 Tap the desired size from [Photo Size]. Photo Size Usage guidelines No.
A digital image is made up of a collection of small dots called pixels. If it contains a large number of pixels, the image becomes large, it takes up more memory, and the image is displayed in fine detail. “Image size” is shown by the number of pixels. Although you cannot see the differences on the screen of the camera, the fine detail and data processing time differ when the image is printed or displayed on a computer screen.
The larger the movie size, the higher the movie quality. The movies shot with the camera will be recorded in MPEG-4 AVC/H.264 Main Profile, approximately 30 or 60 frames per second, Progressive, AAC LC, “MP4 format”. Table of contents Movie Size 1 Tap [MENU] t [Shooting Settings]. Tap the LCD screen when the screen display is not shown. Operation Search Movie Size Settings Search 2 Tap the desired size from [Movie Size].
Curbs the flicker generated by fluorescent by using the electro-shutter. 1 Tap [MENU] t [Shooting Settings]. Table of contents Flicker Reduction Tap the LCD screen when the screen display is not shown. Operation Search (On) Uses the Flicker Reduction. (Off) Does not use the Flicker Reduction. Settings Search 2 Tap the desired mode from [Flicker Reduction].
1 Tap [MENU] t [Shooting Settings]. Tap the LCD screen when the screen display is not shown. Table of contents Self-Timer Operation Search 2 Tap the desired mode from [Self-Timer]. (10sec) Does not use the self-timer. Sets the 10-second delay self-timer. When you press the (Shutter) button or the movie button, a selftimer icon flashes, and after rapid beep sounds are heard, the camera will shoot.
Table of contents Viewing 1 Tap (Playback) to switch to playback mode. The index screen appears. Operation Search 2 Select an image and tap. Movie A single movie plays back when an image is selected. Settings Search Still image z To show previous/next images Index Drag your finger in the direction of the arrows. You can send multiple images at one time by flicking. Previous Next z To search for a point in a movie to start playback Drag z on the playback bar to the desired scene.
Table of contents z To go back to shooting mode Do one of the following: – Tap on the index screen. (Shutter) button or movie button. (Shutter) button Settings Search Movie button Operation Search – Press the z To go back to the index screen .
Enlarges the played back still images. 1 Tap (Playback) to switch to playback mode. Table of contents Playback zoom 2 Select the still image and tap. 3 Double-tap the part you want to enlarge. Operation Search Settings Search 4 Adjust the magnification and the part to enlarge. Note Index Each double-tap on the LCD screen enlarges the image up to 8 times its original size. Drag the image to change the part to enlarge. To cancel playback zoom, tap .
Allows you to select unwanted images for deletion. 1 Tap (Playback) to switch to playback mode. 2 Tap (Delete) on the index screen. Table of contents Delete Operation Search Settings Search 3 Tap images you want to delete. Repeat the above step until there are no more images to be deleted. Select an image with a mark again to release the mark. Index 4 Tap [OK] t [OK]. z To delete images during playback Tap (Delete) t [OK] in single-image mode.
Table of contents Volume control You can adjust the volume for playback movies. 1 Tap (Playback) to switch to playback mode. 2 Select a movie and tap. 3 Tap (Volume control). Operation Search Tap the LCD screen when the screen display is not shown. Settings Search 4 Touch and hold the volume.
Wi-Fi allows you to connect to the network service via a LAN environment, either in or outside the home. Before you connect, you first need to register your access point. You can use Wi-Fi from the menu screen, which is opened by tapping the MENU button. Depending on the region, menu contents may differ. Operation Search The following functions are available from the MENU button.
Table of contents Setting Wi-Fi 1 Press the ON/OFF (Power) button. 2 Tap [MENU] t [Main Settings] t [Wi-Fi Settings], and [Wi-Fi Connection] to show the mark. Operation Search 3 Select an access point to connect. 4 Enter the password. Notes Index z When using a hotspot (public Wireless LAN access Settings Search • Network device connections and setting methods differ according to the device.
Touching the text field brings the keyboard up. Enter your text, then touch @. • The number of characters you can input is limited.
You can send images you are taking to family and friends in real time. Registration with the live streaming service is required in advance. Table of contents Live Broadcast (Live Streaming) 1 Press the ON/OFF (Power) button. 2 Register with a live streaming service for this purpose. 3 Tap [MENU] t [Live Streaming]. 4 Establish the Wi-Fi connection. 5 Enter [Username] and [Password] on the login screen, then tap [OK]. 6 Press the movie button. Operation Search • For details, see http://www.sony.net/xxx.
You can upload images to your favorite sharing site soon after recording. (Playback) to switch to playback mode. 2 Tap (Share) on the index screen. • You can also share images from the single-image mode. • You can also share images by tapping the share button on the screen displayed when shooting ends. 3 Tap images you want to upload, then tap [Next]. Operation Search 1 Tap Table of contents Uploading images directly (Share) Settings Search Wi-Fi connection is automatically established.
1 Tap [MENU] t [Save to PlayMemories online service]. Operation Search You can save all images recorded on the camera to Personal Space. By uploading images to Personal Space, you can also enjoy recorded images by accessing your contents from an Internet device, such as a computer, smartphone, tablet computer, or Bravia, anywhere and anytime. A Personal Space account is required in advance.
You can copy recorded images to a smartphone or tablet computer. Installing a suitable application (PlayMemories Mobile) for this purpose to the smartphone or tablet computer is required in advance. Table of contents Copying data to a smartphone 1 Tap [MENU] t [Send to Smartphone]. 3 Select and transfer the camera contents using the installed application on the smartphone.
Table of contents Recommended computer environment Windows Microsoft Windows XP* SP3/Windows Vista SP2/Windows 7 SP1 Others CPU: Intel Pentium III 800 MHz or faster (For playing/editing the High Definition movies: Intel Core Duo 1.66 GHz or faster/Intel Core 2 Duo 1.66 GHz or faster/Intel Core 2 Duo 2.
To play back and edit movie files (MPEG-4 AVC/H.264) recorded by the camera on your computer, you need to install the software compatible with MPEG-4 AVC/H.264 or the PlayMemories Home. Note • Operations are not guaranteed, even on computers fulfilling the above system requirements. For example, other open or background applications currently running may limit product performance.
1 Select images and the sharing site to upload with the camera in advance (page 47). PlayMemories Home starts automatically and the confirmation screen for uploading images appears. Notes Operation Search 2 Connect the camera to a computer in which the PlayMemories Home (pre-loaded on the internal memory) is already installed. Table of contents Uploading images to a network service • Set [LUN Settings(USB)] to [Multi].
Table of contents Beep Sets the sound for when you operate the camera. 1 Tap [MENU] t [Main Settings] t [Beep] t desired mode. Operation Search Turns on the beep sound when you press the movie button. Off Turns off the beep sound.
Performs a demonstration of the camera. 1 Tap [MENU] t [Main Settings] t [Demo Mode] t desired mode. Table of contents Demo Mode Operation Search Performs a demonstration. Off Does not perform a demonstration. Settings Search On Note Index • The demonstration stops when operating any of the following. – Touch LCD screen. – Press the (Shutter) button or movie button. – Turn off the power.
Initializes the setting to the default setting. Even if you execute this function, the images are retained. Table of contents Initialize 1 Tap [MENU] t [Main Settings] t [Initialize] t [OK]. Operation Search • Perform initialization after charging the camera to prevent the camera from turning off during the process.
Selects the type of signal to be output to a TV from the HDMI OUT jack. If images are not displayed on the TV clearly, changing the setting may improve the display. Table of contents HDMI Output 1 Tap [MENU] t [Main Settings] t [HDMI Output] t desired mode. Operation Search Outputs with 60Hz. 50Hz Outputs with 50Hz.
Sets the display method for the recording media displayed on a computer screen or other monitor when the camera is connected with a computer or AV component using a USB connection. Table of contents LUN Settings(USB) 1 Tap [MENU] t [Main Settings] t [LUN Settings(USB)] t desired mode. Operation Search Select this setting when you connect the camera to a computer. Single Select this setting in cases where the images are not displayed when the camera is connected to a device other than a computer.
Formats the internal memory. 1 Tap [MENU] t [Main Settings] t [Format] t [OK]. Table of contents Format Operation Search Settings Search Note • Note that formatting permanently erases all data.
Sets the date and time again. 1 Tap [MENU] t [Main Settings] t [Date & Time Setting]. Table of contents Date & Time Setting Operation Search Date & Time Format Selects the date and time display format. Daylight Savings Pushes forward an hour. Date & Time Sets the date and time (page 25). Settings Search 2 Tap the items you want to set.
Connect the camera to a TV which has an HDMI terminal with an HDMI cable (sold separately). Refer also to the instruction manuals of the TV. Table of contents Viewing images on a TV 1 Turn off both the camera and the TV. Operation Search 2 Open the jack cover and connect the camera to the TV with the HDMI cable (sold separately). HDMI terminal 1 To HDMI terminal 2 To HDMI OUT jack Settings Search HDMI cable 3 Turn on the camera. 4 Turn on the TV and set the input.
If you want to view images on a TV screen, you need a TV with an HDMI terminal and an HDMI cable (sold separately). The color system of the TV must match that of the camera. Check the following lists for the TV color system of the country or region where the camera is used, and set [HDMI Output] (page 56).
If you experience trouble with the camera, try the following solutions. 1 Check the items on pages 62 to 68. Table of contents Troubleshooting 2 Turn the power off and then on again. Settings Search 4 Consult your Sony dealer or local authorized Sony service facility. Operation Search 3 Press and hold the ON/OFF (Power) button for at least 7 seconds, and force-quit the camera. Then turn the camera on again (page 13).
Cannot charge the camera. Table of contents Operation Search • Turn off the camera and make the USB connection. • Disconnect the USB connection support cable, and then reconnect it. • Use the USB connection support cable (supplied). • Charge the battery in an ambient temperature of 10°C to 30°C (50°F to 86°F). • Turn on the computer and connect the camera. • Release the computer from sleep or hibernation status. • Connect the camera directly to a computer using the supplied USB connection support cable.
The top and bottom edges of images are trimmed slightly on a connected TV. Table of contents • The LCD screen of the camera can display recording images across the entire screen (full pixel display). However, this may cause slight trimming of the top, bottom, right, and left edges of images when played back on a TV that is not compatible with full pixel display. Black bands appear on the left and right of the screen.
Cannot establish a connection with the Wireless LAN access point. • For details on the verification method used for the encryption key (WEP/WPA), see the operation manual for the access point or the information listed on the bottom panel of the device. • The number of characters that can be input differs depending on the encryption type. • This camera cannot be connected to a 5 GHz access point. Settings Search Cannot enter the encryption key.
The camera does not work properly. • Press and hold the ON/OFF (Power) button for at least 7 seconds, and force-quit the camera. Then turn the camera on again. Table of contents Others The lens gets fogged. The camera becomes warm when you use it for a long time. • This is not a malfunction. Operation Search • Moisture condensation has occurred. Turn off the camera and wait about an hour for the moisture to evaporate. The Clock Set screen appears when you turn on the camera.
If the following messages appear, follow the instructions. System error • Turn the power off and then on again. Camera overheating Allow it to cool Settings Search • If you record movies for an extended period, the camera temperature rises. In this case, stop recording movies. Operation Search • The battery level is low. Charge the battery pack immediately. Depending on the conditions of use, the indicator may flash even though there are still 5 to 10 minutes of remaining battery time left.
Maximum number of images already selected Operation cannot be executed in unsupported files • Playback zoom cannot be performed on movies. Table of contents • Up to 100 files can be selected when using [Delete] and [Share]. Invalid operation Login expired • The authentication information of the network service has expired. Login to the network service again. Operation Search • This message appears if you perform an invalid operation.
The number of still images and recordable time may vary depending on the shooting conditions. Table of contents Number of still images and recordable time of movies Still images Capacity 4:3 (12M) 16:9 (8M) xx 16:9 (2M) xx xx Operation Search (Units: Images) Size Notes Settings Search • When the number of remaining recordable images is greater than 9,999, the “>9999” indicator appears.
On charging the battery pack • We recommend charging the battery pack in an ambient temperature of between 10°C to 30°C (50°F to 86°F). The battery pack may not be effectively charged in temperatures outside this range. • When usable battery life becomes half the usual time, even after charging the battery fully, the battery may need to be replaced. Consult your nearest Sony dealer. • Battery performance decreases in low temperature surroundings.
Do not use/store the camera in the following places Operation Search • In an extremely hot, cold or humid place In places such as in a car parked in the sun, the camera body may become deformed and this may cause a malfunction. • Under direct sunlight or near a heater The camera body may become discolored or deformed, and this may cause a malfunction.
“Network Linkage Function”: Certain function of connecting, linking, working your audio-visual data in this product with certain websites which offer services linking your data (the “Website”) Operation Search Settings Search Index – NEITHER SONY NOR LICENSORS OF SONY WHICH GRANT SONY CERTAIN INTELLECTUAL PROPERTY RIGHTS RELATING TO THE SONY SOFTWARE (“LICENSORS”) WARRANT OR MAKE ANY REPRESENTATION THAT YOU WILL BE ABLE TO USE, IN WHOLE OR A PART OF, NETWORK LINKAGE FUNCTION OR ANY WEBSITE NOW OR IN THE F
Camera [System] Standards: IEEE802.11b/g/n compliant Channel: 1 to 11 (USA, Canada) 1 to 13 (EU, Australia, U.K.) Index [Wireless LAN] Settings Search [Input and Output connectors] Power: Built-in rechargeable battery pack USB charging (supplied from the computer by connecting with the supplied USB connection support cable) Charging time: Approx. xx mins. (when charging from the USB connector of the computer) Approx. xx mins.
Trademarks Operation Search • Microsoft, Windows, Windows Vista and DirectX are either registered trademarks or trademarks of Microsoft Corporation in the United States and/or other countries. • Mac, Mac OS, the Mac OS logo, iMac, iBook, iMovie, PowerBook, Power Mac and eMac are trademarks or registered trademarks of Apple Inc. • Intel and Pentium are trademarks or registered trademarks of Intel Corporation.
B P Battery pack ........................................................................70 Photo Size ............................................................................33 Beep ........................................................................................53 Pixel ........................................................................................34 Table of contents Index Playback zoom ...................................................................
Owner’s Record The model and serial numbers are located on the bottom. Record the serial number in the space provided below. Refer to these numbers whenever you call your Sony dealer regarding this product. Mobile HD Snap Camera Important Notice Model No. MHS-TS55 Serial No. __________________________________ WARNING To reduce fire or shock hazard, do not expose the unit to rain or moisture. CAUTION Observe the following cautions, as there may be a risk of heat generation, fire or explosion.
(Continued) Note: This equipment has been tested and found to comply with the limits for a Class B digital device, pursuant to Part 15 of the FCC Rules. These limits are designed to provide reasonable protection against harmful interference in a residential installation. This equipment generates, uses, and can radiate radio frequency energy and, if not installed and used in accordance with the instructions, may cause harmful interference to radio communications.