4-183-856-11(1) NEX-3/NEX-5 Interchangeable Lens Digital Camera Instruction Manual Preparing the camera Mastering the basic operation Using the recording functions Using the playback functions Checking the functions available Importing images to the computer Others Additional information on this product and answers to frequently asked questions can be found at our Customer Support Website. E-mount Printed using VOC (Volatile Organic Compound)-free vegetable oil based ink.
English Owner’s Record The model and serial numbers are located on the bottom. Record the serial number in the space provided below. Refer to these numbers whenever you call upon your Sony dealer regarding this product. Model No. NEX-3/3C/ NEX-5/5C Serial No. ______________________________ WARNING To reduce fire or shock hazard, do not expose the unit to rain or moisture.
• Be sure to charge the battery pack using a genuine Sony battery charger or a device that can charge the battery pack. • Keep the battery pack out of the reach of small children. • Keep the battery pack dry. • Replace only with the same or equivalent type recommended by Sony. • Dispose of used battery packs promptly as described in the instructions.
For Customers in the U.S.A. UL is an internationally recognized safety organization. The UL Mark on the product means it has been UL Listed. If you have any questions about this product, you may call: Sony Customer Information Center 1-800-222-SONY (7669) The number below is for the FCC related matters only. [ Regulatory Information Declaration of Conformity Trade Name: SONY Model No.: NEX-3 Responsible Party: Sony Electronics Inc. Address: 16530 Via Esprillo, San Diego, CA 92127 U.S.A. Telephone No.
[ Note: This equipment has been tested and found to comply with the limits for a Class B digital device, pursuant to Part 15 of the FCC Rules. These limits are designed to provide reasonable protection against harmful interference in a residential installation. This equipment generates, uses, and can radiate radio frequency energy and, if not installed and used in accordance with the instructions, may cause harmful interference to radio communications.
[ Disposal of Old Electrical & Electronic Equipment (Applicable in the European Union and other European countries with separate collection systems) This symbol on the product or on its packaging indicates that this product shall not be treated as household waste. Instead it shall be handed over to the applicable collection point for the recycling of electrical and electronic equipment.
Table of contents Preparing the camera Checking the accessories supplied .................................10 Identifying parts ................................................................12 Preparing the battery pack ...............................................16 Attaching/removing the lens .............................................19 Inserting a memory card (sold separately) .......................21 Attaching the flash ............................................................
Checking the functions available Menu list ........................................................................... 50 Functions available for each shooting mode ................... 56 Flash modes available...................................................... 57 Importing images to the computer Installing the software....................................................... 58 What you can do with the supplied software ................... 60 Creating a movie disc (NEX-5/5C) ..............................
This manual covers several models supplied with different lenses. The model name varies depending on the supplied lens.
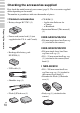
Preparing the camera Checking the accessories supplied First check the model name of your camera (page 9). The accessories supplied differ depending on the model. The number in parentheses indicates the number of pieces. x Common accessories • Battery charger BC-VW1 (1) Preparing the camera • Power cord (mains lead) (1) (not supplied in the U.S.A.
x NEX-5K/5CK/3K/3CK • E18 – 55 mm zoom lens/Lens cap (1) (attached to the camera)/Lens hood (1) Preparing the camera GB 11
Identifying parts See the pages in parentheses for details of operation. NEX-5/5C Preparing the camera NEX-3/3C A B C D E F G H I J K L M (Playback) button (29) ON/OFF (Power) switch (25) Shutter button (28) Remote sensor AF illuminator/Self-timer lamp/ Smile Shutter lamp Speaker Microphone* Smart accessory terminal (23) Lens (19) Lens release button (20) Mount Image sensor** Lens contact** * Do not cover this part during movie recording. ** Do not touch this part directly.
NEX-5/5C A (USB) terminal B Hook for shoulder strap Attaching the shoulder strap is recommended not to drop the camera. Preparing the camera NEX-3/3C C HDMI terminal (49) D Light sensor E LCD monitor The tilting LCD monitor of the camera allows flexible shooting positions.
Preparing the camera NEX-5/5C x Flash NEX-3/3C A Screw B Flash C Connector* * Do not touch this part directly. A Battery/Memory card cover (17, 21) B Tripod receptacle • Use a tripod with a screw length of less than 5.5 mm (7/32 inch). You will be unable to firmly secure the camera to tripods having screws longer than 5.5 mm (7/32 inch), and may damage the camera.
x Lens On the E18 – 200 mm lens, refer to the instruction manual of the E18 – 200 mm lens (supplied). E16 mm F2.8 (supplied with NEX-5A/5CA/3A/3CA) E18 – 55 mm F3.5-5.6 OSS (supplied with NEX-5D/ 5CD/5K/5CK/3D/3CD/3K/ 3CK) Preparing the camera A Converter index* B Focusing ring C Lens contacts** D Mounting index * A converter is sold separately. ** Do not touch this part directly.
Preparing the battery pack When using the camera for the first time, be sure to charge the NP-FW50 “InfoLITHIUM” battery pack (supplied). x Charging the battery pack The “InfoLITHIUM” battery pack can be charged even when it has not been fully depleted. It can also be used when it has not been fully charged. Preparing the camera 1 Insert the battery pack onto the battery charger. • Push the battery pack until it clicks. 2 Connect the battery charger to the wall outlet (wall socket). For the U.S.
Notes • The charging time differs depending on the remaining capacity of the battery pack or charging conditions. • We recommend charging the battery pack in an ambient temperature of between 10 °C to 30 °C (50 °F to 86 °F). You may not be able to efficiently charge the battery pack outside of this temperature range. • Connect the battery charger to the nearest wall outlet (wall socket).
2 Firmly insert the battery pack NEX-5/5C all the way while pressing the lock lever with the tip of the battery. Lock lever NEX-3/3C Lock lever Preparing the camera 3 Close the cover. x Checking the remaining battery level Check the level with the following indicators and percent figures displayed on the LCD monitor. “Battery exhausted.” Battery level High Low You cannot shoot any more image. Note GB 18 • The displayed level may not be correct under certain circumstances.
z What is an “InfoLITHIUM” battery pack? An “InfoLITHIUM” battery pack is a lithium-ion battery pack that has functions for exchanging information related to operating conditions with your camera. Using the “InfoLITHIUM” battery pack, the remaining battery time in percent figures is displayed according to the operating conditions of your camera. x Removing the battery pack Preparing the camera Turn off the camera and slide the lock lever in the direction of the arrow.
2 Mount the lens by aligning the white index marks on the lens and the camera. • Hold the camera’s face downward to prevent the dust from entering into the camera. White index marks Preparing the camera 3 While pusing the lens lightly toward the camera, turn the lens clockwise until it clicks into the locked position. • Be sure to put the lens on straight. Notes • When attaching a lens, do not press the lens release button. • Do not use force when attaching a lens.
Notes • When changing the lens, if dust or debris gets inside the camera and adheres to the surface of the image sensor (the part that acts as the film), it may appear on the image, depending on the shooting environment. The camera vibrates slightly when it is turned off, due to the anti-dust function, to prevent dust from adhering to the image sensor. However, attach or remove the lens quickly somewhere away from dusty locations. • Do not leave the camera with the lens removed. 1 Open the cover.
3 Close the cover. x Removing the memory card Open the cover, make sure that the access NEX-5/5C lamp is not lit, and push the memory card once. Preparing the camera Access lamp NEX-3/3C Access lamp Note • When the access lamp is lit, do not remove the memory card or the battery pack, or turn off the power. The data may be corrupted.
Attaching the flash When you want to use a flash during shooting, attach the flash device (supplied). The flash is enabled when it is raised, and disabled when lowered. 1 Attach the flash to the smart accessory terminal of the camera. 2 Fasten the screw to secure the flash. 3 To fire the flash, raise the flash first. Preparing the camera • When using the E18 – 200 mm lens, you must attach the extender (page 24). • Lower the flash when you do not intend to use it.
z Carrying the flash The flash case can be conveniently attached to the shoulder strap. Put the flash in the case when you are not using it to protect it from harm. Preparing the camera x Attaching the extender (when using the E18 – 200 mm lens) If you attach the flash directly to the camera, images will be partly shadowed by the lens. To avoid this situation, attach the extender. 1 Attach the extender to the camera securely. 2 Attach the flash to the extender and fasten the screw.
Turning on the camera and setting up the date When you turn on the camera for the first time, the screen to set date and time appears. 1 Set the power switch to ON to turn on the camera. 2 Press the center of the control wheel to confirm [OK]. 3 Select your area by pressing the right or left of the control wheel and press the center. 4 Press the left or right of the control wheel to select each item, and press the top or bottom, or turn it to select the numeric value.
5 Repeat step 4 to set other items, then press the center of the control wheel. Note • You cannot superimpose the date on images on this camera. Using “PMB” stored on the CD-ROM (supplied), you can save or print images with date. Refer to “PMB Help” for more details (page 60). Preparing the camera x Resetting the date and time/Checking the current clock setting Press [Menu], then select [Setup] t [Date/Time Setup] (page 32, 54).
Mastering the basic operation Shooting still images In the (Intelligent Auto) mode, the camera analyzes the subject, and allows you to shoot with appropriate settings. 1 Set the power switch to ON to turn on the camera. 2 Point the camera to the subject.
4 Press the shutter button halfway down to focus. When the focus is confirmed, beeps sound and z lights up. Mastering the basic operation Focus indicator 5 Press the shutter button fully down to shoot. Recording movies 1 Set the power switch to ON to turn on the camera. 2 Point the camera to the subject. 3 Press the MOVIE button to start recording. Focus and brightness are adjusted automatically. MOVIE button 4 GB 28 Press the MOVIE button again to stop recording.
Notes • The sound of the camera and the lens in operation might be recorded while recording a movie. You can disable the sound recording by selecting [Menu] t [Setup] t [Movie Audio Rec] t [Off] (page 32, 54). • The angle of view of movies is narrower than that of still images. After you press the MOVIE button, the camera shows the actual range to be recorded by displaying an empty frame on the screen. Playing back images 1 (playback) Mastering the basic operation Press the button.
2 Press the left side of the control wheel repeatedly to select (movie), and press the center. 3 Turn the control wheel to select the desired movie, and press the center. Mastering the basic operation During movie playback Control wheel operation To pause/resume Press the center. To fast-forward Press the right, or turn it right. To fast-rewind Press the left, or turn it left. To slow-forward Turn it right during pause. To slow-reverse Turn it left during pause.
2 Press the center of the control wheel to confirm [OK]. Press [Cancel] to quit the operation. [Cancel] [OK] Mastering the basic operation z To delete several images Select [Menu] t [Playback] t [Delete] to select and delete specific images at the same time.
Using the control wheel and soft keys The control wheel and soft keys allow you to use various functions of the camera. x Control wheel Mastering the basic operation When shooting, DISP (Display Contents), (Flash Mode), (Exposure Comp.) and (Drive Mode) functions are assigned to the control wheel. When playing back, DISP (Display Contents) and (Image Index) functions are assigned to the control wheel.
x Soft keys The soft keys have different roles, depending on the context. The assigned role (function) of each soft key is shown on the screen. To use the function shown at the upper right corner of the screen, press soft key A. To use the function shown at the lower right corner of the screen, press soft key B. To use the function shown at the center, press the center of the control wheel (soft key C). In this handbook, the soft keys are indicated by the icon or the function shown on the screen.
Using the guide function of the camera The camera provides various “Help Guides” which explain the functions, and “Shooting Tips” which introduce tips for better shooting. Use these guides to make better use of the camera. x Help Guides The camera displays the Help Guide to explain the selected function, when you change the setting, etc. You can hide the Help Guides by selecting [Menu] t [Setup] t [Help Guide Display] t [Off].
Using the recording functions Defocusing the background easily (Background Defocus Control) In the [Intelligent Auto] mode, you can defocus the background easily to make the subject stand out. 1 Press [Menu], then select [Shoot Mode] t (Intelligent Auto). [Menu] 2 Press the center of the control wheel. Using the recording functions The [Background Defocus] screen appears. Control wheel 3 Defocus the background by turning the control wheel.
Selecting the flash mode 1 Attach the flash (page 23). 2 Press (Flash Mode) on the control wheel. 3 Turn the control wheel to select the desired mode, and press the center. (Flash Off): Does not fire even if the flash is raised. (Autoflash): Fires if it is dark or against light. (Fill-flash): Fires every time you trigger the shutter. (Slow Sync.): Fires every time you trigger the shutter. Slow sync shooting allows you to shoot a clear image of both the subject and the background. (Rear Sync.
Adjusting the brightness of still images (Exposure compensation) You can adjust the exposure in 1/3 EV steps in a range of –2.0 EV to +2.0 EV. 1 Press (Exposure Comp.) on the control wheel. 2 Turn the control wheel to select the desired value, and press the center. Using the recording functions When the image is too bright, set [Exposure Comp.] toward –. When the image is too dark, set [Exposure Comp.] toward +. Using the self-timer 1 Press (Drive Mode) on the control wheel.
Shooting still images continuously The camera records images continuously while you press and hold down the shutter button (max. 2.3 images per second). 1 Press (Drive Mode) on the control wheel. 2 Turn the control wheel to select press the center. (Continuous Adv.), and z To shoot continuously at a higher speed Select (Speed Priority Cont.) from (Drive Mode) to shoot more images continuously (max. 7 images per second). The focus and exposure of the first shot are used for the following shots.
2 Press DISP repeatedly to select the desired mode. During shooting Disp. Basic Info: Shows basic shooting information. Graphically shows the shutter speed and aperture value, except for when [Shoot Mode] is set to [Intelligent Auto] or [Sweep Panorama]. Display Info.: Shows recording information. No Disp. Info.: Does not show recording information. During playback Display Info.: Shows recording information. Histogram: Displays the luminance distribution graphically, in addition to recording information.
x Scene Selection 1 Select SCN (Scene Selection) (page 39). 2 Turn the control wheel to select the desired mode, and press the center. (Portrait): Blurs away backgrounds and sharpens the subject. Expresses skin tones softly. (Landscape): Shoots the entire range of scenery in sharp focus with vivid colors. (Macro): Shoots close subjects such as flowers, insects, food, or small items. (Sports Action): Shoots a moving subject at a fast shutter speed so that the subject looks as if it is standing still.
x Sweep Panorama While you pan the camera, the camera shoots several images and composes them into one panoramic image. 1 Select 2 Point the camera at the edge of the subject, then press the shutter button fully down. (Sweep Panorama) (page 39). This part will not be taken. Pan the camera to the end, following the guidance on the LCD monitor.
z Playing back scrolling panoramic images You can scroll panoramic images from the beginning to the end by pressing the center of the control wheel while panoramic images are being displayed. Press it again to pause. • Panoramic images are played back with the supplied software “PMB” (page 60). • Panoramic images shot with other cameras may not be displayed or scrolled correctly. Shows the displayed area of the whole panoramic image.
z Shutter speed When a faster shutter speed is used, a moving subject such as a running person, cars, and sea spray appears as if they are stopped. When a slower shutter speed is used, a trailing image of the movement of the subject is captured to make more natural and dynamic image. Using the recording functions x Aperture Priority You can adjust the range in focus, or defocuses the background. 1 Select A (Aperture Priority) (page 39).
Selecting the image size The image size determines the size of the image file that is recorded when you take an image. The larger the image size, the more detail will be reproduced when the image is printed on large format paper. The smaller the image size, the more images can be recorded. In the case of movies, the larger the image size, the higher the image quality. 1 Press [Menu]. [Menu] 2 Use the control wheel to select [Image Size] t [Image Size], and press the center.
Panorama The image size varies depending on the shooting direction (page 51). (Standard) Shoots images using standard size. Vertical: 2160 × 3872 Horizontal: 8192 × 1856 (Wide) Shoots images using wide size. Vertical: 2160 × 5536 Horizontal: 12416 × 1856 Movie NEX-5/5C [AVCHD] mode Usage guidelines 1920 × 1080 17 Mbps Records with the highest image quality for viewing on a high-definition TV.
Focusing on the face (Face Detection) The camera detects the faces of your subjects and adjusts the focus on the face. You can select the priority face to be focused on. 1 Press [Menu]. [Menu] 2 Use the control wheel to select [Camera] t [Face Detection], and press the center. 3 Turn the control wheel to select the desired mode, and press the center. (Off): Does not use Face Detection function. (Auto): Selects the face the camera is to automatically focus on.
Using the playback functions Enlarging the playback image (Enlarge Image) 1 Press the (Playback) button to enter the playback mode. (Playback) button 2 Display the image you want to enlarge, then press [Enlarge] (the center of the control wheel). 3 Turn the control wheel to adjust the scaling. 4 Press the top/bottom/right/left of the control wheel to select the portion you want to enlarge. Using the playback functions Control wheel • To cancel the operation, press [Exit].
Displaying the image list 1 Press the (Playback) button to enter the playback mode. (Playback) button 2 Press (Image Index) on the control wheel. Six images are displayed at a time. 3 Turn the control wheel to select an image. • To return to the single-image screen, select the desired image, and press the center. z Switching between the still image and the movie You can switch the image type on the image index easily.
Viewing images on a TV To view images recorded on the camera on a TV, an HDMI cable (sold separately) and an HD TV equipped with an HDMI connector are required. 1 Connect the camera to the TV with an HDMI cable (sold separately). To the HDMI connector HDMI cable To the HDMI terminal Using the playback functions Note • Use an HDMI mini connector on one end (for the camera), and a plug suitable for connecting your TV on the other end.
Checking the functions available Menu list When you press [Menu], six menu items; [Shoot Mode], [Camera], [Image Size], [Brightness/Color], [Playback], and [Setup], appear on the screen. You can set various functions in each item. Items that cannot be set in the context are displayed in gray. x Shoot Mode Allows you to select a shooting mode, such as exposure mode, panoramic, Scene Selection. GB 50 Intelligent Auto The camera evaluates the subject and makes the proper settings.
x Camera Allows you to set shooting functions, such as continuous shooting, self-timer, and flash. Selects the drive mode, such as continuous shooting, self-timer, or bracket shooting. (Single-shot Adv./Continuous Adv./Speed Priority Cont./Self-timer/Self-timer(Cont.)/ Bracket: Cont./ Remote Cdr.*) Flash Mode Selects the method used to fire the flash. (Flash Off/Autoflash/Fill-flash/Slow Sync./Rear Sync.) AF/MF Select Selects auto focusing or manual focusing.
x Image Size Allows you to set the image size and aspect ratio, etc. Still Image Size Selects the image size. (3:2: L: 14M/ M: 7.4M/ S: 3.5M 16:9: L: 12M/ M: 6.3M/ S: 2.9M) Aspect Ratio Selects the aspect ratio. (3:2/16:9) Quality Selects the compression format. (RAW/RAW & JPEG/Fine/Standard) Panorama Image Size Selects the image size. (Standard/Wide) Movie File Format* Selects the movie recording format. (AVCHD/MP4) Image Size Selects the image size.
Creative Style Selects the image processing method. (Standard/Vivid/Portrait/Landscape/Sunset/Black & White) x Playback Allows you to set playback functions. Deletes images. (Multiple Img./All in Folder/All in Date Rng.) Slide Show Plays back images automatically. (Interval/Movie Type/Repeat) Still/Movie Select Selects a still image or movie to play back. (Still/Movie) Image Index Selects the number of images to be displayed on the index screen.
Auto Review Sets the display time of the image right after shooting. (10 Sec/5 Sec/2 Sec/Off) Grid Line Turns on the grid line that helps you to adjust the composition of images. (On/Off) Histogram Displays the histogram of the luminance distribution. (On/Off) MF Assist Displays an enlarged image when focusing manually. (On/Off) Color Space Changes the range of color reproduction. (sRGB/AdobeRGB) SteadyShot Sets camera shake compensation.
Display Color Selects the color of the LCD monitor. (Black/White/Blue/Pink) Wide Image Selects a method to display wide images. (Full Screen/Normal) Playback Display Selects the method used to play back portrait images. (Auto Rotate/Manual Rotate) CTRL FOR HDMI Sets whether or not to operate the camera with an HDMI-compliant TV’s Remote Control. (On/Off) USB Connection Selects the method used for a USB connection. (Mass Storage/PTP) Cleaning Mode Allows you to clean the image sensor.
Eye-Fi cards can be used only in the countries/regions where they were purchased. Use Eye-Fi cards in accordance with the law of the countries/regions where you purchased the card. NEX-5C/3C do not have this function. Functions available for each shooting mode The functions you can use depend on the selected shooting mode. In the table below, indicates the function available. – indicates the function not available. The functions you cannot use are displayed in gray on the screen.
Flash modes available The flash modes you can select depend on the shooting mode and functions selected. In the table below, indicates the function available. – indicates the function not available. The flash modes you cannot select are displayed in gray on the screen. Shoot Mode Off Autoflash Intelligent Auto Fill-flash Slow Sync. Rear Sync.
Importing images to the computer Installing the software To utilize images recorded with the camera, the following software is provided: • Sony Image Data Suite “Image Data Converter SR” “Image Data Lightbox SR” • “PMB” (Picture Motion Browser) (Windows only) Note • Log on as Administrator. x Windows The following computer environment is recommended when using the supplied software and importing images via a USB connection.
1 Turn on your computer, and insert the CD-ROM (supplied) into the CD-ROM drive. The installation menu screen appears. 2 Click [Install]. 3 Remove the CD-ROM after the installation is complete. • Make sure that both “Sony Image Data Suite” and “PMB” are checked and follow the instructions on the screen. • Connect the camera to the computer during the procedure following the instructions on the screen.
1 Turn on your Macintosh computer, and insert the CD-ROM (supplied) into the CD-ROM drive. 2 Double-click the CD-ROM icon. 3 Copy the [IDS_INST.pkg] file in the [MAC] folder to the hard disk icon. 4 Double-click the [IDS_INST.pkg] file in the copy-to folder. • Follow the instructions on the screen to complete the installation. What you can do with the supplied software x “PMB” With “PMB” you can do the following, etc.: • Import images shot with the camera and display them on the computer.
For details on “Image Data Converter SR” and “Image Data Lightbox SR,” refer to Help. To start Help, click [Start] t [All Programs] t [Sony Image Data Suite] t [Help] t [Image Data Converter SR Ver.3] or [Image Data Lightbox SR]. The support information for the “Sony Image Data Suite” (English only): http://www.sony.co.jp/ids-se/ Creating a movie disc (NEX-5/5C) You can create a disc from AVCHD format movies recorded on the camera. Select the method that best suits your disc player.
z Characteristics of each type of disc A Blu-ray disc enables you to record high definition image quality (HD) movies of a longer duration than DVD discs. High definition image quality (HD) movie can be recorded on DVD media, such as DVD-R discs, and a high definition image quality (HD) disc is created. • You can play a high definition image quality (HD) disc on AVCHD format playback devices, such as a Sony Blu-ray disc player and a PlayStation®3. You cannot play the disc on ordinary DVD players.
Others Checking the number of recordable images Once you insert a memory card into the camera and set the power switch to ON, the number of images that can be recorded (should you continue to shoot using the current settings) is displayed on the LCD monitor. Notes • When “0” (the number of recordable images) flashes in yellow, the memory card is full. Replace the memory card with another one, or delete images in the current memory card (page 30).
Movies The table below shows the approximate recording times available. These are the total times for all movie files. Continuous recording is possible for approximately 29 minutes.
List of icons on the LCD monitor Icons are displayed on the screen to indicate the camera status. You can change the screen display using DISP (Display Contents) on the control wheel.
Display 100% Indication C Remaining battery Display Indication Scene Recognition icons z Focus status 1/125 Shutter speed F3.5 Aperture value Metered manual Flash charge in progress ±0.
Display Indication Drive Mode Display Indication Smile detection sensitivity indicator Focus mode ±0.
Learning more about the camera (α Handbook) “α Handbook,” which explains how to use the camera in detail, is included on the CD-ROM (supplied). Refer to it for in-depth instructions on the many functions of the camera. x For Windows users 1 Turn on your computer, and insert the CD-ROM (supplied) into the CD-ROM drive. 2 Click [Handbook]. 3 Click [Install]. 4 Start “α Handbook” from the shortcut on the desktop.
Troubleshooting If you experience trouble with the camera, try the following solutions. 1 Check the items on pages 69 to 72. Also refer to “α Handbook” (PDF). 2 Remove the battery pack, wait for about one minute, reinsert the battery pack, then turn on the power. 3 Reset the settings (page 55). 4 Consult your Sony dealer or local authorized Sony service facility. Battery pack and power The battery pack cannot be installed.
• If you do not operate the camera for given period of time, the camera turns to power saving mode. To cancel the power save, operate the camera, such as pressing the shutter button halfway down. The CHARGE lamp flashes when charging the battery pack. • You can use an NP-FW50 battery pack only. Make sure that the battery is NP-FW50. • If you charge a battery pack that has not been used for a long time, the CHARGE lamp may flash. • The CHARGE lamp flashes in two ways, fast (about 0.
• You are shooting in manual focus mode. Set [AF/MF Select] to [Autofocus]. • Ambient light is insufficient. • The subject may require special focusing. Use the [Flexible Spot] or manual focus function. The flash does not work. • Raise the flash (page 23). • The flash is not attached correctly. Reattach the flash (page 23). • You cannot use a flash with the following shooting mode: – – – – – [Bracket: Cont.
The image is whitish (Flare). Blurring of light appears on the image (Ghosting). • The picture was taken under a strong light source, and excessive light has entered the lens. When using the zoom lens, attach a lens hood. The corners of the picture are too dark. • If any filter or hood is used, take it off and try shooting again. Depending on the thickness of the filter and improper attachment of the hood, the filter or the hood may partially appear on the image.
Precautions Notes on the LCD monitor and lens • The LCD monitor is manufactured using extremely high-precision technology so over 99.99 % of the pixels are operational for effective use. However, there may be some tiny black points and/or bright points (white, red, blue or green in color) that constantly appear on the LCD monitor. These points are normal in the manufacturing process and do not affect the images in any way.
and in some cases this malfunction cannot be repaired. On storing Be sure to attach the lens cap when not using the camera. On operating temperatures Your camera is designed for use under the temperatures between 0°C and 40°C (32°F and 104°F). Shooting in extremely cold or hot places that exceed this range is not recommended. On moisture condensation If the camera is brought directly from a cold to a warm location, moisture may condense inside or outside the camera.
• • • • • • • • • If moisture condensation occurs, remove it before using the camera (page 74). • Do not shake or strike the camera. In addition to malfunctions and an inability to record images, this may render the memory card unusable, or cause image data breakdown, damage or loss. • Clean the flash surface before use. The heat of flash emission may cause dirt on the flash surface to become discolored or to stick to the flash surface, resulting in insufficient light emission.
• Discs recorded with HD (high definition) image quality can be played back only on AVCHD format-compatible devices. DVD-based players or recorders cannot play back HD image quality discs, as they are incompatible with the AVCHD format. Also, DVD-based players or recorders may fail to eject HD image quality discs. Warning on copyright Television programs, films, videotapes, and other materials may be copyrighted.
[Recording media] “Memory Stick PRO Duo” media, “Memory Stick PRO-HG Duo” media, SD memory card, SDHC memory card, SDXC memory card [LCD monitor] LCD panel: 7.5 cm (3.0 type) TFT drive Total number of dots: 921 600 (640 × 3 (RGB) × 480) dots [Input/output terminals] USB: miniB HDMI: HDMI type C minijack [Power] Used battery pack: Rechargeable battery pack NP-FW50 [Others] Flash Flash guide number: GN 7 (in meters at ISO 100) Recycling time: Approx.
Lens On the E18 – 200 mm lens, refer to the instruction manual of the E18 – 200 mm lens (supplied). Lens E16 mm single focus lens E18 – 55 mm zoom lens Camera NEX-5A/5CA/5D/5CD/ 3A/3CA/3D/3CD NEX-5D/5CD/5K/5CK/ 3D/3CD/3K/3CK Equivalent 35 mm-format focal length*1 (mm) 24 27 - 82.5 Lens groups-elements 5-5 9-11 Angle of view*1 Minimum focus*2 (m (feet)) Maximum magnification (×) Minimum f-stop Filter diameter (mm) Dimensions (max. diameter × height) (mm (in.)) Mass (g (oz.
BC-VW1 Battery charger Input rating: 100 V – 240 V AC, 50 Hz/60 Hz, 4.2 W Output rating: 8.4 V DC, 0.28 A Operating temperature range: 0°C to 40°C (32° to 104°F) Storage temperature range: –20°C to +60°C (–4°F to +140°F) Maximum dimensions: Approx. 63 × 95 × 32 mm (2 1/2 × 3 3/4 × 1 5/16 inches) (W/H/D) Mass: Approx.
• HDMI, the HDMI logo and HighDefinition Multimedia Interface are trademarks or registered trademarks of HDMI Licensing LLC. • Macintosh and Mac OS are trademarks or registered trademarks of Apple Inc. • PowerPC is a registered trademark of IBM Corporation in the United States. • Intel, Intel Core, and Pentium are trademarks or registered trademarks of Intel Corporation. • SDXC Logo is a trademark of SD-3C, LLC. • Eye-Fi is a trademark of Eye-Fi Inc.
Index A AF Illuminator ............................. 53 AF/MF Select............................... 51 Anti Motion Blur ......................... 40 Aperture Priority .......................... 43 Area Setting ................................. 54 Aspect Ratio................................. 52 Auto Review ................................ 54 Autofocus Area ............................ 51 Autofocus Mode .......................... 51 B Background Defocus Control ...... 35 Battery pack .......................
Long Exposure NR ...................... 54 M Macintosh .................................... 59 Macro ........................................... 40 Manual Exposure ......................... 39 Memory card................................ 21 Menu ............................................ 50 Metering Mode ............................ 52 MF Assist..................................... 54 Moisture condensation................. 74 Movie ........................................... 28 Movie Audio Rec............