
Operating Instructions
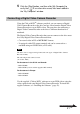
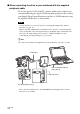
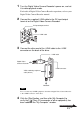

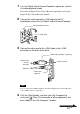
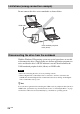
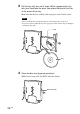
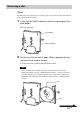
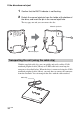
Table Of Contents
- Table of Contents
- Overview
- Supplied Accessories
- Locating the Controls and Connectors
- Setting up the Drive
- Connecting the Drive
- Basic Operation
- Installing the software
- Precautions before use
- Playing an Audio CD
- Playing a DVD video
- Performing a System Recovery on a Notebook
- Precautions
- Maintenance
- Getting Help
- Specifications
- Troubleshooting
- Inhalt
- Übersicht
- Mitgeliefertes Zubehör
- Lage und Funktion der Teile und Bedienelemente
- Aufstellen des Laufwerks
- Anschließen des Laufwerks
- Grundfunktionen
- Installieren der Software
- Sicherheitshinweise zur Verwendung
- Wiedergeben einer Audio-CD
- Wiedergeben eines DVD-Videos
- Ausführen einer Systemwiederherstellung auf einem Notebook
- Sicherheitsmaßnahmen
- Wartung
- Hilfeinformationen und technische Unterstützung
- Technische Daten
- Störungsbehebung
- Table des matières
- Présentation
- Accessoires fournis
- Emplacement des commandes et des connecteurs
- Installation du graveur
- Raccordement du graveur
- Opérations de base
- Installation des logiciels
- Précautions à prendre avant l’utilisation
- Lecture d’un CD audio
- Lecture d’un DVD-Vidéo
- Récupération du système d’exploitation sur l’ordinateur portable
- Précautions
- Entretien
- Aide
- Spécifications
- Dépannage
30
GB
If the disc does not eject
1 Confirm that the BUSY indicator is not flashing.
2 Detach the manual eject pin from the holder at the bottom of
the drive, and insert the pin in the manual eject hole.
The tray pops out and you can remove the disc.
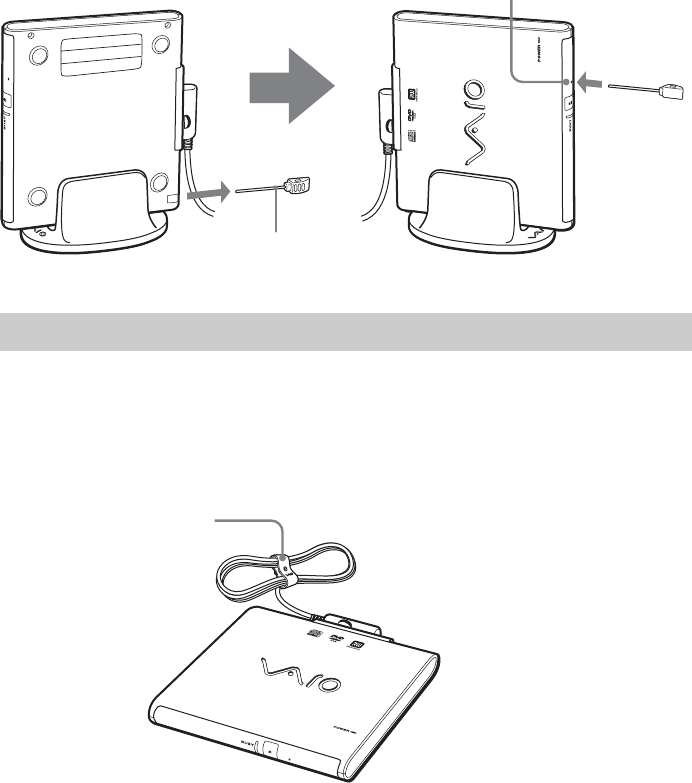
Transporting the unit (using the cable clip)
With the supplied cable clip, you can quickly and easily coil the VAIO
notebook peripheral cable (80 cm) or i.LINK cable into a neat loop for
transport as described below. When the drive is connected using the VAIO
notebook peripheral cable (80 cm), you only have to remove the connector
from the notebook. You can transport the drive with the cable attached.
Manual eject pin
Cable clip
Manual eject hole