4-675-240-12 (1) Read This First Operating Instructions Personal Entertainment Organizer PEG-NX80V PEG-NX73V © 2003 Sony Corporation 1 Setting up your CLIÉ™ handheld 2 Basic operations of your CLIÉ™ handheld 3 Have a try Taking pictures / Recording movies Recording a voice memo Listening to music Managing schedules / addresses Viewing computer documents Using the Bluetooth™ function Connecting to the Internet CLIÉ™ handheld components
The following manuals are included with your CLIÉ handheld. Refer to the following together with this manual. Before you start using your CLIÉ handheld (This manual) Read This First (Operating Instructions) Explains the following: • Setting up your CLIÉ handheld and computer • Basic operations • What you can do with the applications Be sure to read the supplied “Safety & Regulations Guide” to use your CLIÉ handheld safely.
Before use Caution CAUTION IN NO EVENT SHALL SONY BE LIABLE FOR ANY INCIDENTAL, INDIRECT OR CONSEQUENTIAL DAMAGES OR OTHER DAMAGES INCLUDING WITHOUT LIMITATION LOSS OF PROFITS, LOSS OF REVENUE, LOSS OF DATA, LOSS OF USE OF THE PRODUCT OR ANY ASSOCIATED EQUIPMENT, DOWNTIME, AND PURCHASER’S TIME RELATED TO OR ARISING OUT OF THE USE OF THIS PRODUCT, ITS HARDWARE AND/OR ITS SOFTWARE. Please contact your nearest Sony dealer regarding any problems you have with your Sony product.
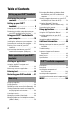
Table of Contents Setting up your CLIÉ™ handheld Confirming the package contents . . . . . . . . . . . . . . . . 6 Setting up your CLIÉ™ handheld . . . . . . . . . . . . . . . . 8 Charging your CLIÉ handheld. . . . . . . . . . . . . 8 Performing the initial setup after turning on your CLIÉ handheld for the first time . . . . 11 Exchanging Date Book and Address Book data between your CLIÉ handheld and computer . . . . . . . . . . . . . . . . . . . . . . . . .
Notes on this manual • This manual supports PEG-NX80V and PEG-NX73V. – The illustrations in this manual are for PEG-NX80V, unless specified otherwise. – Differences between PEG-NX80V and PEG-NX73V are specified in each corresponding section. • Screen shots in this manual may be different from the actual displays in the supplied software. • The contents of this manual are written for users with knowledge of using Windows®. For details about computer operation, refer to the manual for the computer.
Setting up your CLIÉ™ handheld This chapter explains how to charge your CLIÉ handheld and use it with your computer. Confirming the package contents Please confirm the accessories in the package before you start setting up your CLIÉ handheld. CLIÉ handheld (1) Cradle (1) The illustration is for PEG-NX80V. AC power adapter (1) (including AC cord) Headphones (1) Stylus (1) Audio remote control (1) The stylus is stored in your CLIÉ handheld at the factory.
Plug adapter (1) Plug adapter attachment (1) Setting up your CLIÉ™ handheld Installation CD-ROM Strap (1) Refer to the illustration below to attach the strap. Read This First - Operating Instructions (1, this manual) Safety & Regulations Guide (1) Troubleshooting Q&A (1) Software license agreement (1) Other printed materials Make sure that the package contains all of the above contents. If any item is missing, contact the Sony Customer Information Service Center or a Sony dealer.
Setting up your CLIÉ™ handheld Perform the following before setting up your CLIÉ handheld. Step 1: Charging your CLIÉ handheld Step 2: Performing the initial setup after turning on your CLIÉ handheld for the first time Step 1: Charging your CLIÉ handheld Before you use your CLIÉ handheld for the first time, be sure to fully charge the battery. To a wall outlet 1 2 8 Connect the AC power adapter to the cradle’s AC adapter connector. Connect the AC power adapter to a wall outlet.
3 Insert your CLIÉ handheld at an angle into the cradle, then lay it back into place. The POWER LED indicator of your CLIÉ handheld turns on when charging starts. Tip Subsequent charges will require less time if you charge your CLIÉ handheld frequently. Note If the battery of your CLIÉ handheld is completely discharged, all user data stored in the internal memory of your CLIÉ handheld will be lost. Charging your CLIÉ handheld without a cradle You can charge your CLIÉ handheld using the plug adapter.
Connect the AC cord to the AC power adapter and then plug the AC cord into a wall outlet. To a wall outlet AC cord Removing the plug adapter Push the release buttons on both sides of the plug adapter (1), and then remove the plug adapter (2). Using the supplied plug adapter attachment Attaching the plug adapter attachment Refer to the illustration below to attach the supplied plug adapter attachment.
Step 2: Performing the initial setup after turning on your CLIÉ handheld for the first time Changing the operating style You can use your CLIÉ handheld with the display panel set in three different styles. Carrying style Put your CLIÉ handheld in the “carrying style” when carrying it in your bag or pocket to prevent the screen from damage. Setting up your CLIÉ™ handheld The first time you turn on your CLIÉ handheld, you are required to make initial settings.
Turned style Put your CLIÉ handheld in the “turned style” to make it compact when you operate it with the stylus or use it in camera mode. b Open the display and rotate it as indicated by the arrow until it clicks into place b Fold the display over the keyboard Note Do not rotate the display panel wrong direction. Do not apply too much force. Closing the display panel Close the display panel by rotating it as indicated by the arrow.
1 Slide down the POWER/HOLD switch. Your CLIÉ handheld turns on, and the Welcome screen is displayed. Setting up your CLIÉ™ handheld b Slide down the POWER/HOLD switch Tip If you cannot turn on your CLIÉ handheld • Did you charge your CLIÉ handheld as described on page 8? b For more help, refer to the supplied manual “Troubleshooting Q&A.” • Perform a soft reset if you cannot turn on your CLIÉ handheld even after charging it (page 31). 2 Take out the stylus.
Notes • Always use the pointed end of the stylus for tapping or making strokes on your CLIÉ handheld screen. Never use a writing pen, pencil, or other sharp object to write on the screen. • When you put the stylus back in its holder, push it in until it clicks into place. 3 Press lightly on the screen with the stylus. This action is called “tapping.” The Setup screen for digitizer calibration is displayed.
5 Tap the Set Time box. The Set Time screen is displayed. Tip 6 Setting up your CLIÉ™ handheld You can reconfigure the date and time settings in the Preferences screen. b For details, refer to “Customizing your CLIÉ™ handheld (Preferences): Setting up the Date & Time preferences” in the “Handbook.” Tap the arrow v or V to set the current time. Tap each box to set the hour and minute. 7 Tap OK. The current time is set and the Setup screen is displayed. 8 Tap the Set Date box.
10 Tap the current month and then tap the current date. The Set Date screen closes. 11 Tap the Time Zone box. The Set Time Zone screen is displayed. 12 13 16 Tap the region to set the time zone and then tap OK. Tap the arrow V next to Daylight Saving and select On or Off.
Tap Next. 15 Tap Next and Done. Setting up your CLIÉ™ handheld 14 b The CLIE Launcher screen is displayed.
Using your CLIÉ™ handheld with your computer You can perform the following if you use your CLIÉ handheld with your computer. • Synchronize the latest schedules and addresses, between your CLIÉ handheld and your computer. • Save a backup copy of your CLIÉ handheld data on your computer. • Transfer images and music from your computer to your CLIÉ handheld. • Learn how to use add-on applications in detail with the “CLIÉ Application Manual” installed on your computer.
Notes • Do not simply copy the Palm™ Desktop for CLIÉ folder from the supplied Installation CD-ROM to your computer. To install the software properly, follow the installation procedure described in this manual. • If you have more than one CLIÉ handheld and the old version of Palm™ Desktop for CLIÉ software has already been installed on your computer, follow the procedure below to upgrade to the new version. * If you are using PEG-N710C Series or PEG-S300 Series, refer to your CLIÉ handheld support website.
8 Click Next. The Create User Account window is displayed. 9 Enter a user name in the Create User Account window. You can enter any user name you prefer. Note If you have more than one CLIÉ handheld Enter a user name that is different from the one you use for another CLIÉ handheld. If you set an identical user name to multiple CLIÉ handhelds, errors may occur. Tip When you transfer data between CLIÉ handhelds Refer to “Transferring data from another CLIÉ™ handheld” in the “Handbook.” 10 Click Next.
Step 2: Connecting the cradle to your computer When you have completed the Palm™ Desktop for CLIÉ software installation, connect the cradle to a USB port of your computer. To a USB port of your computer To a wall outlet Note Be sure to connect the cradle directly to a USB port of your computer. If the cradle is connected to a computer via another device, such as a USB hub, the HotSync® operation may not perform correctly.
Step 3: Entering a user name for your CLIÉ handheld 1 Place your CLIÉ handheld in the cradle. 2 Press the HotSync button on the cradle. Press the HotSync 3 button Click OK on the Users dialog box. A beep sounds and the HotSync® operation starts. Your user name, entered in the Palm™ Desktop for CLIÉ software installation window, is registered on your CLIÉ handheld. When the setup is complete, “HotSync operation complete.” will be displayed on your CLIÉ handheld. 4 Click OK on the computer window.
Synchronizing data between your CLIÉ handheld and computer (HotSync®) The HotSync® operation is a one-step operation that allows you to synchronize data between your CLIÉ handheld and your computer, back up the data of your CLIÉ handheld to your computer, and install add-on applications. b For details, refer to “Exchanging and updating files/data using the HotSync® operation (Other HotSync® operations)” in the “Handbook.
4 Press the HotSync button on the cradle. The HotSync® operation between your CLIÉ handheld and computer starts. Press the HotSync button When the HotSync® operation is complete, the following screen is displayed. 5 Double-click the Palm™ Desktop for CLIÉ icon on the Windows desktop. You can also click Start, select Programs (for Windows XP, select All Programs), Sony handheld, and click Palm Desktop for CLIÉ to start the application.
To access other information screens (Address Book, To Do List and Memo Pad) Click each icon at the left side of the screen. If problems occur, even those requiring a hard reset, you can restore your CLIÉ handheld to the same state as it was at the last HotSync® operation. You cannot back up some applications installed later or some data created with such applications. b For details, refer to “Making a backup of the data on your CLIÉ handheld” on page 80.
Basic operations of your CLIÉ™ handheld This chapter explains how to start an application, enter text and perform a reset. Starting an application To work with your CLIÉ handheld, you need to start applications. The following explains the basic operations to start an application. 1 Displaying the CLIE Launcher screen 2 Selecting an application 3 Quitting the application The following shows how to start applications from the CLIE Launcher screen using the Jog Dial™ navigator.
2 Selecting an application 1 Rotate the Jog Dial™ navigator to select an application to start. M Move up and down 2 b m Basic operations of your CLIÉ™ handheld Rotate up and down Press the Jog Dial™ navigator. The selected application starts. Press b Tip To select each group The group list is highlighted in the CLIE Launcher screen when you press the BACK button. You can also select an application by selecting the group first while rotating the Jog Dial™ navigator.
3 Quitting the application You do not need to save data manually on your CLIÉ handheld as you do with the computer. All the changes in the application that you are working on are automatically saved, and the last screen you worked on is displayed when you restart the application. Display the CLIE Launcher screen to switch to another application while you are working on an application. You can select either of the following methods to display the CLIE Launcher screen.
2 Tap the application icon. The selected application starts. You can also start the applications by pressing the application buttons. The default setting of the application buttons are: Date Book, Address Book, To Do List, Memo Pad Hardware keyboard side Display panel side Note The application buttons on the display panel side are used only when your CLIÉ handheld is in the “turned style” (page 12).
Entering text There are six ways to enter text into your CLIÉ handheld. You can use whichever is the most comfortable for you. z Hardware keyboard (page 99) You can enter text using the hardware keyboard in the same way as your computer’s keyboard. This is useful when you want to enter lots of text. z Handwritten input system There are two ways of using the handwritten input system. b For details, refer to “Entering text on your CLIÉ™ handheld” in the “Handbook.
Restarting your CLIÉ handheld Normally, you do not need to reset your CLIÉ handheld. However, should your CLIÉ handheld not turn on or not respond, you can perform a soft reset to solve the problem. Follow the procedure below to reset your CLIÉ handheld. All records and entries stored on your CLIÉ handheld are retained even after performing a soft reset. Use the stylus to gently press the RESET button. The system shuts down and then restarts.
Performing a hard reset If the soft reset does not solve the problem, you will need to perform a hard reset to restart your CLIÉ handheld. Notes • All records and add-on applications stored on your CLIÉ handheld will be erased by performing a hard reset. • Perform a hard reset only if a soft reset does not solve your problem. You can restore your CLIÉ handheld data if you have made a backup on your computer. b For details, refer to “Backing up your CLIÉ™ handheld data and applications” in the “Handbook.
4 Press the v button. Press the v button Notes • After the RESET button is pressed, it takes a while before the Welcome screen is displayed. Be sure not to press the RESET button again while resetting. • If the scroll button is not pressed for long enough, the hard reset might not be performed. 33 Basic operations of your CLIÉ™ handheld A hard reset is performed on your CLIÉ handheld. After restarting, the system displays “palm POWERED,” “CLIÉ,” and “SONY,” followed by the Welcome screen.
Have a try Enjoying image files You can take and view pictures using your CLIÉ handheld as a digital still camera. • Application to be used: – Taking pictures: CLIE Camera – Viewing image files: CLIE Viewer b For details, refer to “Still images” in the “CLIÉ Application Manual” installed on your computer. Taking pictures 1 Press the CAPTURE button to start CLIE Camera. Tip You can tap the CLIE Camera icon in the CLIE Launcher screen to start CLIE Camera.
3 Position the subject in the viewfinder and press the CAPTURE button. A picture is taken. Note Have a try By taking pictures, hold your CLIÉ handheld fiemly with both hands and press the CAPTURE button slowly. After the CAPTURE button is pressed when the viewfinder blacks out, your CLIÉ handheld captures an image. At this moment, do not move your CLIÉ handheld, otherwise the picture will be blurred.
2 3 4 Slide the ND FILTER switch to the ON. Take pictures as outlined in step 1 to step 3 of "Taking pictures" on page 34. Slide the ND FILTER switch to the OFF. Note The brightness of the screen may change suddenly if the ND FILTER is used. This is not a malfunction. Viewing image files You can view image files in CLIE Viewer. b For details, refer to “Viewing handwritten memos and image files, and playing back voice memos” on page 44.
Enjoying image files Getting Ready Taking pictures CLIE Camera................................................................................ page 66 Importing image files from your computer Image Converter........................................................................... page 68 Viewing/Selecting CLIE Viewer ................................................................................ page 66 Utilizing features Organizing image files in albums CLIE Album..................................
Enjoying movies You can record movies using your CLIÉ handheld as digital video camera. Your movies are saved on “Memory Stick” media. • Application to be used: – Recording movies: Movie Recorder – Viewing movies: Movie Player, CLIE Viewer • Required media: “Memory Stick” media b For details, refer to “Movies” in the “CLIÉ Application Manual” installed on your computer. Recording movies 1 Insert “Memory Stick” media into your CLIÉ handheld.
3 4 Point the built-in camera directly at the subject, by rotating the camera lens. Position the subject in the viewfinder and press the CAPTURE button. Have a try Start recording the movie. Tip You can tap the REC icon on the Movie Recorder screen to record. 5 Press the CAPTURE button once again to stop recording. Recording movies with the ND (Neutral Density) FILTER (PEG-NX80V only) When you take pictures in very bright sunlight (such as the beach or a skiing ground,) turn the ND FILTER on.
2 3 4 Slide the ND FILTER switch to the ON. Record movies as outlined in step 1 to step 4 of "Recording movies" on page 38. Slide the ND FILTER switch to the OFF. Notes • If the ND FILTER is switched during recording, a picture may be confused or noise may mix with a sound. • The brightness of the screen may change suddenly if the ND FILTER is used. This is not a malfunction. Viewing movies You can view movies in CLIE Viewer.
Enjoying movies Getting Ready Recording movies Movie Recorder............................................................................ page 69 Importing movie files from your computer Image Converter........................................................................... page 68 Giga Pocket Plugin....................................................................... page 70 Viewing/Selecting movies by searching from the list CLIE Viewer .............................................................
Recording a voice memo (Voice Recorder) You can record sounds using the built-in microphone of your CLIÉ handheld. You can also use the voice memo as an alarm sound or attach it to an e-mail. • Application to be used: – Recording a voice memo: Voice Recorder – Playing back a voice memo: Voice Recorder, CLIE Viewer b For details, refer to “Voice Recorder” in the “CLIÉ Application Manual” installed on your computer.
3 Slide down the VOICE REC switch once again to stop recording. Playing back a voice memo You can play back a voice memo using Voice Recorder or CLIE Viewer. b For details about Voice Recorder, refer to “Voice Recorder” in the “CLIÉ Application Manual” installed on your computer. b For details about CLIE Viewer, refer to “Viewing handwritten memos and image files, and playing back voice memos” on page 44.
Viewing handwritten memos and image files, and playing back voice memos You can use CLIE Viewer to view handwritten memos, image files, or movie files and play back the voice memos saved on your CLIÉ handheld or “Memory Stick” media. Different kinds of file are displayed in date order. This makes it easier to find the file you want to display or play back. You can also attach image files or movie files to your message, or select data to use with applications, such as PhotoStand, CLIE Album or Photo Editor.
Selecting/Deleting files You can select a file from the list screen in CLIE Viewer to attach image files or movie files of your CLIÉ handheld or “Memory Stick” media to e-mails, to use the image files in PhotoStand (page 67), CLIE Album (page 66) and Photo Editor (page 67), or to delete files. 1 2 Start CLIE Viewer. Tap a command button to choose a function.
Listening to music You can listen to music on your CLIÉ handheld by transferring music files from your computer to the “Memory Stick” media inserted into your CLIÉ handheld.
Playing back music data 1 3 Have a try 2 Connect the supplied audio remote control and headphones to your CLIÉ handheld. Select the AudioPlayer icon in the CLIE Launcher screen to start Audio Player. Tap the playback Tap the stop music. button to play music. button to stop the Tip You can use the audio remote control to play music.
Managing schedules (Date Book) You can save the date and times of your schedules. You can efficiently manage your schedules, such as conferences or business trips. • Application to be used: Date Book b For details, refer to “Date Book” in the “CLIÉ Application Manual” installed on your computer. Entering a schedule 1 2 Press the Book. button on the display panel to start Date Tap New and set the start time and end time of the schedule. 1 Tap to set the start time. 2 Tap to set the end time.
3 Enter a schedule. Tip b For details on entering text, refer to “Entering text on your CLIÉ™ handheld” in the “Handbook.” Have a try Deleting a schedule 1 Tap a schedule you want to delete and tap the Menu icon. The menu screen is displayed. 2 Tap Delete Event... from the Record menu. The confirmation message is displayed. 3 Tap OK. Tip The deleted data from your CLIÉ handheld will be saved on your computer the next time you synchronize your CLIÉ handheld with your computer.
Managing addresses and telephone numbers (Address Book) You can register information such as names, addresses, telephone numbers and an image attachment. You can select your own Address Book record to be set as Name Card. You can send the Address Book record to another CLIÉ handheld or Palm OS® compatible device by beaming. • Application to be used: Address Book b For details, refer to “Address Book” in the “CLIÉ Application Manual” installed on your computer. Entering a new address 1 2 Press the Book.
Deleting an address entry 1 Tap the address you want to delete and tap the Menu icon. The menu screen is displayed. 2 Tap Delete Address... from the Record menu. The confirmation message is displayed. 3 Tap OK. Have a try Tip The deleted data from your CLIÉ handheld will be saved on your computer the next time you synchronize your CLIÉ handheld with your computer. To view the saved data on your computer, open the Palm™ Desktop for CLIÉ software, and select Open Archive...
Exchanging Date Book and Address Book data between your CLIÉ handheld and computer The HotSync® operation (page 23) enables you to exchange Date Book data and the Address Book data between your CLIÉ handheld and computer. Depending on the softwares on your computer, there are two ways to exchange data.
Viewing computer documents on your CLIÉ handheld (Picsel Viewer for CLIE) You can view documents created in Microsoft® Word/Excel/PowerPoint® or PDF files on your CLIÉ handheld. b For details, refer to “Using your CLIÉ™ handheld with your computer” on page 18.
3 Copy the documents you want to the storage media inserted into your CLIÉ handheld. Use Data Import and Data Export to transfer documents to the storage media in your CLIÉ handheld. Data Export (for PC) Data Import (for CLIÉ handheld) Viewing the documents 1 Select the PicselViewer icon in the CLIE Launcher screen to start Picsel Viewer for CLIE. b 2 Tap the Carousel screen. icon at the bottom right of the The Carousel menu is displayed. 3 Tap the Folder View you want to view.
Using the Bluetooth™ function (for Bluetooth™ built-in models only) The Bluetooth™ function is a new technology that enables wireless communication for mobile phones, computers and other mobile devices. The Bluetooth™ function enables wireless communication within a range of approximately 33 feet (approximately 10 meters)1). You can use the function to exchange data, such as image files, between your CLIÉ handheld and other Bluetooth™ compliant devices.
1) The actual range will vary depending on factors such as obstacles between devices, magnetic fields around a microwave oven, static electricity, interference, radio wave conditions, reception sensitivity or antenna performance, the operating system, or software application, etc. 2) The Bluetooth™ function is required in the target devices. b For information on the compliant devices, refer to the URL shown on the back cover of this manual.