Program © 2000 Sony Corporation, © 2000 Palm, Inc. or its subsidiaries. All rights reserved. Documentation © 2000 Sony Corporation Sony, Memory Stick, the Memory Stick logo, and PictureGear are trademarks of Sony Corporation. Graffiti, HotSync, Palm Modem, and Palm OS are registered trademarks, and the HotSync logo and Palm are trademarks of Palm, Inc. or its subsidiaries. Microsoft and Windows are registered trademarks of Microsoft Corporation.
Table of Contents Features .............................................. 4 Unpacking your Sony handheld ........ 5 Manuals and CD-ROM ................ 6 Designation and function of each component ........................... 7 Front view of Sony handheld ...... 7 How to put the protective carrying case on Sony handheld ............... 9 Rear View of Sony handheld ..... 10 Cradle ........................................ 11 Screen ........................................
Features The Personal Entertainment Organizer (hereafter “Sony handheld”) functions as an personal digital organizer with features such as Date Book, Address Book, To Do List, and Memo Pad. In addition to these functions, the Sony handheld also works as an information terminal, with an excellent extended ability to connect to other devices such as personal computers.
Unpacking your Sony handheld ❏ Personal Entertainment Organizer (1) ##### ❏ Cradle (1) ❏ AC Adapter (1) ❏ Stylus (1) ❏ 8MB Memory Stick (1) ❏ Protective Carrying Case (1) 5
Manuals and CD-ROM ❏ Install CD-ROM (1) ❏ Personal Entertainment Organizer Operating Instructions (1) ❏ Read This First (1) (this document) ❏ PictureGear Pocket Operating Instructions (1) ❏ Graffiti® Card (1) ❏ Graffiti Label (1) ❏ End-User’s License Agreement (1) ❏ Other printed materials 6
Designation and function of each component ##### Front view of Sony handheld 1 Memory Stick Indicator It lights up while Sony handheld is accessing to Memory Stick media. 2 Infrared Communication Port Uses infrared technology to transmit data to and receive data from other Palm OS handhelds, and to perform HotSync operations. For more information, refer to the Sony handheld Operating Instructions. 3 Jog Dial Navigator Used to select and execute applications or items.
5 Scroll Button Displays text and other information that extends beyond the area of the screen. Pressing the lower half of the scroll button scrolls down to view information below the viewing area, and pressing the upper half of the button scrolls up to view the information above the viewing area. 6 Memory Stick Slot Insert Memory Stick media into this slot. 7 Power Button Used to turn the Sony handheld on or off. Also, pressing this button for longer than 2 seconds turns the back light on or off.
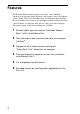
How to put the protective carrying case on Sony handheld Put the supplied protective carrying case on Sony handheld following below. ##### z Please remove the protective carrying case from the Sony handheld while the Sony handheld is placed on the cradle or connect to the AC adapter.
Rear View of Sony handheld 1 Stylus Used to tap icons and buttons on the screen, or to enter characters. For details, see “Using the stylus.” 2 Reset Button Under normal use, you should not have to use this button. For more information, refer to the Sony handheld Operating Instructions. 3 Interface Connector Used to connect to the cradle, or AC adapter.
Cradle ##### 1 Interface Connector You can connect a Sony handheld. 2 HotSync Button Data in the Sony handheld can be synchronized with the data saved on a computer. For more detailed information, see “Exchanging and Updating Data Using HotSync Operations” in the Sony handheld Operating Instructions. 3 Cradle Indicator When you connect the AC Adapter to the cradle and place the Sony handheld on the cradle, this indicator lights in green and charging will start.
Screen 1 Battery Remaining Amount Display Display of remaining on battery. 2 Home Icon Tap this icon and the Application Launcher appears displaying a list of applications. 3 Menu Icon Tap this icon and a menu of current applications appears. 4 Contrast Adjustment Icon* Tap this icon to adjust the contrast of the Sony handheld screen. *If the digitizer preferences are not set correctlly, this screen does not appear. Please set the preferences correctly.
5 Application Icon Tap this icon to select an application. 6 Scroll Bar Drag this bar to scroll the screen. 7 Calculator Icon ##### Tap this icon to open the Calculator. 8 Find Icon Tap this icon to open the find screen. 9 Graffiti Writing Area This area is for hand-writing input with Graffiti text.
Charging Sony Handheld Charging with the cradle Note Before you use the Sony handheld for the first time, be sure to charge it. Connect the supplied cradle of Sony handheld to an AC adapter in advance. Charging will start automatically by putting Sony handheld on the cradle. The first time charge take about 3 hours. Subsequent charges (on a frequent basis) will require less time.
Basic Operations With Sony handheld, you can use the supplied stylus to enter characters or specify an application you want to execute. Taking out the stylus The stylus is stored on the back side of your Sony handheld. Pull it out as needed when using Sony handheld. Take out the stylus. In order to avoid losing the stylus, always put it back into its holder on Sony handheld after using.
Dragging Just as you use a mouse pointer to drag an item on your computer’s screen, you can drag an item on your Sony handheld screen by touching lightly on the item with the stylus and moving the stylus along the screen surface. Touch the desired item on the screen with the stylus and move it along the screen surface (drag). Examples of dragging: By dragging the scrollbar, you can view the portion of data that is not displayed on the screen.
Using the Jog Dial navigator Sony handheld is also designed to allow all major operations to be performed using only the Jog Dial navigator, so you can use Sony handheld with just one hand, and not use the stylus. The icons of application which can be performed by the Jog Dial navigator have the mark. mark Rotating the Jog Dial navigator You can rotate the Jog Dial navigator to select various items in succession or to select an application to start.
Turning on and performing initial settings of Sony handheld Turn on your Sony handheld and perform the initial settings required for operation. You can familiarize yourself with your Sony handheld by following this procedure. 1 Press the Sony handheld power button. Sony handheld is turned on, and the Welcome screen appears. After a while, the Setup screen appears. 2 Take out the Stylus, and tap anywhere on the screen.
4 Following the instruction on the screen, tap the center of the displayed mark. If the Digitizer is not configured correctly, problems may occer. For example, the scroll bar may not operate properly, or “tapping” may not produce the desired results. If tapping is not recognized correctly, please re-configure the Digitizer from the beginning. See “Changing the digitizer preferences” in the Sony handheld Operating Instructions for more information on setting the Digitizer.
9 Tap the area surrounded by the Set Date frame. The Set Date screen appears. 10 Tap or next to the year at the top of the screen to adjust the year. 11 Tap the current month, then tap the current date. The date is set correctly, and the screen returns to the time/date setup screen. 12 Tap Next. The Enter Data screen appears. 13 Tap Done. The initial settings are complete, and the Sony handheld Home screen appears. You can now use the Sony handheld.
Entering Data in Your Sony Handheld Using the onscreen keyboard You can open the onscreen keyboard anytime you need to enter text or numbers on your organizer. Note that you cannot enter Graffiti characters while using the onscreen keyboard. 1 Open any application (such as Memo Pad). 2 Tap any record, or tap New. 3 Tap "a" to open the alphabetic keyboard, or tap "1" to open the numeric keyboard.
Using Graffiti writing to enter data You can use Graffiti writing commands to create letters, numbers, punctuation, and symbols. The Graffiti writing strokes include all letters, numbers, and symbols found on a standard keyboard. Writing Graffiti characters Most people find they can enter text quickly and accurately with only minutes of practice. Graffiti writing includes any character you can type on a standard keyboard.
To write Graffiti letters 1 Tap the screen where you want your text to go. Note You need to tap above the Graffiti writing area, and you must see a flashing cursor before you write the text. Use the tables on the following pages to find the stroke shape for the letter you want to create. For example, the stroke shown below creates the letter "n". Entering Data in Your Sony handheld 2 Note There are two different stroke shapes available for some letters.
z When using Graffiti writing, keep these tips in mind: • Accuracy improves when you write large characters, You should draw strokes that nearly fill the Graffiti writing area. • To delete characters, simply set the insertion point to the right of the character you want to delete and make the backspace stroke (a line from right to left) in the Graffiti writing area. • Write at natural speed. Writing too slowly can generate recognition errors. • Do not write on a slant.
Space Backspace Carriage Return Period Tap twice. You can make capital letters with the same stroke shapes as the basic alphabet characters. To make capital letters, you must first "shift" to caps — just as you press the Shift key on a keyboard — and then write the character strokes. Note Graffiti writing includes a feature that automatically capitalizes the first letter when you create a new sentence or a new record (by tapping New or a blank line).
Writing numbers Writing numbers with Graffiti writing is similar to writing letters of the alphabet, except that you make the character strokes on the right-hand side (numbers side) of the Graffiti writing area. Number Strokes Number 0 5 1 6 2 7 3 8 4 9 Strokes Writing punctuation marks Graffiti writing can create any punctuation symbol that you can enter from a standard keyboard. All punctuation marks begin with a single tap on the Graffiti writing area.
Symbol Stroke Symbol Dash — Comma , Left Paren ( Apostrophe ‘ Right Paren ) Question ? Slash / Exclamation ! Dollar $ Entering Data in Your Sony handheld Period . Stroke Additional Graffiti punctuation Writing symbols and extended characters All symbols and extend characters begin with the stroke in the Graffiti writing area of Sony handheld: Symbol Shift When the Symbol Shift is active, a slanted shift symbol appears in the lower-right corner of the screen.
, + ± × : = , c Y = ƒ ∅ ,, . ? ! ,, • Writing accented characters To create accented characters, draw the stroke normally used to create the letter, followed by an accent stroke. Graffiti writing then adds the accent to the letter. For example, the following diagram shows the strokes required to draw an accented "e".
Command Stroke Move cursor right Move cursor left Previous field (Address Book only) Open Address Record (Address Book only) Using Graffiti ShortCuts Graffiti ShortCuts make entering commonly used words or phrases quick and easy. ShortCuts are similar to the Glossary or Autotext features of some word processors. Graffiti writing comes with several predefined ShortCuts, and you can also create your own. Each ShortCut can represent up to 45 characters.
Using your computer keyboard If you have a lot of data to enter, or prefer to use the computer keyboard, you can use Palm™ Desktop for Sony software or any supported PIM to enter information. You can then perform a HotSync® operation to synchronize the information on your computer with the information on your Sony handheld. All the main applications on your Sony handheld are also available in Palm Desktop for Sony software and in most PIMs, so you don't need to learn different applications.
To import data 1 Open Palm Desktop for Sony software. 2 Click the application into which you want to import data. 3 If you are importing records that contain a field with category names, do the following: 4 From the File menu, choose Import. 5 Select the file you want to import. 6 Click Open. 7 To import data into the correct Palm Desktop for Sony fields, drag fields in the left-hand column so that they are opposite the corresponding imported field on the right .
Connecting Sony Handheld to Your Computer What you can do with Sony handheld and computer in combination You can use Palm Desktop for Sony software to utilize many functions of the Sony handheld applications on your computer. You can also use HotSync feature to easily synchronize data between Sony handheld and your computer. Using the same Sony handheld application on your computer You can copy and edit data from the Date Book, Address Book, To Do List, Memo Pad, and Expense on your computer.
Installing the Palm Desktop for Sony software Computer system requirements To install and operate the Palm Desktop for Sony software, your computer system must meet the following requirements: • CPU: Pentium processor 90MHz or greater (MMX technology Pentium processor recommended) • RAM: 32 MB or more (64 MB or more recommended) • Hard disk drive: 64 MB or more available space • Display: High Color or more (640 x 480 pixels or more/800 x 600 pixels or more recommended) • CD-ROM drive • Mouse or similar poi
2 Insert the Install CD-ROM into the CD-ROM drive of the computer. The installer menu appears. 3 Click Install Palm Desktop for Sony. The Palm Desktop for Sony software installation begins. Follow the instructions shown on the screen. When the installation is finished, Sony Handheld Registration screen appears. 4 Fill in the customer registration following the instructions shown on the screen. You need Internet access for the online customer registration.
Place the Sony handheld on the cradle Place the Sony handheld on the cradle, so that your computer can recognize the Sony handheld. Place the Sony handheld on the cradle. 2 Press the HotSync button of the cradle. The USB Driver Installation Wizard appears and the driver is installed. Follow the instructions on the screen. The driver installation screen appers. Follow the instruction on the screen to install the driver.
To uninstall the Palm Desktop for Sony software 1 From the Windows Start menu, click Settings, and click Control Panel. The Control Panel appears. 2 Double-click the Add/Remove Programs icon. The Add/Remove Programs window appears. 3 Click the Install/Uninstall tab. For Windows® 2000 Professional, click Change/Remove Programs. 4 Select Palm Desktop, and click Add/Remove. For Windows® 2000 Professional, select Palm Desktop from Currently Installed Programs, then click Delete. 5 Click Yes.
Additional Information Customer registration If you do not fill out the customer registration soon after installing PalmDesktop for Sony software, follow the instructions below to complete the registration. 1 Click Sony Handheld Registration icon on the desktop of Windows. The Sony Handheld Registration screen appears. Click http://www.sony.com/peg/registration. Your computer is connected to the Internet and the Web page for user registration is displayed. 3 Follow the instructions on the screen.
Which manual to read? This section provides brief description on the other manuals provided with Sony handheld. Refer to each manual as needed. ❏ Operating Instractions This manual provides detailed description on how to use Sony handheld, beginning with basic Information. After reading this “Read This First”, be sure to read this manual also. ❏ PictureGear Pocket Operating Instructions This manual provides detailed description on how to use picture album application included with Sony handheld.
Opening the gMedia Operating Instructions The Operating Instructions in PDF format is included in the gMedia application attached to the gMedia software. The procedure to access the Operating Instructions is as follows: 1 Insert the supplied Install CD-ROM to the CD-ROM drive on your computer. 2 After the Installation menu appears, click Exit. Installation menu closes. Open the Windows® Explorer, then double-click the CDROM drive. The file directories of Install CD-ROM appear.
Printed in Japan