3-868-186-12 (1) Glasstron Operating Instructions US Mode d’emploi FR WARNING YOUR FAILURE TO FOLLOW THESE OPERATING INSTRUCTIONS MAY RESULT IN EYE FATIGUE, EYE DAMAGE, OR OTHER INJURY. CAREFULLY READ THIS INSTRUCTION MANUAL AND BECOME FAMILIAR WITH ALL SAFETY INSTRUCTIONS FOR THIS PRODUCT. THIS PRODUCT SHOULD NOT BE USED BY CHILDREN AGE 15 OR YOUNGER. IF YOU HAVE BEEN DIAGNOSED WITH EYE DISEASE OR EYE INJURY, CONSULT YOUR DOCTOR BEFORE USE AND DO NOT USE WITHOUT YOUR DOCTOR’S APPROVAL.
WARNING To prevent fire or shock hazard, do not expose the unit to rain or moisture. This symbol is intended to alert the user to the presence of uninsulated “dangerous voltage” within the product’s enclosure that may be of sufficient magnitude to constitute a risk of electric shock to persons. This symbol is intended to alert the user to the presence of important operating and maintenance (servicing) instructions in the literature accompanying the appliance.
INFORMATION This equipment has been tested and found to comply with the limits for a Class B digital device, pursuant to Part 15 of the FCC Rules. These limits are designed to provide reasonable protection against harmful interference in a residential installation. This equipment generates, uses, and can radiate radio frequency energy and, if not installed and used in accordance with the instructions, may cause harmful interference to radio communications.
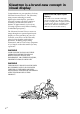
Glasstron is a brand-new concept in visual display Congratulations on your purchase of a Sony Glasstron Personal Viewer. The Glasstron, using current technology in small, lightweight visual displays, provides a television viewing experience similar to watching a 52-inch television from a distance of approximately 6.6 feet (2 m). (Viewing experience may differ according to individual perception.
Table of Contents SAFETY INSTRUCTIONS .............................................. 6 About the Glasstron ...................................................... 11 Getting Started Checking the supplied accessories ............................. 12 Locating the parts and controls ................................... 13 Connecting the Glasstron ............................................. 14 Connecting video equipment ................................ 14 Connecting other equipment ............................
SAFETY INSTRUCTIONS THE SONY GLASSTRON PERSONAL VIEWER SHOULD BE USED IN STRICT ACCORDANCE WITH ALL INSTRUCTIONS TO PREVENT EYE OR OTHER INJURY, LOSS OF VISUAL FUNCTIONS, PROPERTY DAMAGE, OR DEATH. USE RESTRICTIONS Warning: No Use by Children Age 15 or Younger. This product is designed for adult use. The eyes of children are still developing and may be adversely affected by use of this product, and it may cause eye fatigue, eye damage, or loss of visual functions.
Health Concerns Warning: Eye Fatigue/Eye Damage/Loss of Visual Functions. Misuse or overuse of this product may result in eye fatigue, eye damage, or loss of visual functions. Stop using if you feel tired or experience headaches or discomfort. Warning: No Use by Children Age 15 or Younger. This product is designed for adult use. The eyes of children are still developing and may be adversely affected by use of this product, and it may cause eye fatigue, eye damage, or loss of visual functions.
SAFETY INSTRUCTIONS (continued) Health Concerns Caution: Motion Sickness from External Motion. Do not use this product while subject to external motion –– for example, as a passenger in a car. Use of this product under these conditions may cause motion sickness. Caution: Accidents. Do not use this product while walking, skating, bicycling, operating a motor vehicle or other power equipment, or while engaged in any other similar activity.
Instructions for Safe Fit Warning: Proper Fit. Each time this product is used, adjustment screens will appear requiring the viewer to properly fit the product. Failure to properly fit the product each time may result in eye fatigue, eye damage, or loss of visual functions and may result in accident or injury. For instructions on how to properly fit this product, see pages 18 through 23. Warning: No Use by Children Age 15 or Younger. This product is designed for adult use.
SAFETY INSTRUCTIONS (continued) Warnings for Electronic Products Caution: Electric Shock. Failure to observe all operating and maintenance instructions may cause damage to your product and may result in property damage or injury or death from electric shock, fire, or other cause. Caution: Do Not Disassemble. Any required service on this product should be performed by an authorized service technician.
About the Glasstron Caution: The screen is always right in front of you. The Glasstron is a face-mounted display. With this type of display, the screen is always in front of you, even if you move your head. Because of this feature, you can concentrate on the screen more easily compared with ordinary TVs, and you have a sense of being in the action. Getting Started • It is easy to adjust the Glasstron to your eyes. You can use the display unit even while wearing glasses.
Checking the supplied accessories Check that the following accessories are supplied with your Glasstron. If any item is not supplied, contact your Sony dealer or local authorized Sony service facility.
Locating the parts and controls Refer to the pages indicated in parentheses ( ) for details.
Connecting the Glasstron Connecting video equipment Connect a VCR, laser disc player, DVD player, or camcorder to the power supply box as shown below. VCR, laser disc player, DVD player, camcorder, etc.
Connecting other equipment The plug adaptor (phonojack y phonojack) is supplied. Use the plug adaptor according to the equipment you want to connect. Getting Started TV game, DVD player, camcorder, etc.
Connecting the Glasstron (continued) If your video equipment has an S video jack We recommend connecting the Glasstron to your video equipment using an S video cable and the audio/video cable to enjoy the highest quality pictures. In this case, you do not need to connect the video (yellow) plug. If you connect both the S video and video plugs, the S video signal is automatically selected. Power supply box VCR, Laser disc player, DVD player, camcorder, etc.
Connecting the power source Connect the AC power adaptor AC-PLM2 (supplied) to a wall outlet. Do not connect the power source until all other connections are complete.
Wearing the Glasstron WARNING • Failure to properly fit the product (see “Proper Fit,” page 9) each time may result in eye fatigue, eye damage, or loss of visual functions and may result in accident or injury. • This product should not be used by children age 15 or younger. The eyes of children are still developing and may be adversely affected by use of this product, and it may cause eye fatigue, eye damage, or loss of visual functions. In addition, this product may not be adjusted to fit a child’s head.
3 Adjust the width of the side pieces. Using side piece adjusters Getting Started There are two settings for the side piece width adjustment. If the fit seems loose, insert the side piece adjusters to the hinges of the left and right side pieces. Not using side piece adjusters To use the side piece adjusters 1 This is the original position. Normally keep adjusters here.
Wearing the Glasstron (continued) For increased comfort while wearing Glasstron If the Glasstron fit is loose or uncomfortable, place the supplied side piece pads onto the tip of each side piece. Note Use the side peace pads pocket-side inward. 4 Wear the stereo earphones. Detach the stereo earphones from the display unit and put them in your ears. Notes • If the stereo earphones are loose, we recommend using the spare ear-pads (not supplied).
Using the Glasstron If you set the user lock , unlock it (page 25). Before you start… Be sure to follow the procedures in “Connecting the Glasstron” (pages 14-17) and “Wearing the Glasstron” (pages 18-20). WARNING Each time this product is used, adjustment screens will appear, requiring the viewer to properly fit the product. To prevent eye damage, do not use this product if the vertical lines do not cross the horizontal line on the next screen. The Glasstron includes two small (left and right) LCDs.
Using the Glasstron (continued) 2 If the screens are aligned, press the START/BATT CHECK button. Left screen Right screen You may see a horizontal line on the left screen rather than the right screen and vertical lines on the right screen rather than the left screen. This is not a malfunction. Correct The combined picture you see with both eyes If the image you see matches one of the pictures below, you have correct screen alignment.
3 Start playback on the video equipment connected to the Glasstron. 4 Adjust the volume by turning the VOL control. When you set the AVLS ON/OFF switch to ON, you cannot turn up the volume beyond the defined limit (see page 24). VOL lower 6 Check that the four corners of the screen are clear. If the four corners of the screen are not clear, do the step 2 (page 22) to check the screen position alignment again. Operations 5 louder Adjust the brightness by turning the BRIGHT control.
Using the Glasstron (continued) After you finish using the Glasstron Take off the Glasstron, and turn off the power. Note on the LCDs The LCD screen is made with highprecision technology. However, black points or bright points of light (red, blue, or green) may appear constantly on the LCD screen. This is not malfunction. (Effective dots: more than 99.
Setting the user lock WARNING This product should not be used by children age 15 or younger. The eyes of children are still developing and may be adversely affected by use of this product. To prevent such use, this product is equipped with the user lock system. When the user lock is on, audio and video signals are not input and all operations except power on/off are disabled. To use the Glasstron, unlock the user lock. 1 Set the user lock switch as shown in the illustration. USER LOCK VERR.
Using an optional battery pack If you use a battery pack such as the NP-F550, you can use the Glasstron without connecting to a wall outlet. Charge the battery pack before use by using the optional battery charger, BC-V615. You cannot charge the battery pack while it is on the unit. 1 Slide the BATT/COVER RELEASE button to remove the cover. When not using the unit, keep the cover on the power supply box. BATT/COVER RELEASE button 2 Attach the battery pack to the power supply box.
Checking the remaining battery life When the battery pack is weak, the following message appears on the screen. Replace the battery pack with a charged one. When no indication or caution appears on the screen, press the START/ BATT CHECK button. BATTERY DOWN PILE PLATE The remaining battery life appears and the picture disappears. START/BATT CHECK When using the AC power adaptor, the “ ” mark appears on the screen.
Precautions Use Installation • Operate the product only with the supplied AC power adaptor (AC-PLM2). If you use a different AC power adaptor, it may cause a malfunction. • To prevent internal heat buildup, do not block the ventilation openings. • Avoid operating the product at temperatures below 41°F (5°C). • Do not subject the product to high temperature or direct sunlight. If you do not observe the above instructions, the product may become deformed and the screens may become impossible to align.
• • • • If the nose piece is disconnected Reinsert the nose piece to its position. Insert B to A. If the side pieces are disconnected You can reattach the side piece. Insert the side piece to the inner side of the display unit. Gently push until it clicks into position. However, reattaching the side pieces may cause a malfunction. Be careful not to reattach them too often. Window coating To avoid reflection, the windows are coated.
Troubleshooting If you have any questions or problems not listed below, contact your Sony dealer or local authorized Sony service facility. Symptom Cause The playback picture does Connections are incorrect. not appear. The picture is dark or dim. Unlock the user lock (page 25). You are not wearing the Glasstron correctly. Put on the Glasstron correctly (pages 18 - 20). The window (where the picture is displayed) is dirty. Adjust the brightness (page 23).
Specifications A Accessories supplied 12 AC power adaptor 17 Adjusting brightness 23 nose piece 18 side pieces' width 19 volume 23 AVLS 24 B Battery pack 26 C, D, E, F, G, Checking the screen position alignment 22 Connection battery pack 26 power 17 video equipment 14 - 16 H Health concerns 7, 8 I, J, K, L, M, N, O Instructions for safe fit 9 P, Q Precautions 28 R Remaining battery life 27 S, T Safety instructions 6 - 10 Screen alignment 22 Stereo earphones 20 U, V User lock 25 W, X, Y, Z Addit
AVERTISSEMENT Pour éviter tout risque d’incendie ou de décharge électrique, ne pas exposer cet appareil à la pluie ou à l’humidité. AVERTISSMENT Le cordon d'alimentation secteur ne peut être remplacé que dans un centre de service après-vente qualifié. ATTENTION Pour éviter tout risque d’électrocution, faites correspondre la lame large de la fiche avec la fente large de la prise et enfichez-la complètement.
FR 3-FR
Le Glasstron incarne un tout nouveau concept de système d’affichage. Nous vous remercions d’avoir fait l’acquisition d’une visionneuse individuelle Glasstron Sony. Le Glasstron, qui fait appel aux technologies modernes de systèmes d’affichage miniaturisés légers, assure une expérience télévisuelle comparable au visionnage sur un écran de 52 pouces à une distance d’approximativement 2 m (6,6 pieds). (Les impressions de visionnage peuvent varier suivant les facultés de perception individuelles.
Table des matières INSTRUCTIONS DE SECURITE ................................... 6 A propos du Glasstron ................................................. 11 Préparation Vérification des accessoires fournis ............................ 12 Localisation des composants et des commandes ..... 13 Raccordement du Glasstron ........................................ 14 Raccordement d’un appareil vidéo ....................... 14 Raccordement d’un autre appareil ......................
INSTRUCTIONS DE SECURITE LA VISIONNEUSE INDIVIDUELLE GLASSTRON SONY DOIT ETRE UTILISEE EN STRICTE CONFORMITE AVEC TOUTES LES INSTRUCTIONS AFFERENTES AFIN D’EVITER LES BLESSURES AUX YEUX ET AUTRES, LA PERTE DE FONCTIONS VISUELLES, LES DOMMAGES AUX BIENS ET D’ECARTER LES DANGERS DE MORT. RESTRICTIONS D’UTILISATION Avertissement: Cet appareil ne peut être utilisé par des enfants âgés de 15 ans ou moins. Cet appareil est destiné à l’usage adulte.
INFORMATIONS DE SECURITE COMPLEMENTAIRES A. Problèmes de santé - Voir pages 7 à 8. B. Instructions d’ajustage - Voir page 9. C. Avertissements relatifs aux appareils électroniques - Voir page 10. Problèmes de santé Avertissement: Fatigue oculaire, affections oculaires, perte de fonctions visuelles. Une utilisation inappropriée ou excessive de cet appareil peut entraîner une fatigue oculaire, des affections oculaires ou encore la perte de fonctions visuelles.
INSTRUCTIONS DE SECURITE (suite) Problèmes de santé Attention: Mal des transports résultant du visionnage Certains utilisateurs ressentent des symptômes de mal des transports, des maux de tête ou des nausées en visionnant des films ou des enregistrements vidéo, et plus particulièrement s’ils comportent des scènes d’action intense et très animées. Si vous ressentez l’un de ces symptômes, interrompez immédiatement l’utilisation de cet appareil.
Instructions d’ajustage Avertissement : Ajustez correctement la visionneuse. Chaque fois que cet appareil est utilisé, les écrans de réglage s’affichent pour inviter l’utilisateur à ajuster correctement l’appareil. La négligence de cette précaution à chaque utilisation peut provoquer une fatigue ou des troubles oculaires, ou encore la perte de fonctions visuelles et entraîner un accident ou des blessures. Pour des instructions détaillées sur l’ajustage de cet appareil, reportez-vous aux pages 18 à 23.
INSTRUCTIONS DE SECURITE (suite) Avertissements relatifs aux appareils électroniques Attention: Electrocution La non-observation de toutes les instructions d’utilisation et d’entretien peut endommager votre visionneuse et entraîner des dommages aux biens ou encore des blessures, voire la mort, à la suite d’une électrocution, d’un incendie ou d’une autre cause. Attention: Ne pas démonter Les opérations d’entretien de cet appareil doivent être confiées au personnel d’entretien qualifié.
A propos du Glasstron Attention: L’écran se trouve toujours droit devant vous. Le Glasstron est un écran d’affichage à placer sur le visage. Avec ce type d’affichage, l’écran se trouve toujours devant vous, même si vous tournez la tête. Cette caractéristique vous permet de vous concentrer sur l’écran plus facilement qu’avec des téléviseurs ordinaires, et vous avez réellement l’impression d’être en pleine action. Préparation • Le Glasstron s’ajuste facilement.
Vérification des accessoires fournis Vérifiez si les accessoires suivants vous ont été fournis avec votre Glasstron. S’il manque l’un de ces accessoires, veuillez consulter votre revendeur Sony ou un centre de service après-vente Sony agréé.
Localisation des composants et des commandes Pour plus de détails, reportez-vous aux pages indiquées entre parenthèses ( ).
Raccordement du Glasstron Raccordement d’un appareil vidéo Raccordez un magnétoscope, un lecteur de disques laser, un lecteur DVD ou un caméscope au bloc d’alimentation comme illustré ci-dessous. Magnétoscope, lecteur de disques laser, lecteur DVD, caméscope, etc.
Raccordement d’un autre appareil L’adaptateur de fiche (prise phono y prise phono) est fourni. Utilisez l’adaptateur de fiche en fonction de l’appareil que vous voulez raccorder. Préparation Jeu vidéo, lecteur DVD, caméscope, etc.
Raccordement du Glasstron (suite) Si votre appareil vidéo dispose d’une prise S vidéo Nous vous recommandons de raccorder le Glasstron à votre appareil vidéo à l’aide du câble S vidéo et du câble audio/vidéo pour bénéficier des images de la plus haute qualité possible. Dans ce cas, vous ne devez pas raccorder la fiche vidéo (jaune). Si vous raccordez les fiches S vidéo et vidéo, le signal S vidéo sera automatiquement sélectionné.
Raccordement de la source d’alimentation Raccordez l’adaptateur secteur AC-PLM2 (fourni) à une prise murale. Ne raccordez pas la source d’alimentation avant d’avoir terminé tous les autres raccordements.
Port du Glasstron AVERTISSEMENT • La négligence de cette précaution (voir “Ajustez correctement la visionneuse” à la page 9) à chaque utilisation peut provoquer une fatigue ou des troubles oculaires, ou encore la perte de fonctions visuelles et entraîner un accident ou des blessures. • Ce produit ne doit pas être utilisé par des enfants de 15 ans ou moins. Les yeux des enfants sont en plein développement et peuvent être affectés par l’utilisation de ce produit.
3 Ajustez la largeur des branches Pour régler l’ajustement des branches 1 Il s’agit de la position d’origine. En principe, laissez les dispositifs de réglage dans cette position. 2 Tournez légèrement les branches vers l’intérieur et pressez ensuite délicatement les parties supérieure et inférieure du dispositif de réglage des branches et tirez vers l’extérieur pour le dégager. ajustement de branche Avec ajustement des branches Préparation Il y a deux positions de réglage de la largeur des branches.
Port du Glasstron (suite) Pour un confort accru lorsque vous portez le Glasstron Si le Glasstron ne s’adapte pas correctement ou procure une sensation d’inconfort, glissez les coussinets fournis sur l’extrémité des branches. Remarque Utilisez les coussinets des branches vers l'intérieur. 4 Mettez les écouteurs stéréo sur les oreilles. Enlevez les écouteurs stéréo de l’unité d’affichage et mettez-les dans les oreilles.
Utilisation du Glasstron Si vous réglez le verrou utilisateur, déverrouillez-le (page 25). Avant de commencer... Appliquez les procédures de “Raccordement du Glasstron” (pages 14-17) et de “Port du Glasstron” (pages 18 - 20). AVERTISSEMENT Chaque fois que cet appareil est utilisé, les écrans de réglage s’affichent pour inviter l’utilisateur à ajuster correctement l’appareil.
Utilisation du Glasstron (suite) 2 Si les écrans sont alignés, appuyez sur START/BATT CHECK. Ecran gauche Ecran droit Il se peut que vous voyiez une ligne horizontale sur l’écran gauche plutôt que l’écran droit et des lignes verticales sur l’écran droit plutôt que l’écran gauche. Il ne s’agit pas d’un dysfonctionnement. Correct Image combinée que vous voyez avec les deux yeux. Si l’image que vous voyez correspond à l’une des images ci-dessous, c’est que l’alignement des écrans est correct.
3 Démarrez la lecture sur l’appareil vidéo raccordé à la visionneuse Glasstron. 4 Ajustez le volume en tournant la commande VOL. Si vous réglez le commutateur AVLS ON/OFF sur ON, vous ne pouvez pas augmenter le volume au-delà de la limite définie (voir page 24). VOL moins fort plus fort Vérifiez si les quatre angles de l’écran sont clairs. 6 Ajustez la luminosité à l’aide de la commande BRIGHT.
Utilisation du Glasstron (suite) Après avoir utilisé le Glasstron Retirez le Glasstron et mettez-le hors tension. Remarque sur l’écran LCD L’écran LCD fait appel à des technologies de haute précision. Il se peut toutefois que de minuscules points noirs et/ou lumineux (de couleur rouge, bleue ou verte) apparaissent de manière constante sur l’écran LCD. Il ne s’agit pas d’un dysfonctionnement.
Réglage du verrou utilisateur AVERTISSEMENT Ce produit ne doit pas être utilisé par des enfants de 15 ans au moins. Les yeux des enfants sont en plein développement et peuvent être affectés par l’utilisation de ce produit. Pour éviter que des enfants n’utilisent l’appareil, il est muni d’un verrou utilisateur. Lorsque le verrou utilisateur est activé, les signaux audio et vidéo ne sont pas entrés et toutes les opérations sauf la mise sous/hors tension sont désactivées.
Utilisation de la batterie en option Avec une batterie comme une NP-F550, vous pouvez utiliser le Glasstron sans le raccorder à une prise murale. Chargez la batterie avant de l’utiliser à l’aide d’un chargeur de batterie BC-V615 en option. Vous ne pouvez pas charger la batterie alors qu’elle se trouve sur le Glasstron. 1 Faites coulisser le bouton BATT/COVER RELEASE pour déposer le couvercle. Lorsque vous n’utilisez pas l’appareil, laissez le couvercle sur le bloc d’alimentation.
Vérification de l’autonomie résiduelle de la batterie Si aucune indication ni avertissement n’apparaît sur l’écran, appuyez sur le bouton START/BATT CHECK. Lorsque la batterie faiblit, le message suivant apparaît à l’écran. Remplacez-la par une batterie chargée. BATTERY DOWN PILE PLATE L’autonomie résiduelle de la batterie apparaît et l’image disparaît. START/BATT CHECK Si vous utilisez l’adaptateur secteur, le symbole “ ” apparaît à l’écran.
Précautions Utilisation • Faites uniquement fonctionner cet appareil au moyen de l’adaptateur secteur (AC-PLM2) fourni. L’utilisation d’un autre adaptateur secteur risque de provoquer un dysfonctionnement. • Fiche à polarité unifiée • Si un liquide ou un solide venait à s’introduire à l’intérieur du boîtier, débranchez l’appareil et faites-le vérifier par un technicien compétent avant de le remettre en service. • Mettez toujours l’appareil hors tension lorsque vous ne l’utilisez pas.
• • • • Si le pontet s’enlève Réinstallez-le en position. Si les branches se démontent Vous pouvez les réinstaller. Introduisez les branches dans la partie intérieure de l’unité d’affichage. Poussez délicatement jusqu’à ce qu’elles s’encliquettent en position. La réinstallation des branches risque cependant de provoquer un dysfonctionnement. Veillez à ne pas les remonter trop souvent. Revêtement des verres Pour éviter les reflets, les verres sont revêtus.
Dépannage Si vous avez des questions ou des problèmes qui ne figurent pas dans cette liste, consultez votre revendeur Sony ou un centre de service après-vente Sony agréé. Symptômes Cause Remèdes L’image de lecture n’apparaît pas. Les connexions sont incorrectes. Branchez correctement les appareils (pages 14 - 17). Le verrou utilisateur est réglé. Déverrouillez le verrou utilisateur (page 25). L’image est sombre ou foncée. Vous ne portez pas correctement le Glasstron.
Spécifications Index Alimentation Adaptateur secteur: AC-PLM2 100-240 V CA, 50/60 Hz, 16 W Tension de sortie 9 V, 1,3 A Batterie: NP-F550 (non fournie) Consommation électrique 1,7 W Approx. Température d’utilisation 5°C à 35°C (41°F à 95°F) Température de stockage –10°C à 60°C (14°F à 140°F) Dimensions Unité d’affichage: Approx. 173 × 53 × 56 mm (Approx. 6 7/8 × 2 1/8 × 2 1/4 po) (l/h/p, repliée) A Bloc d’alimentation: Approx. 53 × 39 × 104 mm (Approx.
Sony Corporation Printed in Japan