
User Manual
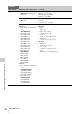

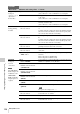
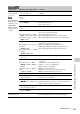
Table Of Contents
- Table of Contents
- Overview
- Preparations
- Recording
- Basic Operation Procedure
- Selecting the Video Format
- Switching the ND Filters
- Using the 5600K CC Filter
- Adjusting the White Balance
- Adjusting the Black Balance
- Displaying the Markers and Zebra Patterns
- Setting the Gain
- Setting the Electronic Shutter
- Adjusting the Iris
- Adjusting the Zoom
- Adjusting the Focus
- Reducing Flickers
- Setting the Time Data
- Recording Audio Signals
- Outputting the Color Bars and Reference Tone
- Recording Shot Marks
- Adding the OK Mark
- Rec Review
- Changing Functions of the Assignable Buttons
- Interval Recording
- Frame Recording
- Picture Cache Recording
- Slow & Quick Motion Recording
- Freeze Mix: Image Alignment
- Picture Profiles
- Deleting Clips
- Operating Planning Metadata
- Playback
- Thumbnail Screens
- Playing Back Clips
- Clip Operations
- Clip Operation Menus
- Basic Operations of the Clip Operation Menus
- Displaying the Detailed Information of a Clip
- Adding/Deleting the OK Mark to/from a Clip (HD Mode Only)
- Copying Clips
- Deleting Clips
- Displaying the EXPAND CLIP Screen
- Displaying the SHOT MARK Screen (HD Mode Only)
- Adding/Deleting Shot Marks (HD Mode Only)
- Changing the Index Frame (HD Mode Only)
- Dividing a Clip (HD Mode Only)
- Status Displays
- Menu Configuration and Detailed Settings
- Storing/Retrieving the Setting Data
- Connecting External Devices
- Appendixes

Setup Menu List
127
Menu Configuration and Detailed Settings
Clip
Setting for clip
name or deletion
Auto Naming
Title / Plan
Select the method to specify clip names.
Title: To specify as desired by “Title Prefix”
Plan: To use a name specified in planning metadata (if no
name is specified in planning metadata, the name specified
by “Title Prefix” is used.)
Title Prefix
nnn_ (nnn=least three digits of
the serial number)
(Max. 7 characters displayed)
Call the Character Set screen to set the title part (4 to 46
characters) of the clip names.
Configuration of the Character Set screen
Character selection area (3 lines):
To select a character to insert in the cursor position of the
Title Prefix area.
!#$%()+,-.=@[]^_~0123456789
abcdefghijklmnopqrstuvwxyz
ABCDEFGHIJKLMNOPQRSTUVWXYZ
Cursor operation area (1 line):
Space: To change the character in the cursor position to a
space
INS: To insert a space in the cursor position
DEL: To delete a character in the cursor position
T: To move the cursor to the left
t: To move the cursor to the right
ESC: To cancel the change and exit the Character Set
screen
END: To validate the change and exit the Character Set
screen
Title Prefix area (1 line):
For entering the title
To set the title
1 Turn the jog dial to select (highlight) a character in the
character selection area to be entered in the cursor position
of the Title Prefix area. Then press the jog dial. (The
selected character is entered and the cursor moves to the
right.)
2 Repeat step 1 for setting the title. (Use Space, INS, and DEL
as required.)
3 When the title setting is completed, select END to exit the
Character Set screen.
Number Set
000l to 9999
Set the 4-numeric part of the clip name.
Update
Media(A) / Media(B)
To update the managerial file on the SxS memory card in the
selected slot.
1)
(Select “Execute” on the confirmation screen to begin.)
Last Clip DEL
Execute / Cancel
Select “Execute” to delete the last recorded clip.
All Clips DEL
Execute / Cancel
Select “Execute” to delete all clips on the active SxS memory
card.
Note
Clips to which you applied OK mark cannot be deleted.
OTHERS
Menu items Subitems and setting values Contents