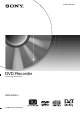
2-636-510-11(3) DVD Recorder Operating Instructions RDR-GXD310 © 2005 Sony Corporation
CAUTION Important Information Should you experience a problem with this recorder, please refer to the trouble shooting section on page 88. If you are unable to rectify the problem, contact the Sony Customer Information Centre on WARNING To prevent fire or shock hazard, do not expose the unit to rain or moisture. To avoid electrical shock, do not open the cabinet. Refer servicing to qualified personnel only. The mains lead must only be changed at a qualified service shop.
On recording About this manual This equipment has been tested and found to comply with the limits set out in the EMC Directive using a connection cable shorter than 3 metres. • Note that the contents of the recording cannot be compensated for under any and all conditions, including conditions that may arise due to a malfunction of this unit. • Make trial recordings before making the actual recording.
Table of Contents Important Information . . . . . . . . . . . . . . . . . . . . . . . . . . . . . . . . . . . . . . . . . . . . . . . . . . 2 WARNING . . . . . . . . . . . . . . . . . . . . . . . . . . . . . . . . . . . . . . . . . . . . . . . . . . . . . . . . . . . 2 Precautions . . . . . . . . . . . . . . . . . . . . . . . . . . . . . . . . . . . . . . . . . . . . . . . . . . . . . . . . . . 3 Ways to Use Your DVD Recorder . . . . . . . . . . . . . . . . . . . . . . . . . . . . . . . . . . . . . . . . .
Guide to Digital Services . . . . . . . . . . . . . . . . . . . . . . . . . . . . . . . . . . . 38 EPG (Electronic Programme Guide) . . . . . . . . . . . . . . . . . . . . . . . . . . . . . . . . . . . . . 38 Viewing a list of available channels . . . . . . . . . . . . . . . . . . . . . . . . . . . . . . . . . . . . 38 Viewing programmes related to a specific category. . . . . . . . . . . . . . . . . . . . . . . . 39 Programme information . . . . . . . . . . . . . . . . . . . . . . . . . . . . . . . . . . .
Erasing and Editing . . . . . . . . . . . . . . . . . . . . . . . . . . . . . . . . . . . . . . . 67 Before Editing . . . . . . . . . . . . . . . . . . . . . . . . . . . . . . . . . . . . . . . . . . . . . . . . . . . . . . . 67 Edit options for DVD-RWs (VR mode) . . . . . . . . . . . . . . . . . . . . . . . . . . . . . . . . . . 67 Edit options for DVD+RWs/DVD-RWs (Video mode)/DVD+Rs/DVD-Rs . . . . . . . . 68 Erasing and Editing a Title . . . . . . . . . . . . . . . . . . . . . . . . . . . . . . . . . . .
Ways to Use Your DVD Recorder Recording/Playback Compatible media and reference pages Quick access to recorded titles – Title List , Play the beginning of a title while it is being recorded – Chasing Playback , Watching one title while recording another – Simultaneous Rec and Play -RWVR -RWVideo +R -R “3.
Quick Guide to Disc Types Recordable and playable discs Type Icon used in this manual Disc Logo DVD+RW VR mode DVDRW Formatting (new discs) Compatibility with other DVD players (finalising) +RW Automatically formatted in +VR mode Playable on DVD+RW compatible players (automatically finalised) -RWVR Format in VR mode (page 26) Playable only on VR mode compatible players (finalisation unnecessary) -RWVideo Format in Video mode (page 26) Playable on most DVD players (finalisation necessary) (pa
Recording Features Rewrite (page 45) Auto Chapter (page 83) Editing Features Manual Chapter (page 71) Record 16:9 sizes (page 50) Change title name (page 68) Delete title (page 70) A-B Erase (page 69) Playlist (page 71) Yes Yes No No Yes Yes Yes No Yes Yes Yes Yes Yes Yes Yes Yes Yes Yes No Yes*3 Yes Yes No No No Yes No No Yes Yes*4 No No No Yes No Yes*3 Yes Yes*4 No No Discs that cannot be recorded on • 8 cm discs • DVD-Rs in VR mode (Video Recording format)
Playable discs Type Disc Logo Icon used in this manual DVD VIDEO DVD Discs such as movies that can be purchased or rented VIDEO CD VCD VIDEO CDs or CD-Rs/CD-RWs in VIDEO CD/Super VIDEO CD format CD Music CDs or CD-Rs/CD-RWs in music CD format that can be purchased CD DATA DVD — DATA DVD DVD+RWs/DVD+Rs/DVD-RWs/DVD-Rs/ DVD-ROMs containing JPEG image files DATA CD — DATA CD CD-ROMs/CD-Rs/CD-RWs containing MP3 audio tracks or JPEG image files 8 cm DVD+RW/ DVD-RW/DVD-R — — “DVD VIDEO” and
Maximum recordable number of titles Disc Number of titles* DVD-RW/DVD-R 99 DVD+RW/DVD+R 49 DVD+R DL 49 * The maximum length for each title is eight hours. Note on playback operations of DVD VIDEOs/ VIDEO CDs Music discs encoded with copyright protection technologies This product is designed to play back discs that conform to the Compact Disc (CD) standard. Recently, various music discs encoded with copyright protection technologies are being marketed by some record companies.
Hookups and Settings Hooking Up the Recorder Follow steps 1 to 7 to hook up and adjust the settings of the recorder. b Notes • • • • Plug cords securely to prevent unwanted noise. Refer to the instructions supplied with the components to be connected. You cannot connect this recorder to a TV that does not have a SCART or video input jack. Be sure to disconnect the mains lead of each component before connecting.
Step 2: Connecting the Aerial Cable Connect the aerial cable by following the steps below. Do not connect the mains lead until you reach “Step 5: Connecting the Mains Lead” on page 18.
Step 3: Connecting the Video Cords Select one of the following patterns A through D, according to the input jack on your TV monitor, projector, or AV amplifier (receiver). This will enable you to view pictures. A Connecting to a SCART input jack When you set “Line1 Output” to “S Video” or “RGB” in “Easy Setup” (page 22), use a SCART cord that conforms to the selected signal. B Connecting to a video input jack You will enjoy standard quality images.
When playing “wide screen” images Some recorded images may not fit your TV screen. To change the picture size, see page 79. If you are connecting to a VCR b Notes • Do not connect more than one type of video cord between the recorder and your TV at the same time. • You cannot use the PROGRESSIVE button with the connections B and C. • When you connect the recorder to your TV via the SCART jacks, the TV’s input source is set to the recorder automatically when you start playback.
Using the PROGRESSIVE button By using the PROGRESSIVE button, you can select the signal format in which the recorder outputs video signals: interlace or progressive. 1 Connect the recorder using the COMPONENT VIDEO OUT jacks (pattern D on page 14). 2 Set “Component Out” in “Video” setup to “On” (page 79). 3 Press the PROGRESSIVE button. “PROGRESSIVE” appears in the front panel display when the recorder outputs progressive signals.
Step 4: Connecting the Audio Cords Select one of the following patterns A or B, according to the input jack on your TV monitor, projector, or AV amplifier (receiver). This will enable you to listen to sound. This connection will use your TV’s or stereo amplifier’s (receiver’s) two speakers for sound. You can enjoy the following surround effects (page 60).
z Hint For correct speaker location, see the operating instructions supplied with the connected components. b Notes • Do not connect your TV’s audio output jacks to the LINE IN (R-AUDIO-L) jacks at the same time. This will cause unwanted noise to come from your TV’s speakers. • In the connection A, do not connect the LINE IN (RAUDIO-L) and LINE 2 OUT (R-AUDIO-L) jacks to your TV’s audio output jacks at the same time. This will cause unwanted noise to come from your TV’s speakers.
Step 6: Preparing the Remote You can adjust the remote’s signal to control your TV. If you connected the recorder to an AV amplifier (receiver), you can use the supplied remote to control the AV amplifier’s (receiver’s) volume. b Notes • Depending on the connected unit, you may not be able to control your TV or AV amplifier (receiver) with some or all of the buttons below. • If you enter a new code number, the code number previously entered will be erased.
4 Release [/1. When the TV/DVD switch is set to TV, the remote performs the following: Buttons Operations [/1 Turns your TV on or off 2 (volume) +/– Adjusts the volume of your TV PROG +/– Selects the programme position on your TV t TV/DVD Switches your TV’s input source Number buttons and SET, -/--* Selects the programme position on your TV * If you use the number buttons to select the TV’s programme position, press -/-- followed by the number buttons for two-digit numbers.
Code numbers of controllable AV amplifiers (receivers) If more than one code number is listed, try entering them one at a time until you find the one that works with your AV amplifier (receiver). The System Menu appears. 2 Select “SETUP,” and press ENTER. SETUP Code number Sony Press SYSTEM MENU.
◆ Component Out If you are using the COMPONENT VIDEO OUT jack, select “On.” Step 7: Easy Setup ◆ Line1 Output To output video signals, select “Video.” To output S video signals, select “S Video.” To output RGB signals, select “RGB.” Select “Video” to enjoy the SMARTLINK features. • If you set “Component Out” to “On,” you cannot select “RGB.” Make the basic adjustments by following the onscreen instructions in “Easy Setup.
Connecting a VCR or Similar Device Connecting to the LINE 3 jack Connect a VCR or similar recording device to the LINE 3 jack of this recorder. TV Hookups and Settings After disconnecting the recorder’s mains lead from the mains, connect a VCR or similar recording device to the LINE IN jacks of this recorder. See also the instruction manual supplied with the connected equipment. To record on this recorder, see “Recording from connected equipment without a timer” on page 55.
Connecting to the LINE 2 IN or LINE 4 IN jacks Connect a VCR or similar recording device to the LINE 2 IN or LINE 4 IN jacks of this recorder. If the equipment has an S-video jack, you can use an S-video cord instead of an audio/video cord. VCR, etc.
Connecting to a Satellite or Digital Tuner TV to SCART input Hookups and Settings Connect a satellite or digital tuner to this recorder using the LINE 3 jack. Disconnect the recorder’s mains lead from the mains when connecting the tuner. To use the Synchro-Rec function, see below. Satellite tuner, etc.
Formatting a DVD disc (Disc Info) Seven Basic Operations — Getting to Know Your DVD Recorder +RW 1. Inserting and Formatting a DVD Disc (Disc Info) Inserting a Disc +RW VCD +R -RWVR -RWVideo CD -R -RWVR -RWVideo New discs are automatically formatted when inserted. If necessary, you can manually re-format a DVD+RW or DVD-RW disc to make a blank disc. For DVD-RWs, you can select a recording format (VR mode or Video mode) according to your needs (page 8).
3 Move the cursor down the TOOLS menu until “Disc Info” is selected, and press ENTER. Example: When a DVD-RW (VR mode) is inserted. b Note Disc Information Close Disc Name Media DVD-RW Title no. Original 3 / Playlist 2 Format Date 13.10.2005 ~ 28.10.2005 HSP : 0H45M LP : 1H30M SEP : 4H00M VR Protect Disc Finalise Off SP : 1H00M EP : 2H00M Erase All Format 2. 3 / 4.
2. Recording a Programme +RW +R -RWVR -RWVideo -R This section introduces the basic operation to record the current TV programme to a disc (DVD). For an explanation of how to make timer recordings, see page 45. t TV/DVD 1 2 3 4 5 6 7 8 9 PROG +/– 4 Press z REC. Recording starts. Recording stops automatically after 8 hours of continuous recording or when the DVD is full. To stop recording Press x REC STOP located beneath the remote control cover.
Checking the disc status while recording You can check the recording information such as recording time or disc type. Press DISPLAY twice during recording. The recording information appears. 3. Playing the Recorded Programme (Title List) +RW -RWVR -RWVideo +R -R To play a recorded title, select the title from the Title List. 2 4 5 6 7 8 9 B Recording status 3 0 C Recording mode TITLE LIST D Recording time M/m, ENTER Press DISPLAY to turn off the display.
Title List with Thumbnail Images (Example: DVD-RW in VR mode) TITLE LIST ORIGINAL 3 The sub-menu appears. The sub-menu displays options applicable only to selected item. The displayed options differ depending on the model, situation, and disc type. 4.3 / 4.7GB 12 Tennis Fri 28.10. 2005 13:00 Select a title, and press ENTER. AAB (0H30M) LSP 0.9GB 11 Travel DEF Wed 26.10. 2005 20:00 (0H30M) SEP 0.3GB 10 Mystery Tue 25.10. 2005 9:00 TITLE LIST AAB (1H00M) SLP 0.
To change a title thumbnail picture (Thumbnail) (DVD-RW in VR mode only) You can select a favourite scene for the thumbnail picture shown in the Title List menu. Press TITLE LIST in stop mode. 3 Select “Set Thumbnail,” and press ENTER. The selected title starts to play in the background. 4 While watching the playback picture, press H, X, or m/M to select the scene you want to set for a thumbnail picture, and press ENTER. The display asks for confirmation.
B Available functions for DVD VIDEOs ( angle/ audio/ subtitle, etc.), or playback data for DATA DVDs and DATA CDs C The current selected function or audio setting (appears only temporarily) Example: Dolby Digital 5.1 ch Rear (L/R) 1 : English DolbyDigital 3/2.1 Front (L/R) + Centre LFE (Low Frequency Effect) D The current selected angle z Hints • If “DTS” is set to “Off” in “Audio” setup, the DTS track selection option will not appear on the screen even if the disc contains DTS tracks (page 82).
Example: When playing a VIDEO CD Playing time and number of the current scene or track Example: When playing a CD Track playing time and the current track/index number m You can label a DVD, title, or program by entering characters. You can enter up to 64 characters for a title or disc name, but the actual number of characters displayed in the menus such as the Title List will vary. The steps below explain how to change the name of the recorded programme.
5 Press
6. Labelling and Protecting a Disc You can execute options effective for the entire disc using the Disc Information display. Protecting a disc -RWVR 1 Insert a disc. See “Inserting a Disc” on page 26. 2 Disc Information 1 2 3 4 5 6 7 8 9 Close DiscName Disc Name 0 Media DVD-RW Title no. Original 3 / Playlist 2 Date 13.10.2005 ~ 28.10.
7. Playing the Disc on Other DVD Equipment (Finalise) +RW -RWVR -RWVideo +R -R 1 2 4 5 6 7 8 9 0 Finalising is necessary when you play discs recorded with this recorder on other DVD equipment. When you finalise a DVD+RW, DVD-RW (Video mode), DVD+R, or DVD-R, a DVD menu will be automatically created, which can be displayed on other DVD equipment. Before finalising, check the differences between the disc types in the table below.
Unfinalising a disc -RWVR -RWVideo For DVD-RWs (Video mode) DVD-RW (Video mode) that have been finalised to prohibit additional recording or editing can be unfinalised to allow further recording or editing. If you cannot record or edit on a DVD-RW (VR mode) that has been finalised with other DVD equipment, “This disc was finalised. Unfinalise it.” may appear. b Note The recorder is not able to unfinalise DVD-RWs (Video mode) that have been finalised on another recorder. 1 Insert a disc.
Example of EPG Display: Guide to Digital Services All Programmes 040 Thu 27 Oct 10:32 DDE NEWS 15 Thu 27 Oct 10:30 11:00 b Note DDE NEWS 15 DDE News DDE News NCE Live from Prague Digital Services availability depends on the broadcaster. Digital Services are not instantly available when the recorder is first turned on. J9 No Event Information CMY No Event Information AAC Opening... NCE 1 John's...
2 Press the
◆ Some examples of category types are as follows: All Programmes: This gives a complete channel list. Favourite List 1: Displays the favourite channels you have stored in the Favourite list 1 folder (page 42). Films: Displays movies available for viewing. News: Displays all news channels. Entertainment: Displays all entertainment channels. Sports: Displays all sports channels. Kids: Displays all children’s channels. Music: Displays all music channels.
Press the M/m buttons or enter a channel number using the number buttons to display programme information on other channels. 4 Press the TV/RADIO button to switch between the TV and Radio channels 5 When viewing information for the currently highlighted channel, press the ENTER button to exit the information display and view the programme. Viewing a digital text service Many digital TV channels broadcast information via their text service.
3 If you are instructed to press ‘OK’ or ‘Select’ when viewing the text pages, press the ENTER button. 4 When you have finished viewing the text service, follow the on screen instructions, or press the PROG +/- button to exit. Selecting digital text from other channels Digital text services may also be available on other digital channels. This is sometimes indicated by a small symbol on your TV screen, superimposed on the programme you are watching.
4 Select “Favourites,” and press ENTER The DTV Settings- Favourites List 1 display appears. Favourites List 1 Programme Service 001 DDE News 002 AAC 003 NCE 5 004 Channel J 005 Digital Teletext Page Down Next List 1 While a Favourite List is displayed, press repeatedly the YELLOW button on the remote control until the favourite list you want to view is displayed. Favourites List 3 Programme Service Show Fav This display shows all the TV or Radio channels available to you.
Indicates the currently viewed channel Favourite List 1 040 DDE NEWS 15 001 NCE Live from Prague 10:12 - 12:00 003 J9 No Event Information 09:35 - 10:45 010 CMY Opening 10:00 - 11:00 022 AAC News 10:10 - 10:50 025 NCE 1 Weather 10:30 - 10:37 Add to List 1 List 2 List 3 4 Number buttons, SET 1 2 4 5 6 7 8 9 CLEAR 3 0 TV/RADIO Coloured control buttons Press the TV/RADIO button to display either your favourite TV or favourite Radio channels at any time.
Timer Recording Before Recording Before you start recording… z Hint Timer recordings will be made regardless whether or not the recorder is turned on. You can turn off the recorder without affecting the recording even after recording starts. b Notes • If any digital teletext is operated while recording, it’s contents will be recorded on the disc. • If the subtitles are displayed while recording, they will be recorded on the disc.
Timer Recording (Standard/ EPG) +RW -RWVR -RWVideo +R 2 “Date”: Sets the date. The item changes as follows: Today y Tomorrow y …… y Thu 28.10 (1 month later) y Sun (every Sunday) y …… y Sat (every Saturday) y Mon-Fri (Monday to Friday) y Mon-Sat (Monday to Saturday) y Sun-Sat (Sunday to Saturday) y Today -R You can set the timer for a total of 30 programmes up to one month in advance. There are two methods to set the timer: the standard method and EPG method.
If the timer settings overlap Overlapped timer settings are shown as follows. z Hint You can play the recorded programme by selecting the programme title in the Title List. Timer b Notes These timer settings overlap. Do you want to continue? Wed 29.10 21:00-22:00 AAB SP Wed 29.10 20:30-22:00 DEF SP OK Cancel To confirm, change, or cancel timer recording See “Checking/Changing/Cancelling Timer Settings (Timer List)” on page 52.
Recording TV programmes using the EPG application 4 Select a current time TV/radio broadcast or a future programme you wish to record. Once highlighted, press the ENTER button. The sub menu appears with the description of the programme displayed in the information box. The EPG application is a feature that simplifies setting the timer. Just select the programme you wish to record in the EPG display. The date, time, and channel of that programme are set automatically.
◆ Some examples of timer event icon types are as follows: (red): Indicates the programme is set as timer and whole programme can be recorded. (grey): Indicates the programme is set as timer but only a part of the programme can be recorded. (e.g. because of timer setting overlap). (red): Indicates the programme is now recording. Press / while the EPG display is turned on to display the previous/next ten channels. To stop recording during timer recording Open the remote’s cover and press x REC STOP.
This function works with DVD-Rs and DVDRWs (Video mode) when the recording mode is set to HQ, HSP, SP, or LSP. For all other recording modes, the screen size is fixed at “4:3.” For DVD-RWs (VR mode), the actual picture size is recorded regardless of the setting. For example, if a 16:9 size picture is received, the disc records the picture as 16:9 even if “Line Rec. Picture Size” is set to “4:3.” For DVD+RWs/DVD+Rs, the screen size is fixed at “4:3.
Creating chapters in a title The recorder can automatically divide a recording (a title) into chapters by inserting chapter marks during recording. To disable this function, set “Auto Chapter” in “Features” setup to “Off” (page 83). When recording on a DVD-RW (VR mode) When recording on other recordable discs Chapter marks are inserted at approximately 6minute intervals during recording. -RWVR -RWVideo +RW ++R -R You can check, change, or cancel timer settings using the EPG menu.
3 Press the M/m buttons to select the options. Once highlighted, press the ENTER button. The sub menu appears: “Modify”: Changes the timer setting. Select an item using
3 Select the timer setting you want to check/ change/cancel, and press ENTER. To change or cancel the setting, repeat steps 3 and 4 above. The sub-menu appears. 4 Select one of the options, and press ENTER. “Modify”: Changes the timer setting. Select an item using
Recording From Connected Equipment +RW -RWVR --RW VR RWVideo ++R 3 Select the line input audio when recording a bilingual programme on the DVD-RWs (VR mode). Press TOOLS to select “Line Audio Input,” and press ENTER. Then select “Bilingual,” and press ENTER. -R 4 Press REC MODE repeatedly to select the recording mode. For details about the recording mode, see page 45.
If the timer settings of a Synchro-Recording and another timer recording overlap Regardless of whether or not the programme is a Synchro Rec programme, the programme that starts first has priority and the second programme starts recording only after the first programme has finished. 7:00 8:00 9:00 10:00 First programme At the same time, press X REC PAUSE on this recorder and the pause or play button on the connected equipment. Recording starts. To stop recording, press x REC STOP on this recorder.
To create and edit Playlist titles Erasing and Editing Before Editing This recorder offers various edit options for various disc types. Before you edit, check the disc type in the front panel display, and select the option available for your disc (page 8). b Notes • You may lose the edited contents if you remove the disc or a timer recording starts while editing. • DVD discs created by DVD video cameras cannot be edited on this recorder.
Edit options for DVD+RWs/DVDRWs (Video mode)/DVD+Rs/DVD-Rs +RW -RWVideo +R -R You can perform simple edits. Since Video mode titles are actual recordings on the disc, you cannot undo any edits you make. The edit functions available for Video mode titles are: – Setting protection against erasure (page 68). – Labelling a title (page 68). – Erasing a title (page 68). – Erasing multiple titles (page 70). – Erasing a section of a title (A-B Erase) (DVD+RWs only) (page 69).
“A-B Erase”: Erases a section of the title (page 69). “Delete Chapter”: Erases chapter units of the title while viewing thumbnails (see below). Erasing a section of a title (A-B Erase) +RW z Hints • You can erase multiple titles at one time (page 70), or erase all of the titles on the disc at once (page 70). • You can automatically erase titles that have already played. • You can label or re-label DVDs (page 35). -RWVR You can select a section (scene) in a title and erase it.
b Notes • Images or sound may be momentarily interrupted at the point where you erase a section of a title. • Sections shorter than five seconds may not be erased. • For DVD+RWs, the erased section may be slightly different from the points you selected. Erasing multiple titles (Erase Titles) +RW -RWVR -RWVideo +R -R Erasing all titles on the disc +RW 1 Press TITLE LIST. Press TOOLS to select “Erase Titles,” and press ENTER. The display for selecting titles to be erased appears.
3 Select a title by pressing
5 Select the IN point by pressing m/M, and press ENTER. The display for setting the end point (OUT) appears, and the title continues to play in the background. 6 Select the OUT point by pressing m/M, and press ENTER. The display asks for confirmation. To reset the IN or OUT point, select “Change IN” or “Change OUT” and repeat step 5 or 6. To view the selected scene, select “Preview.” 7 To play the Playlist title Press TOOLS while the Title List menu is turned on.
2 Press TOOLS to select “Combine,” and press ENTER. Dividing a Playlist title (Divide) The display for selecting titles appears. 3 -RWVR Select a title, and press ENTER. A number indicating the order in which you selected the title appears. To cancel the selection, press ENTER again. You can divide a Playlist title. 1 Press TOOLS and select “Playlist” from the TOOLS menu to switch the Title Lists, if necessary. Combine Select the titles to combine. 1 4 OK 4 Yacht 25. 9 3 Cruising 25.
Example: DVD-RW (VR mode) Playback TITLE LIST ORIGINAL 12 Tennis Playing Fri 28.10. 2005 13:00 DEF Wed 26.10. 2005 20:00 (0H30M) SEP 0.3GB -RWVR -RWVideo VCD AAB (0H30M) LSP 0.9GB 11 Travel 10 Mystery +RW 4.3 / 4.7GB CD +R -R DVD Tue 25.10. 2005 9:00 AAB (1H00M) SLP 0.8GB 9 World Sports DATA DVD DATA CD GHI Wed 19.10. 2005 20:00 (1H00M) SEP 0.6GB 3 Select the title, and press ENTER. The sub-menu appears. Z 1 2 3 4 5 6 7 8 9 4 PROG +/– Select “Play,” and press ENTER.
To resume playback from the point where you stopped (Resume Play) When you press H again after you stop playback, the recorder resumes playback from the point where you pressed x. To start from the beginning, press TOOLS to select “Play Beginning,” and press ENTER. Playback starts from the beginning of the title/ track/scene. If you use the SMARTLINK connection, you can easily start playing. Press H. The recorder and your TV automatically turn on and the TV’s input is switched to the recorder.
Playback options To check the position of the buttons below, see the illustration on page 56. Buttons Operations (audio) -RWVR DVD Selects one of the audio tracks recorded on the disc when pressed repeatedly. VCD DVD : Selects the language. -RWVR : Selects the main or sub sound. CD VCD (subtitle) CD : Selects stereo or monaural audio tracks. Selects a subtitle language when pressed repeatedly. DVD (angle) Selects an angle when pressed repeatedly.
b Notes • Angles and subtitles cannot be changed with titles recorded on this recorder. • 96 kHz PCM audio and DTS audio do not have surround effects. • The surround effects do not work while performing playback quickly with sound. Adjusting the picture quality +RW VCD 1 Notes on playing DTS sound tracks on a CD Notes on playing DVDs with a DTS sound track DTS audio signals are output only through the DIGITAL OUT (COAXIAL or OPTICAL) jack.
3 Press
Playing from the beginning of the programme you are recording (Chasing Playback) Playing a previous recording while making another (Simultaneous Rec and Play) -RWVR -RWVR “Chasing Playback” allows you to view the recorded part of a programme while the recording is being made. You do not need to wait until the recording finishes. Press TOOLS while recording to select “Chasing Playback,” and press ENTER. 1 While recording, press TITLE LIST. The Title List appears.
Searching for a Title/ Chapter/Track, etc. Searching by title number or time code +RW VCD Number buttons, SET 1 2 3 4 5 6 7 8 9 CLEAR -RWVR -RWVideo CD +R -R DVD DATA DVD DATA CD You can search a disc by title, chapter, scene or track. As titles and tracks are assigned individual numbers, select the title or track by entering its number. You can also search for a scene using the time code. 0 1
Playing MP3 Audio Tracks or JPEG Image Files Selecting an MP3 album or track 1 Press TITLE LIST. The album list appears. To change the page, press DATA DVD DATA CD You can play MP3 audio tracks and JPEG image files on DATA CDs (CD-ROMs/CD-Rs/CDRWs) or JPEG image files on DATA DVDs (DVD-ROMs/DVD+RWs/DVD+Rs/DVD-RWs/ DVD-Rs). 2 3 4 5 6 7 8 9 TITLE LIST Music Album 2 3 Samba Dance 4 Live Jazz 5 Piano Jazz 6 My heart Pop music 7 Paradise Pop music 8 The Best Pop music / .
Selecting a JPEG album or image 1 Press TITLE LIST. The album list appears. To change the page, press / . To change the slideshow speed Press TOOLS while the album list or image list is displayed to select “Slideshow Speed,” and press ENTER. Then select the speed from “Fast” (quick), “Normal,” and “Slow.” To go to the previous or next album Press TITLE LIST / while the JPEG image is displayed.
MP3 audio tracks or JPEG image files that the recorder can play MP3 is audio compression technology that satisfies certain ISO/MPEG regulations. JPEG is image compression technology. You can play MP3 (MPEG1 Audio Layer 3) format audio tracks and JPEG image files on DATA CDs (CD-ROMs/CD-Rs/CD-RWs) or JPEG image files on DATA DVDs (DVD-ROMs/ DVD+RWs/DVD+Rs/DVD-RWs/DVD-Rs). DATA CDs discs must be recorded according to ISO9660 Level 1, Level 2 or Joliet format for the recorder to recognize the MP3 tracks.
About playback order of albums, tracks, and files Albums play in the following order: Structure of disc contents Tree 1 Tree 2 Tree 3 Tree 4 Tree 5 ROOT Album MP3 audio track/ JPEG image file When you insert a DATA CD/DATA DVD and press H, the numbered tracks (or files) are played sequentially, from 1 through 7. For JPEG image file, press to go to the next album. (For instance, when you want to go from 1 to 2.
3 Settings and Adjustments Clock and Language Settings (Settings) The “Settings” setup helps you to make clock and language settings for the recorder. 1 Press SYSTEM MENU while the recorder is in stop mode. 2 3 Select “SETUP,” and press ENTER. Select “Settings,” and press ENTER. The Settings display appears with the following options. Clock DTV Settings Language To change the numbers, press < to return to the item to be changed, and press M/m. 4 5 Press ENTER to start the clock.
• If you have not yet registered a password, the display for registering a new password appears. Digital TV settings (DTV Settings) DTV Settings - Parental Lock Enter a new password. The DTV Settings Setup enables you to take full advantage of Digital TV Broadcasting services such as favourites channels setting or to prevent children’s viewing unsuitable channels and programmes. 1 Press SYSTEM MENU while the recorder is in stop mode. 2 3 Select “SETUP,” and press ENTER.
Tuning Lock Channels Page Up Programme Service 001 DDE News 002 AAC 003 NCE 5 004 Channel J 005 Digital Teletext Page Down Show Locked If you do not wish to lock one of the five channels in the display, press the RED or GREEN button to view the previous or next five channels available. 3 The Tuning Display allows you to tune your recorder automatically or to hide unused or unwanted programmes and also change the order of the programmes on display.
When Auto Tune has ended, a completion display appears indicating the number of TV and Radio channels that have been found and stored. GREEN button to view the previous or next five channels available. 4 Auto Tune Number of channels found: 50 Number of TV Channels: 30 Number of Radio Channels: 20 Tuning has sucessfully completed 3 Press the ENTER button to remove the display and view the first channel captured.
GREEN button to view the previous or next five channels available. 3 Press the M/m buttons to highlight the programme number you wish your selected channel to appear on. Signal Strength This information screen shows the signal strength of the broadcast you are watching.
Video Settings (Video) Video settings will adjust items related to the image, such as size and colour. Choose the settings according to the type of TV or tuner connected to the DVD recorder. 1 Press SYSTEM MENU while the recorder is in stop mode. 2 3 Select “SETUP,” and press ENTER. 16:9 4:3 Letter Box 4:3 Pan Scan Select “Video,” and press ENTER. The “Video” setup appears with the following options. The default settings are underlined.
Progressive Mode DVD software can be divided into two types: film based software and video based software. Video based software is derived from TV, such as dramas and sit-coms, and displays images at 30 frames/60 fields (25 frames/50 fields) per second. Film based software is derived from film and displays images at 24 frames per second. Some DVD software contains both Video and Film.
Audio Settings (Audio) The “Audio” setup allows you to adjust the sound according to the playback and connection conditions. 1 2 3 Press SYSTEM MENU while the recorder is in stop mode. Select “SETUP,” and press ENTER. Select “Audio,” and press ENTER. The “Audio” setup appears with the following options. The default settings are underlined.
Audio - Audio Connection Digital Out : On D-PCM Dolby Digital : 2 3 4 MPEG : PCM DTS : Off 48kHz/96kHz PCM : 48kHz/16bit On Select this when the recorder is connected to an audio component with a built-in DTS decoder. Off Select this when the recorder is connected to an audio component without a built-in DTS decoder. Select “Digital Out,” and press ENTER. On Normally select this position. Off The influence of the digital circuit upon the analogue circuit is minimal.
b Note Recording and Parental Control Settings (Features) • The actual chapter mark interval may vary depending on the amount of information contained in the video to be recorded. Parental Control (DVD VIDEO only) The “Features” setup allows you to adjust recording and parental control settings. 1 2 3 Press SYSTEM MENU while the recorder is in stop mode. Playback of some DVD VIDEOs can be limited according to a predetermined level, such as the age of the users.
the table (page 102). Then select “OK” and press ENTER. 5 Select “Level,” and press ENTER. The selection items for “Level” are displayed. Features - Parental Control Level : Off Standard : 8 Screen Saver The screen saver image appears when you do not use the recorder for more than 10 minutes while an on-screen display, such as the System Menu, is displayed on your TV screen. The screen saver image helps prevent your display device from becoming damaged (ghosting).
Parental Control (Password) This “Password” Setup allow you to set or to modify the password that gives access to Parental Control settings. Disc and Remote Control Settings/Factory Settings (Options) The “Options” setup allows you to set up other operational settings. 1 Press SYSTEM MENU while the recorder is in stop mode. 1 2 3 Press SYSTEM MENU while the recorder is in stop mode. Select “SETUP,” and press ENTER. 2 3 Select “SETUP,” and press ENTER. Select “Password,” and press ENTER.
Power Save Selects whether this recorder is in power save mode when the power is turned off (standby). On Sets to power save mode. The front panel display is off when the recorder is in standby. Off Does not set to power save mode. Normally, select this. b Notes • Power Save mode does not function when a Synchro Recording is set, even when “Power Save” is set to “On.” • The SMARTLINK features are not available when “Power Save” is set to “On.
Easy Setup (Resetting the Recorder) Select this to run the “Easy Setup” programme. 1 Press SYSTEM MENU while the recorder is in stop mode. 2 3 Select “SETUP,” and press ENTER. Select “Easy Setup,” and press ENTER. SETUP Settings DTV Settings Video Audio Features Password Options 4 5 6 Easy Setup Press ENTER. Select “Start.” Follow the instructions for “Easy Setup” (page 22) from step 2.
Picture noise appears. Additional Information Troubleshooting If you experience any of the following difficulties while using the recorder, use this troubleshooting guide to help remedy the problem before requesting repairs. Should any problem persist, contact the Sony Customer Information Centre on 08705 111 999 (Monday-Friday from 8:30am to 6:00pm) Power The power does not turn on. , Check that the mains lead is connected securely. Tuner The channel is not found or stored or missed.
The picture from equipment connected to the recorder’s input jack does not appear on the screen. , If the equipment is connected to the LINE 1 – TV jack, select “L1” in the front panel display by pressing PROG +/– or INPUT SELECT. If the equipment is connected to the LINE 2 IN jacks, select “L2” in the front panel display by pressing PROG +/– or INPUT SELECT. If the equipment is connected to the LINE 4 IN jacks, select “L4” in the front panel display by pressing PROG +/– or INPUT SELECT.
Playback The recorder does not play any type of disc. , The disc is upside down. Insert the disc with the labelled side facing up. , The disc is not correctly inserted. , Moisture has condensed inside the recorder. Remove the disc and leave the recorder turned on for about half an hour until the moisture evaporates. , If the disc was recorded on another recorder, the recorder cannot play the disc if it was not finalised (page 36). The recorder does not start playback from the beginning.
, Other timer setting overlapped the timer setting (page 53). , There is no DVD inside the recorder. , There is not enough disc space for the recording. , A scrambled channel is selected. , The Channel activated Parental Lock is selected. Recording does not stop immediately after you press x REC STOP. , It will take a few seconds for the recorder to input disc data before recording can stop. Synchro-Recording does not complete.
, The remote is not pointed at the remote sensor on the recorder. , Different command modes are set for the recorder and remote. Set the same command mode (page 21). The default command mode setting for this recorder and the supplied remote is DVD3. , Set the TV/DVD switch to DVD (page 20). Other Sony equipment responds to the remote. , The same command mode is set for both the equipment and recorder. Set a different command mode for the recorder (page 21). Others The recorder does not operate properly.
Self-diagnosis Function (When letters/numbers appear in the display) When the self-diagnosis function is activated to prevent the recorder from malfunctioning, a fivecharacter service number (e.g., C 13 00) with a combination of a letter and four numbers appears in the front panel display. In this case, check the following table.
• Clean the disc with a cleaning cloth. Wipe the disc from the centre out. • Do not use solvents such as benzine, thinner, commercially available disc/lens cleaners, or anti static spray intended for vinyl LPs. • Do not use the following discs. – A disc that has a non-standard shape (e.g., card, heart). – A disc with a label or sticker on it. – A disc that has cellophane tape or sticker adhesive on it.
General Specifications System Laser: Semiconductor laser Transmission standards: DVB-T Channel coverage: UHF channels B21 - B69 The above channel coverage merely ensures the channel reception within these ranges. It does not guarantee the ability to receive signals in all circumstances.
Guide to Parts and Controls For more information, see the pages in parentheses. Remote Buttons with an orange dot next to them can be used with your TV when the TV/DVD switch is set to TV. A TV/DVD switch (19) B Z (open/close) button (26) C [/1 (on/standby) button (22) D t TV/VIDEO, TV/DVD button (19) E PROG (programme) +/– buttons (28) 1 2 3 4 5 6 7 8 9 The + button has a tactile dot*. F Number buttons (48, 62) SET button (48) 0 The number 5 button has a tactile dot*.
Y H (play) button (56) X (pause) button (58) x (stop) button (56) The H button has a tactile dot*.
Front panel display DVD RW VR VCD TV PROGRESSIVE SMARTLINK A Playing/recording status E Displays the following (32): • • • • • • B Disc type*/recording format C Audio signal indicators (31) D TV indicator (28) F Playing time/remaining time Current title/chapter/track/index number Recording time/recording mode Clock Programme position TV Direct Rec indication (28): “TV” appears in the right most two digits.
Rear panel AERIAL LINE 1 - TV LINE 3 Y IN DIGITAL OUT PB/ CB COAXIAL OUT PCM/DTS/MPEG/DOLBY DIGITAL -AUDIO R L VIDEO S VIDEO OPTICAL LINE 4 IN LINE 2 OUT -AUDIO R L VIDEO S VIDEO COMPONENT VIDEO OUT PR/ CR ~ AC IN A AERIAL IN/OUT jacks (13) B LINE 1 – TV jack (14) C LINE 3 jack (23) D COMPONENT VIDEO OUT (Y, PB/CB, PR/CR) jacks (14) E AC IN terminal (18) G LINE 2 OUT (R-AUDIO-L/VIDEO) jacks (14, 17) H LINE 4 IN (S VIDEO) jack (24) I LINE 4 IN (R-AUDIO-L/VIDEO) jacks (24) Additional Inf
Glossary Chapter (page 62) Sections of a picture or a music feature that are smaller than titles. A title is composed of several chapters. Depending on the disc, no chapters may be recorded. A DVD-R is a recordable disc that is the same size as a DVD VIDEO. Contents can be recorded only once to a DVD-R, and will have the same format as a DVD VIDEO. DVD-RW (page 8) Copy restriction set by copyright owners, etc.
of an image, and the odd numbered field shows the odd numbered lines of an image. MPEG Audio (page 82) International standard coding system used to compress audio digital signals authorized by ISO/ IEC. MPEG 2, used on DVDs, conforms to up to 7.1-channel surround. Original (page 67) Titles actually recorded on a DVD-RW (VR mode). Erasing original titles frees up disc space. Playlist (page 67) Playback information created from the actual recordings on a DVD-RW (VR mode).
Language Code List For details, see page 74. The language spellings conform to the ISO 639: 1988 (E/F) standard.
Digital TV Channel List Only the main transmitters are listed. For further details or updates refer to the web site http://www.bbc.co.uk/reception/transmitters/tv_trans/index.
Index Words in quotations appear in the on-screen displays.
F “Factory Setup” 86 Favourites Deleting a channel from the Favourites List 43 Moving to a different favourite list 43 Setting a favourite list 42 Watching or listening to a favourite channel 43 “Features” 83 “File Search” 62 “Finalise” 36 Finalising 36 “Format DVD-RW” 85 “Format” 26 Formatting 26 Freeze Frame 58 Front panel 97 Front panel display 32, 98 “Line4 Input” 80 M Mains Lead 18 Manual Clock Set 74 Manufacturer Information 78 MENU 56 Menu DVD’s Menu 56 Top menu 56 “MNR” 59 “Modify” 53 “Move” 72 MP
S S VIDEO 14 “S Video” 22, 80 “Scart Setting” 80 Scene List 72 Screen Saver 84 “Search” 62 Searching fast reverse/fast forward 58 locating the beginning of the title/chapter/track 58 search mode 62 visual search 62 SET 20, 34 “Set Thumbnail” 68 Signal Strength 78 Simultaneous Rec and Play 61 Slow-motion play 58 SMARTLINK 15 Sort 30 Sound quality 60 Subtitle 58, 74 Super VIDEO CD 10 Surround 60 Synchro Rec 54 T Technical Information 78 Thumbnail picture 31 “Time Search” 62 TIME/TEXT 32 TIMER 46 Timer List 5
Printed on 100% recycled paper.