3-867-416-11 (1) Cordless Telephone with Answering System Operating Instructions US Manual de instrucciones ES SPP-A968 ©1999 by Sony Corporation
Owner’s Record The model and the serial numbers are located at the bottom of the unit. Record the serial number in the space provided below. Refer to these numbers whenever you call upon your Sony dealer regarding this product. Model No. SPP-A968 Serial No. ________________ IMPORTANT SAFETY INSTRUCTIONS When using your telephone equipment, basic safety precautions should always be followed to reduce the risk of fire, electric shock and injury to persons, including the following: 1.
. Do not open or mutilate the battery pack. Released electrolyte is corrosive and may cause damage to the eyes or skin. It may be toxic if swallowed. 12. Unplug this product from the wall outlet and refer servicing to qualified service personnel under the following conditions: A. When the power cord or plug is damaged or frayed. B. If liquid has been spilled into the product. C. If the product has been exposed to rain or water. D.
6. The telephone company may make changes in its facilities, equipment, operations or procedures that could affect the operation of the equipment. If this happens the telephone company will provide advance notice in order for you to make necessary modifications to maintain uninterrupted service. 7. If trouble is experienced with this equipment (SPP-A968), for repair or warranty information, please contact Sony Direct Response Center: Tel 1-800-222-7669.
Table of contents Getting Started 6 Read this first 7 Step 1: Checking the package contents 8 Step 2: Setting up the base unit 11 Step 3: Preparing the battery pack 13 Step 4: Entering your area code 14 Identifying the parts Basics 17 Making calls 18 Redialing 19 Receiving calls Telephone Features 21 One-touch dialing 21 Storing phone numbers 22 Making calls with one-touch dialing 23 Phone Directory 23 Storing phone numbers and names 24 Changing a stored name and/or phone number 25 Erasing a memory locati
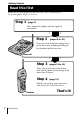
Getting Started Read this first Before you use your phone, you must set it up. Here’s a quick way to set up your phone: Steps 1, 2, 3 and 4. Step 1 (page 7) First, unpack the phone and the supplied accessories. Step 2 (pages 8 to 10) Next, you need to do three things to set up the base unit, including finding the best location for the base unit. Base unit Step 3 (pages 11 to 12) Then, you need to insert the battery pack into the handset and charge it for more than 12 hours.
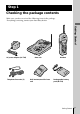
Step 1 Checking the package contents Make sure you have received the following items in the package. If anything is missing, contact your local Sony dealer.
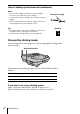
Step 2 Setting up the base unit Do the following steps: • Choose the best location • Connect the base unit • Choose the dialing mode Choose the best location Where you place the base unit affects the reception quality of the handset.
Connect the base unit If you want to hang the base unit on the wall, see page 47. 4 Getting Started ,yy, y,y,y, y, y, Display window Hook the cord. 3 To AC outlet 1 Align the f To DC IN 9V 2 marks. AC power adaptor (supplied) Telephone line cord To telephone (supplied) outlet 2 To LINE 1 1 Attach the wall bracket on the bottom of the base unit as illustrated to use it as a stand. 2 Connect the telephone line cord to the LINE jack and to a telephone outlet.
Step 2: Setting up the base unit (continued) Notes • Use only the supplied AC-T46 AC power adaptor. Do not use any other AC power adaptor. • Connect the AC power adaptor to a continuous power supply. • Place the base unit close to the AC outlet so that you can unplug the AC power adaptor easily. Polarity of the plug – Tips • If your telephone outlet is not modular, contact your telephone service company for assistance. • To remove the wall bracket, press the upper tab.
Step 3 Preparing the battery pack Charge the battery pack for more than 12 hours before you start using your phone. compartment lid of the handset. 2 Connect the battery connector Red Black BP-T24 with correct polarity (black wire goes on right side and red wire goes on left). Getting Started 1 Slide open the battery 3 Hook the cords and insert the battery pack. Then close the lid. Hook 4 Place the handset on the base unit. You can place either side facing up.
Step 3: Preparing the battery pack (continued) Battery duration A fully charged battery pack lasts for about: • Approx. 6 hours when you use the handset continuously • Approx. 10 days (RING ON mode) or 1 month (RING OFF mode) when the handset is in standby mode. Notes • The battery pack will gradually discharge over a long period of time, even if not in use. • If you leave the battery pack in the handset without charging it, the battery pack will be completely discharged.
Step 4 Entering your area code When you use this phone for the first time, or move to an area that has a different area code, you must enter your area code. Turn Press 1 Press (VOL/PGM). 2 Turn Jog Dial up to make “AREA” flash. DIRECTORY AREA Getting Started This is necessary because the phone must distinguish local or long distance calls to properly dial calls from the Caller ID list. 3 Press Jog Dial. “ENTER AREA CODE” appears on the display.
Identifying the parts Refer to the pages indicated in parentheses for details. Base Unit 1 9 2 3 0 4 qa 5 qs 6 qd 7 qf 8 qg qh qj qk 1 Display window (p.9, 34) 9 Antenna (p. 9, 47) 2 IN USE lamp 0 Speaker Lights when the cordless handset is in use. 3 CHARGE lamp (p. 11) Lights while the battery is being charged. 4 GREETING button (p. 29) Plays back the greeting message. Also used when recording a greeting. 5 ERASE button (p. 30, 34) Erases the recorded greeting or messages.
Display ql w; The display on the base unit shows the answering machine operation. 3 4 y , y,y,y,y, y, 2 Getting Started 1 wa ws wd wf qj HANDSET LOCATOR button (p. 27) Allows you to page the cordless handset. qk PLAY/STOP (MAILBOX 1, 2, 3) buttons (p. 34) Plays back the messages in each mail box. ql AUDIBLE INDICATE switch (p. 32) Selects the answering mode. w; RINGER SELECT switch (p. 31) Selects the ring time. wa DIAL MODE switch (p. 10) Selects pulse or tone dialing.
Identifying the parts (continued) Handset 1 2 3 4 5 6 0 qa qs qd qf 7 8 qg qh 9 1 Antenna 2 Speaker Switches the ringing mode. 3 Jog dial (p. 13, 23, 40) q; Display window (p. 39) 4 TALK button (p. 17, 35) qa CALL WAITING/FLASH button (p. 19, 46) Lets you make or receive a call. 5 REDIAL button (p. 18) Redials the last number called. 6 VOL (volume) /PGM (program) button (p. 13, 17, 21, 23) Used to adjust the speaker volume.
Basics Making calls 1 Pick up the handset from the base unit. 2 Press (TALK) and wait until “TALK” appears on the display. The IN USE lamp on the base unit lights up. (REDIAL) (VOL/PGM) (*TONE) Basics You then hear a dial tone. If you hear five short error beeps and “OUT OF RANGE” appears on the display, move closer to the base unit. 3 Dial the phone number. During a conversation, you can adjust the handset volume. Follow the procedure described in the following table.
Making calls (continued) If the battery becomes weak during a call The handset will beep every three seconds and E and “BATTERY LOW” appear on the display. Finish your call and charge the battery pack. For optimum performance, charge the battery for a full 12 hours. Note that during the first 10 - 15 minutes of charging, the phone will be inactive, i.e., unable to make or receive a call.
Receiving calls 1 When you hear the phone ring, pick up the handset from the base unit, and press (TALK) . “TALK” appears on the display and the IN USE lamp on the base unit lights up. (CALL WAITING/FLASH) 2 When you’re done talking, press Basics (VOL/PGM) During a conversation, you can adjust the handset volume. Follow the procedure described in the table below. (OFF) or replace the handset on the base unit. The display and the IN USE lamp on the base unit go off.
Receiving calls (continued) To turn the ringer off Set the RING switch on the bottom to OFF. You can save battery power. The handset will not ring. You can still make calls, and also receive calls if another telephone connected to the same line rings to inform you on incoming calls, but you cannot page the handset from the base unit. Note You cannot receive Caller ID data when the handset is off and the base unit in RING OFF mode. See page 39 for details.
Telephone Features One-touch dialing You can dial with one touch of a key by storing a phone number on a one-touch dial button. Storing phone numbers 1 Press (VOL/PGM). DIRECTORY AREA (PAUSE) Jog Dial 2 Press one of the three You hear a confirmation beep. (TALK) A= If a number is stored, it appears on the display. To store a new number, turn Jog Dial to erase it. Telephone Features ONE-TOUCH DIAL buttons ((A) to (C)). 3 Enter the phone number you want to store.
One-touch dialing (continued) Note Do not allow more than 20 seconds to elapse between each step of the procedure. Tips • If you have entered a wrong number in step 3 and have not pressed (VOL/PGM) (step 4) yet, just turn Jog Dial down to erase it. Then enter the correct number. • You may press Jog Dial instead of (VOL/PGM) in step 4.
Phone Directory You can dial a number by scrolling through the Phone Directory. You can store up to 50 numbers. Storing phone numbers and names Example: to store “SONY” “123-4567”. Turn Press 1 Press (VOL/PGM). (Be sure not to press (TALK).) DIRECTORY AREA 2 Press Jog Dial. “ENTER NAME” appears. 3 Enter the name using the dialing keys. You can enter up to 15 characters.
Phone Directory (continued) 4 Press (VOL/PGM). “ENTER NUMBER” appears. 5 Enter the phone number. You can enter up to 16 digits, including a tone and a pause, each of which is counted as one digit. SONY 1234567 6 Press (VOL/PGM). You hear a long confirmation beep, and the name and the number are stored. The display goes off. Notes • If you try to save a 51st phone number, you will hear five short error beeps and “MEMORY FULL” will be displayed. You cannot store the phone number.
3 Turn Jog Dial up to make “PGM” flash and press Jog Dial. SONY 1234567 The cursor flashes at the last character of the name. 4 Turn Jog Dial down to erase the characters and enter the new name. If you want to change only the number, skip this step. 5 Press Jog dial. The cursor flashes at the last digit of the phone number. 6 SMITH 1234567 Turn Jog Dial down to erase the number and enter the new number. 7 Telephone Features If you don’t want to change the number, skip this step. Press Jog Dial.
Phone Directory (continued) Making calls from the Phone Directory Turn 1 Press Jog Dial twice. Press “DIRECTORY” appears on the display. 2 Display the name and phone number you want to call. To search in alphabetical order: Turn Jog Dial up or down. To search by entering the initial character: Press the dialing key of the desired character, then turn Jog Dial. SONY 1234567 3 Press Jog Dial. DIAL PGM ERASE 1234567 4 Press Jog Dial again. The phone number will be dialed.
Paging You can page the handset from the base unit. Note that you cannot page if the handset is in use. To page Press (HANDSET LOCATOR). The handset rings. When you keep pressing (HANDSET LOCATOR), the handset rings continuously. Telephone Features Note You cannot page the handset when its RING switch is set to OFF.
Answering Machine Features Preparing the answering machine Note that you cannot operate the base unit while the handset is in use. Setting the day and time Set the day and time so that you can stamp day and time for the incoming messages. You’ll hear the recorded day and time when you play back messages. 1 Press (SET/REC). 2 Press (TIME). You hear a voice guide: “Please set the day. To select, press the SKIP or REPEAT button. To enter, press the SET button”.
7 Press (SKIP/QUICK) or (REPEAT/SLOW) repeatedly until the correct minute is announced. 8 Press (SET/REC). You hear a long confirmation beep, followed by the day and time. Then the phone starts counting time. Notes • Do not allow more than 20 seconds (or 60 seconds when setting the minute) to elapse between each step of the procedure. • If a power interruption occurs, the day and time will be erased.
Preparing the answering machine (continued) Notes • If recording did not succeed, you hear five short error beeps. Start over the procedure. • If a call comes in or (TALK) is pressed while recording a greeting, recording is cancelled. Start over the procedure. • If you hear five short error beeps while recording, the recording area may be full. In this case, erase unnecessary messages (see page 34). Tips • If four minutes have passed in step 3, recording stops automatically.
Selecting the ring time There are three options of ring time. Select the ring time by setting the RINGER SELECT switch. RINGER SELECT switch Mode If new messages have been recorded, the phone answers at the second ring and records incoming messages; if no new messages are recorded, it answers at the fifth ring. When you call from an outside phone and hear more than two rings, you know that there are no new messages. If you hang up at this point before the phone answers, you can save the toll for the call.
Preparing the answering machine (continued) Selecting the answering mode You can set the answering machine to record incoming messages (normal mode), or just make an announcement without recording messages (announcement only mode). You can record your own greeting, or use the factory pre-recorded greetings. In the normal mode, you also have the option of having a beep to tell you if you have received any new incoming messages.
Turning on the answering function Press (ANSWER ON/OFF) so that it lights up in red . Note When the memory is full, you hear five short error beeps and you cannot turn on the answering function. Erase unnecessary messages (see page 34). When a caller calls The caller can choose one of the two ways to leave a message: • Select a mailbox by pressing (*)(1) (MAILBOX 1), (*)(2) (MAILBOX 2) or (*)(3) (MAILBOX 3) while the caller hears the greeting.
Playing back messages When you come home (ERASE) (REPEAT/SLOW) If (ANSWER ON/OFF) flashes in red, or the display shows the Message number of new messages and number the MAILBOX indicator flashes, indicator press the mailbox button (VOLUME) ((MAILBOX 1), (MAILBOX 2) or (MAILBOX 3)). The machine (ANSWER ON/OFF) plays back from the first new (SKIP/QUICK) message. Additional tasks when playing back messages To Do this Adjust the speaker volume Press (VOLUME) (+) or (-).
Screening incoming calls You can screen calls by leaving the answering function on (see page 33) while you are at home. When a call is answered, you can hear the message being recorded through the base unit (you cannot hear the message through the handset) but the caller cannot hear you. Then, you can decide whether to answer the call or not. This function is available only on the base unit. To answer the call Press (TALK). Recording is cancelled and you can speak to the caller.
Recording a memo You can record a “memo” (up to four minutes) as a personal reminder or as a message for other people. You can play back the recorded memo like any incoming messages (see page 34). 1 Press (MEMO). You hear a voice guide. 2 Select a mailbox by pressing (MAILBOX 1), (MAILBOX 2) or (MAILBOX 3). You will hear a voice guide, then a long confirmation beep. MIC (Microphone) (MAILBOX 1) (MAILBOX 2) (MAILBOX 3) 3 After the tone, start recording.
Operating from an outside phone You can call from a touch-tone phone and pick up new messages recorded on the phone. First, you just set the remote ID code (security code) and turn on the answering function before going out. Setting the remote ID code (security code) 1 Press (SET/REC). 2 Press (ANSWER ON/OFF). You hear a voice guide: “Please set the security code. To select, press the SKIP or REPEAT button. To enter, press the SET button”.
Operating from an outside phone (continued) Picking up new messages 1 2 Call your phone from a touch-tone phone. While you hear your greeting play, press (security code). (#), and your remote ID code You hear a long confirmation beep and the greeting stops. Following the voice guide informing you of the number of messages recorded, the phone stands by for you to enter a control code. 3 To do other operations, enter the control code within 20 seconds (see the table below). To quit, hang up the phone.
Caller ID Features Understanding the Caller ID service Caller ID allows the caller’s phone number to be shown on the display before you answer the call. In order to use this feature, you must first subscribe to Caller ID service. The name of this service may vary depending on your telephone company. To use this feature, be sure to enter your area code (see page 13). When you receive a call The phone number appears on the display with the date and time as shown in the following example.
Looking at the Caller ID list The phone stores the data of the last 20 calls received including “OUT OF AREA” and “PRIVATE” calls. It keeps track of all calls received; even if they were not answered. However, if the RING switch is set to OFF when the handset is off the base unit, the phone cannot receive the Caller ID data. Viewing the Caller ID list You can look through the Caller ID list to check the phone number and/or name of the calls received. Turn Press 1 Press Jog Dial.
About the “*” mark SMITH JOHN * 1-201-123-4567 “*” appears if there are more than two calls from the same phone number. The older data will be replaced by the new data, so the calls are counted as only one call. Erasing data from the Caller ID list Old data will be erased automatically when a 21st call comes in, but you can also manually erase unnecessary data one by one or erase the entire list.
Looking at the Caller ID list (continued) To erase the entire list at once 1 Display any Caller ID data. SMITH JOHN 1-201-123-4567 2 Press Jog Dial. DIAL PGM ERASE 1-201-123-4567 3 Turn Jog Dial up to make “ERASE” flash and press Jog Dial. ERASE NO YES ALL 1-201-123-4567 4 Turn Jog Dial up to make “ALL” flash, then press Jog Dial. ALL ERASE NO YES 1-201-123-4567 5 Turn Jog Dial up to make “YES” flash, then press Jog Dial.
Using the Caller ID list By using the Caller ID list, you can call back a phone number from the Caller ID list easily, or store numbers from the Caller ID list into memory dialing keys. Calling back a number from the Caller ID list Turn Press 1 Display the phone number you want to call from the Caller ID list (see page 40). SMITH JOHN 1-201-123-4567 2 Confirm the number and press Jog Dial. DIAL PGM ERASE 1-201-123-4567 3 Press Jog Dial again.
Using the Caller ID list (continued) Storing a number of the Caller ID list into the Phone Directory 1 Display the name and phone number you want to store from the Caller ID list (see page 40). 2 Confirm the number and press Jog Dial. SMITH JOHN 1-201-123-4567 DIAL PGM ERASE 1-201-123-4567 3 Turn Jog Dial up to make “PGM” flash and press Jog Dial. SMITH JOHN 12011234567 The cursor flashes at the end of the name. Enter or change the name, if necessary (see page 24). 4 Press Jog Dial.
To change the number of digits of the phone number If the number of digits of the phone number in the Caller ID list is different from the actual phone number, you need to adjust the number of digits of the phone number to call back or store into the phone directory. 1 While the phone number from the Caller ID list is displayed, press (#) repeatedly until the phone number with the correct number of digits appears on the display. Each time you press (#), the number of digits changes as follows.
Using “Caller ID with call waiting” service This telephone is compatible with the “Caller ID with call waiting” service. Make sure that your telephone company offers this service. Like the basic Caller ID service, you need to subscribe to “Caller ID with call waiting” in order to use this service. Even though you may have already subscribed to “Caller ID” and “call waiting” as two separate services, you need to request a subscription to “Caller ID with call waiting” as a single service.
Additional Information Mounting the base unit on a wall 1 Reverse the hang-up tab. 2 Plug the telephone line cord to 1 Hang-up tab the LINE jack and the AC power adaptor to the DC IN 9V jack, and hook the cords. Use the shorter cord for mounting. 3 Attach the wall bracket to the center of the base unit. 2 AC power adaptor cord Telephone line cord Align the fmarks of the wall bracket with those of the base unit.
Notes on power sources On battery pack For the customers in the USA • Store the battery pack at a temperature between 41°F (5°C) and 95°F (35°C) for best performance. RECYCLING NICKEL-CADMIUM BATTERIES • If you do not use the handset for a long period of time, remove the battery pack after charging for more than 12 hours. On power failure During a power interruption, you cannot make or receive calls, and you cannot use the answering machine. Nickel-Cadmium batteries are recyclable.
Troubleshooting One-touch dialing/ Phone Directory Symptom Remedy You hear five short error beeps when you press (TALK). • Make sure you set up the base unit correctly (page 8). • Move the handset closer to the base unit. • Replace the handset on the base unit, then pick it up and try again. If the handset is on the base unit, pick up the handset and replace it again. You hear no dial tone. • Make sure the telephone line cord is securely connected to the telephone outlet (page 9).
Paging Troubleshooting (continued) Symptom Remedy The handset does not ring when calling from the base unit. • Set the RING switch to ON. Caller ID Operating from an outside phone Answering machine You cannot hear anything from • Use the VOLUME control on the base unit to increase the speaker volume. the speaker. No time stamp is heard. • Make sure the day and time are set (page 28). • The day and time may have been cleared due to a power interruption. Set them again (page 28).
Caller ID Power source/battery Symptom Remedy You cannot dial the number from the Caller ID list. • Make sure you entered your area code correctly (page 13). • You may need to change the number of digits of the phone number (page 45). • This function may not work when the phone is connected to a Private Branch Exchange (PBX). The memory match function does not work. • If the call is from an office which uses multiple lines, the phone number may not match the number you put in the memory.
Specifications 52US General Base unit Spread method Direct-Sequence Spread-Spectrum Access method FDMA-TDD Frequency band 902 - 928 MHz Operating channel 20 channels Dial signal Tone, 10 PPS (pulse) selectable Supplied accessories See page 7. Power source DC 9V from AC power adaptor AC-T46 Battery charging time Approx. 12 hours Dimensions Approx. 6 3⁄4 x 2 3⁄8 x 8 1⁄2 inches (w/h/d), antenna excluded (approx. 170 x 60 x 214 mm) Antenna: 6 1⁄ 2 inches (165 mm) Mass Approx. 18 oz (approx.
Index A E, F R Adjusting volume handset 17 speaker 34 Announcement only 32 Answering machine turning on 33 Area code 13 Audible indicate 32 Erasing Caller ID data 41 last phone number dialed 18 messages 34 Phone Directory 23 Recording greeting 29 memo 36 Receiving calls 19 Redialing 18 Remote ID code (security code) 37 Ringer turning on/off 20 ringer select 31 G, H Greeting 29 B Battery pack charging 11 duration 12 C Call waiting service 19 Caller ID 39 Caller ID list 40 calling back 43 Memory match
Registro del propietario Los números de modelo y de serie se encuentran en la parte inferior del teléfono. Anote el número de serie en el espacio que se proporciona a continuación. Refiérase a estos números cada vez que se comunique con su distribuidor Sony con respecto al producto.
12. Desconecte este producto de la línea telefónica y refiera el servicio a personal de servicio calificado bajo las siguientes condiciones: A. Cuando el cable eléctrico o el enchufe se encuentra dañado o deshilachado. B. Si se ha derramado líquido dentro del producto. C. Si el producto ha estado expuesto a lluvia o agua. D. Si el producto no opera normalmente al seguir las instrucciones de operación.
6. La compañía telefónica puede realizar cambios en sus instalaciones, equipos, operaciones, o procedimientos que pueden afectar la operación del equipo. Cuando suceda esto, la compañía telefónica le avisará con antelación para que usted realice las modificaciones necesarias para mantener ininterrumpido el servicio. 8. Todas las reparaciones deberá realizarlas un centro de reparaciones Sony.
Índice Procedimientos iniciales 6 Lea esto primero 7 Paso 1: Comprobación del contenido del paquete 8 Paso 2: Instalación de la unidad base 11 Paso 3: Preparación del paquete de batería 13 Paso 4: Introducción del prefijo 14 Identificación de los componentes Operaciones básicas 17 Realización de llamadas 18 Rellamada 19 Recepción de llamadas Funciones del teléfono 21 Marcación rápida 21 Almacenamiento de números de teléfono 22 Realización de llamadas mediante la marcación rápida 23 Directorio telefónico A
Procedimientos iniciales Lea esto primero Antes de utilizar el teléfono, es preciso instalarlo. En los pasos 1, 2, 3 y 4 se describe un método rápido para la instalación del teléfono. Paso 1 (página 7) En primer lugar, desembale el teléfono y los accesorios suministrados. Paso 2 (páginas 8 a 10) A continuación, debe realizar tres acciones para instalar la unidad base, incluida la localización de ésta.
Paso 1 Comprobación del contenido del paquete Adaptador de alimentación de CA (AC-T46) Cables de línea telefónica (2) Unidad base Abrazadera de pared/ soporte para la unidad base Procedimientos iniciales Verifique que el paquete incluye los siguientes elementos. En caso de que falte alguno, póngase en contacto con su proveedor local Sony.
Paso 2 Instalación de la unidad base Siga estos pasos: • Elija el mejor emplazamiento • Conecte la unidad base • Elija el modo de marcación Elija el mejor emplazamiento La situación de la unidad base afecta a la calidad de recepción del auricular.
Conexión de la unidad base Si desea montar la unidad base en la pared, consulte la página 47. 4 Enganche el cable. 3 A una toma de CA 1 A DC IN 9V 2 Alinee las marcas f. Adaptador de alimentación de CA (suministrado) A una toma de teléfono Cable de línea telefónica (suministrado) 2 A LINE 1 Procedimientos iniciales ,yy, y,y,y, y, y, Visor 1 Fije la abrazadera de pared en la parte inferior de la unidad base, según se muestra, para utilizarla como soporte.
Paso 2: Instalación de la unidad base (continuación) Notas • Utilice solamente el adaptador de alimentación de CA AC-T46. No utilice otros adaptadores de alimentación de CA. • Conecte el adaptador de alimentación de CA a un suministro de alimentación continuo. • Sitúe la unidad base cerca de la toma de CA, de forma que pueda desenchufar el adaptador fácilmente. Polaridad del enchufe – Consejos • Si la toma de teléfono no es modular, solicite asistencia al servicio técnico de la compañía telefónica.
Paso 3 Preparación del paquete de batería Cargue el paquete de batería durante más de 12 horas antes de comenzar a utilizar el teléfono. compartimiento de la batería, situada en el auricular, para abrirla. Rojo 2 Conecte el conector del paquete Negro BP-T24 de batería con la polaridad correcta (cable negro en el lado derecho y rojo en el izquierdo). 3 Enganche los cables e inserte el Procedimientos iniciales 1 Deslice la tapa del paquete de batería. A continuación, cierre la tapa.
Paso 3: Preparación del paquete de batería (continuación) Duración del paquete de batería Un paquete de batería completamente cargado dura aproximadamente: • 6 horas si utiliza el auricular de forma continua • 10 días (modo RING ON) o 1 mes (modo RING OFF) cuando el auricular se encuentra en modo de espera. Notas • El paquete de batería se descargará durante un periodo de tiempo prolongado, incluso si no está en uso. • Si deja el paquete de batería en el auricular sin cargarlo, se descargará por completo.
Paso 4 Introducción del prefijo Al emplear este teléfono por primera vez o al trasladarlo a una zona donde haya un prefijo distinto, es preciso introducir el prefijo adecuado. Esto es necesario, ya que el teléfono debe distinguir entre llamadas locales y conferencias para marcar correctamente los números de la lista de ID de llamada. Pulse 1 Pulse (VOL/PGM). 2 Gire el dial de avance hacia arriba para que “AREA” parpadee. DIRECTORY AREA 3 Pulse el dial de avance. “ENTER AREA CODE” aparece en el visor.
Identificación de los componentes Consulte las páginas indicadas entre paréntesis para obtener más información. Unidad base 1 9 2 3 0 4 qa 5 qs 6 qd 7 qf 8 qg qh qj qk 1 Visor (p.9, 34) 2 Indicador IN USE Se ilumina mientras se utiliza el auricular inalámbrico. 3 Indicador CHARGE (p. 11) Se ilumina mientras se carga la batería. 4 Botón GREETING (p. 29) Reproduce el mensaje de saludo. También se utiliza al grabar un saludo. 5 Botón ERASE (p. 30, 34) Borra el saludo o mensajes grabados.
Visor ql w; El visor de la unidad base muestra el funcionamiento del contestador automático. 3 4 y , y,y,y,y, y, 2 wa ws wd wf qj Botón HANDSET LOCATOR (p. 27) Permite llamar al auricular inalámbrico. qk Botones PLAY/STOP (MAILBOX 1, 2, 3) (p. 34) Reproducen los mensajes de cada buzón. ql Interruptor AUDIBLE INDICATE (p. 32) Selecciona el modo de contestación. w; Interruptor RINGER SELECT (p. 31) Selecciona el número de señales de llamada. wa Interruptor DIAL MODE (p.
Identificación de los componentes (continuación) Auricular 1 2 3 4 5 6 0 qa qs qd qf 7 8 qg qh 9 9 Interruptor RING (p. 12, 20) 1 Antena 2 Altavoz 3 Dial de avance (p. 13, 23, 40) 4 Botón TALK (p. 17, 35) Permite realizar o recibir llamadas. 5 Botón REDIAL (p. 18) Vuelve a marcar el último número marcado. 6 Botón VOL (volumen) /PGM (programa) (p. 13, 17, 21, 23) Se utiliza para ajustar el volumen del altavoz.
Operaciones básicas Realización de llamadas 1 Levante el auricular de la unidad base. 2 Pulse (TALK) y espere hasta que “TALK” aparezca en el visor. El indicador IN USE de la unidad base se ilumina. (VOL/PGM) (*TONE) 3 Marque el número de teléfono. Durante la conversación, es posible ajustar el volumen del auricular. Realice el proceso descrito en la tabla que aparece más adelante. Operaciones básicas (REDIAL) A continuación, oirá el tono de marcación.
Realización de llamadas (continuación) Si la batería se debilita durante una llamada El auricular emitirá un pitido cada tres segundos y los indicadores E y “BATTERY LOW” aparecerán en el visor. Finalice la llamada y cargue el paquete de batería. Para obtener un rendimiento óptimo, cargue la batería durante 12 horas. Tenga en cuenta que durante los primeros 10 - 15 minutos de carga, el teléfono estará inactivo, es decir, incapaz de realizar o recibir llamadas.
Recepción de llamadas 1 Cuando el teléfono suene, levante el auricular de la unidad base y pulse (TALK). “TALK” aparece en el visor y el indicador IN USE de la unidad base se ilumina. (CALL WAITING/FLASH) 2 Cuando finalice la conversación, pulse (OFF) o vuelva a colocar el auricular en la unidad base. El visor y el indicador IN USE de la unidad base se desactivan.
Recepción de llamadas (continuación) Para desactivar la señal de llamada en el auricular Ajuste el interruptor RING de la parte inferior en OFF. Puede ahorrarse energía de la batería. El auricular no emitirá señales de llamada. Aún puede realizar llamadas y recibirlas si otro teléfono conectado a la misma línea suena al recibir llamadas entrantes, pero no podrá llamar al auricular desde la unidad base.
Funciones del teléfono Marcación rápida Es posible marcar pulsando una sola tecla mediante el almacenamiento de números de teléfono en los botones de marcación rápida. Almacenamiento de números de teléfono 1 Pulse (VOL/PGM). DIRECTORY AREA (PAUSE) Dial de avance 2 Pulse uno de los tres botones ONE-TOUCH DIAL ((A) a (C)). (TALK) A= Si hay algún número almacenado, aparecerá en el visor. Para almacenar un número nuevo, gire el dial de avance para borrarlo.
Marcación rápida (continuación) Nota No deje que transcurran más de 20 segundos entre cada paso del proceso. Consejos • Si ha introducido un número incorrecto en el paso 3, pero aún no ha pulsado (VOL/PGM) (paso 4), basta con girar el dial de avance hacia abajo para borrarlo. A continuación, introduzca el número correcto. • Puede pulsar el dial de avance en lugar de (VOL/PGM) en el paso 4.
Directorio telefónico Es posible marcar números desplazándose por el directorio telefónico. Es posible almacenar hasta 50 números. Almacenamiento de números de teléfono y nombres Gire Pulse Ejemplo: para almacenar “SONY” “1234567”. 1 Pulse (VOL/PGM). (Asegúrese de no pulsar (TALK).) DIRECTORY AREA Si “DIRECTORY” no parpadea, gire el dial de avance hacia abajo para que parpadee. Aparece “ENTER NAME”. 3 Introduzca el nombre mediante las teclas de marcación.
Directorio telefónico (continuación) 4 Pulse (VOL/PGM). Aparece “ENTER NUMBER”. 5 Introduzca el número de teléfono. Es posible introducir hasta 16 dígitos, incluidos un tono y una pausa, contándose cada uno de ellos como un dígito. SONY 1234567 6 Pulse (VOL/PGM). Se oirá un pitido largo de confirmación, y el nombre y el número quedarán almacenados. El visor se apagará.
3 Gire el dial de avance hacia arriba para que “PGM” parpadee y pulse dicho dial. SONY 1234567 El cursor parpadea en el último carácter del nombre. 4 Gire el dial de avance hacia abajo para borrar los caracteres e introduzca el nombre nuevo. Si desea cambiar sólo el número, omita este paso. 5 Pulse el dial de avance. El cursor parpadea en el último dígito del número de teléfono. 6 SMITH 1234567 Gire el dial de avance hacia abajo para borrar el número e introduzca el nuevo.
Directorio telefónico (continuación) Realización de llamadas desde el directorio telefónico Gire Pulse 1 Pulse el dial de avance dos veces. “DIRECTORY” aparece en el visor. 2 Muestre el nombre y número de teléfono al que desee llamar. Para buscar en orden alfabético: Gire el dial de avance hacia arriba o abajo. Para buscar mediante la introducción del primer carácter: Pulse la tecla de marcación del carácter que desee y gire el dial de avance. SONY 1234567 3 Pulse el dial de avance.
Llamada al auricular desde la unidad base Es posible llamar al auricular desde la unidad base. Tenga en cuenta que no es posible llamar al auricular si éste está utilizándose. Para llamar al auricular Pulse (HANDSET LOCATOR). El auricular suena. Si mantiene pulsado (HANDSET LOCATOR), el auricular sonará continuamente. Funciones del teléfono Funciones del teléfono Nota No es posible llamar al auricular si el interruptor RING de éste está ajustado en OFF.
Funciones del contestador automático Preparación del contestador automático Observe que no es posible utilizar la unidad base mientras se utiliza el auricular. Ajuste del día y la hora Este ajuste permite indicar el día y la hora en los mensajes entrantes. Al reproducir los mensajes, en la grabación escuchará el día y la hora. 1 Pulse (SET/REC). 2 Pulse (TIME). Escuchará una guía oral, indicándole lo siguiente: “Please set the day. To select, press the SKIP or REPEAT button.
7 Pulse (SKIP/QUICK) o (REPEAT/SLOW) varias veces hasta que se anuncien los minutos correctos. 8 Pulse (SET/REC). Se escuchará un pitido largo de confirmación seguido del día y la hora. A continuación, el teléfono empezará a cronometrar el tiempo. Notas • Entre cada paso del proceso, no deberán transcurrir más de 20 segundos (o 60 segundos cuando ajuste los minutos). • Si se produce una interrupción de la alimentación, el día y la hora se borrarán.
Preparación del contestador automático (continuación) Notas • Si la grabación no se ha realizado satisfactoriamente, oirá cinco pitidos cortos de error. Empiece de nuevo el proceso. • Si se recibe una llamada o si pulsa (TALK) durante la grabación del saludo, ésta se cancelará. Realice de nuevo el proceso. • Si escucha cinco pitidos cortos de error mientras graba, es posible que el área de grabación esté llena. En este caso, borre los mensajes que no necesite (consulte la página 34).
Selección de las señales de llamada Existen tres opciones de señales de llamada. Seleccione la que desee con el interruptor RINGER SELECT. Interruptor RINGER SELECT Modo TS (ahorro de costes) Si se han grabado mensajes nuevos, el teléfono contesta después de la segunda señal y graba los mensajes entrantes; si no se han grabado mensajes nuevos, contesta después de la quinta señal. Así puede ahorrarse el precio de la llamada al comprobar los mensajes desde un teléfonoexterno.
Preparación del contestador automático (continuación) Selección del modo de contestación Es posible ajustar el contestador automático para que grabe mensajes entrantes (modo normal), o para que salude sin grabar mensajes (modo sólo saludo). Puede grabar su propio saludo, o utilizar los saludos grabados en fábrica. En el modo normal, también puede disponer de la opción de oír un pitido que le avise si ha recibido mensajes entrantes nuevos.
Activación de la función de contestador Pulse (ANSWER ON/OFF) para que se ilumine en rojo. Nota Si la memoria está llena, se escucharán cinco pitidos cortos de error y la función de contestador no podrá activarse. Borre los mensajes que no necesite (consulte la página 34). Cuando alguien llama Podrá elegir una de las siguientes formas para dejar un mensaje: • Seleccionar un buzón pulsando (*)(1) (MAILBOX 1), (*)(2) (MAILBOX 2) o (*)(3) (MAILBOX 3) mientras la persona que llama oye el saludo.
Reproducción de mensajes Al llegar a casa (ERASE) Indicador de número de mensajes (VOLUME) (REPEAT/SLOW) (ANSWER ON/OFF) (SKIP/QUICK) Si (ANSWER ON/OFF) parpadea en rojo, o si el visor muestra el número de mensajes nuevos y el indicador MAILBOX parpadea, pulse el botón del buzón ((MAILBOX 1), (MAILBOX 2) o (MAILBOX 3)). La unidad realizará la reproducción desde el primer mensaje nuevo.
Admisión o rechazo de llamadas entrantes Es posible aceptar o rechazar llamadas dejando la función de contestador activada (consulte la página 33) mientras se encuentra en casa. Al responder a una llamada, podrá oír el mensaje que esté grabándose mediante la unidad base (no es posible escuchar los mensajes mediante el auricular), pero la persona que llama no podrá oírle a usted. Después, podrá decidir si contestar a la llamada o no. Sólo es posible disponer de esta función en la unidad base.
Grabación de memorandos Es posible grabar un “memorando” (máximo de cuatro minutos) como recordatorio personal o como mensaje para otra persona. Es posible reproducir el memorando grabado como cualquier mensaje entrante (consulte la página 34). 1 Pulse (MEMO). Oirá una guía oral. 2 Seleccione un buzón pulsando (MAILBOX 1), (MAILBOX 2) o (MAILBOX 3). Oirá una guía oral y después un pitido largo de confirmación.
Operación desde un teléfono externo Es posible llamar desde un teléfono de tonos y recoger los mensajes nuevos grabados. Basta con definir el código ID remoto (código de seguridad) y activar la función de contestador antes de salir. Ajuste del código ID remoto (código de seguridad) 1 Pulse (SET/REC). 2 Pulse (ANSWER ON/OFF). Oirá una guía oral: “Please set the security code. To select, press the SKIP or REPEAT button. To enter, press the SET button”.
Operación desde un teléfono externo (continuación) Recogida de nuevos mensajes 1 2 Llame a su teléfono desde un teléfono de tonos. Mientras oye la reproducción del saludo, pulse (#) y su código ID remoto (código de seguridad). Oirá un pitido largo de confirmación y el saludo se interrumpirá. Siguiendo la guía oral que informa sobre el número de mensajes grabados, el teléfono quedará a la espera para que introduzca un código de control.
Características de ID de llamada Concepto del servicio de ID de llamada El ID de llamada permite que el número de teléfono de la persona que llama aparezca en el visor antes de contestar a la llamada. Para poder utilizar este servicio, es preciso solicitarlo. La denominación de este servicio puede variar en función de la compañía telefónica. Para emplear este servicio, asegúrese de introducir su prefijo (consulte la página 13).
Lista de ID de llamada El teléfono almacena los datos de las últimas 20 llamadas recibidas incluidas las llamadas “OUT OF AREA” y “PRIVATE”. Mantiene un registro de todas las llamadas recibidas, aunque no se hayan contestado. No obstante, si el interruptor RING está ajustado en OFF y el auricular no se encuentra en la unidad base, el teléfono no podrá recibir los datos de ID de llamada.
Acerca de la marca “*” SMITH JOHN * 1-201-123-4567 “*” aparecerá si hay más de dos llamadas del mismo número de teléfono. El dato más antiguo se sustituirá por el reciente para que las llamadas se cuenten sólo como una. Eliminación de datos de la lista de ID de llamada Los datos antiguos se borrarán automáticamente al recibirse la llamada número 21, aunque también es posible borrar manualmente los datos innecesarios uno por uno o borrar la lista completa.
Lista de ID de llamada (continuación) Para borrar la lista completa de una vez 1 Muestre cualquier dato de ID de llamada. SMITH JOHN 1-201-123-4567 2 Pulse el dial de avance. DIAL PGM ERASE 1-201-123-4567 3 Gire el dial de avance hacia arriba para que “ERASE” parpadee y pulse dicho dial. ERASE NO YES ALL 1-201-123-4567 4 Gire el dial de avance hacia arriba para que “ALL” parpadee y pulse dicho dial.
Uso de la lista de ID de llamada Mediante el uso de la lista de ID de llamada, es posible llamar fácilmente a un número de teléfono de la lista de ID de llamada, o almacenar números de dicha lista en las teclas de marcación de memoria. Realización de llamadas a números de la lista de ID de llamada 1 Muestre el número de teléfono Gire Pulse de la lista de ID de llamada al que desee llamar (consulte la página 40). SMITH JOHN 1-201-123-4567 2 Confirme el número y pulse el dial de avance.
Uso de la lista de ID de llamada (continuación) Almacenamiento de números de la lista de ID de llamada en el directorio telefónico 1 Muestre el nombre y número de teléfono que desee almacenar de la lista de ID de llamada (consulte la página 40). 2 Confirme el número y pulse el dial de avance. 3 Gire el dial de avance hacia arriba para que “PGM” parpadee y pulse dicho dial. SMITH JOHN 1-201-123-4567 DIAL PGM ERASE 1-201-123-4567 SMITH JOHN 12011234567 El cursor parpadea al final del nombre.
Para cambiar el número de dígitos del número de teléfono Si el número de dígitos del número de teléfono de la lista de ID de llamada es diferente del número de teléfono real, será preciso ajustar dicho número de dígitos para realizar llamadas o para almacenarlo en el directorio telefónico. 1 Mientras se visualiza el número de teléfono de la lista de ID de llamada, pulse (#) varias veces hasta que el visor muestre el número de teléfono con el número correcto de dígitos.
Uso del servicio de “ID de llamada con llamada en espera” Este teléfono es compatible con el servicio de “ID de llamada con llamada en espera”. Compruebe que su compañía telefónica ofrezca este servicio. Al igual que el servicio de ID de llamada básico, es necesario solicitar el servicio de “ID de llamada con llamada en espera” para poder utilizarlo.
Información adicional Instalación de la unidad base en la pared 1 Dele la vuelta a la lengüeta para colgar el auricular. 1 2 Enchufe el cable de línea telefónica en la toma LINE y el Lengüeta para colgar el auricular adaptador de alimentación de CA en la toma DC IN 9V, y enganche los cables. Emplee el cable más corto para realizar la instalación. 3 Fije la abrazadera de pared en el centro de la unidad base.
Notas sobre fuentes de alimentación Batería Para clientes en EE.UU. • Guarde la batería a una temperatura comprendida entre 5°C y 35°C para obtener un rendimiento óptimo. RECICLAJE DE PILAS DE NÍQUELCADMIO • Si no va a utilizar el auricular durante mucho tiempo, extraiga la batería después de cargarla durante más de 12 horas. Corte de suministro eléctrico Durante una interrupción en el suministro eléctrico, no es posible realizar ni recibir llamadas.
Solución de problemas Marcación rápida/ Directorio telefónico Problema Solución Se oyen cinco pitidos cortos de error al pulsar (TALK). • Compruebe que ha instalado la unidad base correctamente (página 8). • Acerque el auricular a la unidad base. • Coloque el auricular en la unidad base; a continuación, levántelo y vuelva a intentarlo. Si el auricular se encuentra en la unidad base, levántelo y vuelva a colocarlo.
ID de llamada Operación desde un teléfono externo Contestador automático Llamada al auricular desde la unidad base Solución de problemas (continuación) 50ES Problema Solución El auricular no suena al llamar desde la unidad base. • Ajuste el interruptor RING en ON. No es posible oír nada por el • Utilice el control VOLUME de la unidad base para altavoz. aumentar el volumen del altavoz. No se oye la indicación de hora. • Compruebe que ha ajustado el día y la hora (página 28).
Fuente de alimentación/batería ID de llamada Problema Solución No es posible marcar el número • Compruebe que ha introducido su prefijo de la lista de ID de llamada. correctamente (página 13). • Es posible que tenga que cambiar el número de dígitos del número telefónico (página 45). • Es posible que esta función no se active si el teléfono está conectado a una central privada con extensiones (PBX). La función de comparación en memoria no se activa.
Especificaciones Generales Unidad base Método de transmisión Espectro de transmisión de secuencia directa Método de acceso FDMA-TDD Banda de frecuencia 902 - 928 MHz Canal de funcionamiento 20 canales Señal de marcación Tonos, 10 PPS (impulsos) seleccionable Accesorios suministrados Consulte la página 7. Fuente de alimentación CC 9V del adaptador de alimentación de CA AC-T46 Tiempo de carga de la batería Aprox. 12 horas Dimensiones Aprox.
Índice alfabético A G, H O Admisión o rechazo de llamadas 35 Ajuste del volumen altavoz 34 auricular 17 Almacenamiento de datos de ID de llamada en el directorio telefónico 44 Altavoz 17, 34 AUDIBLE INDICATE 32 Grabación memorando 36 saludo 29 Operación desde un teléfono externo 37 OUT OF AREA 39 I, J, K P, Q ID de llamada 39 almacenamiento en el directorio telefónico 44 función de comparación en memoria 39 lista de ID de llamada 40 realización de llamadas 43 ID de llamada con llamada en espera 46 I
Sony Corporation Printed in Taiwan, R.O.C.