Multi Channel AV Receiver Operating Instructions STR-DN1080
For the customers in the USA Owner’s Record The model and serial numbers are located on the rear of the receiver. Record the serial number in the space provided below. Refer to these numbers whenever you call upon your Sony dealer regarding this product. Model No. STR-DN1080 FOR UNITED STATES CUSTOMERS. NOT APPLICABLE IN CANADA, INCLUDING IN THE PROVINCE OF QUEBEC. POUR LES CONSOMMATEURS AUX ÉTATS-UNIS. NON APPLICABLE AU CANADA, Y COMPRIS LA PROVINCE DE QUÉBEC. For the customers in the USA Serial No.
12) Use only with the cart, stand, tripod, bracket, or table specified by the manufacturer, or sold with the apparatus. When a cart is used, use caution when moving the cart/apparatus combination to avoid injury from tip-over. 13) Unplug this apparatus during lightning storms or when unused for long periods of time. 14) Refer all servicing to qualified service personnel.
This equipment complies with IC radiation exposure limits set forth for an uncontrolled environment and meets RSS-102 of the IC radio frequency (RF) Exposure rules. This equipment should be installed and operated keeping the radiator at least 20 cm or more away from person's body (excluding extremities: hands, wrists, feet and ankles). For the customers in Europe 5,150 MHz – 5,250 MHz band is restricted to indoor operations only.
Hereby, Sony Corp., declares that this equipment is in compliance with the essential requirements and other relevant provisions of Directive 1999/5/EC. For details, please access the following URL: http://www.compliance.sony.de/ This product is intended to be used in the following countries.
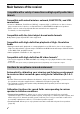
Manuals provided for this product The following manuals are provided for this product.
About These Operating Instructions These Operating Instructions mainly describe the procedures for using the remote control. You can also use the controls on the receiver if they have the same or similar names as those on the remote control. Some illustrations are presented as conceptual drawings, and may be different from the actual products. These Operating Instructions cover models for the United States, Canada, Oceanian and European countries.
Main features of the receiver Compatible with a variety of connections and high-quality audio/video formats Compatible with wired/wireless network, BLUETOOTH, and USB connections Connect a Walkman, iPod/iPhone (AirPlay), computer, NAS, or USB device to the receiver to play content on those devices or transmit music to BLUETOOTH headphones/speakers. Music services such as Spotify and Chromecast built-in are supported. For details, see the Help Guide.
In-Ceiling Speaker Mode**: Reproduces more natural sound by lowering the position of audio output from speakers installed in the ceiling. Center Speaker Lift Up**: Reproduces natural sound that feels more authentic by lifting the sound from the center speaker up to the height of the screen. * Digital Cinema Auto Calibration EX ** For details, see the Help Guide.
Supports bi-amping of front speakers You can enhance the sound quality of the front speakers by connecting different amplifiers to the tweeter and woofer using a bi-amplifier connection (page 26). Support for music and video playback in different rooms The Wireless Multi-Room function** lets you listen to the same music in different rooms. The multi-zone features let you output audio and video signals to another room. * For details, see the Help Guide.
Supplied Accessories Remote control (1) R03 (size AAA) batteries (2) FM wire antenna (aerial) (1) Calibration microphone (1) Inserting batteries into the remote control Insert two R03 (size AAA) batteries (supplied) in the remote control. Make sure that the + and – ends are in the correct position when installing batteries. Note Do not leave the remote control in an extremely hot or humid place. Do not use a new battery with old ones.
Parts and Controls Receiver Front panel (power) (page 39) Power indicator SPEAKERS (page 41) CONNECTION PAIRING BLUETOOTH PHONES jack Operates the BLUETOOTH function. TUNER PRESET +/– Connect headphones here. Power indicator Selects preset stations or channels. NFC sensor 2CH/MULTI, MOVIE, MUSIC (page 46) Display panel (page 13) DISPLAY MODE Switches information on the display panel.
Indicators on the display panel UPDATE Lights up when new software is available. D.C.A.C. Lights up when the measurement results of the Auto Calibration (D.C.A.C. EX) function are applied. S.OPT. Lights up when the Sound Optimizer function is activated. A.P.M. Lights up when the A.P.M. (Automatic Phase Matching) function is activated. You can only set the A.P.M. function in the D.C.A.C. function. D.R.C. Lights up when dynamic range compression is activated.
Rear panel COAXIAL IN jack HDMI IN/OUT jacks* IR REMOTE IN/OUT jacks You can control the receiver from a distance by connecting an IR repeater (not supplied) to the IR REMOTE IN jack. You can start or stop playback of devices such as a CD player connected to the receiver by connecting an IR blaster (not supplied) to the IR REMOTE OUT jack. Wireless LAN antenna LAN port SPEAKERS terminals Only the USA and Canadian models are equipped with the SPEAKERS ZONE 2 terminals.
About input/output of video signals The digital video signals input to the HDMI IN jacks of this receiver are output from HDMI OUT A (TV) or HDMI OUT B/HDMI ZONE jacks only. The analog video signals input from VIDEO IN jacks are output from the MONITOR OUT jack only. Use the following illustration as reference when you connect the receiver, AV device, and TV.
Remote control Select “HDMI OFF” to turn off the output for the HDMI OUT A (TV) and HDMI OUT B/HDMI ZONE jacks. Input buttons BD/DVD, SAT/CATV, GAME, SA-CD/CD, USB, TV, FM Selects the input channel connected to the device you want to use. When you press any of the input buttons, the receiver turns on. WATCH, LISTEN Allows you to display the Watch or Listen screen directly without the need to select it on the home menu. Press WATCH to display the Watch screen or LISTEN to display the Listen screen.
HOME Displays the home menu on the TV screen. / (previous/next), (play/pause)3), (stop) Skip, play, pause, stop operation. PRESET +/– Selects preset stations or channels. (volume) +3)/– Adjusts the volume level of all speakers at the same time. (muting) Turns off the sound temporarily. Press the button again to restore the sound. 1) Available services may vary depending on your location. Spotify playback using the receiver is limited to Spotify Premium accountholders.
Preparation Installing Speakers You can connect up to 7 speakers and 2 subwoofers to this AV receiver. Place the speakers and subwoofers according to the speaker system of your preference. Location of each speaker Note When you connect only one surround back speaker (SB), place the surround back speaker directly behind the listening position. As the subwoofer (SW) does not emit highly directional signals, you can place it wherever you want.
Functions FDL Front Dolby Atmos enabled left speaker FDR Front Dolby Atmos enabled right speaker Produces sounds from the top middle left/right channels and reflects these sounds off the ceiling. Enables playing back sounds of Dolby Atmos 3D movies without the need to install ceiling speakers.
Connecting Speakers This receiver allows you to connect up to 7.1-channel system. The speaker layout diagram is a guide for the ideal speaker placement. You do not need to adjust your speaker placement exactly the same as the diagram. Note Before connecting cables, be sure to disconnect the AC power cord (mains lead). Before connecting the AC power cord (mains lead), make sure that metallic wires of the speaker cables are not touching each other between the SPEAKERS terminals.
Examples of speaker connections Preparation 5.
7.1-channel speaker system using surround back speakers 30˚ 100˚ – 120˚ Same angle Surround speakers Subwoofer Surround back speakers* Center speaker Front speakers Monaural audio cable (not supplied) Speaker cable (not supplied) * If you connect only one surround back speaker, connect it to the L (+/–) terminals. After you have made the connection, select a speaker pattern with only one surround back speaker connected for [Speaker Pattern] in [Speaker Settings].
5.1.2-channel speaker system using top middle speakers Preparation 30˚ 100˚ – 120˚ Surround speakers Subwoofer Top middle speakers* Center speaker Front speakers Monaural audio cable (not supplied) Speaker cable (not supplied) * After you have made the connection, set [Speaker Pattern] in [Speaker Settings] to [5.1.2 (TM)].
5.1.2-channel speaker system using Dolby Atmos enabled speakers 30˚ 100˚ – 120˚ Surround speakers Subwoofer Front Dolby Atmos enabled speakers* Center speaker Front speakers Monaural audio cable (not supplied) Speaker cable (not supplied) * After you have made the connection, set [Speaker Pattern] in [Speaker Settings] to [5.1.2 (FD)].
5.1-channel speaker system with Zone 2 speakers 30˚ Zone 2 100˚ – 120˚ Surround speakers Subwoofer Preparation Main zone Speakers (Zone 2) (for USA and Canadian models only)* Speakers (Zone 2) (for other models)* Center speaker Front speakers Monaural audio cable (not supplied) Speaker cable (not supplied) * Only USA and Canadian models are equipped with the SPEAKERS ZONE 2 terminals. The USA and Canadian models are used for illustrative purposes in these Operating Instructions.
5.1-channel speaker system with Bi-Amplifier connection When the front speakers are Bi-wire speakers, which are equipped with separate terminals for high-frequency sounds (tweeter) and low-frequency sounds (woofer), you can make the biamplifier connection. Connect each pair of terminals for tweeter and woofer to the SPEAKERS FRONT A terminals and SPEAKERS SURROUND BACK/HEIGHT terminals of this receiver.
Note You can only set [Surround Back Speaker Assign] if the speaker pattern is set to a setting that does not have surround back and height/overhead speakers (page 19).
2.1-channel speaker system (for enjoying Front Surround) If you select [Front Surround] for the sound field setting, you can enjoy virtual surround effects using only the two front speakers. Place the speakers as shown below to enjoy Front Surround. Set the height of a tweeter of the front speaker at the same height as your ears. 30˚ 1.5 m – 3 m Tip Change the direction of the front speakers little by little to search for and set the direction that gives you the best surround effects.
Connecting a TV Notes on connection Before connecting cables, be sure to disconnect the AC power cord (mains lead). Sony recommends that you use an HDMI cable made by Sony or another HDMI-authorized cable. Be sure to use a High Speed HDMI Cable with Ethernet. For video signals that require a high bandwidth such as 4K/60p 4:4:4, 4:2:2 and 4K/60p 4:2:0 10 bit etc., be sure to use a Premium High Speed HDMI Cable with Ethernet, which supports bandwidths up to 18 Gbps.
Connecting a TV incompatible with the Audio Return Channel (ARC) function via an HDMI connection When you connect the receiver to a TV using the HDMI cable , the receiver can output audio and video signals to the TV. Note, however, that you also need to connect the optical digital cable or audio cable to the TV in order to output TV audio from the speakers connected to the receiver.
With just one HDMI cable connection, you can listen to the TV audio from the speakers connected to the receiver while the receiver sends audio and video signals to the TV. Audio/Video signals HDMI cable (not supplied) Note For this connection, you need to turn the Control for HDMI function on. Press HOME, then select [Setup] – [HDMI Settings] – [Control for HDMI] – [On]. You also need to perform the setting on the TV menu. Turn on the ARC function.
Connecting a TV without HDMI jacks You need to connect the optical digital audio cable or audio cable to the TV in addition to connecting the video cable . Video signals Audio signals or Recommended connection Alternative connection Video cable (not supplied) Audio cable (not supplied) Optical digital audio cable (not supplied) Note When you have connected the receiver and TV using the above method, video from the device connected to the VIDEO IN jacks is displayed on the TV.
Connecting Audio-Visual Devices Before connecting cables, be sure to disconnect the AC power cord (mains lead). The HDMI IN jacks of the receiver are compatible with HDCP 2.2. To watch content protected by HDCP 2.2, such as 4K content, connect these HDMI IN jacks to HDCP 2.2-compatible HDMI jacks on the player. Refer to the operating instructions of the connected device for details. Audio/Video signals Game console, DVD player, etc.
Tip This connection is an example. You can connect each HDMI device to any HDMI IN jacks. The BD/DVD and SA-CD/CD inputs have better sound quality. When you need a higher sound quality, connect your device to these HDMI IN jacks and select them as the input. The image quality depends on the type of connecting jack. We recommend you connect your devices via an HDMI connection if they have HDMI jacks.
Connecting devices with jacks other than HDMI jacks Preparation Before connecting cables, be sure to disconnect the AC power cord (mains lead).
Note To listen to the sounds from a device connected to the AUDIO IN jacks, do not connect any device to the HDMI IN, COAXIAL IN, and OPTICAL IN jacks, which are labeled with the same device name (such as SAT/CATV, TV, VIDEO 1, and SA-CD/CD). Tip You can connect devices other than those indicated above to the AUDIO IN jacks (SAT/CATV, VIDEO 1, and SA- CD/CD). You can rename each input so that the name can be displayed on the display panel of the receiver.
Connecting another amplifier or TV in the HDMI zone Preparation Before connecting cables, be sure to disconnect the AC power cord (mains lead). Main zone HDMI zone Speaker TV Speaker Amplifier/ Receiver Audio/Video signals Recommended connection Alternative connection HDMI cable (not supplied) Note To use this connection, set [HDMI Out B Mode] in the [HDMI Settings] menu to [Zone].
Connecting to a network When using wireless LAN connection Select the connection method based on your LAN (Local Area Network) environment. The following illustrations are configuration examples of a home network with the receiver and a server. Internet Modem When using wired LAN connection Router Connect your receiver to the network using a LAN cable* (not supplied). Internet Server (computer, etc.
Connecting the AC Power Cord (mains lead) Before connecting the antenna (aerial), be sure to disconnect the AC power cord (mains lead). Before connecting the AC power cord (mains lead), be sure to make connections for speakers and the other devices. 1 Connect the AC power cord (mains lead) to a wall outlet. FM wire antenna (aerial) (supplied) Note Be sure to fully extend the FM wire antenna (aerial).
Setting up the Receiver using the Easy Setup To perform initial setup of the receiver, make sure a TV is connected to the receiver (page 29). Then, switch the input of the TV to the input to which the receiver is connected. Note It is not possible to perform the Easy Setup procedure using the indications on the front display panel. When you turn on the receiver for the first time or after the receiver is initialized, the Easy Setup screen appears on the TV screen.
Selecting the front speakers Preparation Connect the supplied calibration microphone to CALIBRATION MIC jack. Set up the calibration microphone at your listening position. SPEAKERS Press SPEAKERS repeatedly. Calibration microphone (supplied) Note The speakers emit very loud sound during the calibration and the volume cannot be adjusted. Be considerate of your neighbors and any children who are present.
6 Listening/Watching When you select [FM TUNER], tune in to your desired station by using the buttons on the remote control according to the guide on the TV screen. For details on operation, visit the Help Guide. Enjoying Sound and Video Playing AV devices/Listening to FM radio You can connect AV devices to the receiver to enjoy a wide range of content such as movies and audio. Also, you can listen to FM broadcasts in highquality sound through the built-in tuner. 1 Turn on the device you want to play.
When [Enhanced format] is selected, we 5 Set [Zone2] – [Zone2 Power] – [On]. You can also press ZONE SELECT on the receiver repeatedly to select “ZONE2 ON ?”, then press ZONE POWER on the receiver to set. 6 Select [Zone2 Input], then select the source signals you want to output. You can also turn INPUT SELECTOR on the receiver while “2. xxxx”* appears on the display panel.
Enjoying sound from speakers located in other rooms using another amplifier (Zone 2) 1 Connect another amplifier located in Zone 2 (page 36). 2 Turn on the receiver in main zone and the amplifier in Zone 2. 3 4 Set the volume control for Zone 2. 7 Adjust the volume using the amplifier in Zone 2. If you set [Zone2 Line Out] to [Variable] in step 3, select [Zone2 Volume] then adjust the volume. You can also turn MASTER VOLUME on the receiver while “2. xxxx”* appears on the display panel.
6 Note Adjust the volume using the volume control on the amplifier or TV in HDMI zone. Tip You can avoid possible interference to the signals To exit zone operation Set [HDMI Zone Power] to [Off] in step 4. Available inputs for each zone Available inputs vary depending on the zone you have selected. Select the input you want on TV screen or display panel. For details on the available inputs, refer to “Available inputs for each zone” in Help Guide. IN jacks cannot be output to the speakers in Zone 2.
Enjoying Sound Effects Selecting a sound field When you select a sound field according to the input source and your preferences, you can enjoy the sounds with added sound field effects. 1 Press HOME. The home menu is displayed on the TV screen. 2 Select [Sound Effects] – [Sound Field]. 3 Press / to select the sound field you want, then press . Sony recommends selecting a sound field labeled [Movie] for movies and a sound field labeled [Music] for music.
Relations between sound fields and speaker outputs The list below shows which speaker outputs sound when a certain sound field is selected. 2-channel content 2ch Stereo 2CH/ MULTI Surround back speakers Subwoofer Height speaker MULTI ST. DIRECT 3) DIRECT A.F.D. (Auto Format Decoding) A.F.D. 2) Dolby Surround DOLBY SURR. 1) NEURAL:X 1) FRONT SUR. 1) A.
Multi-channel content Sound field Front speakers Center speaker Surround speakers Surround back speakers Subwoofer Height speaker 2CH STEREO Multi Channel Stereo MULTI ST. Direct DIRECT A.F.D. (Auto Format Decoding) A.F.D. Dolby Surround DOLBY SURR. NEURAL:X FRONT SUR. A.
Selectable sound fields and their effects Sound field Effects of the sound field 2CH STEREO Plays back 2-channel audio signals without adding any surround effects. Monaural and multi-channel audio signals are output after being converted into a 2-channel signal. This sound field is best suited for playing back audio signals as they are from two front speakers only, without adding any virtual surround effects. The sound is output from the front left/right speakers only.
Network functions What you can do with network features You can enjoy playing back audio content in high-quality audio from a computer or network HDD, or iPhone/iPad/iPod or other smartphone or tablet connected to your home network either wired or wirelessly. You can also enjoy music services such as internet radio by connecting internet. You can also control this receiver from a smartphone by using the compatible apps.
Listening with BLUETOOTH headphones/ speakers 1 Press BLUETOOTH RX/TX repeatedly to select “BT TX.” Internet music services With the receiver connected to the Internet, you can listen to music from a variety of music services. For details, refer to “Enjoying music services offered on the Internet” in Help Guide. The BLUETOOTH mode switches to TX (transmitter). 2 Turn on the headphones/ speakers and set them to pairing mode.
4 Press / to select the name of the headphones/speakers, and then press . After “CONNECTING” flashes and the headphone name or speaker name is displayed, the BLUETOOTH connection is complete. CONNECTING XXXXXX * * “XXXXXX” represents the name of a detected BLUETOOTH device. 5 Press one of the input buttons to select the input you want. The sound is output from the BLUETOOTH headphones/speakers. No sound is output from the receiver. 6 Adjust the volume of the BLUETOOTH headphones/ speakers.
Additional Information Saving power By updating your software to the latest version, you can take advantage of the newest functions. The new software is available when: the “UPDATE” indicator lights up on the display panel. a message appears on the TV screen if the [Software Update Notification] is set to [On]. Note Do not turn the receiver off or disconnect the AC power cord (mains lead) and the LAN cable until the download and update processes are completed. Doing so may cause a malfunction.
5 Update the software. “UPDATING” flashes on the display panel during the software update process. However, “UPDATING” may disappear temporary during updating. Troubleshooting If a problem occurs while operating the receiver, check the following to resolve the problem before consulting your nearest Sony dealer. Check to see if the problem is listed in this “Troubleshooting” section. Visit the Help Guide for detailed examples. You can search by a keyword using the online troubleshooting guide.
No 3D content appears on the TV screen. Depending on the TV or the video device, 3D content may not be displayed. For details on the 3D HDMI video format supported by the receiver, visit the Help Guide. Be sure to use a High Speed HDMI Cable with Ethernet. No 4K content appears on the TV screen. Depending on the TV or the video device, 4K content may not be displayed. Check the video capability and settings of your TV and video device.
Check that headphones are not connected to the receiver. Press (muting) to cancel the muting function. Try pressing the input button on the remote control or turning INPUT SELECTOR on the receiver to select the input to which you want to listen. If you want to listen to sound from the TV speaker, set [Audio Out] to [TV + AMP] in the [HDMI Settings] menu. If you cannot play multi-channel audio source, set [AMP]. However, the sound will not be output through the TV speaker.
Cannot select the [Network Settings] menu. Wait for a few moments after you have turned on the receiver, and then select the [Network Settings] menu again. Error messages [Overload occurred.] appears on the TV screen. An over-current from the (USB) port was detected. Disconnect the USB device as prompted in the warning message and close the message. Code 30 Headphones are connected. Please disconnect the headphones and retry calibration. Code 31 The front speakers are not selected correctly.
Code 35 The speaker pattern configuration does not match calibration result. Please check the speaker pattern and connection. Warning 40 The measurement has been completed, but the noise level is high. For best results, calibrate in as quiet a place as possible. Although the receiver heats up during operation, this is not a malfunction. If you continuously use this receiver at a large volume, the cabinet temperature of the top, side and bottom rises considerably.
On BLUETOOTH communication Supported BLUETOOTH version and profiles Profile refers to a standard set of functions for various BLUETOOTH product features. See “BLUETOOTH section” in “Specifications” (page 62) for the BLUETOOTH version and profiles supported by this receiver. BLUETOOTH devices should be used within approximately 10 meters (33 feet) (unobstructed distance) of each other. The effective communication range may become shorter under the following conditions.
On copyrights This receiver incorporates Dolby* Digital Surround and the DTS** Digital Surround System. * Manufactured under license from Dolby Laboratories. Dolby, Dolby Atmos, Dolby Surround, and the double-D symbol are trademarks of Dolby Laboratories. ** For DTS patents, see http://patents.dts.com. Manufactured under license from DTS, Inc. DTS, the Symbol, DTS in combination with the Symbol, DTS:X, and the DTS:X logo are registered trademarks or trademarks of DTS, Inc.
This product contains software that is subject to the GNU General Public License (“GPL”) or GNU Lesser General Public License (“LGPL”). These establish that customers have the right to acquire, modify, and redistribute the source code of said software in accordance with the terms of the GPL or the LGPL.
Equalizer Gain levels ±10 dB, 1 dB step 3) INPUT SHORT (with sound field and equalizer bypassed). 4) Weighted network, input level. USB section (USB) port: Type A (For connecting USB flash drive) Maximum current 1A Network section FM tuner section Tuning range USA and Canadian models: 87.5 MHz – 108.0 MHz (100 kHz step) Other models: 87.5 MHz – 108.
General Power requirements Area Power requirements USA, Canada 120 V AC, 60 Hz Oceania 230 V AC, 50 Hz Europe 230 V AC, 50/60 Hz Additional Information Power consumption 240 W European models Standby mode: 0.4 W (When [Control for HDMI], [Standby Through], [Bluetooth Standby], and all zone power are set to [Off].) Bluetooth Standby mode: 1.5 W (When [Bluetooth Standby] is set to [On], and [Control for HDMI], [Standby Through], and all zone power are set to [Off].
Playable types of audio files Codec Extension MP3 (MPEG 1 Audio Layer-3)1) AAC/HE-AAC 1), 2) WMA9 Standard2) WMA 10 Pro 3), 4) .mp3 .m4a, .aac3), .mp43), .3gp3) .wma .wma LPCM1) .wav FLAC2) .flac, .fla Dolby Digital1), 3) .ac3 DSF 2) DSDIFF2), 5) AIFF 2) .dsf .dff .aiff, .aif ALAC2) .m4a Vorbis .ogg Monkey’s Audio .ape 1) The receiver can play ".mka" files. These files cannot be played on a home network server. The receiver may not play this file format on a home network server.
Supported digital audio formats The digital audio formats that this receiver can decode depend on the digital audio output jacks of the connected device. This receiver supports the following audio formats. The words in brackets are those indicated on the display panel. Maximum number of Connection with decoded channels the receiver Dolby Digital [DOLBY D] 5.1 COAXIAL/OPTICAL, HDMI Dolby Digital Plus [DOLBY D +]1) 7.1 HDMI Dolby TrueHD [DOLBY HD]1) 7.
END USER LICENSE AGREEMENT IMPORTANT: BEFORE USING THE SOFTWARE, PLEASE READ THIS END USER LICENSE AGREEMENT (“EULA”) CAREFULLY. BY USING THE SOFTWARE YOU ARE ACCEPTING THE TERMS OF THIS EULA. IF YOU DO NOT ACCEPT THE TERMS OF THIS EULA, YOU MAY NOT USE THE SOFTWARE. This EULA is a legal agreement between you and Sony Corporation (“SONY”).
CONTENT SERVICE PLEASE ALSO NOTE THAT THE SOFTWARE MAY BE DESIGNED TO BE USED WITH CONTENT AVAILABLE THROUGH ONE OR MORE CONTENT SERVICES (“CONTENT SERVICE”). USE OF THE SERVICE AND THAT CONTENT IS SUBJECT TO THE TERMS OF SERVICE OF THAT CONTENT SERVICE. IF YOU DECLINE TO ACCEPT THOSE TERMS, YOUR USE OF THE SOFTWARE WILL BE LIMITED. You acknowledge and agree that certain content and services available through the SOFTWARE may be provided by third parties over which SONY has no control.
AUTOMATIC UPDATE FEATURE From time to time, SONY or the THIRD-PARTY SUPPLIERS may automatically update or otherwise modify the SOFTWARE, including, but not limited to, for purposes of enhancement of security functions, error correction and improvement of functions, at such time as you interact with SONY’s or third parties’ servers, or otherwise.
©2017 Sony Corporation Printed in Malaysia 4-686-524-12(1)
About this guide/À propos de ce guide/ Acerca de esta guía This Startup Guide covers models sold in the United States, Canada, Oceania, and Europe. Only the US and Canadian models are equipped with SPEAKERS ZONE 2 terminals. The US and Canadian models are used for illustrative purposes in this Startup Guide.
2 Connecting a TV, AV devices, and FM wire antenna (aerial) Raccordement d’un téléviseur, de périphériques AV et d’une antenne fil FM Conexión de un televisor, dispositivos AV y antena FM de cable TV Téléviseur Televisor 3 ɞ Performing the Easy Setup and starting playback Exécution d’Easy Setup et démarrage de la lecture Ejecución de Easy Setup e inicio de la reproducción Hint / Conseil / Observación Connect the AC power cord (mains lead) to a wall outlet (mains), and then press Æ (power) to turn the AV
STR-DN1080 7.2 ch. Dolby Atmos® Wi-Fi® Network AV Receiver Experience true home theater without limitations with this 7.2 channel receiver with Dolby Atmos® 3D and DTS:X object-based surround sound, plus 4K HDR and HDCP 2.2 compatibility.1 Enjoy the flexibility of 6-in/2-out HDMI2 and multi-room listening, plus voice control powered by Google Home.4 All in a smaller chassis that fits more places. Bullets r Supports Dolby Atmos® 3D and DTS:X® objectbased surround sound up to 7.1ch r 7.2 Ch.
Can’t fit seven-channel surround sound? No problem. Phantom rear surround channels will transform your five-channel system into a seven-channel system. Experience amazing sound with Hi-Res Audio and native DSD up to 5.6 Experience digital music at its best with High-Resolution Audio. Enjoy studio-quality sound in higher-than-CD quality that feels like the artist is performing right in front of you.
Input/Output Others Output Power Sound Field Speaker Out Tone Control Tuner Video Input Video Output HDMI Bluetooth Receiver Yes Bluetooth Transmitter Yes Ethernet Ethernet Port (Power over Ethernet): 1 (-) NFC Yes USB Front(ver) / Rear(ver) Yes (2.0) / - Wi-Fi Yes (2.4GHz/5GHz), (11a/b/g/n) Center 165W (6ohms, 1kHz, 1ch driven THD 0.9%) / 120W + 120W (6ohms, 1kHz, 2ch driven THD 0.9%) / 100W + 100W (6ohms, 20-20kHz, 2ch driven 0.09%) Front 165W (6ohms, 1kHz, 1ch driven THD 0.
Audio Features Decoding Formats Others Video Features Audio Return Channel Yes S-Select Yes Dolby Atmos Yes Dolby Digital Yes Dolby Dual Mono Yes Dolby TruHD/Dolby Digital Plus Yes / Yes DSD Yes (Up to 2.8MHz 5.1ch) DTS:X Yes DTS / DTS-ES (Matrix6.1 / Discrete6.1) Yes / Yes DTS 96/24 Yes DTS HD MA / DTS HD HR Yes / Yes LPCM Yes (Up to 192kHz/24 bit 7.
Network Features AAC Yes AirPlay Yes ALAC Yes (Up to 192kHz/24 bit 5.1ch) DSD Yes (Up to 5.6MHz 5.1ch) DSF Yes (Up to 5.6MHz 5.1ch) FLAC Yes (Up to 192kHz/24 bit 5.1ch) Google Cast Yes LPCM WAV (LPCM): Yes (Up to 192kHz/24 bit 7.1ch), AIFF(LPCM): Yes (Up to 192kHz/24 bit 5.1ch) Mobile Application SongPal / Video & TV sideview MP3 Yes Music Decoding Formats for Network Client [MP3].mp3, [AAC/HE-AAC].m4a, .aac, [WMA9 Standard]. wma, [LPCM].wav, [FLAC].flac, .fla, [DSF].dsf, [DSDIFF].
AAC Yes (Up to 192kHz/24 bit 5.1ch) DSD Yes (Up to 5.6MHz 5.1ch) DSF Yes (Up to 5.6MHz 5.1ch) FLAC Yes (Up to 192kHz/24 bit 5.1ch) Interface 2.0 LPCM WAV (LPCM): Yes (Up to 192kHz/24 bit 7.1ch), AIFF(LPCM): Yes (Up to 192kHz/24 bit 5.1ch) MP3 Yes Music Decoding Formats [MP3].mp3, [AAC/HE-AAC].m4a, .aac, [WMA9 Standard]. wma, [LPCM].wav, [FLAC].flac, .fla, [DSF].dsf, [DSDIFF].dff, [AIFF].aiff, .aif, [ALAC].
SONY. 4-534-172-11(1 ) 1111111111111111111111111111111111111111111111111111111 • 4 5 3 4 1 7 2 1 1 • (1) l§.t.i@il [I How to set up the "Song Pal" app "Song Pal" is a free dedicated app for smartphones that allows you to enjoy the music content on your audio system or smartphone, by using a wireless BLUETOOTH®connection. Some features of the app are as follows .
SONY: 1111111111111111111111111111111111111111111111111111111 • 4 5 8 8 7 0 1 1 2 • (1) Before connecting speakers/ Avant de raccorder des enceintes/ Antes de conectar los altavoces/ Vor dem AnschlieBen der Lautsprecher • Check that the speaker impedance is within the rated impedance range indicated on the back panel of the receiver (or amplifier). Verifiez que !'impedance des enceintes est comprise dans Ia plage d'impedance nominale indiquee sur le panneau arriere de l'ampli-tuner (ou amplificateur).
Speaker wires are in contact with each other due to excessive removal of insulation. Les fils des enceintes sont en contact les uns avec les autres en raison d'une elimination excessive de I' isolation. Los hilos de los altavoces estan en contacto entre sf porque se ha quitado demasiado aislante. Die Lautsprecherkabel beri.ihren einander aufgrund einer zu sehr entfernten lsolierung. Speaker wires are not tightly twisted and fully inserted to the speaker terminals.
SONY 11;JDk:;you ·for purchasing this Sony product. Proper registration will .@ius to send you periodic mailings about new products and other lg~nt.announcements. Registering your product will also allow us ·~-~~;you in the unlikely eve~t that. it .~11 need adjustment c;ri~ti()n. Please take the t1me to reg1ster your new product , ., ~ •• I.A'•.-:· -.... II-' .. - , at our website: http://www.sony.com/productregistration You will find the product serial number on the main unit and the carton box.
SONY® GARANTIE LIMITEE E.-U. et Canada uniquement- 2 ans Sony Electronics Inc. exclusivement pour les achats effectues aux Etats-Unis et Sony du Canada Ltee. exclusivement pour les achats effectues au Canada (collectivement « Sony , ) garanUt ce produit contre les defauts de materiaux ou de fabrication pour le proprietaire d'origine et tous les proprietaires utilisateurs finaux suivants (" Vous , ou " Vos , ) pendant Ia periode definie cidessus et comme indique dans les presentes.
1111111111111111111111111111111111111111111111111111111 4-599-107-11 SONY® LIMITED WARRANTY I Video & Audio I U.S. and Canada only - 2 years Sony Electronics Inc. solely for purchases made in the United States and Sony of Canada Ltd. solely for purchases made in Canada (collectively "Sony") warrants this product against defects in material or workmanship for the original owner and any subsequent end user owner(s) (''You" or ''Your") for the time period set forth above as set forth herein.