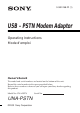
3-082-258-11 (1) USB – PSTN Modem Adaptor Operating Instructions Mode d’emploi Owner’s Record The model and serial numbers are located on the bottom of the unit. Record the serial number in the space provided below. Refer to these numbers whenever you call upon your Sony dealer regarding this product. Model No. UNA-PSTN UNA-PSTN ©2003 Sony Corporation Serial No.
English Before operating the unit, please read this instructions thoroughly, and retain it for future reference. WARNING To prevent fire or shock hazard, do not expose the unit to rain or moisture. Countries and areas This product is intended to be used in the following countries or areas.
However, there is no guarantee that interference will not occur in a particular installation. If this equipment does cause harmful interference to radio or television reception, which can be determined by turning the equipment off and on, the user is encouraged to try to correct the interference by one or more of the following measures: — Reorient or relocate the receiving antenna. — Increase the separation between the equipment and receiver.
If this equipment causes harm to the telephone network, the telephone company will notify you in advance that temporary discontinuance of service may be required. But if advance notice is not practical, the telephone company will notify the customer as soon as possible. Also, you will be advised of your right to file a complaint with the FCC if you believe it is necessary.
For the Customers in CANADA This Class B digital apparatus complies with Canadian ICES-003. INDUSTRY CANADA NOTICE This product meets the applicable Industry Canada technical specifications. The Ringer Equivalence Number (REN) is an indication of the maximum number of devices allowed to be connected to a telephone interface. The termination on an interface may consist of any combination of devices subject only to the requirement that the sum of the RENs of all the devices does not exceed five.
For the Customers in Europe Hereby, Sony Corporation, declares that this USB-PSTN modem adaptor is in compliance with the essential requirements and other relevant provisions of the Directive 1999/5/EC. For details, please access the following URL: http://www.compliance.sony.de/ This equipment is in compliance with the requirements of the directive 1999/5/EC (R&TTE), to be connected with all European analogue PSTN.
Table of contents Precautions on Use ............................................................................................... 8 Precautions on Handling ..................................................................................... 9 Maintenance .......................................................................................................... 9 Parts identification ............................................................................................. 10 Before Use ...............
Precautions on Use Where not to place this device Regardless of whether the USB-PSTN modem adaptor is in use or in storage, do not place it in any of the following locations. Doing so may lead to breakdown. • Locations of extremely high temperature The temperature gets extremely high inside a car with the windows closed in summer or in strong sunshine, and leaving the USB-PSTN modem adaptor inside may cause it to be deformed or break down.
Precautions on Handling • Using the USB-PSTN modem adaptor reduces the amount of time you can use your camcorder, because they share the camcorder’s battery. • When not using the USB-PSTN modem adaptor, disconnect it from your camcorder to prevent your camcorder’s battery from going flat. • Do not lift your camcorder by the USB-PSTN modem adaptor or its cable. • Do not pull out the connector by pulling the cable. • Do not bend or apply excessive force to the cable.
Parts identification When connecting the USB-PSTN modem adaptor, do so correctly by checking the shape of the connectors.
Setting up the unit You must make certain settings before you can connect the unit to your telephone line. Choose the proper settings for your telephone signaling type. You also have to set the AREA CODE switches according to your area. 2 4 3 (1) Be sure that this unit is not connected to the USB-PSTN modem adaptor compatible camcorders or a RJ-11 cable (telephone cable). (2) Open the switch cover. (3) Select the telephone signaling type with the TONE/P1 (PULSE10)/P2 (PULSE20) selector.
Setting up the unit (continued) (5) Close the cover. The setting is completed. Notes • If the TONE/P1 (PULSE10)/P2 (PULSE20) selector is not set to the appropriate position, you cannot communicate with the camcorder. • If you cannot check the dial speed of your pulse dialing phone, set the TONE/P1 (PULSE10)/P2 (PULSE20) selector to P1 (PULSE10). • In some countries and areas, TONE/P1 (PULSE10)/P2 (PULSE20) setting is not required.
The setup of the AREA CODE switches The default AREA CODE setting is “Japan”. Set the AREA CODE switches to the appropriate positions using a sharppointed object following the information given in the table below. You cannot use the unit in areas other than the areas indicated on the table. TONE P1 P2 Notes • “1” for the parameter in the table indicates that setting the switch to the ON side. • The relationship between the 6-digit numbers in the table and the switch positions is as illustrated below. (e.
Preparation To connect to the Internet, first you must connect the USB-PSTN modem adaptor to a USB network adaptor-compatible camcorder. Connecting to a telephone line with a PSTN modem adaptor Connect to the Internet via a telephone line using a USB-PSTN modem adaptor. 1 Connect the supplied telephone cable to this unit and the modular jack of the telephone.
2 Attach the USB-PSTN modem adaptor’s USB connector to (USB) jack of your camcorder. Note The position of (USB) jack varies from model to model. For details, refer to your USB network adaptor compatible camcorder’s instruction manual. 3 Set your USB network adaptor compatible camcorder’s power switch to “MEMORY/NETWORK” to display the Network Menu. Your camcorder is now ready for communication. Note Connect the USB-PSTN modem adaptor directly to your USB network adaptor compatible camcorder.
Disconnecting the USB-PSTN modem adaptor from your camcorder 1 2 Remove the USB-PSTN modem adaptor’s USB connector from (USB) jack of your camcorder. Remove the telephone cable from the USB-PSTN modem adaptor.
Troubleshooting Before sending the USB-PSTN modem adaptor for repairs, read this manual and the support information on our website http://www.sony.net/. If the USB-PSTN modem adaptor still does not work properly, consult your Sony dealer or local authorized Sony service facility. Symptom Cause/Measures A USB error occurs ex) Connection Error Connect USB Device • Check that the USB-PSTN modem adaptor is correctly connected to the USB terminal of your USB network adaptor compatible camcorder.
Specifications Modem part Applicable line Interface for the telephone circuit NCU Dial type NCU command Communication format Sending communication rate Receiving communication rate Modulation mode standard Sender sensitivity Error correction Data compression Analog telephone line 2 line ceremony interface AA Pulse dialing (10/20 pps) Tone dialing AT command Dual 300/1200/2400/4800/7200/9600/ 12000/14400/16800/19200/21600/ 24000/26400/28800/31200/33600 bps 300/1200/2400/4800/7200/9600/ 12000/14400/16800/
General Outer dimensions Weight Operating temperature Storage temperature approx. 86 × 17.1 × 65 mm (3 1/2 × 11/16 × 2 5/8 in) (width × height × depth) approx. 54 g (1.9 oz) 0°C ~ +40°C –20°C ~ +60°C Accessories Telephone cable (1) Operating Instructions Design and specifications are subject to change without notice.
Français Avant d’utiliser cet appareil, veuillez lire attentivement ces explications, puis conservez-les de manière à pouvoir les consulter. AVERTISSEMENT N’exposez pas cette unité à la pluie ou à l’humidité. Risques d’incendie ou de chocs électriques.
A l’attention de la clientèle européenne Par la présente, Sony Corporation déclare que cet adaptateur modem USBPSTN est conforme aux exigences essentielles et aux autres dispositions pertinentes de la directive 1999/5/CE. Pour plus de détails, consulter notre site URL : http://www.compliance.sony.de/ Cet équipement est conforme aux exigences de la directive 1999/5/EC (R&TTE) pour être connecté à tous les PSTN analogues européens.
Table des matières Précautions d’utilisation ...................................................................................... 5 Précautions de manipulation .............................................................................. 6 Entretien ................................................................................................................. 6 Nomenclature des pièces ..................................................................................... 7 Avant la mise en service ......
Précautions d’utilisation Endroits où il ne faut pas placer le dispositif Qu’il soit en service ou rangé, l’adaptateur modem USB-PSTN ne devra pas être posé dans les types d’endroits suivants au risque de l’endommager. • Endroits à température très élevée Ne posez pas l’adaptateur modem USB-PSTN dans une voiture fermée en plein été ou lorsqu’elle est garée en plein soleil car la température de l’habitacle atteint des degrés susceptibles d’endommager le dispositif ou de la déformer.
Précautions de manipulation • L’adaptateur modem USB-PSTN réduit le temps d’utilisation du caméscope dont il partage la pile. • Débranchez l’adaptateur USB-PSTN du caméscope dès que vous ne l’utilisez plus de façon à ne pas décharger la pile du caméscope. • Ne soulevez pas le caméscope par l’adaptateur modem USB-PSTN ou par le câble. • Ne tirez pas le connecteur par le câble. •Ne pliez pas le câble et ne le forcez pas. Entretien Essuyez l’adaptateur modem USB-PSTN avec un chiffon doux et sec.
Nomenclature des pièces Lorsque vous connectez l’adaptateur modem USB-PSTN, vérifiez la forme des connecteurs qui vous guidera pour une connexion correcte.
Configuration de l’unité Avant de pouvoir connecter le dispositif sur une ligne téléphonique, certains réglages sont nécessaires. Choisissez la configuration qui correspond aux signaux téléphoniques de votre ligne. Vous devez également régler les commutateurs de AREA CODE pour votre région. 2 4 3 (1) Vérifiez que le caméscope compatible avec une carte modem USBPSTN ou que le câble RJ-11 (câble téléphonique) ne sont pas connectés. (2) Ouvrez le cache des commutateurs.
(5) Fermez le cache. La configuration est terminée. Remarques • La communication avec le caméscope n’est pas possible si le sélecteur TONE/P1 (PULSE10)/P2 (PULSE20) n’est pas réglé sur la bonne position. • Si vous n’arrivez pas à connaître la vitesse de numérotation de votre téléphone à impulsions positionnez le sélecteur TONE/P1 (PULSE10)/P2 (PULSE20) sur P1 (PULSE10). • Dans certains pays ou régions le réglage de TONE/P1 (PULSE10)/P2 (PULSE20) n’est pas nécessaire.
Configuration de l’unité (suite) Réglage des commutateurs de AREA CODE Par défaut le AREA CODE est réglé sur « Japon ». A l’aide d’un objet pointu déplacez les commutateurs de AREA CODE sur la position qui convient à votre secteur ; suivez les directives du tableau cidessous. Il n’est pas possible d’utiliser cet appareil dans les régions ou pays non indiqués dans le tableau. TONE P1 P2 Remarques • Le paramètre « 1 » indique que le commutateur est réglé sur ON.
Préparation Pour vous connecter à Internet vous devez d’abord connecter l’adaptateur modem USB-PSTN au caméscope compatible avec un adaptateur de réseau USB. Connexion à une ligne de téléphone via un adaptateur modem PSTN Connexion à Internet via une ligne de téléphone avec un adaptateur modem USB-PSTN. 1 Connectez le câble de téléphone fourni à l’unité et à la prise de téléphone modulaire.
Préparation (suite) 2 Raccordez le connecteur USB de l’adaptateur modem USBPSTN à la prise (USB) du caméscope. Remarque L’emplacement de la prise (USB) diffère d’un modèle à l’autre. Pour plus de détails consultez le mode d’emploi du caméscope compatible avec un adaptateur réseau USB. 3 Réglez le commutateur du caméscope compatible avec un adaptateur réseau USB sur « MEMORY/NETWORK » pour afficher le menu réseau. Votre caméscope est maintenant prêt pour la communication.
Déconnexion de l’adaptateur modem USB-PSTN et du caméscope 1 2 Retirez le connecteur USB de l’adaptateur modem USB-PSTN de la prise (USB) de votre caméscope. Retirez le câble de téléphone de l’adaptateur modem USBPSTN.
Dépannage Avant d’envoyer votre adaptateur modem USB-PSTN en réparation lisez ce manuel et les aides en ligne de notre site Internet http://www.sony.net/. Si l’adaptateur modem USB-PSTN ne fonctionne toujours pas correctement, appelez votre distributeur Sony ou un service de dépannage agrée de Sony. Symptomes Cause/Remède Erreur de USB ex) Connection Error Connect USB Device • Vérifiez la connexion de l’adaptateur modem USB-PSTN à la borne USB de votre Caméscope compatible avec un adaptateur réseau USB.
Caractéristiques techniques Modem Ligne téléphonique Interface pour le circuit téléphonique NCU Dial type Commande NCU Format de communication Sending communication rate Receiving communication rate Norme de modulation Sensibilité d’envoi Correction d’erreur Compression des données Analogique interface cérémonie 2 lignes AA Composition au cadran (10/20 pps) Composition au clavier Commande AT Double 300/1200/2400/4800/7200/9600/ 12000/14400/16800/19200/21600/ 24000/26400/28800/31200/33600 bps 300/1200/24
Caractéristiques techniques (suite) Générales Dimensions extérieures Poids approximatif Température de fonctionnement Température de stockage environ 86 × 17,1 × 65 mm (3 1/2 × 11/16 × 2 5/8 po) (largeur × hauteur × profondeur) 54 g (1,9 on) 0°C à +40°C –20°C à +60°C Accessoires Câble de téléphone (1) Consignes d’exploitation La conception et les spécifications peuvent être modifiées sans avis préalable.
Printed on 100% recycled paper using VOC (Volatile Organic Compound)-free vegetable oil based ink.