
User's Manual
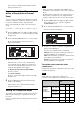


Table Of Contents

14
Setting the battery type (BATTERY)
You can set the type of battery being used in order to
provide a more accurate battery level indication.
TYPE1
: Recommended setting when using alkaline LR6
(size AA) batteries. Indicates the battery level based on
the characteristics of new Sony alkaline LR6 (size AA)
batteries.
TYPE2: Recommended setting when using rechargeable
nickel metal hydride batteries.
TYPE3: Recommended setting when using lithium
batteries.
The characteristics of batteries change according to
battery type and environmental conditions. It is
recommended that you understand the characteristics of
batteries before using them.
Setting the display contrast (CONTRAST)
Adjust the contrast of text and icons on the display in the
range 1 to 10.
The configurable values are given below.
(Light) 1 2 3 4 5 6
7 8 9 10 (Dark)
Restoring factory default settings
(RESET)
Restore all parameters to their factory default settings.
Press and hold the SET button. A prompt appears asking
you whether to restore factory default settings. Press the
+ or – button to select YES, then press the SET button.
The unit parameters are restored to their factory default
settings.
Displaying the software version
(VERSION)
Display the software version of the unit.
RX (tuner) 1/2 Menu
For details on menu operation, see “Basic Menu
Operations” (page 13).
Use this menu to set the digital wireless receiver functions
(the main functions of this receiver).
Selecting group/channel (GP/CH)
The factory default setting varies depending on the
model.
For details, see “Setting the Receive Channel” (page 9).
Setting an available channel automatically
(AUTO SET)
Automatically search for and set an available channel,
and start infrared transmission to the transmitter.
For details, see “Searching for available channels and
configuring the channel settings via infrared
communication (AUTO SET)” (page 11).
Selecting the frequency band (BAND)
Select the receive frequency band.
This menu is not available on Japanese and Korean
models. On these models, the frequency band cannot be
selected.
For details about the groups and channels in each frequency
band, refer to the “Frequency List” on the CD-ROM.
Searching for and selecting available
channels (CLR SCAN)
Search for available channels.
For details, see “Searching for Available Channels
within a Group (Clear Channel Scan)” (page 9).
Using infrared transmission (SYNC)
Transfer the frequency and compander mode set on the
unit to a transmitter using an infrared transmitter.
For details, see “Configuring the group/channel
manually and configuring the channel settings via
infrared communication (SYNC)” (page 11).
Setting the compander mode
(COMPANDER)
Set the operating mode of the compander.
For details, see “Setting the Compander Mode”
(page 10).
Setting the frequency to an active channel
(ACT SCAN)
Search for channels already in use. This is useful when
using more than one receiver in combination with a single
transmitter.
For details, see “Searching for Active Channels within a
Group (Active Channel Scan)” (page 10).
Selecting the output connector for
received audio (ASSIGN)
Select the connector from which to output received
signals.
Under factory default settings, tuner 1 is set to OUT1 and
tuner 2 is set to OUT2.
OUT1: Output the audio from the OUTPUT 1 connector.
OUT1/2: Output the audio from both the OUTPUT 1 and
OUTPUT 2 connectors.
OUT2: Output the audio from the OUTPUT 2 connector.
Note
Note