
users manual


19
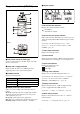
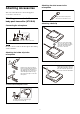
If attaching a camcorder, bend the URX-P40 antenna
down so that the antenna is not reflected on the display.
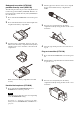
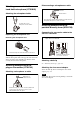
To remove the shoe mount adaptor
Operation
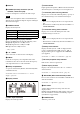
Procedure for UWP-D series devices (UTX-B40/
M40/P40 and URX-P40)
1
Connect the tuner as required.
For details about example connections, see “System
Configuration Example” (page 32).
2
Press and hold the POWER button for at least one
second on the tuner to turn the power on.
Some noise may occur when power is turned on.
Accordingly, turn down the audio input level of
devices connected to the tuner when turning the
power on.
3
Press and hold the NFC SYNC button on the tuner for
at least four seconds.
Clear Channel Scan starts searching for an available
channel within the configured channel group.
When Clear Channel Scan finishes, the channel with
the least noise and interference will be set.
When the channel is set, NFC communication starts
automatically.
For details about how to set the group, see “Setting
the receive channel” (page 21).
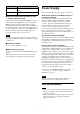
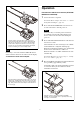
4
Place the N-Marks of both the tuner and transmitter in
close proximity (approximately 5 mm).
At this time, make sure that the transmitter is turned
on or that the battery level is sufficient and the
transmitter is turned off.
Note
Push the bottom of the belt clip to make some space
between the belt clip and the tuner (1), align the belt clip
with the two vertical grooves on the shoe mount adaptor,
and insert the adaptor in the direction of the arrow (2).
Push the shoe mount adaptor in fully until the belt clip fits
into the horizontal groove on the adaptor holds.
Push and hold the part labeled “PUSH” on the shoe mount
adaptor (1), and disengage the horizontal part of the belt
clip from the horizontal groove on the shoe mount adaptor
(2). Then, push the shoe mount adaptor in the direction of
the arrow (3).
Note
Example using a body-pack transmitter (UTX-B40).
Similarly, place the N-Marks in close proximity when using
other types of transmitters.