
Quick Reference Manual (Multilingual)


9
US
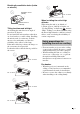
1 Position the unit so that the lens is
parallel to the screen.
2 After connecting the AC cord to the
projector, plug the AC cord into a wall
outlet.
3 Press the ?/1 (ON/STANDBY)
switch to turn on the projector.
4 Press the PATTERN button to display
a test signal for performing
adjustments.
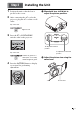
a Move both lens shift dials to
adjust the picture position.
b Adjust the picture size using the
zoom lever.
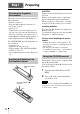
Installing the Unit
Step 2
Lights in red.
Top of the unit
Flashes in green for a
while (tens of seconds)
and then lights in green.
Top of the unit
To adjust the vertical
position
To adjust the horizontal
position
Zoom lever