
Projector User Manual
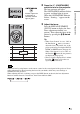
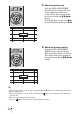
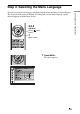
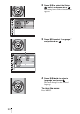
Table Of Contents
- Table of Contents
- Precautions
- Location of Controls
- Connections and Preparations
- Projecting
- Projecting the Picture on the Screen
- Using the Picture Position
- Selecting the Wide Screen Mode
- Watching 3D Video Images
- Selecting the Picture Viewing Mode
- Adjusting the Picture Quality
- Adjusting the Picture Using Real Color Processing
- Using the Supplied Software to Adjust the Picture Quality (ImageDirector3)
- Using the Menus
- Others
- About the Control for HDMI
- About the x.v.Color
- About the simulated 3D feature
- Troubleshooting
- Replacing the Lamp and the Air Filter and Cleaning the Ventilation Holes (intake)
- Cleaning the Air Filter
- Cleaning and the Screen of the Projector
- How to Use the USB Charging AC Power Adaptor
- Specifications
- Ceiling Installation
- Index

22
Tip
• When “Lens Control” is set to “Off” on the Installation
menu, you cannot adjust the picture
position (1 page 63).
When “Test Pattern” is set to “Off” on the Function menu, the test pattern is not displayed
(1 page 62).
• The test signal is displayed for 1 minute.
Press the button to clear the test signal display before that.
4 Adjust the picture size.
Press the LENS ADJUSTMENT
(ZOOM) button to display the Lens
Zoom adjustment window (test
pattern). Then adjust the size of the
picture by pressing the M/m/</,
buttons.
To make the picture larger, press
M/,.
To make the picture smaller, press
m/<.
5 Adjust the picture position.
Press the LENS ADJUSTMENT
(SHIFT) button to display the Lens
Shift adjustment window (test pattern).
Then adjust to the proper position of
the picture by pressing the M/m/</,
buttons.