
Projector User Manual


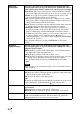


Table Of Contents
- Table of Contents
- Precautions
- Location of Controls
- Connections and Preparations
- Projecting
- Projecting the Picture on the Screen
- Using the Picture Position
- Selecting the Wide Screen Mode
- Watching 3D Video Images
- Selecting the Picture Viewing Mode
- Adjusting the Picture Quality
- Adjusting the Picture Using Real Color Processing
- Using the Supplied Software to Adjust the Picture Quality (ImageDirector3)
- Using the Menus
- Others
- About the Control for HDMI
- About the x.v.Color
- About the simulated 3D feature
- Troubleshooting
- Replacing the Lamp and the Air Filter and Cleaning the Ventilation Holes (intake)
- Cleaning the Air Filter
- Cleaning and the Screen of the Projector
- How to Use the USB Charging AC Power Adaptor
- Specifications
- Ceiling Installation
- Index

59
Using the Menus
Power Saving Sets the power saving mode.
When set to “On,” the projector goes into power saving mode if no
signal is input for 10 minutes. At that time, the ON/STANDBY
indicator lights in orange, then the screen becomes dark. In power
saving mode, the power saving mode is cancelled if a signal is input
or any button on the projector or the remote control is pressed. If you
do not want to set the projector to power saving mode, select “Off.”
Input-A Signal Sel. Selects the type of signal input from the equipment connected to
the INPUT A connector.
Selects the type of signal input from the equipment by selecting
“Input-A” with the INPUT button.
Auto: Selects the input signal type automatically.
Computer: Inputs the signal from a computer.
Video GBR: Inputs the signal from a TV game or HDTV broadcast.
Component: Inputs the component signal from a DVD player/
recorder, Blu-ray Disc player/recorder, digital tuner, etc.
When the input signal is not displayed correctly with this item set to
“Auto,” select the item according to the input signal.
Lamp Setting When replacing the lamps, set the desired lamp setting
(1 page 77).
Note