
Operation Manual

1
Open the cover for the nano SIM card and memory card slots.
2
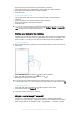
Using a fingernail or other similar object, drag out the nano SIM card holder.
3
Remove the nano SIM card, then re-insert the holder.
4
Close the cover.
To remove the memory card
1
Turn off the device and open the cover for the nano SIM card and memory
card slots.
2
Press the memory card inwards and then release it quickly.
3
Drag out the memory card fully and remove it.
4
Close the cover.
You can also remove the memory card without turning the device off in step 1. To use this
method, you must first unmount the memory card under Settings > Storage > Unmount SD
card, then follow the rest of the instructions above.
Starting your device for the first time
The first time you start your device, a setup guide opens to help you configure basic
settings, sign in to some accounts and personalise your device. For example, if you
have a Google™ account, you can sign in to it here and get set up straight away.
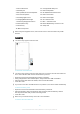
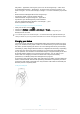
To turn on the device
Make sure that the battery is charged for at least 30 minutes before you turn on the device for
the first time.
1
Press and hold down the power key until the device vibrates.
2
Enter your SIM card PIN when requested, then tap
.
3
Wait a while for the device to start.
Your SIM card PIN is initially supplied by your network operator, but you can change it later
from the Settings menu. To correct a mistake made while entering your SIM card PIN, tap .
To turn off the device
1
Press and hold down the power key until the options menu opens.
2
In the options menu, tap Power off.
It may take a while for the device to shut down.
Why do I need a Google™ account?
Your Xperia™ device from Sony runs on the Android™ platform developed by
Google™. A range of Google™ applications and services is available on your device
when you purchase it, for example, Gmail™, Google Maps™, YouTube™ and the
9
This is an Internet version of this publication. © Print only for private use.