
Instructions / Assembly


5
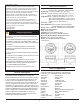
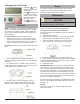
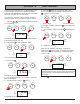
1- Step Calibration Procedure
A) Set CAL factor to 10.
Hold button 3 for three seconds. Press
3 again until the number 10 shows below
“CAL” (NOTE: If you go past 10 keep
pressing 3 because the number will return
to 0 after passing 19).
Press 2 to get back to normal operating
mode.
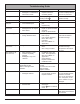
NOTE: If your uid is listed on Table 1, use
that number in step A above in place of 10.
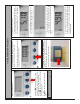
B) Prime pump and meter by dispensing 2 - 3
gallons of uid back into the bulk tank.
With the outlet valve close and the pump still
running, reset the meter to 0.00.
C) Fill the Proving Can exactly to the 5.0
gallon line. Focus on the Proving Can, do not look at
the meter at this point. Keep the hose end nozzle wide
open as long as possible for best accuracy.
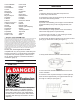
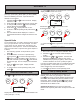
D) Adjust Meter CAL Factor.
• If meter reads high, increase the CAL factor.
Each CAL # changes the accuracy by about 1%.
For a 5 gallon proving can, 1% = 0.05 gallons.
• If 5.10 is displayed, this is 2% over 5.00; the
CAL factor should be changed to CAL 12.
• If the meter reads low instead, lower the CAL
factor. For example, if 4.90 is displayed, it is 2%
less than 5.00, so the CAL factor should be set
to 8.
• When nished with the CAL factor procedure,
press 2 to return to normal mode and to reset
the meter to 0.00. The meter is now calibrated
and ready to use.