® MixPre-6M Multitrack Recorder | USB Audio Interface User Guide
Legal Notices Revision History Product specifications and features are subject to change without prior notification. This table provides the revision history for this guide. Copyright © 2018 Sound Devices, LLC. All rights reserved. Rev# Date Firmware Description Version 2-A 2.21 June 2018 Initial release This product is subject to the terms and conditions of a end-user license agreement provided in this guide, and may be used in accordance with the license agreement.
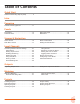
Table of Contents Quick Start Multitrack Recording Step-by-Step. . . . . . . . 5 Intro Powering Flexible Powering Options. . . . . . . . . . . . . 11 Panels Front Panel . . . . . . . . . . . . . . . . . . . . . . . 13 Left Side Panel. . . . . . . . . . . . . . . . . . . . . 13 Right Side Panel. . . . . . . . . . . . . . . . . . . . 14 Back Panel. . . . . . . . . . . . . . . . . . . . . . . . 14 Screens & Navigation Home Screen. . . . . . . . . . . . . . . . . . . . . . 15 Main Menu Screen . . . . . .
User Guide Recording and Playback Formatting SD Cards . . . . . . . . . . . . . . . . 39 Transport Controls . . . . . . . . . . . . . . . . . . 39 Record Arming . . . . . . . . . . . . . . . . . . . 40 Working with Cue Points. . . . . . . . . . . . . . 41 Moving Cue Points. . . . . . . . . . . . . . . . . 43 Previewing Cue Point Positions. . . . . . . . 43 Clearing & Deleting Cue Points. . . . . . . . 44 Locating to Cue Marks. . . . . . . . . . . . . . 44 Punching In/Out. . . . . . . . . . . . . . . . . .
Quick Start Multitrack Recording Step-by-Step This Quick Start chapter is meant as a “step-by-step, how-to” reference for setting up the recorder and making music with the MixPre-6M right out of the box. For more information on features and steps mentioned in this procedure, refer to later chapters in this User Guide. To begin multitrack recording: 1. Connect power. XX Provide at least one power source, either batteries (via included sled) or via USB-C. 2. Power up the MixPre.
User Guide (D) Tap OK to confirm formatting of the card. ⚠⚠ Warning - all data on the SD card will be erased! (E) Tap 6. to return to the Home screen. Create a project. (A) Tap . (B) Tap Project > New. (C) Tap Name to customize the name of the new project. LL If no custom name is provided, the MixPre creates new projects with unique names, such as Song 1, Song 2, etc. by default. (D) Tap Sample Rate to select from available rates. (E) Tap Create. 7. Configure an input.
QUICK START (F) To hear the input as you adjust gain, first turn the Channel knob until fader setting is 0dB. Then, tap Gain (on Channel screen) and turn the HP encoder to adjust input sensitivity for the source. If possible, adjust with signal coming in at the intended level and observe the LED ring around the Channel knob. Aim for the LED ring to remain green for the majority of the time. If unsure where to start, set the gain to 35dB for mic sources, 10dB for line sources, and make adjustments as needed.
User Guide LL You can only use Air on one track at a time. 13. (Optional) Should you want to scrap the recording and try again, tap and then tap History. Using the HP encoder, rotate to highlight and select Restart Song. 14. To lay another track over the just-recorded track, configure an input and proceed from there. See step 7. Configure an input.. 15. After laying down all of your tracks, play your song and adjust track mix levels, pans, reverb, air, etc. 16.
Intro Hi and a big thanks for buying the MixPre-6M! At Sound Devices, we are passionate about great sounding audio. We’ve unleashed our design and engineering team, many of whom are musicians, and asked them to create a groundbreaking device that sets new standards for what’s possible from a super compact and affordable, multitrack audio recorder. From the ground up, we’ve designed the MixPre-6M to be a versatile tool for musicians and singer/songwriters who want to record sound with unrivalled quality.
User Guide Of course, the possible uses for the MixPre-6M are virtually unlimited, but a few common ones are: • Creating a multi-layered song using the track laying and overdubbing features • Mixing and recording small ensemble live performance • Playback of multichannel backing tracks • Recording live events, concerts, jam sessions, and so forth. • Premium-quality 8x4 USB audio interface for any DAW application The MixPre-6M’s versatility is augmented by the various powering options.
Powering Flexible Powering Options In designing the MixPre-6M, we felt that it was important for it to be able to operate in a wide array of applications and environments. To support that goal, power can be supplied from several possible sources: • • • • • • • Four AA NiMH rechargeable or Lithium primary batteries installed in the provided 4-AA battery sled, called MX-4AA (included). Eight AA NiMH rechargeable or Lithium primary batteries installed in the provided 8-AA battery sled, called MX-8AA.
User Guide To ensure Battery Status indicator displays accurate levels/status: 12 1. Tap . 2. Page through submenu and tap Power. 3. Select the type of batteries being used in the sled.
Panels Front Panel Power light, Star button for shortcuts, Channel knobs, Channel knob ring LEDs, backlit Transport buttons, and touch screen Power Light Star Button Channel Knob Ring LEDs Recorder Transport Controls LCD Channel Knobs The Channel knobs on the front panel have two purposes: • Rotate to adjust the level of the selected track in the LR mix. • Press to access the selected track’s Channel screen. Left Side Panel USB connections, XLR/¼-inch TRS inputs 1-2, 2-channel 3.
User Guide Right Side Panel 3.5mm headphone output, 3.5mm Aux/Mic input, XLR/¼-inch TRS inputs 3-4, headphone encoder 3.5 mm Headphone Output 3.
Screens & Navigation The MixPre-6M has a sunlight-viewable, high-resolution, touch-screen-based user interface. The touch screen interface displays the Home screen, Main Menu screen, Channel screens and various other views. For information on Channel screens, see Accessing Channel Screen Settings in the Input Channels chapter.
User Guide You will find on the Home screen numerous items, such as: Name Icon Description Music Notes icon Access the Music Control menu by touching this region of the Home screen. Current name Displays name of current Music project. Time counter Indicates the current song position in hh:mm:ss:tenths. All songs start at 00:00:00:0. Access the Music Control menu by touching this region of the Home screen. Q icon Indicates current cue number: 01, 02, etc.
SCREENS & NAVIGATION Main Menu Screen The Menu screen is where most of the features and functions are selected and set up. To enter the Menu screen: XX Tap on the Home screen. There are three Menu pages. These pages are indicated by the Dots icon . Tapping it will toggle between the three Menu pages. The Menu has its own submenus, which may be displayed by tapping them. Page Submenu Description 1 Presets Lets you save and load user presets to and from SD card and internal memory.
User Guide To return directly to the Home screen from the main Menu: XX Tap . Music Control Menu The Music Control Menu provides fast access to the Cue List, the Solo/Mute screen, metronome on/off, project render, and access to project history. For more information, see Working with Cue Points, Using Solo/Mute, Metronome, Project History and Sharing Projects. To access the Music Control menu: XX Tap 18 in the top left corner of the Home screen.
SCREENS & NAVIGATION Setting the Star Button For your convenience, the MixPre-6M has a user-programmable button, called the Star (*) button, for flexible customization. You may configure it to gain quick access to certain features. To set the Star button functionality: 1. Tap . 2. Set * Button to your preferred function: Shortcut Description Solo/Mute screen Opens Solo/Mute submenu screen. Project Opens Project submenu screen. SD Card Opens SD Card submenu screen.
User Guide 20
Input Channels An input channel is the path an audio source travels before it can be mixed and recorded along with other channels. In the MixPre-6M, think of an input channel as the same as a ‘track’ in a DAW. An input channel can be fed by any of the four XLR or TRS mic/line sources, a 3.5mm Aux line/mic source (with or without plug-in-power), or from USB channels 1-4 from a computer. You can also select the MixPre-6M’s mixer outputs or a metronome click.
User Guide Track Names You can edit a song’s individual track names from its associated Channel screen. For example, changing the default names Track 1 to Drums, Track 2 to Keyboard, Track 3 to Lead Vocals, etc.: To edit Track 1’s name: 1. Press Channel 1 knob. 2. Tap top left corner of the Channel screen. 3. Enter a new name for Track 1 and tap OK.
INPUT CHANNELS into a DAW to develop the song further. The recorded metronome will allow you to set the DAW’s tempo and internal metronome so that it is perfectly aligned with the MixPre recording. For more information, see Metronome. LL The Click option is not available if the track is stereo linked. Enabling Monitoring The Monitoring feature lets you hear the live input signal during playback.
User Guide is soloed, its LED ring will flash orange. Like Mute, soloing is non-exclusive, meaning any number of inputs may be soloed at the same time. You can quickly solo/mute several tracks from the Solo/Mute screen. All 12 tracks’ Solos and Mutes may be viewed and set from this screen. LL Access to it may also be set as a shortcut for Star (*) button. To solo or mute tracks from the Solo/Mute screen: 1. Tap . The Music Control screen appears. 2. Tap Solo/Mute. The Solo/Mute screen appears. 3.
INPUT CHANNELS Using Reverb Reverb sets how much reverb is added to a track in the LR mix. Only the mix is affected, not the individual recorded tracks. To render the reverb effect into the individual recorded tracks, you must use the Bounce feature. LL Reverb is unavailable when recording at 96kHz sample rate. To adjust reverb: XX From the Channel screen, tap Reverb and turn encoder. Range is Off, -50dB to 0 dB in 1 dB increments.
User Guide The Low Cut setting activates and sets the Low Cut filter. Range is Off, 40-160 Hz in 40 Hz steps. Toggling Phase Inversion Phase inversion, also known as polarity reversal, can be used to prevent signal cancellation when a source is dual-mic’d from opposite directions (e.g. overheads on a drum kit) or to compensate for incorrectly wired, balanced cables. The Phase setting toggles Phase Inversion on and off. To toggle a track’s phase inversion: XX From the Channel screen, tap Phase.
INPUT CHANNELS unbalanced 2ch line source, such as smartphone headphone output, stereo line source, etc. When any of the options above are selected as the Aux In Mode, they are available as input sources to any track by selecting an Aux. ◦◦ Off: Select this option to turn off the Aux/Mic input. Track Bank Selector Since there are more tracks (twelve) than physical Channel knobs (four), a Track Bank selector—shown as white boxes in the meter view—is used to select which group of tracks you want to control.
User Guide In this example, the Channel knob track 9 must be rotated clockwise, as indicated by the arrow, from its current fader value of -18dB. Once it reaches the track’s previously stored value of -15dB, the mix level will start to be affected. LL Adjust the Channel knob a small fraction to display the stored value and arrow in orange text. The displayed arrow and stored value will inform you which way to rotate the knob.
Outputs The MixPre-6M includes the Stereo 3.5mm output, which is unbalanced. To route the L/R stereo outputs: 1. Tap . 2. Tap Outputs. 3. Tap Stereo Out to route 3.5mm output. The stereo outputs can be fed from the LR mix (stereo or mono) or can be set to follow whatever is being output in the headphones (stereo or mono). This is useful for providing a secondary headphone output feed.
User Guide headphone jack. ⚠⚠ Since the headphone amplifier is capable of very high output levels, please use caution when wearing headphones as hearing damage could result with inappropriate volume levels. From the main Menu screen, the headphone presets (HP Presets) may be accessed by pressing this icon in the upper left corner of the screen. Above this icon, the currently selected HP preset is displayed. From the HP Presets menu, you may select various HP presets.
Metering LEDs and Metering There are several basic methods for observing input and output levels on the MixPre-6M: Channel knob ring LEDs, Channel screen meter, and Home screen’s meter view. Channel Knob Ring LEDs Channel knob ring LEDs - Each LED ring is capable of displaying green, orange and red colors. The brightness of the light ring indicates the level of the input: green = signal present, red = signal peaking, orange = signal limiting.
User Guide Meter View The Home screen’s meter view displays vertical metering for the 12 tracks and horizontal stereo L/R mix. The meter view also provides the Track Bank selector, which is a white-outlined box (or boxes) surrounding a group of neighboring meters in the meter view. For instance, the Track Bank selector in the following example shows tracks 5-8 selected. For more information, see Track Bank Selector.
Projects Each song or composition in the MixPre-6M is known as a Project. A Project is essentially a folder on the SD card that stores all your song’s audio files and settings. This makes it easy to organize, share, and copy your musical creations. The project folder also includes a special ‘session’ file that enables the MixPre-6M to control precisely where on the timeline and on which track the project’s recorded audio files should be played back.
User Guide Creating Projects MixPre-6M will automatically create a project if record is pressed without first creating a new project. To create a new Music project: 1. Tap . 2. Tap Project > New. 3. When the New Project screen appears, you can do any of the following: XX Name the project. Default is Song#. XX Set the sample rate. Options include: 44.1kHz, 48kHz, or 96kHz. LL Be sure to choose the correct sample rate when you create a new project; you cannot change it once created.
PROJECTS To create a project based on a non-native poly WAV file: 1. 2. 3. Tap . Tap Project > New > Import Recording. Select your file from the those available on the SD card: XX Use the HP encoder to select a .wav file from the root of the SD card. XX Scroll to and select the an Audio project folder first, then choose a .wav file to import it from within the folder.
User Guide Project History Each recording is logged as an item (revision) in the History list. This makes it easy to “undo” to an earlier recording or “redo” to a later recording—ideal for quickly redoing a bad take or comparing different takes. The History list is in chronological order with the most recent recording at the top. To access the History list and switch to an earlier or later recording: 1. Tap at the top left corner of the Home screen. 2. Tap History. The History list appears. 3.
PROJECTS Sharing Projects Sharing projects is as easy as transferring to a computer (see USB File Transfer) and uploading to colleagues via the internet or simply handing them an SD card. There are multiple ways to share a project: • Copy Project Folder - ideal for collaborating with other MixPre-6M users. They can load the whole project from an SD card and continue working from where you left off.
User Guide 38
Recording and Playback The MixPre-6M can record and playback up to twelve audio tracks at 96 kHz, 24-bit to an SD card (SD, SDHC,or SDXC). You can record to the SD card even when using the MixPre-6M as a USB audio interface. This opens up cool opportunities for recording the computer’s USB audio output and mixing it with other mic and line sources plugged into the MixPre.
User Guide All projects start at 00:00:00.0. Function Control Action The button illuminates red while recording is underway. Record Push the REC button to manually start recording from the current position on the timeline. You can manually start recording during playback or when stopped. Only armed channels are recorded. Press Stop to stop recording or playback at the current position. Stop Pressing Stop when already stopped returns the playback cursor to the start of the song.
RECORDING AND PLAYBACK Working with Cue Points The MixPre-6M uses cue points to make it easy to locate quickly to points of interest and set up automatic punch in/out regions. There are different types: Icon Type Description Cue mark (01, 02, etc) Cue marks are cue points that define a specific position of interest within a song, which may be used to “cue” or relocate to that point quickly and easily. For example, set a cue at the start of a verse or chorus. You can name cues for easy identification.
User Guide Alternatively, you can create cue marks and set them as Play In, Record In/Out, or Stop points from the Cue-List. To add cues marks: XX During recording, playback, or pause, tap , the Q icon at the top of the Home screen to add a cue mark exactly at that point in the song. A cue mark number (starting from 01 and incrementing each time a new cue mark is added) is displayed next to the Q icon.
RECORDING AND PLAYBACK To set a cue as a Play In, Record In/Out, or Stop point: 1. From the Cue List, select a cue. 2. Tap Set As. 3. Tap Play In, Record In, Record Out, or Stop to set the selected cue mark as an In/Out point for recording or playback. Moving Cue Points You can finely tune the position of In and Out points in 0.1 second increments. To move Cue Points: 1. Tap Cue List. 2. Use the HP encoder to select a cue point. 3. Tap Move and rotate the HP encoder to adjust the selection in 0.
User Guide Clearing & Deleting Cue Points You can delete cue marks and clear Play In, Record In/Out, or Stop points via the Cue Points menu or Cue List screen. To clear all In and Out stored values: XX Tap Clr In/Out. To clear an individual Play In, Record In/Out, or Stop point: XX Select one from the Cue List and tap Disable. To delete a cue mark: 1. From the Cue List, select a cue mark. 2. Tap Delete.
RECORDING AND PLAYBACK To automatically punch in/out: 1. Set Record In and Record Out points to where you want the MixPre to automatically punch in and out. If a Record In or Out point is set, a ‘P’ is displayed in the status bar to indicate that automatic punching is enabled. See Working with Cue Points. 2. Use Play In and Stop Q-Points to set pre-roll and/or post-roll as necessary.
User Guide feedback. You can adjust the level of the recorded bounce using the LR gain control - tap the L(left) mix meter in the home screen to quickly access LR gain. 3. Decide which track or tracks you want to bounce from. Let’s call these the source tracks. 4. Mute all tracks except the source and destination tracks. 5. Disarm all tracks except for the destination tracks. 6. Set the source track levels, pans, reverb and air effects as required. Effects are burned in to the destination track(s).
RECORDING AND PLAYBACK Metronome The metronome is an audible click that may be used to help you perform in time while recording and also provide a count-in so that you know when to start playing. The first beat of the bar is represented by a higher pitched click than the other beats of the bar. The metronome click is summed with the LR mix and as such can be heard when the headphones or outputs are set to LR. The metronome may also be recorded to a track. Select Click in a track’s Input screen.
User Guide LL The Metronome button will be disabled (appearing grayed out but with an orange icon) whenever Click is assigned as a track’s input source. Record Settings The Record submenu provides access to the settings detailed in the following table: Sub-menu L&R Gain Description Sets the gain for the LR mix. LL AAC Quality Sets the quality value for AAC rendering.
RECORDING AND PLAYBACK 49
User Guide 50
USB USB Audio Interface The MixPre-6M has an integrated 8-in, 4-out core audio-compatible interface for use with a Mac or PC computer. For PC users, the MixPre-6M will appear as a 2x2 audio interface unless a specific ASIO® driver is installed. The latest ASIO driver, along with install instructions, is available for free at www.sounddevices.com/support/downloads. See the MixPre-6M’s Downloads page.
User Guide Low-latency Monitoring We’ve worked really hard with our hardware and software design teams to minimize latency. We’ve found that in many scenarios, latency when monitoring through a DAW (digital audio workstation) is perfectly acceptable, depending upon DAW software, computer hardware and plug-ins. In situations where the throughput latency is higher than desired, the input to the MixPre-6M can be directly monitored in the headphone output. For example...
USB USB Keyboard The use of standard USB computer keyboards is supported with the USB-A port on the recorder’s left panel for situations such as text entry. LL Keyboards with an embedded USB hub and Apple brand keyboards are not compatible. Additionally, some keyboards must be connected only after the recorder is turned on. A connected wired or wireless USB keyboard may also be used as a remote control for certain functions of the MixPre-6M. See the table below for available USB keyboard shortcuts.
User Guide 54
User Presets and System Settings Saving and Recalling Presets Flexibility is the MixPre-6M’s M.O. To make it easy for you to use the recorder in a wide variety of situations, we created a slick feature where you can store and recall snapshots of all of the MixPre-6M’s settings. There are four internal Preset slots available. Also, the SD card can store virtually unlimited Presets. To save a Preset: 1. Tap . 2. Tap Presets > Save to Internal 1-4 or SD Card 3. Enter a Preset Name and tap OK.
User Guide System Settings To access system settings: 1. Tap 2. Tap System. Page . Sub-Menu Description 1 USB-C Lets you indicate whether you intend to use the USB-C port for power only or as an audio input. 1 USB Audio Lets you set the USB Audio interface to output only two channels to increase compatibility with applications that do not support multichannel USB audio. Options include: Normal or Stereo Out LL 56 When set to Stereo Out, the MixPre does not receive USB audio from a computer.
Specifications Specifications are subject to change without prior notice. For the latest information available on all Sound Devices products, visit our website at: www.sounddevices.com. Audio Inputs Name Frequency Response Description 10 Hz to 40 kHz +/- 0.5dB re 1 kHz @ 96 kHz sample rate Total Harmonic Distortion 0.
User Guide Audio Outputs Name Stereo Out Description 3.5 mm TRS stereo unbalanced, 500 ohm output impedance, +7.8 dBu max output level DAC feeding Stereo Out, 32 bit precision; 115 dB dynamic range (A-weighted) Headphone Out Headphone Out 3.5 mm TRS stereo unbalanced, for use with any impedance headphones Output Limiters Digital Recorder Name Description Maximum Record Tracks 12 tracks Sampling Frequency • 44.
SPECIFICATIONS Remote Control Name Keyboard (USB-A) Description Text entry and control Power Name Description AA Batteries 4x AA sled or 8x AA sled (NiMH or Lithium recommended) L-Mount Batteries MX-LMount: 2x L-mount sled for hot-swappable Li-Ion batteries From Computer Bus-powered via USB-C port.
User Guide 60
Software License End-user license agreement for Sound Devices MixPre Series Software / Embedded Firmware Important Read carefully: This Sound Devices, LLC end-user license agreement (“EULA”) is a legal agreement between you (either an individual or a single entity) and Sound Devices, LLC for the Sound Devices, LLC software product identified above, which includes computer software, embedded firmware, and may include associated media, printed materials, and “online” or electronic documentation (“SOFTWARE PRO
User Guide Devices, LLC product, even if Sound Devices, LLC has been advised of the possibility of such damages. In any case, Sound Devices, LLC’s entire liability under any provision of this evaluation license shall be limited to the greater of the amount actually paid by you for the SOFTWARE PRODUCT or U.S. $5.00. Because some states/jurisdictions do not allow the exclusion or limitation of liability for consequential or incidental damages, the above limitation may not apply to you.
® Sound Devices, LLC E7556 Road 23 and 33 Reedsburg, Wisconsin 53959 USA Phone: +1 (608) 524-0625 Fax: +1 (608) 524-0655 Customer Support Toll Free: (800) 505-0625 Email: support@sounddevices.com http://www.sounddevices.com/support http://forum.sounddevices.com Product Information For more information about products and accessories, visit us on the web at www.sounddevices.com. Report Documentation Error Email: techpubs@sounddevices.