Sound Stack SFQ-03
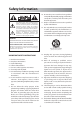
Safety Information 10. Protect the power cord from being walked on or pinched particularly at plugs, convenience receptacles, and the point where they exit from the apparatus. 11. Only use attachments/accessories specified by the manufacturer. 12. Use only with the cart, stand, tripod, bracket or table specified by the manufacturer, or sold with the apparatus. When a cart is used, use caution when moving the cart/apparatus combination to avoid injury from tip-over.
18. Do not place any naked flame sources, such as lighted candles, on the apparatus. 19. The battery used in this product must be properly recycled or disposed of. Please contact your local recycling center for proper battery handling and disposal instructions. Warnings: The device meets the exemption from the routine evaluation limits in section 2.5 of RSS 102 and users can obtain Canadian information on RF exposure and compliance from the Canadian Representative Burnport Holdings Ltd.
Information for Users on Disposal of Old Equipment CAUTION - Proper Installation Install the system in a place which is level, dry and neither too hot nor too cold. The appropriate temperature is between 5 oC and 35 oC. Install the system in a location with adequate ventilation to prevent internal heat from building up inside the unit. Leave sufficient distance between the system and TV. Keep the system away from TV to avoid interference with TV.
Contents Getting Started 5 Package Contents 5 Installing/Replacing the Batteries 5 Connecting the AC Adapter 6 Using the Remote Control 7 System Overview 8 Front View Back View Remote Control 8 8 9 Selecting the Sound Source 9 Playing back from iPad/iPhone/iPod 10 Setting an iPod on the Unit 10 Listening to an iPod Charging an iPod 10 Playing back via Bluetooth 12 Downloading the SoundFreaq App 12 Using Multiple Bluetooth Devices 13 Playing back from Macbook or Macbook Pro 13 P
Getting Started Package Contents Examine whether the following package contents are all included: DOCK PAIR OPTICAL AUX VOLUME Main Unit Remote Control Switch Mode Power Supply FM Antenna + CR2025 3V Lithium Coin Battery CR2025 Adapter Cable It is loaded on the remote control at the factory. Installing/Replacing the Batteries CAUTION: Danger of explosion if battery is incorrectly replaced. Replace only with the same or equivalent type.
Connecting the AC Adapter 1. Insert the Switch Mode Power Supply into 20V/4.47A DC IN jack of the unit. 2. Insert one end of the Adapter Cable into the end of the Switch Mode Power Supply and the other end into an electrical outlet only after all other connections are completed. WARNING! For optimal performance, use only the supplied AC adapter. Ensure that power supply outlet matches with the unit AC's input 100-240V~, 50/60Hz before connection.
Using the Remote Control Using the remote control Storing the remote control Remove the insulation sheet before using for the first time. Aim the remote control at the IR sensor on the front lens within an approximate distance of 7m (23 feet) away. A remote control storage area is designed on the back of the unit. The remote control can be conveniently held in the storage area (magnetically).
System Overview Front View Back View 5 11 OPT 6 7 4 8 5V 500mA VOL 1 2 3 9 12 10 1. SOURCE button Toggle among iPod, AUX, Optical and Bluetooth modes. 2. (Previous) / (Next) button Skip to the previous/next track in iPod and Bluetooth modes. 3. (Play/Pause) button Press to play or pause a track. 4. PAIR button Put the system into Bluetooth mode. 5. Indicators Lights when the UQ3 is activated. Lights in iPod mode Lights in AUX mode OPT Lights in opticle mode Lights in Bluetooth mode 6.
Remote Control 1. (On/Standby) button Switch between standby mode and power-on mode. 2. DOCK button Switch to iPod mode. 3. Bluetooth button Switch to Bluetooth mode. 4. PAIR button Put the system into Bluetooth mode. 5. OPTICAL button Switch to optical mode. 6. AUX button Switch to AUX mode. 7. (Previous) / (Next) button Skip to the previous/next track in iPod and Bluetooth modes. 8. (Play/Pause) button Play/pause a track when listening to a track. 9.
Playing back from iPad/iPhone/iPod Note: In this user manual, “iPod” is used as a general reference to functions on an iPod, iPhone or iPad, unless otherwise specified by the text or illustrations.
Charging an iPod Notes for Caring Your iPod: The battery of the iPod is always charged through the unit when it is connecting to a wall outlet. Charging begins when the iPod is set on the dock. The charging status appears in the display on iPod. Make sure the AC adapter is connected to the unit. The iPod is charged regardless of the sound source selected on the unit. See the iPod instruction manual about the details of iPod charging. .11.
Playing back via Bluetooth Downloading the SoundFreaq App Notes: If your mobile phone supports A2DP protocol, its music will play through the unit. You can make a Bluetooth connection with a mobile phone, an iPhone/iPad/iPod touch or any other Bluetooth-enabled devices. We have developed an App to give you full control from your iPhone/iPad/iPod touch while playing audio over the Bluetooth wireless connection, please download the "SoundFreaq Remote" App for FREE. 1.
The pair indicator starts blinking quickly to indicate that the unit and your device have put into the connection mode. When a Bluetooth connection is established successfully, the indicator will be solid on. 5. Select Bluetooth mode by repeatedly pressing the SOURCE button on the unit or pressing the Bluetooth button on remote control. 6. Select the desired music and press "Play" button on your device. The unit automatically starts playing the audio.
Listening to Tuner The FM radio function can be accessed by: 1) the remote App, when Bluetooth connection has been established; 2) the remote App, when the iPad/iPhone/iPod touch is set on the unit. The operation interface of remote App software is similar to the remote control. You can easily operate the tuner function on the display of iPad/iPhone/iPod touch. Press the Button Functions Remote App Switch between the frequency display and channel number display.
Playing back from External Source Listening to an External Audio Device You can enjoy the sound from an optional component such as a portable digital music player through the speakers of this unit. Be sure to turn off the power of each component before making any connections. For details, refer to the instruction manual of the component to be connected. Connect an external device to the AUX IN jack on the back panel of the unit using a stereo mini plug cord (not supplied). 1. Turn the unit power on. 2.
Optimizing Sound Quality TM "U-Cubed" is an proprietary technology designed to create an ultra wide stereo sound field in digital music systems. With exceptional natural sound reproduction of high definition and fidelity, we create a listening experience where you feel like your speakers are separated much more than they are. To activate UQ3 on: The unit, press the " " button to activate, press again to deactivate. On the remote control or remote App, press the " " button to activate and deactivate.
Troubleshooting Check this list for a possible troubleshooting solution before calling for service. In These Cases Check the following points Power does not come on. • AC adapter is not inserted securely. Plug in securely. Cannot set the iPad/iPhone/iPod. • Is the selected dock adapter compatible to your iPad/iPhone/iPod? • Is the dock adapter properly mounted on the unit? Make sure to mount the dock adapter properly. Cannot operate iPad/iPhone/iPod.
In These Cases Bluetooth connection cannot be established between the system and your Lenovo PC with Win 7 OS. Bluetooth connection cannot be established. Check the following points a. b. c. d. Right click the “Sound Stack” icon in the “Device and Printer” dialog box. Open the “Sound Stack Properties” dialog box and select the “Services” tab. Put the ticks on the “Audio Sink” and “Remote Control” boxes. Press the “Apply” button and the exclamation mark of the “Sound Stack” driver icon will be cleared.
Save this manual